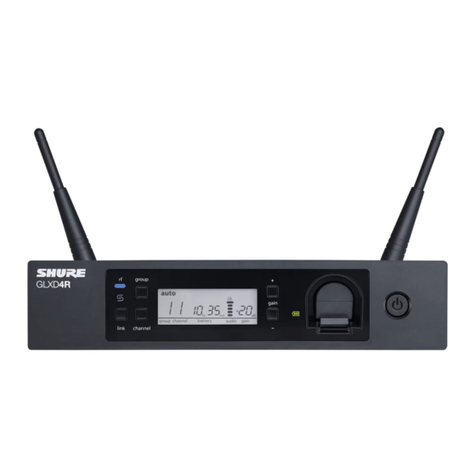
Shure GLXD4+ User manual

GLXD4+
Wireless Receiver
Online user guide for GLXD4+ wireless system. Includes setup instructions, specifications, and more.
Version: 1.1 (2023-B)

Shure Incorporated
2/36
Table of Contents
GLXD4+ Wireless Receiver 3
System Overview 3
Features 3
Receiver 3
Receiver Screen 5
Set Up the Receiver 6
Transmitters 6
Transmitter Status LED 8
Wearing the Bodypack 8
Wearing the Headworn Microphone 8
Correct Microphone Placement 9
Install Transmitter Batteries 9
Batteries and Charging 10
Receiver Charging Bay 10
Charging from an AC Power Source 10
Charging Status LEDs 11
Charging Times and Transmitter Runtimes 11
Important Tips for Care and Storage of Shure Recharge
able Batteries 11
Tips to Improve Wireless System Performance 11
Additional Tips 12
System Set Up 13
Manually Linking Receivers and Transmitters 13
Linking Two Transmitters to a Receiver 13
Identifying Linked Transmitters and Receivers with Re
mote ID 13
Multiple Receiver Systems 14
Receiver Band Modes 14
Gain Adjustment 15
Locking and Unlocking the Controls 15
Locking the Receiver Controls 15
Locking the Transmitter Controls 15
Receiver Display Brightness 15
Firmware 16
Resetting Components 16
Resetting the Receiver 16
Resetting the Transmitter 16
Troubleshooting 16
Accessories 18
Specifications 18
Diagrams 23
Frequency Tables 23
IMPORTANT SAFETY INSTRUCTIONS 30
WARNING 32
Note: 32
Information to the user 32
Certifications 33

Shure Incorporated
3/36
•
•
•
•
•
•
•
GLXD4+
Wireless Receiver
System Overview
GLX-D+ Dual Band Digital Wireless offers confidence without complexity. Dual-band operation in 2.4 and 5.8 GHz more than
doubles the available bandwidth to avoid interference without audio interruption. The receiver is compatible with a selection of
lavalier, headset, and vocal microphones. The included lithium-ion battery offers up to 12 hours of runtime, and can be charged
directly on the receiver or via USB-C.
Features
Exceptional digital audio clarity
Compatible with multiple legendary microphone options
Automatically moves away from interference without audio interruption
Operates in 2.4 and 5.8 GHz spectrum*
Rechargeable battery delivers up to 12 hours of runtime
Rock-solid RF performance for multiple system installations
License-free frequency range
Note: region dependent
Receiver

Shure Incorporated
4/36
◦
◦
◦
◦
◦
◦
◦
①Antenna
Two antennas per receiver. Antennas pick up the signal from the transmitter.
②RF status LED
ON = Linked transmitter is on
Flashing = Searching for transmitter
OFF = Linked transmitter off or transmitter unlinked
③Group button
Press and hold for two seconds to enable manual group edit.
④Link button
Press to manually link receiver to a transmitter or to activate the remote ID function.
⑤Channel button
Press to start a channel scan.
⑥Display
Shows receiver and transmitter status.
⑦Gain buttons
Press to increase or decrease transmitter gain in 1 dB increments.
⑧Battery charging indicator
Illuminates when battery is in charging bay:
Red = Battery charging
Green Flashing = Battery charge > 90%
Green = Battery charged
Amber Flashing = Charging error, replace battery
⑨Battery charging bay
Charges transmitter battery.
⑩Power switch
Powers the unit on and off.

Shure Incorporated
5/36
◦
◦
◦
⑪Power supply port
Connect the supplied 15 V DC external power supply.
⑫Mic output
XLR microphone output port supplies microphone-level audio output.
⑬USB-C port
Connect to computer to download firmware updates.
⑭Instr output
TRS ¼" (6.35mm) audio output. Connect to mixers, recorders, and amplifiers.
Receiver Screen
①Group
Displays the selected group.
②Channel
Displays the selected channel.
③Transmitter battery runtime
Displays remaining battery life in hours and minutes.
Alternatively displays the following battery status:
CALC = Battery life calculation
Lo = Battery life less than 15 minutes
Err = Replace battery
④Audio meter
Indicates audio signal level and peaks.
⑤Gain
Displays transmitter gain settings (dB).
⑥OL indicator
Indicates audio overload, reduce gain.

Shure Incorporated
6/36
1.
2.
⑦Transmitter locked
Displayed when linked transmitter controls are locked.
⑧Scanning
Indicates a scan is in progress.
⑨Auto
Indicates that the selected group has backup channels available.
Set Up the Receiver
Connect the PS43 power supply to the receiver and plug the cord into an AC power source.
Connect the audio output to an amplifier or mixer.

Shure Incorporated
7/36
◦
◦
Transmitters
①Antenna
Carries wireless signal.
②Status LED
LED color and state indicate transmitter status.
③Power switch
Turns the transmitter on/off.
④TA4M input port
Connects to a 4-Pin mini connector (TA4F) microphone or instrument cable.
⑤USB-C charging port
Connect to USB battery charger.
⑥Link button
Press and hold within 5 seconds of power-on to manually link with receiver.
Press momentarily to activate remote ID function.
⑦Battery compartment

Shure Incorporated
8/36
•
•
Holds 1 Shure rechargeable battery.
⑧Microphone cartridge
GLXD2+ transmitter models are available with the following cartridge types: SM58, Beta 58, Beta 87A.
Transmitter Status LED
LED is green during normal operation.
LED color or flashing indicates a change in transmitter status as shown in the following table:
Color State Description
Green
Flashing (slow) Transmitter attempting relink with receiver
Flashing (fast) Unlinked transmitter searching for receiver
Flashes 3 times Indicates locked transmitter when power switch is pressed
Red
On Battery life < 1 hour
Flashing Battery life < 30 minutes
Red/Green Flashing Remote ID active
Amber Flashing Battery error; remove and insert again, or replace battery
Wearing the Bodypack
Clip the bodypack to a belt or slide a guitar strap through the bodypack clip as shown.
For best results, the belt should be pressed against the base of the clip.
Wearing the Headworn Microphone
Position the headworn microphone 13 mm (1/2 in.) from the corner of your mouth.
Position lavalier and headworn microphones so that clothing, jewelry, or other items do not bump or rub against the micro
phone.
Shure Incorporated
9/36
•
•
•
1.
2.
3.
1.
2.
3.
Correct Microphone Placement
Hold the microphone within 12 inches from the sound source.
For a warmer sound with increased bass presence, move the microphone closer to the sound source.
Do not cover grille with hand.
Install Transmitter Batteries
Important: Always fully charge a new battery before first use.
Bodypack:
Move the locking lever to the open position and slide the battery door open.
Place the battery into the transmitter.
Close the battery door.
Handheld:
Unscrew and remove the battery cover.
Place the battery into the transmitter.
Replace and tighten the battery cover.

Shure Incorporated
10/36
1.
2.
1.
2.
Batteries and Charging
GLX-D+ transmitters are powered by Shure SB904 lithium-ion rechargeable batteries. Advanced battery chemistry maximizes
runtimes with zero memory effects, eliminating the need to discharge batteries prior to charging.
When not in use, recommended battery storage temperature is 10°C (50°F) to 25°C (77°F).
Note: The transmitter will not pass RF or audio signals when connected to the charging cable.
The following battery charging options are available:
Receiver Charging Bay
The receiver's built-in charging bay will charge transmitter batteries when the receiver is plugged in to a power outlet.
Insert the battery into the charging bay.
Monitor the battery charging indicator on the front panel.
Charging from an AC Power Source
Plug the charging cable into the charging port on the transmitter.
Plug the charging cable into an AC power source.

Shure Incorporated
11/36
•
•
•
Charging Status LEDs
LED Color Description
Green (solid) Device is fully charged
Red (solid) Charging
Amber (flashing) Out of temperature range, or battery error
Off Power supply is disconnected, or no device is docked in the charging bay
Charging Times and Transmitter Runtimes
Use the following table to determine approximate battery runtime based on the duration of charging time when in 5.8 GHz
mode. Times shown are in hours and minutes. Transmitters automatically poweroff after approximately 1 hour to conserve bat
tery life if the signal from a linked receiver is not detected.
Receiver Bay or AC Power Source Charging Transmitter Runtime
0:15 up to 1:30
0:30 up to 3:00
1:00 up to 6:00
3:00 up to 11:30*
*Storage time or excessive heat will reduce maximum runtime.
Note: If receiver is powered off and remains plugged in, battery will continue charging.
Important Tips for Care and Storage of Shure Rechargeable Batteries
Proper care and storage of Shure batteries results in reliable performance and ensures a long lifetime.
Always store batteries and transmitters at room temperature
Ideally, batteries should be charged to approximately 40% of capacity for long-term storage
During storage, check batteries every 6 months and recharge to 40% of capacity as needed

Shure Incorporated
12/36
1.
◦
◦
2.
◦
◦
◦
•
•
•
Tips to Improve Wireless System Performance
If you encounter interference or dropouts, try the following suggestions:
Place receiver at least 3 meters (10 feet) away from Wi-Fi access points, computers, or other active 2.4 GHz and 5.8
GHz sources.
Avoid heavy Wi-Fi traffic activities such as downloading large files or viewing a movie.
Turn on any Wi-Fi prior to turning on receivers and scanning for the best channel.
Reduce transmitter-to-receiver distance by placing receivers on stage or above the audience with a clear line of sight to
the transmitter.
Move receiver to the top of the equipment rack for a clear line of sight.
Mount antennas remotely to place closer to transmitters and improve RF reliability if receivers cannot be moved
closer.
Make sure people do not block the line of sight between receiver and transmitter.
Additional Tips
Do not place competitive 2.4 GHz and 5.8 GHz receivers near GLXD4R+ receivers.
Connect more than two GLXD4R+ receivers to a GLX-D+ frequency manager to improve RF reliability.
Scan for the best available channel by pressing the channel button.

Shure Incorporated
13/36
•
•
•
1.
2.
3.
1.
2.
3.
4.
1.
2.
3.
1.
2.
3.
Keep transmitters more than 2 meters (6 feet) apart. This is less critical with shorter receiver-to-transmitter distances or if
receivers are connected to a GLX-D+ frequency manager.
Note: If transmitters are within 6 inches of non-GLX-D+ transmitters or microphone cartridges, audible noise is possible.
Move transmitter and receiver away from metal or other dense materials.
During sound check, mark trouble spots and ask performers to avoid those areas.
System Set Up
Important: Before beginning, turn off all receivers and transmitters. Turn on and link each receiver/transmitter pair one at a
time to prevent cross-linking.
Turn on a receiver.
Press and hold the group button to select a group (if necessary). If the group is already set, press the channel button to
scan for the best available channel.
Turn on a transmitter. The blue RF LED will flash while the transmitter and receiver form a link. When the link has suc
cessfully formed, the RF LED will remain illuminated. The transmitter and receiver will remain linked for future usage.
Repeat steps 1-3 for each additional receiver and transmitter. Remember to set each receiver to the same group.
Note: Dashes appearing on the group and channel display after a channel selection indicate that frequencies are not available in the selected group. Choose a
group that supports more receivers and repeat the linking steps.
Manually Linking Receivers and Transmitters
Turn on a transmitter.
Press and hold the link button on the transmitter until the LED begins to flash green.
Press and hold the link button on the receiver. The blue RF LED will flash and then remain illuminated when the link
has been established.
Test the audio to verify the link.
Linking Two Transmitters to a Receiver
Only one transmitter can be active at a time to prevent cross interference. Gain settings for each transmitter can be indepen
dently set and stored when the transmitter is active.
Important! Do not turn on and operate both linked transmitters at any time. Turn off both transmitters before beginning.
Press the group button to select a group. The receiver automatically scans the selected group to find the best available
channel.
Turn on transmitter 1 and link it to the receiver. Adjust the gain, and then turn off the transmitter.
Turn on transmitter 2 and press and hold the link button on the transmitter and the receiver to link them together. Adjust
the gain, and then turn off the transmitter.
Identifying Linked Transmitters and Receivers with Remote ID
Use the remote ID feature to identify linked transmitter and receiver pairs in multiple receiver systems.
To activate remote ID:
Momentarily press the link button on the transmitter or receiver.
The screen of the linked receiver will blink and display ID, while the status LED on the linked transmitter will flash red/
green.
To exit remote ID mode, momentarily press the link button or allow the function to timeout.

Shure Incorporated
14/36
•
•
•
Multiple Receiver Systems
To run more than two receivers at the same time, the GLX-D+ frequency manager is recommended to improve RF reliability
(only compatible with GLXD4R+).
However, you can run multiple receivers without the frequency manager. Select the group by determining the total number of
receivers in your system. All receivers in the system must be set to the same group.
2.4 GHz and 5.8 GHz bands:
Group Number of Receivers Description
12 - 5 typical Default setting
22 - 5 typical Best multi-channel group if you experience interference
31 Best single-channel group if you experience interference
A* Up to 11 typical, 16 maxi
mum
Default setting
B* Best multi-channel group if you experience interference
2.4 GHz bands only:
Group Number of Receivers Description
12 - 4 typical Default setting
22 - 4 typical Best multi-channel group if you experience interference
32 - 4 typical, 8 maximum Only use Group 3 in controlled WiFi environments because there are no back
up frequencies to avoid interference
41 Best single-channel group if you experience interference
A* Up to 9 typical, 11 maxi
mum
Default setting
B* Best multi-channel group if you experience interference
*Groups A and B are only for systems with a GLXD4R+ and GLXD+ frequency manager.
See Tips to Improve Wireless System Performance for additional information. See the GLXD+FM user guide for information
about receiver groups when connected to the GLX-D+ frequency manager.
Receiver Band Modes
There are 3 band modes available for GLXD+ receivers.* The band mode options are:
2.4 GHz-only mode
5.8 GHz-only mode
Best band mode – 2.4 and 5.8 GHz (default)
Note: region dependent

Shure Incorporated
15/36
1.
2.
•
•
•
•
•
To change the band mode:
Press and hold the channel button while powering on the receiver. Continue to hold the channel button for approximate
ly 5 seconds until the band selection menu opens.
Press the up/down gain button to select a band mode. The screen will flash momentarily and scan for the best channel
to use.
Note: Linked receivers and transmitters must be able to operate in the same band. Transmitters that don’t support the selected band mode will unlink from the
receiver.
Gain Adjustment
Momentarily press the gain buttons on the receiver to adjust the gain of a linked transmitter in 1 dB increments. For faster gain
adjustments, press and hold the gain buttons.
Tip: Monitor the audio and observe the receiver audio meter level while adjusting the gain to prevent signal overload.
Locking and Unlocking the Controls
The controls of the receiver and transmitter can be locked to prevent unauthorized setting changes or poweroff. The lock sta
tus is not changed by power cycles.
Locking the Receiver Controls
Simultaneously press and hold the group and channel buttons until LK appears on the screen. Repeat to unlock.
LK is displayed if a locked control is pressed
UN is displayed momentarily to confirm the unlock command
Locking the Transmitter Controls
To lock directly from the transmitter:
Start with the transmitter off, then press and hold the link button while turning on the transmitter. Release the link button when
the transmitter powers on to prevent an accidental factory reset. The lock icon appears on the receiver screen when locked.
Repeat sequence to unlock.
To lock from the receiver front panel:
Simultaneously press and hold the group and link buttons for approximately 2 seconds until the flashing lock icon appears on
the receiver screen. Repeat sequence to unlock.
Note: The transmitter status LED will flash if a locked switch is set to the off position.
Receiver Display Brightness
To adjust the receiver display brightness, press and hold the group button and any gain button simultaneously. Use the gain
buttons to set the brightness of the display to low, medium, or high.
Low = Br 1
Medium = Br 2
High = Br 3

Shure Incorporated
16/36
•
•
•
Firmware
New versions of the firmware can be uploaded and installed using the Shure Update Utility tool.
Download Shure Update Utility from shure.com
To update your firmware, connect the device to your computer using a USB-C cable and open the Shure Update Utility.
Resetting Components
Use the reset function if it is necessary to restore the transmitter or receiver to their factory settings.
Resetting the Receiver
Restores the receiver to the following factory settings:
Gain level = default
Controls = unlocked
Press and hold the link button while turning on the receiver power until the display shows RE.
Note: When reset is complete, the receiver will automatically initiate linking to search for a transmitter. Press and hold the transmitter link button within five
seconds of powering-on to complete the link.
Resetting the Transmitter
Restores the transmitter to the following factory settings:
Controls = unlocked
Press and hold the transmitter link button while turning on the transmitter until power LED turns off.
When the link button is released, the transmitter will automatically initiate linking to find an available receiver. Press the link but
ton on an available receiver to relink.
Troubleshooting
Issue Indicator Status Solution
No sound or faint sound Receiver RF LED on
Verify all sound system connections or ad
just gain as needed.
Verify that the receiver is connected to mix
er/amplifier.

Shure Incorporated
17/36
Issue Indicator Status Solution
Receiver RF LED off
Turn on transmitter.
Make sure the batteries are installed correct
ly.
Link transmitter and receiver.
Charge or change transmitter battery.
Receiver display off
Make sure AC adapter is securely plugged
into electrical outlet.
Make sure receiver is powered on.
Transmitter indicator
LED flashing red Charge or change transmitter battery.
Transmitter plugged
into charger. Disconnect transmitter from charger.
Audio artifacts or dropouts RF LED flickering or off
Change receiver and transmitter to a differ
ent group and/or channel.
Identify nearby sources of interference (cell
phones, WiFi access points, signal proces
sor, etc.) and shutdown or remove source.
Charge or change transmitter battery.
Ensure that receiver and transmitter are po
sitioned within system parameters.
System must be set up within recommended
range and receiver kept away from metallic
surfaces.
Transmitter must be used in line of sight
from receiver for optimal sound.
Distortion OL indicator appears on
receiver display Reduce transmitter gain.
Transmitter and receiver link unsuccessful
Transmitter and receiver
LEDs flash to indicate
that linking started, but
the link fails
Update both components to the latest
firmware version.
Sound level variations when switching to dif
ferent sources N/A Adjust transmitter gain as necessary.
Receiver/transmitter won't turn off Transmitter LED flash
ing rapidly Controls locked.
Receiver gain control cannot be adjusted N/A Check transmitter. Transmitter must be on to
enable gain changes.

Shure Incorporated
18/36
Issue Indicator Status Solution
Receiver controls cannot be adjusted
LK shown on receiver
display when buttons
are pressed
Controls locked.
Transmitter ID function does not respond Transmitter LED flashes
green 3 times Controls locked.
Transmitter information does not appear on
the receiver display N/A Linked transmitter is off or the receiver is not
linked to a transmitter.
Transmitter powers off after 1 hour Transmitter status LED
off
Transmitters automatically power-off after 1
hour to conserve battery life if the signal
from a linked receiver is not detected. Make
sure that linked receiver is turned on.
Accessories
Cable, Instrument, 2.5 foot (.75 m), 4 Pin Mini Connector (TA4F) to 1/4inch Connec
tor. WA302
Cable, Instrument, 2-foot (0.7m), 4-pin Mini Connector (TA4F) with Right-Angle 1/4-
inch Connector, used with Shure Wireless Bodypack Transmitters WA304
Shure Rechargeable Battery SB904
USB-C Battery Charger SBC10-USBC
Premium Guitar Cable TQG Threaded Connector WA305
Power Supply PS43
Specifications
Tuning Bandwidth
Z2 2400 - 2483.5 MHz
Z3 2400 - 2483.5 MHz and 5725 - 5850 MHz
Z4 2400 - 2483.5 MHz and 5725 - 5875 MHz
Z5 2400 - 2483.5 MHz and 5725 - 5825 MHz
Dependent on frequency band
Transmit Mode
Shure proprietary digital

Shure Incorporated
19/36
RF Output Power
10 mW E.I.R.P. maximum
Ambient Temperature Range
Charging: 0°C (32°F) to 40°C (104°F)
Operating: 0°C (32°F) to 45°C (113°F)
Polarity
Positive pressure on microphone diaphragm (or positive voltage applied to tip of WA302 phone plug) pro
duces positive voltage on pin 2 (with respect to pin 3 of lowimpedance output) and the tip of the high im
pedance 1/4-inch output.
Audio Frequency Response
20 Hz – 20 kHz
Dynamic Range
122 dB, A-weighted
RF Sensitivity
-88 dBm, typical
Total Harmonic Distortion
0.2%, typical
Battery Life
Up to 11.5 hours
Channel Count
Up to 4 typical, 8 optimal
2.4 GHz only: Up to 4 typical, 5 optimal
GLXD4+
Power Requirements
14.5 V – 17 V, 600 mA (efficiency level VI power supply)
Antenna Type
Dual-band ½ Wave Sleeve Dipole, non-removable
Dimensions
Antenna folded 7.2 x 4.8 x 1.6 in. (182.82 x 121.97 x 40.3
mm)
Antenna opened 7.2 x 4.8 x 7.3 in. (182.82 x 121.97 x 185.6
mm)

Shure Incorporated
20/36
Weight
10.9 oz (310 g)
Housing
PC/ABS
Spurious Rejection
> 35 dB, typical
Gain Adjustment Range
-20 to 40 dB, 1 dB increments
Phantom Power Protection
Yes
AUDIO OUTPUT:
Configuration
XLR Output Impedance balanced
6.35 mm (1/4") output Impedance balanced
Impedance
XLR Output 100 Ω
6.35 mm (1/4") output 100 Ω (50 Ω, Unbalanced)
Maximum Audio Output Level
XLR connector +1 dBV
6.35 mm (1/4") connector +8.5 dBV
Pin Assignments
XLR Output 1=ground, 2=hot, 3=cold
6.35 mm (1/4") connector Tip=audio, Ring=no audio, Sleeve=ground
RECEIVER ANTENNA INPUT:
Impedance
50 Ω
Maximum Input Level
-20 dBm
GLXD1+
Power Requirements
Shure Rechargeable Li-Ion Battery SB904
USB Power Supply (US/Canada) SBC10-USB15WSUSTWJ
Other manuals for GLXD4+
2
Table of contents
Other Shure Receiver manuals

Shure
Shure GLXD4RPE User manual

Shure
Shure AXS31 User manual

Shure
Shure P4R RECEIVER P4R User manual

Shure
Shure Axient AXT400 User manual

Shure
Shure P4R RECEIVER P4R User manual

Shure
Shure GLXD4R User manual

Shure
Shure SVX Wireless User manual

Shure
Shure PG4 User manual

Shure
Shure AD4Q User manual

Shure
Shure AD4D Axient User manual
Popular Receiver manuals by other brands

PCB Piezotronics
PCB Piezotronics 062A02 Installation and operating manual

ENFORCER
ENFORCER SD-8202GT-PEQ manual

Chamberlain
Chamberlain LiftMaster PROFESSIONAL 423LM owner's manual

Strong
Strong SRT 8112 user manual

Maximum
Maximum XO-4200 Hybrid user manual

SIMONSWERK
SIMONSWERK VARIANT VX 25 N Series Fixing instructions