Shure MW5 User manual

MW5
© 2012 Shure Incorporated
Printed in China
27A16757 (Rev. 2)
Portable Wireless Receiver
ポータブルワイヤレス受信機

WARNING!
LISTENING TO AUDIO AT EXCESSIVE VOLUMES CAN CAUSE PERMANENT HEAR-
ING DAMAGE.
USE AS LOW A VOLUME AS POSSIBLE.
Over exposure to excessive sound levels can damage your ears resulting in permanent
noise-induced hearing loss (NIHL). Please use the following guidelines established by the
Occupational Safety Health Administration (OSHA) on maximum time exposure to sound
pressure levels before hearing damage occurs.
90 dB SPL
at 8 hours
95 dB SPL
at 4 hours
100 dB SPL
at 2 hours
105 dB SPL
at 1 hour
110 dB SPL
at ½ hour
115 dB SPL
at 15 minutes
120 dB SPL
Avoid or damage may occur
SAFETY PRECAUTIONS
The possible results of incorrect use are marked by one of the two symbols
- “WARNING” AND “CAUTION” - depending on the imminence of the danger
and the severity of the damage.
WARNING: Ignoring these warnings may cause severe injury or death as
a result of incorrect operation.
CAUTION: Ignoring these cautions may cause moderate injury or proper-
ty damage as a result of incorrect operation.
WARNING
• If water or other foreign objects enter the inside of the device, fire or electric
shock may result.
• Do not attempt to modify this product. Doing so could result in personal
injury and/or product failure.
CAUTION
• Never disassemble or modify the device, as failures may result.
• Do not subject to extreme force and do not pull on the cable or failures may
result.
WARNING: This product contains a chemical known to the State of California to
cause cancer and birth defects or other reproductive harm
極端に大きな音量で再生すると、慢性の聴力障害の
警 告 !
原 因 と な る 恐 れ が あります 。
できるだけ小さな音量で使用してください。
極端に大きな音を長時間聞き続けると、耳を痛める原因となり、
慢性的な騒音性聴力障害(NIHL)を引き起こす恐れがあります。
聴覚を損なわないようにするため、各音圧に耐えられる最長限度時間に関して
米国労働安全衛生庁(OSHA)が定めたガイドラインを以下に記載します。
지나치게 볼륨을 높여서 오디오를 들을 경우 영구적인 청력 손상을
입을 수 있습니다.가능한 낮은 볼륨으로 사용하십시오.
경고 !
지나치게높은소리로장시간사용하면청력을손상시켜영구적인소
음성난청을유발할수있습니다.미국산업안전보건청(OSHA):Occupational
SafetyHealthAdministration)기준에따르는음압레벨에따라청력손상이발
생하지않도록최대노출시간에대한다음지시사항을따르십시오.
90 dB SPL
8시간
95 dB SPL
4시간
100 dB SPL
2시간
105 dB SPL
1시간
110 dB SPL
30분
115 dB SPL
15분
120 dB SPL
금지, 그렇지 않으면 손상 발생 가능
90 dB SPL
8時間
95 dB SPL
4時間
100 dB SPL
2時間
105 dB SPL
1時間
110 dB SPL
30分
115 dB SPL
15分
120 dB SPL
回避しないと耳を痛める原因となります

3
General Description
Included Components
• MW5: Portable Wireless Receiver
• 1/4 Wave Antennas (2)
• TA3F to XLRM Audio Cable
• TA3F to 3.5 mm (1/8") Audio Cable
• AA Batteries (2) (except in Argentina)
• Shoe Mount
• Mounting Strap
• 90° SMA Adapters (2)
• Zippered Pouch
• Protective Cover
Features
• Wide-band frequency tuning
• True diversity
• Balanced Output
• Variety of mounting options
• Operates with standard AA batteries or Shure SB900 rechargeable battery
The MW5 is a premium portable wireless microphone receiver component, designed to provide Shure UHF-R®-class wireless technology, performance and quality for profes-
sional field and media production applications. Featuring wide-band frequency tuning, hands-on navigation, rechargeability, and a wide variety of mounting options, the MW5 is
the clearest choice for wireless portability.

4
exit enter sync scan
exit enter sync
exit enter sync scan
2 sec
exit enter sync scan
exit enter sync
exit enter sync scan
scan
exit enter sync scan
exit enter sync
exit enter sync scan
scan
exit enter sync
exit enter sync scan
scan
exit enter sync scan

5
MW5 Portable Receiver
① Power Switch
Turns the portable receiver on and off.
② TA3M Jack.
For audio out.
③ 3.5 mm Headphone Jack
For monitoring audio.
④ Scan Button
Press the scan button to find the next available channel. Press and hold for two
seconds to find the group with the most available channels.
⑤ IR Window
For transferring RF settings and name to a transmitter, or copying the MTx list to
another receiver.
⑥ Battery Compartment
Install 2 AA batteries or a Shure SB900 rechargeable battery. Open by pressing
the latches on both sides and pulling outward.
⑦ Menu Buttons
Useinconjunctionwiththe▼▲buttonstoaccesstheconfigurationmenus.
⑧ ▼▲ Buttons
Use to scroll through menus, change settings, or select transmitters in MTx mode.
Can be assigned to control headphone or camera output volumes.
⑨ LCD Screen
Displays current settings and menus.
⑩ Tri-Color Battery LED
Illuminates green, amber, or red to indicate battery power. When red, change
batteries immediately.
⑪ Blue RF LED
Indicates the portable receiver is receiving a signal from the transmitter.
⑫ Detachable Antennas (2)
SMA Connectors (2)
⑬ Power Through Contacts
For powering the receiver when inserted into the Shure AFP522DC camera
mount. The receiver automatically switches to internal power when removed from
the mount or external power is lost.
⑭ Removable AA Adapter
Remove to use with a Shure SB900 rechargeable battery.
Note: To remove adapter, open door and slide adapter out. To reinstall, press the adapter
into place—there is an audible click when seated.

6
Power Audio
The MW5 can be powered by AA batteries, a Shure SB900 rechargeable battery, or
through the Shure AFP522DC camera mount.
Standard AA Batteries
Use the AA adapter (installed in the battery compartment as shipped) when using AA
batteries.
For the battery icon to accuratly display battery life, select the battery type from the bat-
tery menu (SYS SETUP > BATTERY).
Note: Battery type is set to alkaline by default.
SB900 Rechargeable Battery Information
When using an SB900 rechargeable battery, the battery menu displays battery status.
SYS SETUP > BATTERY
Hrs: Min Left:
The number of hours and minutes of battery life left (accurate to within 15 mins)
Health
Battery health displayed as a percentage
Status
Displayed as percentage full and mAh
Temperature
Displayed in Celsius and Fahrenheit
Cycle Count
Displays the number of times battery has been charged
Battery Life (Alkaline, AA)
Battery Indicator LED Approximate Hours Remaining
Green 2½-5
Green 2-2½
Green 1½-2
Green 1-1½
Amber ½-1
Red < ½
Note: Using lower-impedance earphones, different battery types, and higher gain set-
tings may cause the receiver battery life to be different than specified.
Audio Setup
Use the following steps to connect the receiver to a camera. These steps can also be
used to connect to other devices, such as field recorders.
1. Adjust the transmitter output level so that the audio level meter bars on the receiver
are close to, but not at, the peak level (5th segment on the audio bar).
2. Check the input setting on the device to which you are connecting the receiver. Set
the camera output volume on the receiver accordingly (AUDIO > CAMERA VOL).
Input Setting on the Camera MW5 Camera Output Volume
LINE level +10 dB (factory default)
MIC level −5dB
3. Attach the supplied TA3F audio cable to the receiver camera output.
4. Mount the receiver on the camera.
5. Connect the cable to the audio input on the camera.
6. Adjust the camera input to the desired level.
Audio Settings
Use the audio menu (AUDIO) to adjust camera output level and headphone volume.
CAMERA VOL
Adjusts camera output level to match the input level of the device to which you
connect the receiver.
HP VOLUME
Adjusts headphone volume.
HPO MODE
Disablescameraoutputandincreasesheadphoneoutputgain.Assigns▼▲buttons
to adjust the output of headphone volume. Return to AUDIO menu to exit HPO MODE.
Quick Access Volume Adjustment
Thereceivercanbeconfiguredsothatthe▼▲buttonsadjusttheoutputorheadphone
volume. This allows you easily adjust volume while the receiver is mounted, without
having to enter the audio menu.
Note: This setting does not apply when in MTx mode.
UTILITIES > VOL. ASSIGN
CAMERA OUT
The▼▲buttonsadjustcameraoutputvolume.
HEADPHONE
The▼▲buttonsadjustheadphonevolume.
NONE(default)
The▼▲buttonsdonotaffectvolume.
Tone Generator
Access the tone generator menu to send a tone to the camera output (UTILITIES >
TONE GEN).Usethe▼▲buttonstoselecttonesof100Hz,1kHz,or5kHz.Exiting
turns off the tone generator.
Note: Audio from the transmitter is interrupted while in this menu.

7
SystemSetup
group number of frequencies
Radio Frequency (RF) Settings
2. Sync the receiver with the transmitter. Leave the transmitter on.
Repeat the following steps for each additional system:
1. Manually set the receiver to the designated group.
2. Press scan once to find the next compatible frequency.
3. Sync with transmitter and leave transmitter on while setting up additional systems.
Scan and Sync
Use this procedure to set a receiver and transmitter to the same open channel.
Important! Before you begin:
• Turn off the RF on the transmitters for the systems you are setting up. (This prevents
them from interfering with the frequency scan.)
• Turn on potential sources of interference such as other wireless systems or
devices, computers, CD players, large LED panels, effects processors, and digital
rack equipment so they are operating as they would be during the presentation or
performance (so the scan will detect and avoid any interference they generate).
1. Perform a group scan on the receiver by pressing and holding the scan button for
two (2) seconds. GROUP SCAN appears while the receiver scans for the best group of
frequencies in your RF environment.
2. After the scan completes, the receiver displays the best available frequency and
highlights the SET FREQ menu item. Press enter to accept the frequency and return
to the home screen.
3. From the receiver home screen, press enter to go to the main menu and highlight
SYNC.
4. Power on the selected UHF-R transmitter, align the IR windows, and press enter
on the receiver to begin the sync.
5. SYNCING… appears on the LCD. When complete, SUCCESS appears and the LEDs
on the receiver flash. The transmitter and receiver are now tuned to the same
frequency.
Multiple System Setup
When setting up multiple systems, begin by setting up the first system as follows:
1. Conduct a group scan on the receiver by pressing and holding the scan button for
two seconds.
Note the group number and number of compatible frequencies.
Press enter to accept the selected frequency.
Transmitter Compatibility
The receiver is compatible with both UHF-R and Axient transmitters, but must be set to
the correct system mode. Select the transmitter type from the system mode menu. This
configures the receiver with a compatible tonekey, audio companding, and IR sync pro-
tocol. The MW5 does not have Axient ShowLink capabilities.
Note: Changing modes removes all entries in the MTx list. You will be prompted with the
following warning: MTx MODE LIST WLL BE ERASED?.
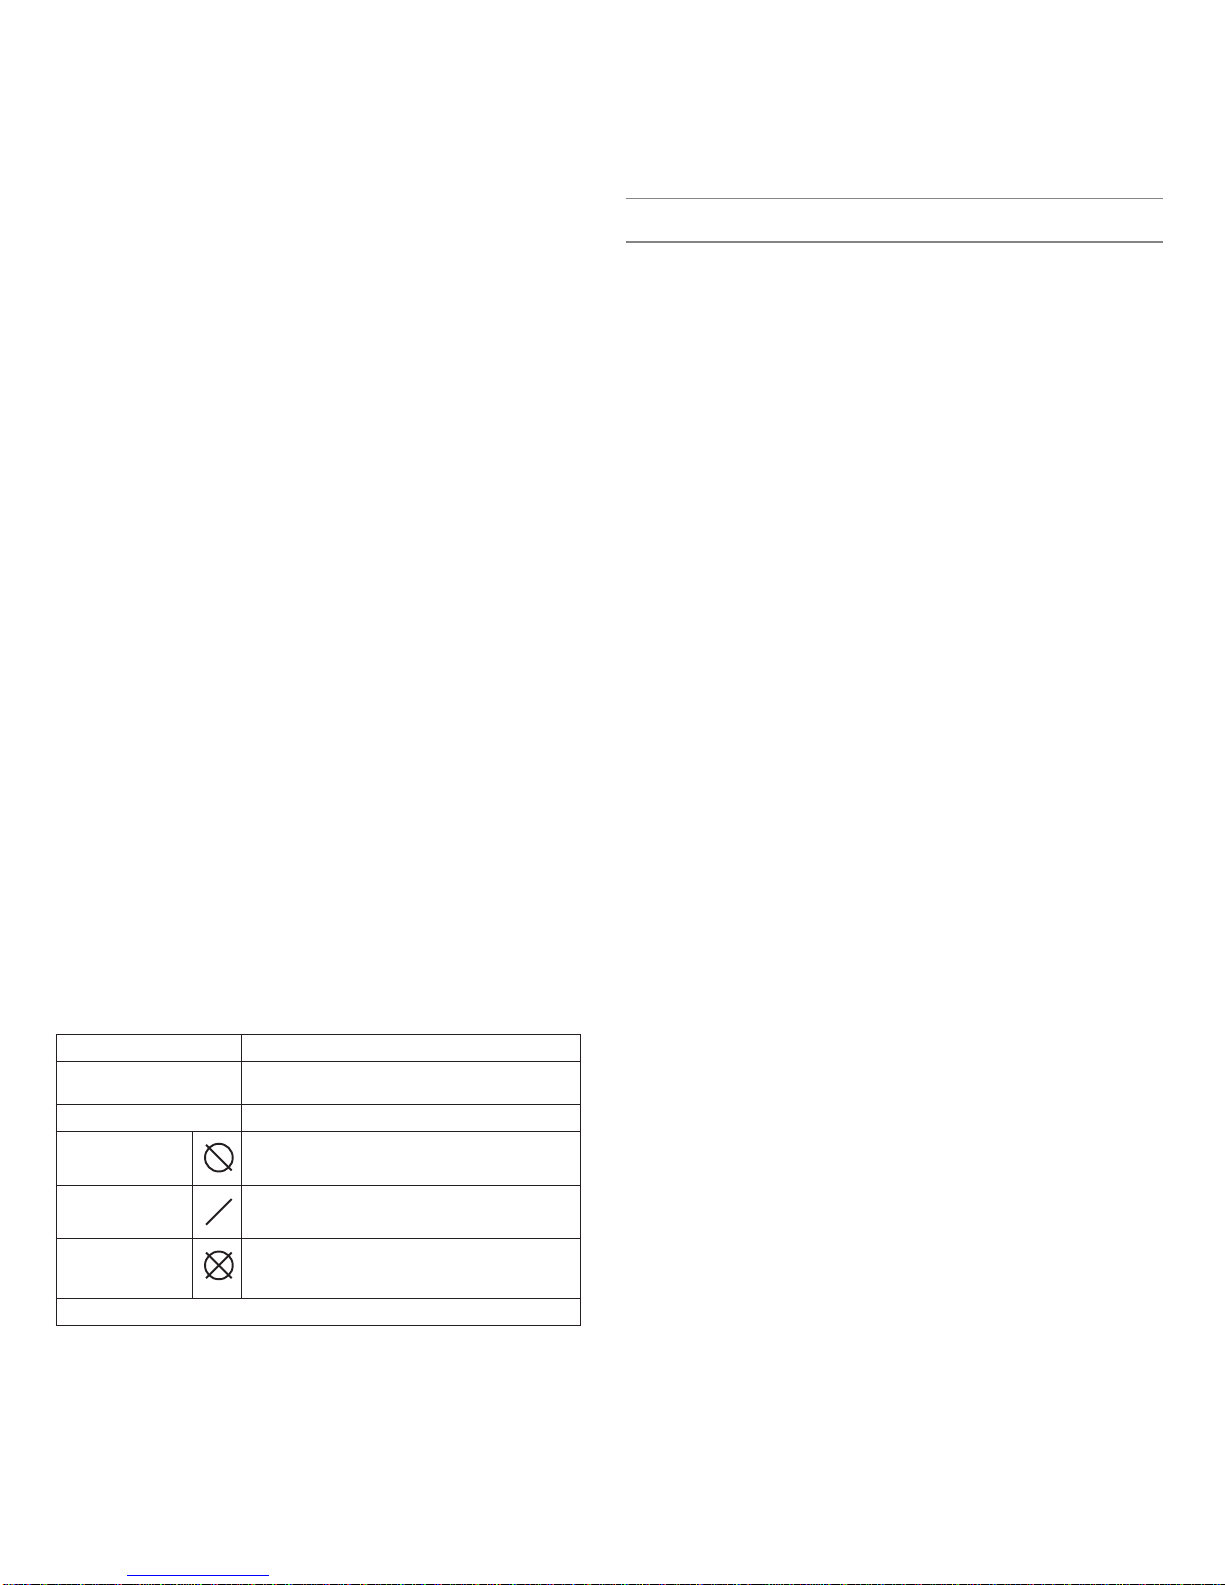
System Mode Menu
UTILITIES > MTx MODE > SYS SETUP > SYS MODE
UHF-R
Compatible with UHF-R transmitters.
Axient
Compatible with Axient transmitters.
RF Pad
Access the RF pad menu (RADIO > RF PAD) to attenuate antenna signal level in 1 dB
increments.
Scanning for an Open Channel
Ifyouexperienceinterference,useoneofthefollowingfrequencyscanstoanalyzethe
RF environment and identify an available frequency.
• Channel Scan: Press the scan button on the bodypack. Finds the first available
channel.
• Group Scan: Press and hold the scan button for two seconds. Finds the group with
the greatest number of available channels. (Each group contains a set of frequencies
that are compatible when operating multiple systems in the same environment.)
• Full Scan: Scans the full RF band and allows you to view the results in a graphical
display.
Full Scan
ThisfeaturescanstheRFbandin25kHzincrementsforallavailablefrequencies,
first with antenna A, then with antenna B. You can then view a graphical display of the
results.
1. Navigate to the full scan menu (RADIO > FULL SCAN)
2. Select RUN SCAN and press enter to initiate the full scan.
3. Once the scan is completed, select SPECTRUM from the full scan menu to view the
results.
Note: If the full scan is interrupted, no data is stored, and NO DATA displays on the
screen.

8
Viewing Full Scan Results
Use the spectrum menu to display full scan results (RADIO > FULL SCAN > SPECTRUM).
• A cursor appears as a small arrow on the top left side of the graph.
• Usethe▼▲tomovethecursorleftorright
• Press the scan button to view the frequency and dBm at the cursor location. The
dBm information is accurate within +5 dB between -100 to -5 dBm.
• Zoom in and out using the enter and exitbuttons.Thereareviews60MHz,9
MHz,or1MHzwide.
To return to the home sreen, press the exit button repeatedly.
Note: The full scan results are retained in memory even after the receiver is powered
off. For accurate results, perform a new full scan if there are changes in location or RF
environment.
Setting the Receiver to a Frequency from the Spectrum View
1. Use the spectrum menu to display full scan results (RADIO > FULL SCAN >
SPECTRUM).
2. Move the cursor to the desired area of the spectrum, usually one with the least
amount of interference.
3. Zoomintothe1MHz-wideviewusingtheenter button.
4. Press scan. The frequency is displayed with the following prompt: Enter to Set?.
5. Press enter to set the receiver to the diplayed frequency and return to the home
screen.
Other Settings
Manual Frequency Selection
To manually adjust group, channel or frequency, use the RADIO > SET FREQ menu.
Squelch
Squelch mutes the audio output from the receiver when the transmitter tonekey RF sig-
nal becomes low or in the presence of high RF noise. While squelch is activate, the blue
LED on the portable receiver turns off.
WARNING: Adjusting the squelch can negatively affect RF and audio performance. Use
the default setting HIGH (NORMAL) unless absolutely necessary.
Squelch Settings
HIGH (NORMAL) Default factory setting.
MID Moderately decreases the signal-to-noise ratio re-
quired to squelch the receiver.
LOW Greatly decreases the noise squelch threshold.
TONEKEY ONLY* Turns off noise squelch leaving only tonekey
squelch on.
HIGH NO TK* High squelch without a tonekey.
NO SQUELCH* Turns off noise and tonekey squelch. (Used as a
debugging tool by engineers or RF coordinators to
"listen" to the RF environment.)
* Symbol appears in display window.
Receiver Label
To change the name displayed on the home screen, use the UTILITIES > LABEL RX
menu.Usethe▼▲buttonstochangeeachcharacter.Pressthescan button to move
the cursor to the next character. Press enter to save the name.
LCD Screen Display Settings
Home Screen
Change the appearance of the LCD from the display menu (SYST CONF > DISPLAY).
Usethe▼▲buttonstopreviewthedifferentwaysofdisplayinginformationonthehome
screen. Press enter to accept the selection.
Contrast
Change the contrast of the LCD from the contrast menu (SYST CONF > CONTRAST).
Usethe▼▲buttonstosetthedesiredcontrast.
Lock Panel
Locks MW5 controls (UTILITIES > LOCK PANEL).
Select and press enter.
Restore
Resets MW5 to factory default parameters (SYST CONF > RESTORE).
Select and press enter.

9
Using Multiple Transmitters with a Single
Receiver (MTx Mode)
The MTx feature stores a list of presets, allowing you to easily switch from one transmit-
ter to another without having to reconfiguring receiver settings. This replaces the need
to mount multiple receivers on your camera whenever you only need to tune to one
transmitter at a time.
The presets are stored as entries in the MTx list. Each entry stores a name, RF chan-
nel, and receiver camera output volume. Transmitters can be synced to entries in the
list, which transfers the entry name and RF channel settings over the IR port.
To use the presets, enter MTx mode on the receiver and scroll through the MTx list with
the▼▲buttonstoreceiveaudiofromthetransmitteronthatRFchannel.
Multiple entries can be set to the same RF channel. This may be desired, for example, if
the same transmitter will be used at different times throughout a performance at varying
volumes.
Entering MTx Mode
To enter MTx mode, select UTILITES > MTx MODE > ENTER MODE. The name and RF
settings for the first entry in the MTx list are displayed.
If the MTx list is empty, EMPTY LIST PRESS ENTER TO ADD CURRENT SETTINGS is
diplayed. Press enter to create a new entry based on the current receiver settings.
Exiting MTx Mode
To exit MTx mode, press enter and select EXIT MTx MO.
Creating an MTx List
Use one of the following methods to add entries to the MTx list.
Scan and Create
This creates a new MTx list with up to 20 entries. Each entry is given an auto-generated
name and assigned a compatible RF channel.
When creating a new list, all existing entries are overwritten.
1. Perform a group scan (press and hold scan button for two seconds).
2. After the scan completes, select CREATE LIST
3. The receiver displays the number of compatible channels available for the MTx list.
Note: The maximum number for a MTx list is twenty (20).
4. Usethe▼▲buttonstochoosethenumberoftransmittersyouwanttoaddtothelist.
5. Press enter to create the list.
CREATING LIST… displays while the list populates. When complete, it displays LIST
DONE before returning to the home screen.
Add Current
Use this method to add entries to the MTx list individually, based on the current settings
of the receiver.
• Tune the receiver to the desired frequency. You may also want to adjust the reciever
camera output level, as this is also stored in the list entry.
• Select ADD CURRENT from the MTx menu (UTILITIES > MTx MODE > ADD CURRENT)
and press enter.
SUCCESS is displayed upon completion.
LIST FULL displays after reaching the maximum of 20 entries.
Copying an MTx List to Another Receiver
Use COPY/PASTE to transfer the MTx list from one portable receiver to another.
1. Highlight COPY/PASTE from the MTx menu on both receivers (UTILITIES > MTx
MODE).
Important: COPY/PASTE must be highlighted on both receivers.
2. Align the receiver IR windows and press enter on the source receiver (the receiver
you want to copy from).
The display shows SUCCESS and the LEDs flash on both receivers after transferring
the list.
Modifying an MTx List Entry
The name, frequency, and camera output volume setting can be modified for each entry
in the list.
1. Enter MTx mode (UTILITIES > MTxMODE > ENTER MODE).
2. Usethe▼▲buttonstoselectanentryfromthelist.
3. Press enter to access the submenu for that entry.
4. Scroll to the MODIFY menu item and press enter.
5. Choose a setting to modify and press enter.
6. Press exit to cancel changes or press enter to save changes and return to home
screen.
Transmitter Name
CLEAR?
Removes current name.
[NAME]
Changecharactersusingthe▼▲buttons,scan button to go to next character.
Frequency
[000.000MHz]
Press entertoselectMHz,enter again to select decimal increments. Change
usingthe▼▲buttons.
Camera Output Volume Setting
CAM. VOL.
This allows you to set a different output volume for each entry. Press enter to set
the level of the camera output of the receiver when tuned to the selected MTx list
entry.

10
Removing List Entries
To delete a single entry:
1. Enter MTx mode (UTILITIES > MTxMODE > ENTER MODE).
2. Usethe▼▲buttonstoselectanentryfromthelist.
3. Press enter to access the submenu for that entry.
4. Scroll to the DELETE menu item and press enter.
To delete the entire list:
1. Access the MTx menu (UTILITIES > MTx MODE)
2. Scroll to the DELETE ALL menu item and press enter.
Syncing Transmitters to the MTx List
After creating an MTx list, you can sync transmitters to the list entries.
When you sync a transmitter to a list entry, it transfers the RF setting
and name of that entry to the transmitter.
Note:
• Transmitters must be from the same frequency band as the portable
receiver.
• Syncing while in MTx mode does not change any of the settings on
the portable receiver.
1. Enter MTx mode (UTILITIES > MTxMODE > ENTER MODE).
2. Usethe▼▲buttonstoselectanentryfromthelist.
3. Press enter to access the submenu for that entry.
4. Highlight the SYNC menu item.
5. Align the receiver and transmitter IR windows and press enter to
begin the sync.
The screen displays SYNC SUCCESS when completed.
6. Repeat for each transmitter in the list.
Specifications
Audio Frequency Response
50Hzto16kHz
Ultimate Quieting
>100 dBm, A-weighted
Total Harmonic Distortion
Ref.±20kHzdeviationwith1kHztone
<0.4% THD, typical
Signal-To-Noise Ratio
A-Weighted
90 dB (typical)
Companding
Patented Shure Audio Reference
Companding
Operating Temperature
-18°C to +57°C (-0°F to +135°F)
Note: Battery characteristics may limit this
range.
Battery Type
Rechargeable Li-Ion (Shure SB900) or AA
batteries (LR6, 1.5 V
Battery Life
AA batteries 4 hours
SB900 8 hours
Net Weight
200g(7oz.),withAAbatteries
Dimensions
83 x 65 x 22 mm (3.3 in. x 2.6 in. x 0.9 in.)
H x W x D
RF Carrier Range
470to952MHz(variesbyregion)
Modulation
FM,45kHzmax.deviation
Antenna Type
Switching Diversity
Dynamic Range
>100 dBm, A-weighted
RF Sensitivity
ref. 12dB SINAD <−106dBm
ref. 30 dB SINAD <−88dBm
Spurious Rejection
>80 dB (typical)
Squelch Threshold
30 dB SINAD (±3 dB)
Compatible Frequencies
Per band 40 (band dependent)
Tuning Bandwidth
60to72MHz(banddependent)
Frequency Stability
±2.5 ppm
Tonekey
UHF-R Mode 32kHz
Axient Mode 28kHz
Camera Output
Configuration
Electronically balanced, mono
Type
TA3
Maximum Audio Output Level
Adjustable
−35dBVto+10dBV
Pin Assignments
1=ground, 2=hot, 3=cold
Headphone Output
Configuration
Unbalanced, mono
Type
3.5 mm (1/8")
Minimum Load Impedance
9.5Ω
Impedance
3.5Ω
Maximum Output Power
100 mW
Pin Assignments
Tip=hot, Ring=cold, Sleeve=ground

11
NOTE:
This Radio equipment is intended for use in musical professional entertainment and
similar applications.
This Radio apparatus may be capable of operating on some frequencies not
authorizedinyourregion.Pleasecontactyournationalauthoritytoobtaininformation
onauthorizedfrequenciesandRFpowerlevelsforwirelessmicrophoneproducts.
MW5
Frequency Band
Name
Range Freq.Span(MHz)
MABJ 779-810 31
X2 925-932 7
Accessories and Parts
Dimensions
22 mm 65 mm
83 mm
Furnished Accessories
TA3F-to-XLRm audio cable WA451
TA3F-to-1/8" (3.5mm) audio cable WA461
Camera shoe mount AFP512
Optional Accessories
Shure Rechargeable Lithium Battery SB900
Shure 8-bay Recharging Station SBC800
Shure Portable Battery Charger SBC210
Anton Bauer plate mount AFP522
Anton Bauer DC plate mount AFP522DC

12
Certifications
Meets essential requirements of the following European Directives:
• R&TTE Directive 99/5/EC
• WEEE Directive 2002/96/EC, as amended by 2008/34/EC
• RoHS Directive 2002/95/EC, as amended by 2008/35/EC
Note: Please follow your regional recycling scheme for batteries and electronic waste
• Conforms to European Regulation (EC) No. 1275/2008, as amended.
Meets requirements of the following standards: EN 300 422 Parts 1 and 2, EN 301 489
Parts 1 and 9, EN60065.
Certified in Canada by IC to RSS-123.
IC: 616A-MW5.
This Class B digital apparatus complies with Canadian ICES-003. Cet appareil numérique
de la classe B est conforme à la norme NMB-003 du Canada.
Approved under the Declaration of Conformity (DoC) provision of FCC Part 15.
The CE Declaration of Conformity can be obtained from Shure Incorporated or any of its
European representatives. For contact information please visit www.shure.com
The CE Declaration of Conformity can be obtained from: www.shure.com/europe/
compliance
AuthorizedEuropeanrepresentative:
Shure Europe GmbH
Headquarters Europe, Middle East & Africa
Department: EMEA Approval
Jakob-Dieffenbacher-Str. 12
75031 Eppingen, Germany
Phone: 49-7262-92 49 0
Fax: 49-7262-92 49 11 4
Email: [email protected]
This device complies with Industry Canada licence-exempt RSS standard(s). Operation
of this device is subject to the following two conditions: (1) this device may not cause
interference, and (2) this device must accept any interference, including interference that
may cause undesired operation of the device. Le présent appareil est conforme aux CNR
d'Industrie Canada applicables aux appareils radio exempts de licence. L'exploitation est
autorisée aux deux conditions suivantes : (1) l'appareil ne doit pas produire de brouillage,
et (2) l'utilisateur de l'appareil doit accepter tout brouillage radioélectrique subi, même si
le brouillage est susceptible d'en compromettre le fonctionnement.
Note: EMC conformance testing is based on the use of supplied and recommended cable
types. The use of other cable types may degrade EMC performance.
Changes or modifications not expressly approved by the manufacturer could void the
user’s authority to operate the equipment.
Information to the user
This equipment has been tested and found to comply with the limits for a Class B digi-
tal device, pursuant to Part 15 of the FCC Rules. These limits are designed to provide
reasonable protection against harmful interference in a residential installation. This
equipment generates uses and can radiate radio frequency energy and, if not installed
and used in accordance with the instructions, may cause harmful interference to radio
communications. However, there is no guarantee that interference will not occur in a
particular installation. If this equipment does cause harmful interference to radio or televi-
sion reception, which can be determined by turning the equipment off and on, the user is
encouraged to try to correct the interference by one or more of the following measures:
• Reorient or relocate the receiving antenna.
• Increase the separation between the equipment and the receiver.
• Connect the equipment to an outlet on a circuit different from that to which the receiver
is connected.
• Consult the dealer or an experienced radio/TV technician for help.
WARNING: Danger of explosion if battery incorrectly replaced. Operate only with Shure
compatible batteries.
Note: Use this receiver only with the included power supply or a Shure-approved
equivalent.
WARNING
• Battery packs may explode or release toxic materials. Risk of fire or burns. Do not
open, crush, modify, disassemble, heat above 140°F (60°C), or incinerate
• Follow instructions from manufacturer
• Never put batteries in mouth. If swallowed, contact your physician or local poison
control center
• Do not short circuit; may cause burns or catch fire
• Do not charge or use battery packs with other than specified Shure products
• Dispose of battery packs properly. Check with local vendor for proper disposal of used
battery packs
• Batteries (battery pack or batteries installed) shall not be exposed to excessive heat
such as sunshine, fire or the like

13
概要
付属品
• MW5: ポータブルワイヤレス受信機
• 1/4波長アンテナ 2本
• TA3F-XLR(オス)オーディオケーブル
• TA3F-3.5 mmオーディオケーブル
• 単3形乾電池 2本(アルゼンチンを除く)
• シューマウント
• 装着用ストラップ
• 90°SMAアダプター 2個
• ジッパーポーチ
• 保 護 カバー
機能
• 広帯域周波数チューニング
• ダ イバーシ ティ
• バランス 出 力
• 様々な装着オプション
• 市販の単3形乾電池またはShure SB900充電池で動作
MW5は最高級ポータブルワイヤレスマイクロホン受信機コンポーネントで、プロフェッショナル用途やメディア制作用途に適したShure UHF-R®クラスのワイヤレス技術・性能・品質を提供しま
す。 広帯域周波数チューニング、ハンズオン・ナビゲーション、充電池への対応、様々な装着オプションを備えたMW5は、携帯型ワイヤレスのベストチョイスです。

14
exit enter sync scan
exit enter sync
exit enter sync scan
2 sec
exit enter sync scan
exit enter sync
exit enter sync scan
scan
exit enter sync scan
exit enter sync
exit enter sync scan
scan
exit enter sync
exit enter sync scan
scan
exit enter sync scan

15
MW5ポータブル受信機
① 電源スイッチ
ポータブル受信機をオン/オフします。
② TA3Mジャック。
オーディオ出力用。
③ 3.5 mmヘッドホンジャック
オ ー デ ィオ モ ニ タリン グ 用 。
④ ス キャン ボ タン
スキャンボタンを 押して 次 の空い ているチャン ネルを探します。2 秒 間 押したままにする
と、最も空きの多いチャンネルを持つグループを探します。
⑤ IRウィンドウ
RF設定と名前を送信機に転送したり、MTxリストを別の受信機にコピーしたりする際に
使 用 し ま す 。
⑥ 電池コンパートメント
単3形乾電池2本またはShure SB900充電池を取り付けます。 両側のラッチを押して外
に 引っ張 ると開 きます 。
⑦ メニューボ タン
▼▲ボタンとともに使用して設定メニューにアクセスします。
⑧ ▼▲ボタン
メニュー、設定変更、MTxモードでの送信機選択のスクロールに使用します。 ヘッドホンま
たはカメラ出力音量のコントロールに割り当てることができます。
⑨ LCDスクリーン
現在の設定やメニューを表示します。
⑩ バッテリー残量表示3色LED
緑、オレンジ、赤に点灯して電池残量を表示します。 赤になったらすぐに電池を交換し
てください 。
⑪ 青色RF LED
ポータブル受信機が送信機からの信号を受信しているときに点灯します。
⑫ 取り外し式アンテナ 2本
SMAコネクター 2個
⑬ パ ワー ス ル ーコン タ クト
Shure AFP522DCカメラマウントに挿入した受信機への電源供給用。 マウントから外した
ときや、外部電源が失われたときには、受信機は自動的に内部電源に切り替わります。
⑭ 取り外し式単3電池アダプター
Shure SB900充電式電池を使用する際は取り外します。
注: アダプターを取り外すにはドアを開けてスライドさせます。 再度取り付けるには、アダプターを
押しこみます。正しく装 着されるとカチッという音が聞こえます。

16
電源 オーディオ
MW5は単3形乾電池、Shure SB900充電式電池、またはShure AFP522DCカメラマウントからの
電源供給により動作します。
市販の単3形乾電池
単3形乾電池を使用する際は単3電池アダプターを使用します(出荷時に電池コンパーメントに
装 着 さ れ て い ま す )。
電池アイコンが電池残量を正確に示すことができるように、電池メニューから電池タイプを選択
し ま す( SYS SETUP > BATTERY)。
注: 電池タイプはデフォルトではアルカリに設定されています。
SB900充電式電池に関する情報
SB900充電式電池を使用している時は、電池メニューに電池ステータスが表示
さ れ ま す 。 SYS SETUP > BATTERY
Hrs: Min Left:
時分表示による電池残量(誤差15分以内)
Health
電池の健康状態がパーセントで表示されます
Status
残量パーセントおよびmAhで表示されます
Temperature
摂氏および華氏で表示されます
Cycle Count
電池の充電回数が表示されます
電池寿命(アルカリ、単3形)
電 池 イン ジ ケーター LED 残り推定時間
緑色 2½~5時間
緑色 2~2½時間
緑色 1½~2時間
緑色 1~1½時間
黄色 ½~1時間
赤色 ½時間未満
注:低インピーダンスのイヤホン、別の種類の電池を使用したり、高ゲイン設定にて使用したりし
た場合には、受信機の電池寿命が仕様とは異なる場合があります。
オ ー デ ィ オ・セット ア ッ プ
次の手順により受信機をカメラに接続します。 これらの手順は、フィールドレコーダー等他のデ
バイスへの接続にも応用できます。
1. 受信機のオーディオレベルメーターバーが、ピークレベル(オーディオバーの5本目)近く、ただ
しピークには達しないように、送信機の出力レベルを調整します。
2. 受信機を接続しているデバイスの入力設定をチェックします。 受信機のカメラ出力音量を
設 定 し ま す( AUDIO > CAMERA VOL)。
カメラの入力設定 MW5カメラ出力音量
ラ インレ ベ ル +10 dB(工場出荷時設定)
MICレベル -5 dB
3. 付属のTA3Fオーディオケーブルを受信機のカメラ出力に取り付けます。
4. カメラに受信機を装着します。
5. ケーブルをカメラのオーディオ入 力に接続します。
6. カメラの入力を任意のレベルに調整します。
音声設定
オ ー デ ィ オ メ ニ ュ ー( AUDIO)を使用してカメラ出力レベルとヘッドホン音量を調整します。
CAMERA VOL
カメラ出力レベルを調整して、受信機を接続しているデバイスの入力レベルに合わせま
す 。
HP VOLUME
ヘッドホンの音量を調整します。
HPO MODE
カメラ出力を無効にし、ヘッドホン出力ゲインを高めます。 ヘッドホン音量の出力を調整す
る の に ▼ ▲ ボ タ ン を 割 り 当 て ま す 。 AUDIOメニューに 戻って HPO MODEを終 了します。
クイックアクセス音量調整
受信機は、▼▲ボタンで出力またはヘッドホンボリュームを調整できるように設定できます。 こ
れによって、オーディオメニューを開かなくても、受信機を装着したまま音量を簡単に調整する
ことができるようになります。
注: この設定はMTxモード時は適用されません。
UTILITIES > VOL. ASSIGN
CAMERA OUT
▼▲ボタンでカメラ出力音量を調整します。
HEADPHONE
▼▲ボタンでヘッドホン音量を調整します。
NONE( デ フ ォ ル ト )
▼▲ボタンは音量に影響しません。
トーンジェネレーター
トーン を カメラ出 力に 送 信 するに は 、トーンジェネレーターメニューへアクセスします
(UTILITIES > TONE GEN)。 ▼▲ボタンを使ってトーンを100 Hz、1 kHz、5 kHzの中から選
択します。 トーンジェネレーターをオフにします。
注: このメニューの使用中は、送信機の音声が中断します。

17
シ ス テ ム セ ット ア ップ
グ ループ 周波数
無線周波数(RF)設定
2. 受信機と送信機を同期させます。 送信機の電源はオンのままにします。
各追加システムで次の手順を繰り返します。
1. 受信機を指定グループに手動で設定します。
2. scanを1回押して、次の互換周波数チャンネルを検索します。
3. 送信機を同期させ、残りのシステム設定中は電源をオンのままにします。
ス キャン 及 び 同 期
この手順によって受信機と送信機を同じ空きチャンネルに設定します。
重要! 始める前に:
• 設定を行っているシステムの送信機のRFをオフにします。(周波数スキャンとの干渉を防止
す る た め で す 。)
• 他のワイヤレスシステムやワイヤレス装置、コンピューター、CDプレーヤー、LEDパネル、エフェ
クトプロセッサー、デジタルラック装置など、電波干渉の原因となり得るものの電源はオンにし
て、講演やパフォーマンスの最中と同様に作動させます(スキャンが干渉を検出し、生成され
る干渉を回避します)。
1. scanボタンを2秒間押して受信機でグループスキャンを実行します。 受信機が各RF環境で
最適な周波数グループをスキャンしている間は、
GROUP SCANと表 示されます 。
2. スキャンが完了すると、受信機は最適な周波数を表示し、
SET FREQメニュー項目をハイライ
ト 表 示 し ま す 。 enterを押すと、その周波数に決定され、ホーム画面に戻ります。
3. 受信機のホーム画面から、
enterを 押 し て メイン メ ニューに 進 み 、SYNCをハイライト表示にし
ます。
4. UHF-R送信機の電源を入れ、IRウィンドウを向き合わせたら、受信機のenterを押して 同 期を
開 始します 。
5. SYNCING…とLCDに表示されます。 完了すると、SUCCESSと表示され受信機のLEDが点滅し
ます。 送信機と受信機は同じ周波数に設定されました。
複数システムの設定
複数のシステムを設定する場合、次の手順で、まず最初のシステムの設定から始めます。
1. scanボタンを2秒間押して受信機でグループスキャンを実行します。
グループ番号と互換周波数チャンネルの数をメモします。
enterを押して選択した周波数に決定します。
送信機の互換性
受信機はUHF-RおよびAxient送信機の両方に互換性がありますが、正しいシステムモードに設定
する必要があります。 システムモードメニューから送信機タイプを選択します。 これによって受信
機は、互換性のあるトーンキー、オーディオコンパンダー、IR同期プロトコルに設定されます。 MW5
はAxient ShowLinkには対応していません。
注: モードを変更するとMTxリストのすべての項目が削除されます。 次の警告が表示されます:
MTx MODE LIST WLL BE ERASED?
シ ス テ ム モ ード メ ニ ュー
UTILITIES > MTx MODE > SYS SETUP > SYS MODE
UHF-R
UHF-R送信機と互換性を持ちます。
Axient
Axient送信機と互換性を持ちます。
R F パ ッド
R F パッド メ ニ ュ ー ( RADIO > RF PAD)にアクセスし、アンテナ信号レベルを1 dB刻みで減衰させる
ことができます。
空 きチャン ネ ル の ス キャン
干渉が生じた場合、次の周波数スキャンのいずれかを行ってRF環境を分析し、使用可能な周波
数を見つけることができます。
• チャンネルスキャン: ボディパックのscanボタンを押します。最初の空きチャンネルを探します。
• グループスキャン: スキャンボタンを2秒間押し続けます。使用可能なチャンネル数が最も多
いグループを探します。(各グループは同じ環境下で運用される複数システムとして互換性を
持つ周波数セットで構成されています。)
• フルスキャン: RF全帯域をスキャンし、グラフィックディスプレイで結果を確認することができ
ま す 。
フ ル ス キャン
この機能は、すべての使用可能な周波数を得るためにRF帯域を25 kHz刻みで、アンテナA、次に
アンテナBの順でスキャンします。次に結果をグラフィック表示で確認することができます。
1. フ ル ス キ ャ ン メ ニ ュ ー を 開 き ま す( RADIO > FULL SCAN)。
2. RUN SCANを選 択し 、enterを押してフルスキャンを開 始します。
3. ス キャン が 完 了 し たら 、フ ル ス キャン メニュー から SPECTRUMを選択して結果を表示します。
注: スキャンが中断されると、データは保存されず、画面にはNO DATAと表 示されます。

18
フルスキャン結果の表示
スペクトラムメニューを使用してフルスキャン結果を表示します(RADIO > FULL SCAN >
SPECTRUM)。
• カーソルがグラフ左上に小さい矢印で表示されます。
• ▼▲を使用してカーソルを左右に動かします。
• scanボタンを押すとカーソル位置の周波数とdBmが表示されます。 dBm情報は-100~-5
dBmの範囲で、誤差+5 dBで表示されます。
• enterとexitボタンを使用して拡大/縮小ができます。 幅60 MHz、9 MHz、1 MHzのいずれ
かで 表 示されます 。
ホーム 画 面に 戻るには 、
exitボタンを繰り返し押します。
注: フルスキャン結果は受信機の電源をオフにした後であっても、メモリーに保存されます。 正
確な結果を得るため、場所やRF環境が変わった場合は新たにフルスキャンを実行してくださ
い 。
スペクトラムビューから受信機の周波数を設定する
1. スペクトラムメニューを使用してフルスキャン結果を表示します(RADIO > FULL SCAN >
SPECTRUM)。
2. カーソルをスペクトラムの任意のエリアに動かします。通常は干渉が一番小さい場所を選
択 し ま す 。
3. enterボタンを使用して1 MHz幅表示に拡大します。
4. scanを押します。 周波数は次のメッセージとともに表示されます: Enter to Set?
5. enterを押すと表示された周波数に受信機が設定され、ホーム画面に戻ります。
その他の設定
周波数のマニュアル選択
グループ、チャンネル、周波数をマニュアルで調整するにはRADIO > SET FREQメニューを 使
用 し ま す 。
スケルチ
スケルチは、送信機トーンキーRF信号が低くなったり、RFノイズが高くなったりすると、受信機
からのオーディオ出力をミュートします。 スケルチが作動すると、ポータブル受信機の青色LED
は消えます。
警告: スケルチを調整するとRFとオーディオ性能に悪影響が出ることがあります。 必要でない
場合はデフォルト設定HIGH (NORMAL)を 使 用 し て く だ さ い 。
スケルチ設定
HIGH (NORMAL) 工場出荷時設定。
MID 受信機のスケルチを作動させるために必要な程度に、適度に
SN比を下げます。
LOW ノイズスケルチのスレッショルドを大幅に下げます。
TONEKEY ONLY* ノイズスケルチをオフにしてトーンキースケルチのみをオン
に し ま す 。
HIGH NO TK* トーン キーなし の 高 ス ケ ル チ 。
NO SQUELCH* ノイズとトーンキースケル チを オフにします 。 (エンジニアまた
はRFコーディネーターがRF環境を「聴く」ためのデバッグツール
と し て 使 用 し ま す 。)
*ディスプレイウィンドウに表示される記号
受信機ラベル
ホーム画面に表示される名前を変更するには、UTILITIES > LABEL RXメニューを 使 用しま
す。 ▼▲ボタンを使用して各文字を変更します。 scanボタンを押してカーソルを次の文字に
動 か し ま す 。 enterを押して名 前を保 存します。
LCD画面表示設定
ホーム画 面
ディスプレイメニューからLCDパネルの表示を変更できます(SYST CONF > DISPLAY)。
▼▲ボタンを使用して、異なるスタイルでのホーム画面の情報表示をプレビューします。
enterを押して選 択を決 定します。
コントラスト
コントラストメニューからLCDのコントラストを変更できます(SYST CONF > CONTRAST)。
▼▲ボタンを使用して任意のコントラストに設定します。
ロック パ ネ ル
MW5コントロールをロックします(UTILITIES > LOCK PANEL) 。
enterを選 択して押します。
復元
MW5を工場出荷時パラメーターにリセットします(SYST CONF > RESTORE)。
enterを選 択して押します。

19
1つの受信機で複数の送信機を使用する(MTx
モ ード )
MTx機能はプリセットリストを保存することで、受信機設定を再設定することなく、送信機から
別の送信機に簡単に切り替えることができます。 これによって、カメラに複数の受信機を装着
する必要がなくなり、そのつど1台の送信機と合わせるだけで済みます。
プリセットはMTxリストにエントリーとして保存されます。 各エントリーには、名前、RFチャンネ
ル、受信機カメラ出力音量が保存されます。 送信機はリストのエントリーに同期することがで
き、エントリー名とRFチャンネル設定をIRポートから転送することができます。
プリセットを使用するには、受信機のMTxモードに入り、▼▲ボタンでMTxリストをスクロールし、
そのRFチャンネルの送信機から音声を受信します。
複数のエントリーを同じRFチャンネルに対して設定することができます。 これは例えば、同じ送
信機をパフォーマンスの時間によって異なる音量で使用する場合などに適しています。
MTxモードに入る
MTxモードに入るには、UTILITES > MTx MODE > ENTER MODEを選択します。 MTxリストの
最初のエントリーの名前とRF設定が表示されます。
MTxリストが空の場合、
EMPTY LIST PRESS ENTER TO ADD CURRENT SETTINGSが表示
さ れ ま す 。 enterを押すと現在の受信機設定による新しいエントリーが作成されます。
MTxモードを終了する
MTxモードを終了するには、enterを押してEXIT MTx MOを 選 択 し ま す 。
MTxリストの作成
次の方法によりMTxリストにエントリーを追加します。
ス キャン および 作 成
これによって新しいMTxリストを作成することができます(最大20エントリー)。 各エントリーには
自動生成された名前と互換RFチャンネルが割り当てられます。
新しいリストを作成すると、すべての既存エントリーが上書きされます。
1. グループスキャンを実行します(2秒間scanボタンを押し続けます)。
2. ス キャン が 完 了 し たら 、
CREATE LISTを選択します。
3. 受信機にそのMTxリストに使用できる互換チャンネルの数が表示されます。
注: 1つのMTxリストの最大数は20です。
4. ▼▲ボタンを使用して、リストに追加する送信機の数を選択します。
5. enterを押してリストを作 成します。
リストに登録される間、
CREATING LIST…と表示されます。 完了するとLIST DONEが表示
さ れ 、ホ ー ム 画 面 に 戻 り ま す 。
現在の設定を追加
この方法により、受信機の現在の設定に基づいて、個々にエントリーをMTxリストに追加します。
• 受信機を任意の周波数に設定します。 受信機カメラ出力レベルを調整したければ、これも
リ ス ト エ ン ト リ ー に 保 存 さ れ ま す 。
• MTxメニュー(UTILITIES > MTx MODE > ADD CURRENT)か ら ADD CURRENTを選択
し、
enterを 押 し ま す 。
完 了 す るとSUCCESSと 表 示 さ れ ま す 。
20エントリーに達するとLIST FULLと表 示されます。
MTxリストエントリーの変更
名前、周波数、カメラ出力音量設定はリストの各エントリーごとに変更できます。
1. MTxモードに入ります(UTILITIES > MTxMODE > ENTER MODE)。
2. ▼▲ボタンを使用して、リストからエントリーを選択します。
3. enterを押して、そのエントリー用のサブメニューにアクセスします。
4. MODIFYメニュー へスクロー ルし 、enterを 押 し ま す 。
5. 設定を選択して変更し、
enterを押します。
6. exitを押して変 更をキャンセルするか、enterを押して 変 更を保 存し 、ホーム画 面に 戻り
ます。
送信機名
CLEAR?
現在の名前を削除します。
[NAME]
▼▲ボタンで文字を変更し、scanボタンで次の文字に進みます。
周波数
[000.000MHz]
enterを押すとMHzの選択ができ、もう一度enterを押すと小数点の選択ができます。
▼▲ボタンを使用して変更します。
カメラ出力の音量設定
CAM. VOL.
これによって各エントリーの出力音量を設定することができます。 enterを押して 、選 択し
たMTxリストエントリーに合わせたときの受信機のカメラ出力レベルを設定します。

20
リスト エ ントリー を 削 除 す る
1 つ の エ ン ト リ ー を 削 除 す る:
1. MTxモードに入ります(UTILITIES > MTxMODE > ENTER MODE)。
2. ▼▲ボタンを使用して、リストからエントリーを選択します。
3. enterを押して、そのエントリー用のサブメニューにアクセスします。
4. DELETEメニュー へスクロー ルし 、enterを押します。
リスト全体を削除する:
1. プ リ セ ッ ト メ ニ ュ ー に ア ク セ ス し ま す( UTILITIES > MTx MODE)
2. DELETE ALLメニュー へスクロー ルし 、enterを押します。
送信機をMTxリストに同期させる
MTxリストを作成したら、送信機をリストエントリーに同期させることができま
す。 送信機をリストエントリーに同期させると、RF設定とそのエントリーの名前
が送信機に転送されます。
注:
• 送信機は、ポータブル受信機と同じ周波数帯域にしてください。
• MTxモードで同期させる場合、ポータブル受信機の設定は変更されませ
ん 。
1. MTxモードに入ります(UTILITIES > MTxMODE > ENTER MODE)。
2. ▼▲ボタンを使用して、リストからエントリーを選択します。
3. enterを押して、そのエントリー用のサブメニューにアクセスします。
4. SYNCメニューをハイライト表示にします。
5. 受信機と送信機IRウィンドウを合わせ、
enterを押して同 期を開 始します。
完了すると画面にSYNC SUCCESSと 表 示 さ れ ま す 。
6. リストの各送信機で繰り返します。
仕様
周波数特性
50Hz ~ 16kHz
超静音
>100 dBm, Aウェイト
THD(全高周波歪率)
Ref.+20kHz偏移、トーン1kHz
<0.4% THD, 標準
S/N比
Aウェイト
90 dB (標準)
コン パ ン デ ィン グ
特許取得済みオーディオリファレンスコンパン
デ ィン グ 方 式
使用温度範囲
-18°C ~ +57°C (-0°F ~ +135°F)
注:電池特性によりこの範囲は限定される場合
が ありま す 。
電 池 タイプ
充電式リチウムイオン (Shure SB900) または 単
三電池 (LR6, 1.5V
電池寿命
単三電池 4時間
SB900 8時間
質量
200 g (7 オンス), 単三電池使用
寸法
83 x 65 x 22mm (3.3 インチ x 2.6 インチ x
0.9 インチ) 高さ×幅×奥行き
RF送受信帯域
470 ~ 952MHz (地域により異なります)
変調
FM, 45 kHz最大偏差
アン テ ナ タイプ
ダ イバーシ ティ切り替 え
ダ イ ナ ミックレ ン ジ
>100dBm, Aウェイト
RF 感度
基準 12dB SINAD < -106dBm
ref. 30 dB SINAD < -88dBm
ス プリア ス 除 去
>80dB (標準)
ス ケ ル チしきい 値
30dB SINAD (±3dB)
互換周波数
帯域毎 40 (帯域により異なる)
チューニング帯域幅
60 ~ 72MHz (帯域により異なる)
Frequency Stability
±2.5ppm
トーン キー
UHF-Rモード 32kHz
Axientモード 28kHz
カメラ 出 力
構成
電子バランス, モノ
タイプ
TA3
最大音声出力レベル
調節式
-35dBV ~ +10dBV
ピンの割当
1=接地、2=ホット、3=コールド
ヘ ッド ホ ン 出 力
構成
アン バランス , モノ
タイプ
3.5 mm
最小負荷インピーダンス
9.5Ω
インピ ーダ ン ス
3.5Ω
最大出力
100mW
ピンの割当
チップ = ホット 、リング =コールド、スリーブ = 接 地
Table of contents
Other Shure Receiver manuals

Shure
Shure GLXD6+ User manual

Shure
Shure P3RA User manual

Shure
Shure AD4D Axient User manual

Shure
Shure P4R RECEIVER P4R User manual

Shure
Shure Axient AXT400 User manual

Shure
Shure GLXD4 User manual

Shure
Shure UR5 User manual

Shure
Shure ADX5D User manual

Shure
Shure BLX4R User manual

Shure
Shure BLX4R User manual
Popular Receiver manuals by other brands

TracVision
TracVision M1 installation guide

PCB Piezotronics
PCB Piezotronics JM352C67/M000-50AD Installation and operating manual

Savant
Savant PAV-VOMVP1F2 Series Quick reference guide

Pioneer
Pioneer VSX-520-S operating instructions

Eltax
Eltax AVR-320 instruction manual

Yamaha
Yamaha RX-V671 Service manual