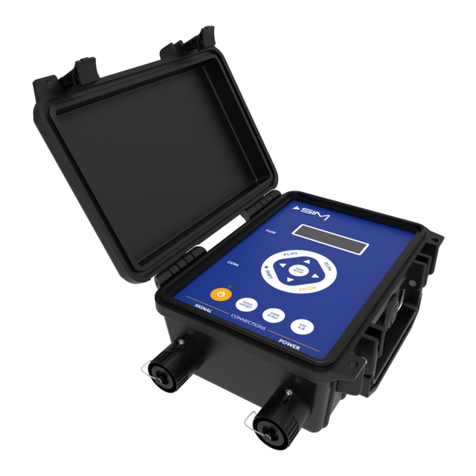
SIM 2W-SIROUT-S User manual

i
2W-SIROUT-S
Two Way Outdoor Sounder With Battery
INSTALLATION MANUAL
P/N 7106663 Rev A

i
Contents
INTRODUCTION ...................................................................................................................... 2
GENERAL DESCRIPTION........................................................................................ 2
2W-SIROUT-S INTRODUCTION TO RUNNER 2
........................................................... 2
SIREN UNIT DESCRIPTION.................................................................................... 3
SETTING THE 2W-SIROUT-S FOR RUNNER 2
CONFIGURATION
...................................... 3
STEP 1: FW2-TRANSCEIVER –LEARNING & OPERATING MODE FOR
RUNNER 2 ONLY ............................................................................................ 3
PHYSICAL DESCRIPTION........................................................................................................ 4
STEP 2: SETTING THE SIREN CONFIGURATION MODE ............................................... 4
STEP 3 : LEARNING THE SIRENS ........................................................................... 6
FUNCTION TESTING AFTER LEARNING. .................................................................... 6
SETTING THE 2W-SIROUT-S FOR SERENITY
CONFIGURATION
...................................... 7
SETTING THE 2W-SIROUT-S CONFIGURATION
............................................................. 7
LEARN THE 2W-SIROUT-S WITH SERENITY C.P
........................................................ 8
FUNCTION TESTING AFTER 2W-SIROUT-S
LEARNING
.
.................................................
10
INSTALLATION INSTRUCTIONS ........................................................................................... 11
INSTALLING THE T
RANSCEIVER
............................................................................ 11
INSTALLING THE SIREN UNITS ............................................................................ 12
MAINTENANCE14
LOW BATTERY INDICATION................................................................................. 14
CHANGING THE SIREN BATTERY........................................................................... 14
ERASING THE SIREN
M
EMORY
.
............................................................................ 14
ERASING THE TRANSCEIVER M
EMORY
. .................................................................. 14
SPECIFICATION: SIREN UNIT .............................................................................................. 16
SPECIFICATION: TRANSCEIVER UNIT.................................................................................. 17

2
Introduction
General Description
The 2W-SIROUT-S can be assigned SIM control panels.
it requires the SIM TX/RX-PB-S installed in the SIM.
The 2W-SIROUT-S unit can be powered by Lithium Battery 3.6V/14Ah or by external
power supply 12V/0.8A or both.
SIM TX/RX-PB-S Introduction into the SIM Panel
SIM TX/RX-PB-S can be installed in selected SIM panel or in an external box while protected
by the on boards tamper
Figure
1

3
Siren Unit Description
Powered by non rechargeable battery Lithium 3.6V/14Ah or 12V DC or both ,in
this case the Battery use as backup.
Alarm signal will activate the Piezo Siren and the Power LED.
The Alarm can be reset by the user by using the Control Panel keypads in case
that itʹs not reset the time out 2min/15min according Jumper D selection –see
Table 1.
Arm/Disarm Indication by Beeps/ Flash (Jumper selection)‐See Table 1
Battery test generates every 4 hours.
Low Battery Indication by Beeps/Flash (Depends on Jumper Selection of B&C) ‐
See Table 1.
Tamper protected (Cover and Back tamper).
The signal transmitted to Transceiver: Synchronization, Acknowledge, Tamper
and Low battery.
The Siren can be assigned to Area A or Area B by jumper selection –See Table 1
Setting the 2W-SIROUT-S for SIM Panels configuration
STEP 1: SIM TX/RX-PB-S –Learning & Operating Mode for
SIM Panels
It is most recommended to perform a factory default before the first
operation
;
Press and Hold the reset push button (see button location in Figure 1).
Connect the bus cable while pressing and holding the reset button.
Continue to hold the reset button for several seconds till ledʹs will finish to flash red &
green alternately.
Wait until the ledʹs stops flashing and then remove your finger from the reset button.
Then slide the device into the socket.
For installation of External Transceiver Box and receiving indications from wireless Siren ‐
the
TX/RX-PB-S should be learned as well, please see and perform the following steps:
Remove the jumper.
Login to the runner programming mode and use the ZONE level to define the TX/RX-
PB-S as wireless device (e.g. P122E 1‐16E options 1‐‐‐5‐‐‐ must be ON.
Enter to P164E (learn the radio device) 16E (e.g. Zone 16) and start the learning process.
While the Runner beeps for indicating learning process begin, press and release the
ʺLearn/resetʺbutton for one second and notice the changes over the runner system
(Learning mode finish).
Make sure to close the tamper switch on the transceiver (in a case of external device
only) after the learning process ends.
Notice: zone (16) in the Runner will be used also by the wireless Sirens to display
an indication of (Low Battery, tamper, and supervision).
Note: The "learn/reset" push button used also for registered Siren inside the transceiver.

4
Physical Description
STEP 2: Setting the Siren Configuration Mode
Figure 2: Siren Description Diagram
The Siren unit can be powered by Lithium Battery 3.6V/14Ah or by external power
supply 12V/0.8A or both, in case of both the battery use as backup.
NOTE: refer to table 1 for Jumpers set-up on the next page

5
Siren's Jumper's MODE SET-UP
Jumper No.
Function if = O (Open)
Function if =1 (Close)
A
Not in used for RUNNER 2 and
SERENITY control panels
B
NO Flashes with ARM/Disarm
Flashes appear with ARM/Disarm
Arm: 2 Flashes (@LOW BAT 3+3
Flashes)
Disarm: 1 Flash (@LOW BAT 2
Flashes)
C
NO Beeps with ARM/Disarm
Beeps sound with ARM/Disarm
Arm: 2 Beeps(@LOW BAT 3+3
Beeps)
Disarm: 1 Beep (@LOW BAT 2
Beeps)
D
2 Min Time out
15 Min Time out
Table 1 - Jumpers Set-Up
Note: On control panel must disable Arm/Disarm chirps from Output‐1 for area A
and area B if system is partitioned
P50E1E: Turn off option 1.
P52EE1E: Turn off option 1.
Mnemonic
Description
<PROG>
PROGRAM key.
<ENTER>
Enter key.
Press key or enter parameter
Notes:
The learning between the Transceiver to the Siren Units should be performing
before the installation of the Siren Units.
It's recommended to locate the Siren at least 2 meter distance from the
transceiver during the learning mode.

6
STEP 3 : Learning the Sirens
Up to 8 Siren units can be activated by single Transceiver. In BUS Mode, these Sirens can be
divided to two groups (A&B) for activating their Sirens (by receiving two separate activation
controls).
Instruction
Description
1
Place the Siren Units on a flat
surface
To verify back tamper is closed.
2
Connect Piezo Siren cable
3
Connect battery cable
The Siren will beep once and then the LED power will
blink for a period of 30 seconds, please wait to the end
of the blinking before activating or learning.
4
Verfiy Siren Tampers are open
Siren tampers must be open during the learning mode
5
Set Jumpers B and C according
to Table 1
Low Battery indication's beeps and flashes will be "on"
no matter what the status of Mode Jumpers B and C.
6
Transceiver <Learn/Test>
On the Transceiver press' Learn/Test button.
Green and RED LED on Transceiver starts flashing.
7
Siren <Learn>
On the Siren press Learn button. Green LED on the
Transceiver turns to solid "ON" for 1 to 3 seconds and
then turns OFF. The Siren is learned by the Transceiver.
8
Close the Siren tampers
Function Testing after learning.
After the learning completed and before the installation verify that the Siren Units
are functioning as defined.
Perform Arm/Disarm verify beep/flash indications.
Perform an Alarm; verify Piezo and Flash are activated.
Perform Alarm Reset via the Keypad by User pin code.

11
Installation Instructions
Installing the Transceiver
1. Choose a central location for the installation of the Transceiver to insure radio
coverage to all the Siren Units.
2. Open the Screw (See Figure‐6) and open the cover.
3. Place the unit on the installation surface and mark out the four screw holes.
4. Use a 6 mm bit to drill the holes.
Figure 5: Transceiver Unit Figure 6: Transceiver Installation
5. Power‐Off the control panel.
6. Wired the Transceiver to the Control Panel.
7. Power‐On the Control Panel.
8. Check the functionality of the system before installing the Siren Units.

12
Installing the Siren Units
A Transceiver can control up to 8 Sirens. It is recommended that the units be
installed on a flat surface in a prominent location.
To install the Siren in each location:
1. Choose a location for each one for the installation of each Siren units. Make sure
that there is Radio coverage to this location from the Transceiver.
Place the Siren Units high enough off the ground in order to make
them
inaccessible to passers‐by and well within the wireless range of the cluster
Transceiver
2. Remove the two pivot screws that secure the Siren cover.
Figure 7: Siren
Unit
3. Remove the Siren cover.
4. Place the unit on the installation surface and mark out the four screw holes.

13
5. Use a 8 mm bit to drill the holes
Battery
Address Jumpers
12 Volt Connector
PIEZO Siren Connector
Battery Connector
Figure 4: Open Siren Unit
6. Fix the unit onto the installation surface.
7. Ensure that the Piezo Siren is connected to the Piezo connector (as shown
below).
Figure 5: Siren Connectors
8. Insert the battery into the battery clip and connect it to the BAT connector
(shown above).
Note: The battery shall be Installed/replaced by service man
The Siren will beep once and then the LED power will blink for a period of 30 seconds,
please wait to the end of the blinking before activating or learning.

15
Maintenance
Low Battery Indication
The battery is tested every 4 hours and after power‐up.
When the Siren battery is low more beeps are added to the ARM/Disarm beeps in
order to indicate the LOW BAT condition of the Siren unit. When Arming the Siren
there are 3 beeps, short pause and another 3 beeps instead of two beeps and when
Disarming the Siren there will be 3 beeps instead of one.
This Low Battery indicationʹs beeps and flashes will be ʺonʺno matter what the status
of Mode Jumpers B and C.
In Bus Mode the Low Battery status will be reported to the Control Panel via the BUS
and will be indicated as Deviceʹs Low Bat Alarm.
Changing the Siren Battery
To change the Siren battery:
Remove the two pivot screws as shown in Figure on page 4.
Disconnect the Power Supply and replace the battery by fresh one.
Verify Low Bat restored and then connect the Power supply.
Note: The battery shall be Installed/replaced by service man
The Siren will beep once and then the LED power will blink for a period of 30
seconds, please wait to the end of the blinking before activating or learning.
Erasing the Siren Memory.
In case of Transceiver need to be replaced, the memory of the Siren Units should be
cleared. To clear the Siren Units memory, follow the next steps.
Turn off the power of the Siren Units.
Press continuously on the Learn button and then power‐up the Siren Unit.
Keep pressing until the Power LED will blink fast 3 times.
Release the Learn Button
Memory clear complete.
Erasing the Transceiver Memory.
In case of replacing or removing one Siren Unit from the installation, the memory of the
Transceiver and other Sirens units should be cleared.
To clear the Transceiver memory, follow the next steps:
Turn off the power of the Transceiver.
Press continuously on Learn button and then power‐up the Transceiver.
Keep pressing until the Blue LED will blink fast 3 times.
Release the Learn Button
Memory clear complete.
Note: Output must be erased in the serenity too.

16
Specification: Siren Unit
FW-Siren Specification (External Unit)
Value
Sound Pressure Level
More then 102dB
Siren Tone
Yelp
Frequency Range
2700 ±500 Hz
Flash Light
Power LED (90 Lumens)
Power Supply Voltage
9V÷15V DC or Battery 3.6V /14Ah Lithium or both.
Current consumption
Standby: 110uA ±10uA@ Battery operation
20mA±2mA@12V DC operation..
Alarm: Average: 950mA @ Battery operation.
Max: 1.8A peak@ Battery operation.
Average: 200mA @ 12V DC operation.
Max: 1.2A peak @ 12V DC operation.
Power Supply current limitation
Up to 1.8A
Maximum Power
Average :4W , Max peak:17W
Siren Alarm Period
2 min/15 min (According the status of Jumper D)
Low Battery Level
2.8V
Low Battery Indication
LED Flash @ Arm/Disarm
(According the status of Jumper B&C)
Arm/Disarm Indication
LED Flash : Arm-1 Disarm-3
LED Flash with Beeps : Arm-1 Disarm-3
(According the status of Jumper B&C)
Supervision
Sync signal every 1 min.
Tamper Switch
Normally Closed.
After power up the Tamper will activate only after
the second opening and then Activate the Piezo
for 2 min or till reset by the C.P.
Battery Life
> 4 Years (Based on 2 min Piezo operation/month)
Material
External Box: P.C. (3mm thick).
Dimensions of unit
L=310mm x W= 205mm x H= 75mm
Weight (Without Battery)
1.2 Kg
Operating temperature range
-30oC to +70oC
Case Protection Level
IP 43
Plastic PC with UV protection
Conformal coated circuit board

17
Specification: Transceiver Unit
Transceiver Specification (Remote)
Value
Power Supply
9V-14V DC
Current Consumption
Receive:30mA±5mA
Transmit:40mA±5mA
Max power
1W
Operating temperature range
-10oC to +50oC
Ambient temperature, storage
-20oC to +70oC
Inputs
IN-1: Trigger Alarm.
IN-2: Trigger Key Arm/Disarm
BUS Connection via Fast Connection or Terminals
Outputs
Tamper Out Terminals ,
Dry contacts 12V DC/100mA
Indication
Blue LED indicate Rx/TX
Tamper
Connected by hardware to TAMP OUT output.
Can be ignored(see Dipswitch 2)
Dipswitch 2
Dip#1 : Define the Mode operation
#1 On: BUS Mode.
#1 OFF: Universal Mode
Dip#2 : Define Tamper
#1 On: With Tamper
#1 OFF: Without Tamper
RF Frequency 868.35MHz
RF Range >500m at open space
Table of contents
Other SIM Marine Equipment manuals