manuals.online logo
Brands
  1. Home
  2. •
  3. Brands
  4. •
  5. SImx
  6. •
  7. Fan
  8. •
  9. SImx Manrose Classic Series User manual

SImx Manrose Classic Series User manual

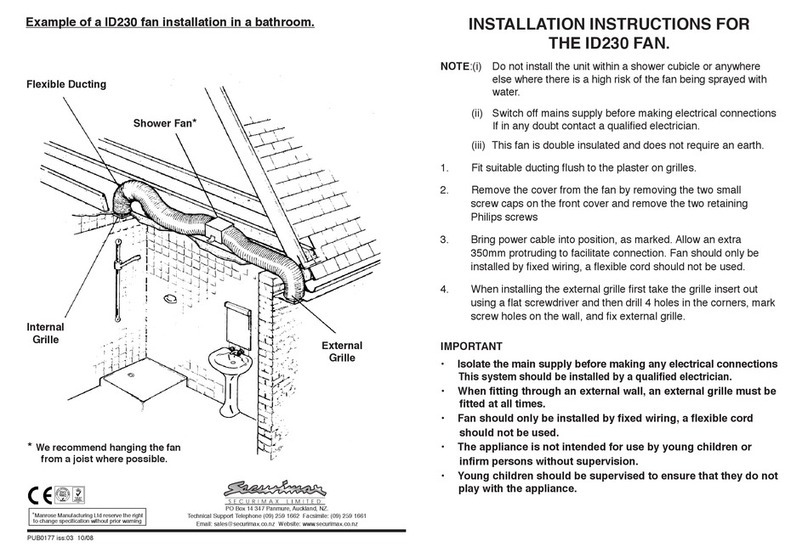
Flexible Duct
Internal Grille
External Grille
The Shower Fan
screwed to the joist
IMPORTANT
• Isolate the mains supply before making any electrical connections.
• This system should be installed by a qualied electrician.
• When tting through an external wall, an external grille must be tted at all times.
• Fan should only be installed by xed wiring, a exible cord should not be used.
• The appliance is not intended for use by young children or inrm persons without supervision.
• Young children should be supervised to ensure that they do not play with the appliance.
• Precautions must be taken to avoid the back-ow of gases into the room from the open ue of
gas or other open-re appliances when mounted in outside windows or walls.
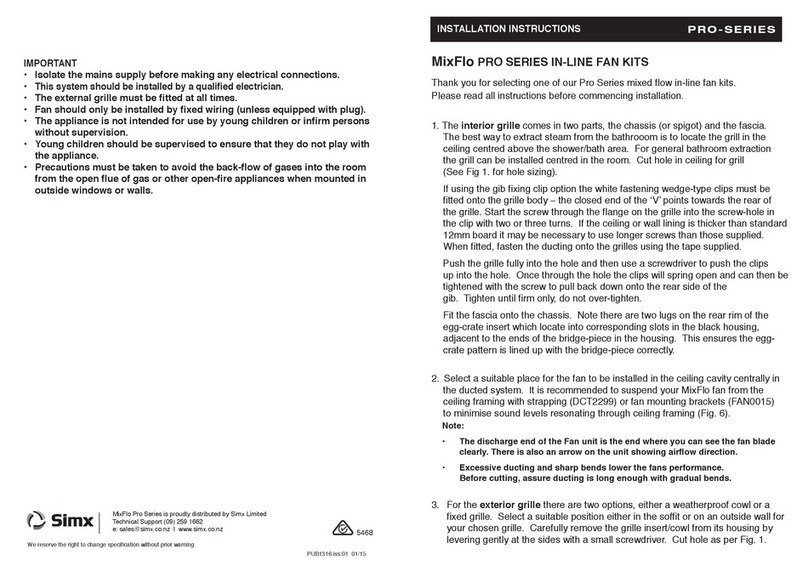
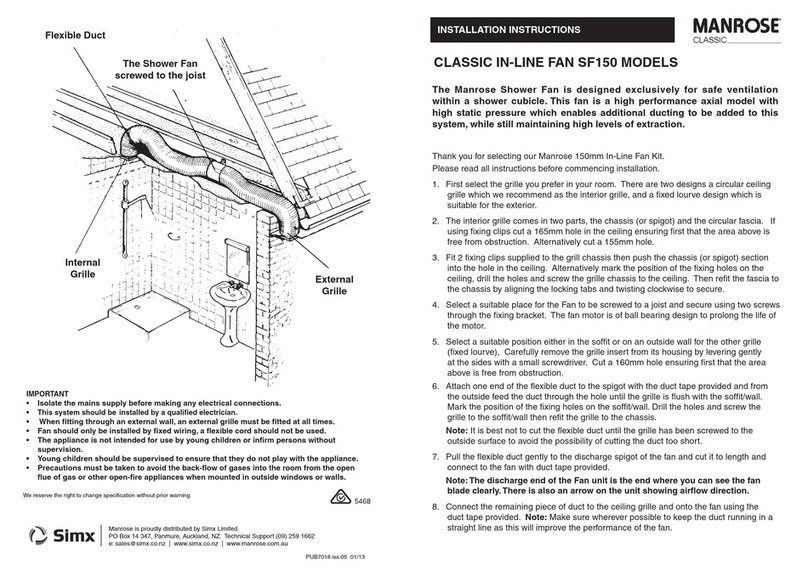
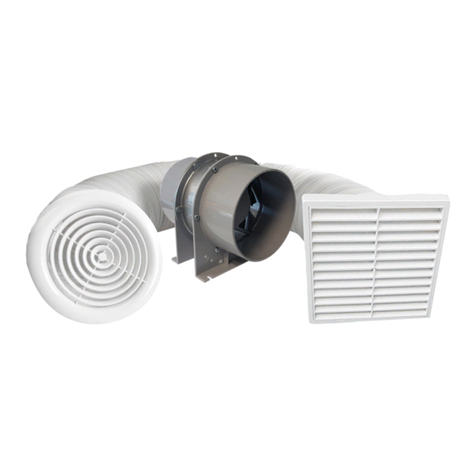
1. First select the grille you prefer in your room. There are two designs a circular
ceiling grille which we recommend as the interior grille, and a xed lourve design
which is suitable for the exterior.
2. The interior grille comes in two parts, the chassis (or spigot) and the circular
fascia. If using xing clips cut a 115mm hole in the ceiling ensuring rst that the
area above is free from obstruction. Alternatively cut a 105mm hole.
3. Fit 2 xing clips supplied to the grill chassis then push chassis (or spigot) section
into the hole in the ceiling. Alternatively mark the position of the xing holes on
the ceiling. Drill the holes and screw the grille chassis to the ceiling then ret the
fascia to the chassis by aligning the locking tabs and twisting clockwise to secure.
4. Select a suitable place for the Fan to be screwed to a joist and secure using
two screws through the xing bracket. The fan motor is of ball bearing design to
prolong the life of the motor.
5. Select a suitable position either in the soft or on an outside wall for the other
grille (xed lourve), carefully remove the grille insert from its housing by levering
gently at the sides with a small screwdriver. Cut a 110mm hole ensuring rst that
the area above is free from obstruction.
6. Attach one end of the exible duct to the spigot with the duct tape provided and
from the outside feed the duct through the hole until the grille chassis is ush with
the soft/wall. Mark the position of the xing holes on the soft/wall. Drill the holes
and screw the grille chassis to the soft/wall then ret the grille to the chassis.
Note: It is best not to cut the exible duct until the grille has been screwed to the
outside surface to avoid the possibility of cutting the duct too short.
7. Pull the exible duct gently to the discharge spigot of the fan and cut it to length
and connect to the fan with duct tape provided.
Note: The discharge end of the Fan unit is the end where you can see the back
draught shutter. There is also an arrow on the unit showing airow direction.
8. Connect the remaining piece of duct to the ceiling grille and onto the fan using the
duct tape provided.
Note: Make sure wherever possible to keep the duct running in a straight line as
this will improve the performance of the fan.
CLASSIC IN-LINE CENTRIFUGAL FANS
INSTALLATION INSTRUCTIONS
We reserve the right to change specication without prior notice.
Manrose is proudly distributed by Simx Limited
PO Box 14 347, Panmure, Auckland, NZ. Technical Support (09) 259 1662
e: [email protected] | www.simx.co.nz | www.manrose.com.au
PUB7158 iss:07 07/15
Thank you for selecting our Manrose Centrifugal 100mm In-Line Fan Kit.
Please read all instructions before commencing installation.
CLASSIC SERIES
Note:
This unit is double insulated and therefore does not require an earth. The time delay is
preset for approximately one minute and can be adjusted as described in paragraph 11.
Try to keep the duct as straight as possible and wherever possible keep the distance
between the ceiling grille and the external soft or wall as short as possible as the shorter
the length of duct the better the performance of the fan.
Neutral
Live
Neutral
Live
Diagram W1
Diagram W2
Rotary switch
Recommended
Mounting Position
1 LIVE
2 NEUTRAL
9. Remove the cover on the Fan Bracket and make the electrical connection as follows:
Wiring of Standard Model FAN0328 + FAN0326 SF200S (Diagram W1).
The fan can be connected to the light switch so that the fan will start when the
light is switched on, or a dedicated fan switch (not supplied). The fan should not
be accessible to a person using either the shower or the bath.
Note: All wiring must be xed securely and the cable to the fan should be a
minimum of 1mm2 in section. All wiring must comply with current Regulations.
This system should be installed by a qualied electrician.
10. Wiring of Timer Model FAN0329 + FAN0327 SF200T (Diagram W2).
The fan can be connected to the light switch so that the fan will start when the
light is switched on, or a dedicated fan switch (not supplied).
Note: All wiring must be xed securely and the cable to the fan should be a
minimum of 1mm2 in section. All wiring must comply with current Regulations.
This system must be installed by a qualied electrician.
When the light is switched off the fan will run for between 60 sec & 30 minutes
(pre-set to 1 minute). The fan should not be accessible to a person using either
the shower or the bath.
11. Timer Adjustment only
T
his time delay can be adjusted by rstly switching off the power to the fan and
removing the cover. Locate the rotary adjuster as shown in Diagram W2. The
serrated adjuster wheel can be rotated using a thumbnail to adjust the timer setting.
+ = Rotate to the right to increase the time (indicated by + on the diagram)
- = Rotate to the left to decrease the time (indicated by - on the diagram)
Only adjust with power switched off.
Specications
Electrical: 220-230V ~ 50Hz
Fan Wattage: 20W
IP Rated: IP44
Airow: 31l/s (110m3/hr)
Max Temp: 40°C

This manual suits for next models

4

Other SImx Fan manuals

SImx Manrose Classic Series User manual

SImx

SImx Manrose Classic Series User manual

SImx MANROSE ID230 Series User manual

SImx

SImx MANROSE ID230 Series User manual

SImx MixFlo Pro Series User manual

SImx

SImx MixFlo Pro Series User manual

SImx Manrose SF150 User manual

SImx

SImx Manrose SF150 User manual

SImx Manrose Classic XP125 User manual

SImx

SImx Manrose Classic XP125 User manual

SImx Manrose User manual

SImx

SImx Manrose User manual

Popular Fan manuals by other brands

VEVOR BT-FL14B user manual

VEVOR

VEVOR BT-FL14B user manual

Monte Carlo Fan Company 5CE52 Series owner's manual

Monte Carlo Fan Company

Monte Carlo Fan Company 5CE52 Series owner's manual

KLASS Fan MELTON LT user manual

KLASS Fan

KLASS Fan MELTON LT user manual

Harbor Breeze 40837 instruction manual

Harbor Breeze

Harbor Breeze 40837 instruction manual

Globo 0390 manual

Globo

Globo 0390 manual

Arlec DCF6060 Assembly and installation manual

Arlec

Arlec DCF6060 Assembly and installation manual

Hunter Installer's Choice Installation and operation manual

Hunter

Hunter Installer's Choice Installation and operation manual

Monte Carlo Fan Company 3AVOR56 D-V1 Series owner's guide

Monte Carlo Fan Company

Monte Carlo Fan Company 3AVOR56 D-V1 Series owner's guide

Greenheck OFSD-211 Specification sheet

Greenheck

Greenheck OFSD-211 Specification sheet

Monte Carlo Fan Company 5OBR52 Series owner's manual

Monte Carlo Fan Company

Monte Carlo Fan Company 5OBR52 Series owner's manual

Rubine Raffica 56-5BL user manual

Rubine

Rubine Raffica 56-5BL user manual

Broan LOSONE SELECT L2000L installation guide

Broan

Broan LOSONE SELECT L2000L installation guide

Nuaire Group MRXBOX95-WM2 Installation and Maintenance

Nuaire Group

Nuaire Group MRXBOX95-WM2 Installation and Maintenance

Sonnenkonig DOLMEN 3 instruction manual

Sonnenkonig

Sonnenkonig DOLMEN 3 instruction manual

Stadler Form Charly little operating instructions

Stadler Form

Stadler Form Charly little operating instructions

SPT SF-1283 owner's manual

SPT

SPT SF-1283 owner's manual

Goldair GCTF450 operating instructions

Goldair

Goldair GCTF450 operating instructions

Canarm DUAL MOUNT SERIES installation instructions

Canarm

Canarm DUAL MOUNT SERIES installation instructions

manuals.online logo
manuals.online logoBrands
  • About & Mission
  • Contact us
  • Privacy Policy
  • Terms and Conditions

Copyright 2025 Manuals.Online. All Rights Reserved.