QUICK START GUIDE
Dock & Play Vehicle Kit
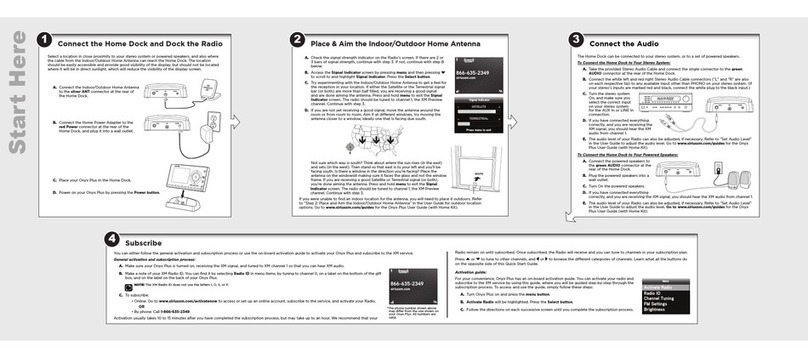
A. Verify the signal reception by looking at the antenna signal strength bars on the screen.
If the Radio is showing at least two bars of antenna signal strength, continue with step
6. If not, be sure that you have mounted the antenna on the outside of the vehicle, as
shown in step 2, and that the vehicle is parked outdoors with a clear view of the sky.
Move the vehicle away from any obstructed area, for example, if you are parked in a
garage, or parked near a large structure.
B. Refer to your Radio’s User Guide (go to www.siriusxm.com/guides) for instructions on
accessing the Antenna Aiming or Signal Indicator screen of your Radio, to see a visual
indication of signal strength.
Verify Signal Reception
Self installation instructions and tips are provided for your convenience. It is your
responsibility to determine if you have the knowledge, skills and physical ability
required to properly perform an installation. SiriusXM shall have no liability for
damage or injury resulting from the installation or use of any SiriusXM or third
party products. It is your responsibility to ensure that all products are installed
in adherence with local laws and regulations and in such a manner as to allow
a vehicle to be operated safely and without distraction. SiriusXM product
warranties do not cover the installation, removal or reinstallation of any product.
Decide on one of the following in-box audio connection options. You can also refer to “Step 6:
Connect the Audio” on page 35 of the Vehicle Kit User Guide for additional audio connection
options, such as a cassette adapter or the FM Direct Adapter (FMDA) (both sold separately). Go
to www.siriusxm.com/guides for the User Guide.
Option 1: Best: Use the provided Aux In Cable, if your vehicle’s stereo system has an auxiliary
input jack.
A. Plug one end of the cable into
the green AUDIO connector
on the PowerConnect Vehicle
Dock and the other end into
the auxiliary input jack on the
vehicle’s stereo system.
B. Turn on your vehicle’s stereo system and set it to play from the auxiliary input source.
C. You should hear the XM audio through your vehicle’s stereo system.
D. Go back to Step 1 “Find a Location for the Vehicle Dock and Mount It” on the opposite
side and finish installing the Dash or Vent Mount. Then the installation is complete.
TIP! Refer to your vehicle’s owner’s manual to find the location of the auxiliary input jack, or
consult the vehicle dealer.
Option 2: Good: Use the PowerConnect feature in your Radio. PowerConnect plays the audio
through your vehicle’s FM radio.
A. Find and make a list of all available FM channels in your area that are not being used by
an FM radio station.
B. Pick the first FM channel on your list. Tune your vehicle’s FM radio to this FM channel.
C. Set your Radio to transmit on the same FM channel that you have selected on your
vehicle’s FM radio. You may need to turn On the FM Transmitter in your Radio first.
Go to www.siriusxm.com/guides for your Radio’s User Guide (with Vehicle Kit) for
instructions.
D. You should hear the XM audio through your vehicle’s FM radio. If you are satisfied with
the sound quality, go back to Step 1 “Find a Location for the Vehicle Dock and Mount It”
on the opposite side and finish installing the Dash or Vent Mount. Then the installation
is complete.
E. If you are not satisfied, move to the next FM channel on your list and repeat the
process. Continue until you have found an FM channel with which you are satisfied.
99.3 6
jump
fmmenu
7 8 9 0
#
1 2 3 4 5
MATCH FM CHANNELS
Connect the Audio
CAUTION: Do not attempt to install, activate, or adjust any of the
setting options described in this Quick Start Guide unless your
vehicle is parked in a safe location.
PowerConnect™ Vehicle Dock
Magnetic Mount
Antenna
Antenna & Dash Mount
Alcohol Preparation Pads
PowerConnect Power Adapter
Aux In Cable
Antenna Cable
Routing Adapter
A. Insert the PowerConnect Power Adapter into your vehicle’s cigarette lighter or power adapter socket. Plug the other end
into the red PWR connector on the rear of the PowerConnect Vehicle Dock.
B. Use the wire guide on the top of
the dock to organize the wires
connected to the dock.
C. Place your Radio into the dock
and press the Power button.
AUDIOANT PWRFM
Connect the PowerConnect Power Adapter
Dash Mount
Screws (4)
Vent Mount and
Extended Vent Clamps
Important Legal Information
!
©2012 Sirius XM Radio Inc. “Sirius”, “XM” and all related marks and logos aretrademarks of Sirius XM Radio Inc. Visit www.siriusxm.com/channellineup for
updates. All programming/channellineup/XM service subject to change or preemption. All other marks and logos are the property of their respectiveowners. All
rights reserved.
Our satellite service is availableonly to those at least 18 and older in the 48 contiguous USA and DC. Our Sirius satelliteservice is also available in PR (with coverage
limitations). Our Internet Radio service is availablethroughout our satellite service area and in AK and HI. Certain channels are not available on our Internet Radio
service or on mobile devices.
This product contains chemicals known tothe State of California to cause cancer and birth defects or other reproductive harm.
Specifications
System
Power Requirements: 9-16 V DC, 500 mA (max)
Operating Temperature: -4°F to +140°F (-20°C to +60°C)
Audio Output: 1.0 Vrms (max)
Power
Connect Dock
Dimensions: 4.0 in (W) x 2.4 in (H) x 1.2 in (D)
102 mm (W) x 63 mm (H) x 31 mm (D)
Weight: 1.6 oz (46 g)
Audio Connector: 1/8 in (3.5 mm) female
Antenna Connector: SMB male
Power
Connect Power Adapter
Dimensions: 3.7 in (W) x 1.7 in (H) x 1.3 in (D)
94 mm (W) x 43 mm (H) x 34 mm (D)
Weight: 2.4 oz (69 g)
Input / Output: 9-16 V DC / 5 V DC, 1.5 A
Cable Length: 4 ft 7 in (1.4 m)
Vehicle Antenna
Type: SiriusXM Magnetic Mount
Connector: SMB female, right angle
Cable Length: 23 ft (7.0 m)
Aux In Cable
Connectors: 1/8 in (3.5 mm) stereo male to
1/8 in (3.5 mm) stereo male
Cable Length: 4 ft (1.2 m)
*The screens shown above are repre-
sentative and may differ from the
screen displayed on your Radio.

