manuals.online logo
Brands
  1. Home
  2. •
  3. Brands
  4. •
  5. SKC
  6. •
  7. Water Pump
  8. •
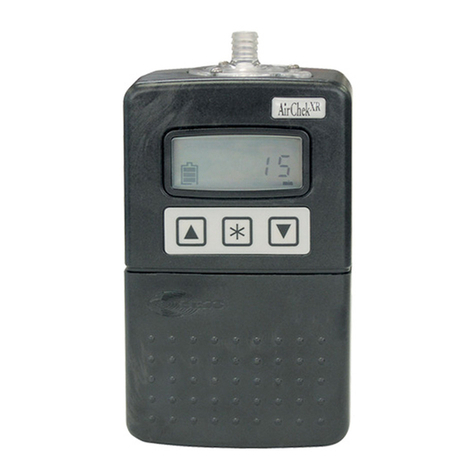
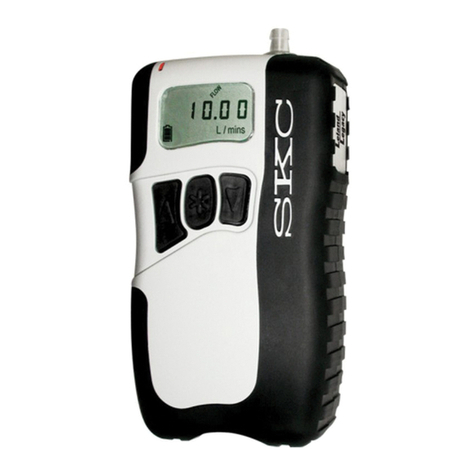
  9. SKC AirChek XR5000 User manual

SKC AirChek XR5000 User manual

AirChek®XR5000
Operating Instructions
操作手册
SKC Inc.
863 Valley View Road
Eighty Four, PA 15330 USA
Form #38047-C Rev 1008
注意:该操作手册可能没有显示所有与该仪器及其使用有关的安全方面的问题。使用者有责任明确并按
照相应的安全和卫生实际情况以及相应的规章制度使用该仪器。这个说明书中包括的信息不能直接理解
为法律意见,或者作为最终的根据或规章制度
2
AirChek XR5000 Quick Guide
AirChek XR5000 快速操作指南
Keypad Basics
键盘
(star key) Scrolls through parameters in user setup functions.
(开始键) 在用户设定功能滚动显示参数
ST (up/down arrow keys)Increase or decrease flow rate, timed run, and run delay time.
ST (上/下箭头键) 增加或减少流量,定时运行和运行延迟时间
Key Sequences
键序列
T分别按每一个键 Press keys individually.
[ST] 同时按键。在运行、保持和退出用户设定功能之间转换
Press keys simultaneously. Toggles between Run and Hold and exits user setup
functions.
STSecurity code to access user setup functions. With pump in a non-running state (no
flashing blue LED), press keys in sequence.
进入用户设定功能的安全代码。在泵非运行状态(蓝色LED灯不闪烁),依次按键。
Operation
操作
•Pump On Press and hold .
开泵 持续按键开泵
•Pump Off Press and hold through countdown. Auto-off will shut down pump after 5 minutes
without activity.
关泵 持续按键并保持倒数计时。如果5min内不进行任何操作泵将自动关闭
•Mode ChangePress [ST] to toggle between Run and Hold.
改变模式 按[ST]在运行和保持间转换
•Keypad Lock Press
T5times quickly to activate. Press T5times quickly to deactivate.
锁键 快速按下T5次激活键.快速按下T键5次锁键
•Continuous Run With pump in a non-running state (no flashing blue LED), press [ST] to run
pump. Press [ST] to Hold pump when completed.
连续运行 在泵处于非运行状态(蓝色LED灯不闪烁),按[ST]运行泵,按[ST]
保持泵运行直到运行完成。
Accessing User Setup Functions
进入用户设定功能
•Entering User Setup Functions
With pump in a non-running state (no flashing blue LED), press ST.
•Exiting User Setup Functions
Press [ST]. Pump is ready. Press [ST] to run the pump or to start a run delay.
进入用户设定功能
在泵处于非运行状态(蓝色LED灯不闪烁),按ST。
退出用户设定功能
按[ST].,泵准备就绪。按[ST]运行泵或开始运行延迟
User Setup Functions
3
用户设定功能
To navigate while in user setup functions, press until the desired function displays.
在用户设定功能,持续按键直到显示出要设定的功能
Function
When LCD Displays
User Action
Result
Clear Accumulated
Run Time
清除累积运行时间
Function only available
when accumulated run
time exists.
只有当累积运行时间存
在时该功能才可用
CLr and flashing Hold
CLr 和闪烁的 Hold。Press [ST].
按[ST]. Clears run and run time
and exits functions. Press
[ST] to run pump.
清除运行和运行时间并退
出功能。按 [ST] 运行
泵。
Adjust Flow Rate*
调节流量 “---” and flashing ADJ
Flow
“---” 和闪烁的 ADJ Flow
Press Sor T. Press
[ST] to exit functions.
按S或T。
按[ST]退出该功能
Flow
increases/decreases.
Press [ST] to run pump.
增加/减少流量。按[ST]
运行泵
Set Timed Run†
设定定时运行 Flashing Set Timed Run
and min
闪烁的 Set Timed Run
和min
Press Sor T. Press
[ST] to exit functions.
按S或T.。
按[ST] 退出该功能
Minutes
increase/decrease. Press
[ST] to run pump.
增加/减少时间。按[ST]
运行泵
Set Run Delay†
设定运行延迟 Flashing Set Run Delay
and min
闪烁的 Set Run Delay
和min
Press Sor T. Press
[ST] to exit functions.
按S或T。
按[ST] 退出该功能
Minutes
increase/decrease. Press
[ST] to start run delay.
Blue LED flashes. Pump
starts after delay elapses.
增加/减少时间。按[ST]
开始运行延迟。当延迟结
束后泵开始运行
*Changing flow rate in user setup functions will not clear accumulated run time.
在用户设定功能区改变流量不会清除累积运行时间
†Changing timed run and/or run delay settings in user setup functions will clear accumulated run time.
在用户设定功能区改变定时运行和
/
或运行延迟将清除累积运行时间
www.skcinc.com
Description
描述
SKC AirChek XR5000 Sample Pumps are designed to offer users enhanced battery power and easy operation in
a lightweight pump that provides accurate airflows from 5 to 5000 ml/min.
SKC AirChek XR5000采样泵是为用户设计的一种具有强大的电池能量、轻巧并且容易操作的采样泵,
它能在5-5000ml/min的范围内提供精确流量
• Three battery options provide flexibility and economy for different applications including long run times.
三个可选电池为包括长时间运行等不同的应用方式提供更多的灵活性和经济性
• The large three-button keypad and straightforward user setup functions offer user-friendly conveniences.
大的三个按钮的键区和简单明了的用户设定功能提供了友好的使用便利。
AirChek XR5000 pumps feature a patented* internal flow sensor that measures flow directly and acts as a
secondary standard, constantly maintaining the set flow rate. A built-in sensor compensates for changes in
temperature that occur after calibration.
AirChek XR5000 泵提供了专利设计的内置流量传感器,从而能够直接测定流量并同时能作为二级标
准,稳定保持设定的流量。内置的传感器能补偿校准后由于温度影响而发生的改变
*U.S. Patent No. 5,892,160
Inlet Port with Protective Filter
带有保护膜的入口端口
Bright blue pump status LED
蓝色明亮的泵状态指示灯
Battery Status Icon
电池状态图标
Easy-to-read Liquid Crystal Display (LCD)
易读取的液晶显示屏(LCD)
Large, simple Operating Keypad
大且易操作的键
3 Battery Pack Options
可选的 3 个电池组
Not shown:
Beltclip (back)
Battery
Charging Jack(back)
AirChek XR5000 Air Sampling Pump
AirChek XR5000 空气采样泵
2
Performance Profile
性能概要
Flow Range: 1000 to 5000 ml/min (5 to 500 ml/min requires optional low flow
adapter kit)
流量范围: 1000-5000ml/min(5-500ml/min需要选择低流量适配头)
Compensation Range: 5000 ml/min at 10 inches water back pressure
4000 ml/min at 20 inches water back pressure
2000 ml/min at 50 inches water back pressure
补偿范围: 10 英寸水背压时 5000 ml/min
20
英寸水背压时 4000 ml/min
50
英寸水背压时 2000 ml/min
Typical Back Pressure of Sampling Media (inches water)
采样介质的典型背压(英寸水)
Flow Rate (L/min)
流量 (L/min)
1.0
1.0
1.5
1.5
2.0
2.0
2.5
2.5
3.0
3.0
3.5
3.5
4.0
4.0
5.0
5.0
Filter/Pore Size (µm)
滤膜/孔径(µm)
25-mm MCE/0.8
25mm MCE/0.8
6 9 12 15 18 21 25 31
25-mm MCE/0.45
25-mm MCE/0.45
14 22 28 35 40 44 50 63
37-mm MCE/0.8
37-mm MCE/0.8
2 3 4 5 6 7 9 11
37-mm PVC/5.0
37-mm PVC/5.0
1 1 2 2 2.5 3 3 4
37-mm, polycarbonate/0.45
37-mm, 聚碳酸酯/0.45
4 6 8 10 12 15 17 21
25-mm MCE/0.45 microvacuum
25-mm MCE/0.45 高真空
21 31 40 48 59 69 79 100
37-mm PTFE/1.0
37-mm 聚四氟乙烯/1.0
7.5 11 14.5 19 22 26 30 40
Compare the information in this table to pump compensation range to determine appropriate applications.
比较表中对泵补偿范围的信息以确定正确的使用
Flow Compensation
流量补偿
System: Patented* isothermal closed loop flow sensor
系统 :专利的等温闭合循环流量传感器
Accuracies: Timing: 1 min/month @ 25°C
Flow Rate: ± 5% of set-point after calibration to desired flow
精确性: 定时: 25°C 时 1分钟/月
流量:调整到相应流量后变化范围 ± 5%
Battery Charge
电池充电
3
Level Indicator: Icon displays on LCD at full, mid, low charge, imminent low battery fault,
and low battery fault.
电量指示: 以满、中、低电量、即将低流量错误和低流量错误等图标显示在液晶屏上
Temperature Range: Operating: 32 to 113 F (0 to 45°C)
Charging: 32 to 113 F (0 to 45°C)
Storage: -4 to 113 F (-20 to 45°C)
温度范围: 操作温度:32 -113 ℉(0 -45°C)
充电温度:32 - 113 ℉(0-45°C)
储存温度:-4-113℉(-20-45°C)
Typical Run Time†:
典型运行时间:
40 小时 22 小时
20 小时 11 小时
18 小时 8 小时
XR5000 M 2 L/min 5 L/min
High-pow 40 hrs 22 hrs
Standard
Li-Ion
20 hrs 11 hrs
Alkaline
18 hrs 8 hrs
† Using a 37-mm 0.8-µm MCE filter
使用37-mm 0.8-µm MCE 滤膜
Timer Display Range: 1 to 9999 minutes (6.8 days). If run time exceeds 6.8 days, timer
display rolls over.
定时显示范围:1-9999分钟(6.8天)。如果运行时间超过 6.8 天,定时器将滚动显示。
Flow Fault: If pump is unable to compensate for > 15 seconds due to excessive back
pressure, the pump stops and holds run time display. Auto-restart is attempted
every 15 seconds up to 5 times.
流量错误:如果由于超过泵压而泵又不能补偿大于15秒,泵就停止并保持运行时间显示。每隔15秒尝
试一次自动重运行,共尝试5次。
Low Battery Fault: 15 seconds to sleep
低电量错误: 15秒后进入休眠状态
Auto-off: 5 minutes of inactivity
自动关泵:5分钟内不进行任何操作
*U.S. Patent No. 5,892,160
4
Performance Profile
性能概要
Battery Pack: High-power Li-Ion (4 cell), rechargeable, 7.4 V, 4.4 Ah
capacity (Cat. No. P85004 for UL Listed pump)
or
Standard Li-Ion (2 cell), rechargeable, 7.4 V, 2.2 Ah
capacity (Cat. No. P85002 for UL Listed pump)
or
Alkaline (6 cells), disposable, size AA, 1.5 V (nominal), Cat. No. P75715 - not UL
Listed for intrinsic safety
电池组:可充电高效锂电池(4芯),7.4V,4.4Ah容量(货号. P85004),或可充电标准锂电池(2
芯)7.4V,2.2Ah容量(货号. P85002)或一次性使用的碱性电池(6芯),2A规
格,1.5V(额定),货号P75715-对于本质安全性未在UL表中列出。
Battery Recharge Time: Standard Li-Ion (2 cell): approximately 4 hrs
High-power Li-Ion (4-cell): approximately 8 hrs
电池再充电时间:标准锂电池(2芯):约4小时
高效锂电池(4芯):约8小时
Size: High-power Li-Ion
and alkaline models: 5.6 x 3 x 2.3 in (14 x 8 x 6 cm)
Standard Li-Ion model:4.2 x 2.9 x 2 in (10.6 x 7.4 x 5.1 cm)
规格:高效锂电和碱电池: 5.6 x 3 x 2.3 英寸 (14 x 8 x 6 cm)
标准锂电:4.2 x 2.9 x 2 英寸 (10.6 x 7.4 x 5.1 cm)
Weight: High-power Li-Ion:.............21 oz (0.6 kg)
Standard Li-Ion model:....16 oz (0.45 kg)
Alkaline model: 17 oz (0.48 kg)
重量:高效锂电池:0.6 kg
标准锂电池:0.45kg
碱性电池:0.48kg
Case: Anti-static plastic
外壳:无静电塑料
RFI/EMI Shielding: CE marked for RFI/EMI protection
RFI/EMI屏蔽: CE认证的RFI/EMI 保护
Approvals: for use in hazardous locations. Models that are UL Listed for intrinsic safety
contain the logo on the label. These models must be used with battery pack Cat.
No. P85004 or P85002 to maintain the UL intrinsic safety listing.
认证:用于在危险场所使用。在UL列出的本质安全性的电池在标签上有显示。该模式必须使用P85004
或P85002电池组以保持UL列出的本质安全性。
5
Cautions:
• For safe operation in hazardous atmospheres, ensure the pump label contains the
logo and the battery pack label contains Cat. No. P85004 or P85002. Use of any other
battery pack (including alkaline) voids the UL Listing for intrinsic safety.
注意:为了保证在危险的大气环境中安全使用,确保泵标签包含标示,而且电池组标签包含
P85004
或
P85002
。使用其他任何的电池组(包括碱性电池)对于
UL
列出的本质安全性都是
无效的
• Use only the charger and battery packs designed for the AirChek XR5000 pump to
ensure reliable performance and retain the SKC warranty.
只使用为
AirChek XR5000
采样泵设计的充电器和电池组以确保可靠的使用性能并能保持
SKC
质量保证
• Use only SKC-approved parts to ensure reliable performance, retain the SKC
warranty, and to maintain the UL Listing for intrinsic safety.
只使用SKC认可的零件以确保可靠性能,保持SKC质量保证,并保持UL所列出的本质安全性
能。
6
Setup
设定
Keypad Basics
The AirChek XR5000 operates by pressing key sequences on the keypad located on the front of the pump case.
键基础
AirChek XR5000通过按位于泵壳前面板键区的键序列进行操作
Keys
键
Scrolls through parameters in user setup functions.
用于在用户设定功能区滚动显示参数
SIncreases flow rate, timed run, and run delay time.
S用于增加流量,定时运行时间和运行延迟时间
TDecreases flow rate, timed run, and run delay time.
T用于降低流量,定时运行时间和运行延迟时间
Key Sequences
键序列
SPress keys individually.
S分别按键
[ST] Press simultaneously to toggle between Hold and Run modes and to exit user setup functions.
[ST] 同时按下在保持(Hold)和运行(Run)模式之间转换并退出用户设定功能
STSecurity code. With pump in a non-running state (no flashing blue LED), press to access user setup
functions.
ST安全模式。在泵非运行状态(蓝色指示灯不闪烁),顺序按下这四个键进入用户设定功
能
Turning the Pump On
开泵
• Press and hold until display shows “ON”.
长时间按住键直到显示屏显示ON
• Press [ST] to run the pump or to place a running pump in Hold. A blue LED on top of the pump
indicates pump is running or that there is a run delay programmed into the pump.
按[ST]运行泵或将运行的泵处于保持状态。泵上部的蓝色指示灯表明泵正运行或在泵中设定有运
行延迟程序
Turning the Pump Off
关泵
• Manual Off (Sleep mode): With pump in a non-running state (no flashing blue
LED), press and hold until a countdown from 3 to 1 appears on the LCD and
Up
arrow
key
Star
key Down
arrow
key
7
pump shuts off. Manual Off will operate even when keypad is locked.
手动关泵(休眠模式):在泵处于非运行状态下(蓝色指示灯不闪烁),长时间按住键直到倒数
计数出现在液晶显示屏上,从3到1后泵关闭。即使当键锁定时手动关泵也能操作。
• Auto Off (Sleep mode): Turns off a non-running pump (no flashing blue LED) after five minutes of
inactivity.
自动关泵(休眠模式):不运行的泵(蓝色指示灯不闪烁)5min内不进行任何操作,泵会自动关
闭。
8
Setup
设定
Locking the Keypad
锁定键
Locking: In any mode, press T5times quickly. A flashing “L” will appear in
the lower right corner of the display.
锁定:在任何模式下,快速按下T键5次,一个闪烁的“L”会出现显示屏的右下角。
Unlocking: Press T5times quickly. The flashing “L” will disappear from the display. The keypad may
be operated normally.
解锁:快速按下T键5次,闪烁的“L”会从显示屏上消失。键就可以正常操作。
• While the keypad is locked, the

key will still operate to allow manual pump shut off in a
non-running state (no flashing blue LED).
在键锁定期间,

键仍能操作以允许泵能在非运行状态(蓝色指示灯不闪烁)下人工关闭。
• A locked keypad will remain locked until the user unlocks it. Turning the pump off and on
does not affect keypad lock status.
锁定的键将保持锁定状态直到操作者解开它。开关泵不影响键锁定状态。
Checking Battery Condition
检查电池状态
See page 12.
见12页
Accessing User Setup Functions
进入用户设定功能
Entering Functions:
• With pump in a non-running state (no flashing blue LED), press ST.
进入功能
在泵非运行状态(蓝色指示灯不闪烁),按ST。
Exiting Functions:
• Press [ST] to exit user setup functions. Pump is ready to run.
退出功能
按[ST]退出用户设定功能。泵处于准备运行状态
User setup functions cannot be accessed while the keypad is locked.
在键锁定期间不能进入用户设定功能。
9
Setup
设定
User Setup Functions
用户设定功能
Function Overview
功能总览
User setup functions are listed below in the order in which they display. Note that the CLr function for clearing
accumulated run time is only available when accumulated run time exists.
用户设定功能在下表中顺序列出。注意用于清除累积运行时间的CLr功能键只在累积运行时间存在时才
有效。
No Accumulated
Run Time
Accumulated
Run Time
CLr
ADJ Flow
调整流量
ADJ Flow
Set Timed Run
设定定时 Set Timed Run
Set Run Delay
设定运行延迟
Set Run Delay
Clearing Accumulated Run Time
清除累积运行时间
1. With the pump in a non-running state (no flashing blue LED), press ST.
1、在泵处于非运行状态下(蓝色显示灯不闪烁),按ST
2. Press [ST] at CLr display to clear accumulated run time. Pump is ready to run.
2、在CLr出现时按[ST]清除累积运行时间。泵准备好运行。
CLr will not cancel Timed Run or Run Delay time settings (see Canceling a Timed Run and/or
Run Delay).
CLr不会取消设定的定时运行或运行延迟时间(见取消定时运行和/或运行延迟)
•Changing the timed run and/or run delay settings in user setup functions will automatically
clear accumulated run time.
在用户设定功能改变定时运行和
/
或运行延迟设定将自动清除累积运行时间。
•Changing the flow rate in user setup functions will not clear accumulated run time.
在用户设定功能改变流量不会清除累积运行时间。
Setting Flow Rate
设定流量
10
1. With pump in a non-running state (no flashing blue LED), press ST.
1、在泵处于非运行状态下(蓝色显示灯不闪烁),按ST键
2. Connect pump inlet to a calibrator.
2、将泵进口与流量校准器连接
3. Press until ADJ and Flow flash on display.
3、按键键直到ADJ和Flow闪烁出现在显示屏上。
4. Press
Sto increase or Tto decrease flow. Dashed lines will move up and down on the LCD to indicate
direction of adjustment. Flow rate will not display on the pump LCD. Observe the calibrator for flow
reading.
4、按S键增加或T键降低流量。虚线将会在液晶显示屏上下移动以表示调整的方向。流量不显示在泵
液晶显示器上。观察流量校准器上的流量示数。
5. Press [ST] to accept flow setting and to exit user setup functions.
5、按[ST]键接受设定的流量并退出用户设定功能。
See Calibration for instructions on calibrating pump flow rate.
见流量校准说明书
11
Setup
设定
Setting a Timed Run
设定定时运行
Program the AirChek XR5000 from its keypad to run from 1 to 9999 minutes.
从AirChek XR5000键区编制从1-9999分钟的运行程序。
With pump in a non-running state (no flashing blue LED):
在泵非运行状态(蓝色指示灯不闪烁)
1. Press STto enter user setup functions.
1、按ST进入用户设定功能
2. Press until a flashing Set Timed Run and min appear on the display.
2、按直到闪烁的Set Timed Run 和min出现在显示屏上。
3. Press Sto increase or Tto decrease minutes.
3、按S键增加或T键减少时间。
4. Press [ST] to accept timed run setting and to exit user setup functions. The setting will appear on the
display and the pump will be ready to run.
4、按[ST]接受设定的定时运行时间并退出用户设定功能。设定的时间就出现在显示屏上,泵准备好
运行。
5. Press [ST] to run the pump. See Note.
5、按[ST]键运行泵。见注意。
• During a timed run, the blue LED on top of the pump case will flash and time remaining will
count down in minutes on the LCD. Once run is complete, pump will stop and accumulated
run time will display.
在时间运行期间,泵壳上部的蓝色指示灯不停闪烁,时间以倒计时的分钟显示在液晶显示屏
上。一旦运行结束,泵将停止同时累积运行时间显示在泵显示屏上。
• “Timed Run” will only appear on the LCD when a timed run duration in minutes has been
selected in user setup functions.
“
Timed RUN
”只在已经在用户设定功能区选择了以分钟定时运行时才出现在显示屏上。
Setting a new timed run automatically clears accumulated run time.
设定一个新的定时运行将自动清除累积运行时间。
Setting a Run Delay
设定运行延迟
Program the AirChek XR5000 from its keypad to automatically start a sample run after a specified period of
time has elapsed.
从AirChek XR5000采样泵的键上设定程序以在特定时间结束后自动开始运行。
With pump in a non-running state (no flashing blue LED):
泵处于非运行状态(蓝色显示灯不闪):
1. Press STto enter user setup functions.
1、按ST键进入用户设定功能
12
2. Press until a flashing Set Run Delay and min appear on the display.
2、按键直到一个闪烁的Set Run Delay和min出现在显示屏上。
3. Press Sto increase or Tto decrease minutes.
3、按S键增加或T键减少设定时间
4. Press [ST] to accept run delay setting and to exit user setup functions. Run delay time will display on the
LCD and the pump will be ready to start run delay.
4、按[ST]键接受运行延迟设定并退出用户设定功能。运行延迟时间将显示在液晶显示屏上,泵准备
好开始运行延迟。
5. Press [ST] to activate the pump. See Note.
5
、按
[ST]
键运行泵。见注意。
•During a run delay, time remaining will count down in minutes and display on the LCD. The
blue LED on top of the pump case will flash during run delay time even though the pump is
not running. Once the run delay time has elapsed, the pump will start running and
accumulated run time will count up in minutes and appear on the display. Once sampling run
is complete, stop the pump by pressing [ST]. Accumulated run time will remain on the
display.
在运行延迟期间,剩余时间将会在液晶显示屏上出现倒计时。在运行延迟期间
即使泵没有运行,泵壳上部的蓝色指示灯不断闪烁。一旦泵延迟时间结束,泵
就开始运行。累积运行时间将会以累积分钟出现在显示屏上。当泵运行结束
时,按[ST]键停泵。累积运行时间会保持在显示屏上。
•“Run Delay” will only appear on the LCD when a run delay duration in minutes has been
selected in user setup functions.
当在用户设定功能区设定了运行延迟时间,“
Run Delay
”将只出现在液晶显示屏上。
Setting a new run delay automatically clears accumulated run time.
设定一个新的运行延迟会自动清除累积运行时间。
13
Setup
设定
Setting a Run Delay and Timed Run
设定运行延迟和定时运行
With pump in a non-running state (no flashing blue LED):
在泵非运行状态(蓝色指示灯不闪烁)
1. Press STto enter user setup functions.
1、按 ST 进入用户设定功能
2. Press until flashing Set Timed Run and min appear on the display.
2、按键直到闪烁的Set Timed Run和min出现在显示屏上
3. Press Sto increase or Tto decrease minutes.
3、按S键增加或T键减少时间(分钟)
4. Press
to scroll to a flashing Set Run Delay and min.
4、按键滚动到闪烁的Set Run Delay and min。
5. Press
Sto increase or Tto decrease minutes.
5、按S键增加或T键减少时间(分钟)
6. Press [ST] to accept run delay and timed run settings and to exit user setup functions. The run delay
setting will appear on the LCD and the pump will be ready to start run delay.
6、按[ST]键接受运行延迟和定时运行设定并退出用户设定功能。运行延迟设定就出现在液晶显示屏
上,泵准备好开始运行延迟
7. Press [ST] to activate the pump. See Note.
7
、按
[ST]
键运行泵。见注意
•During a run delay, the blue LED on top of the pump case will flash, time remaining will
count down to 0 in minutes on display, and timed run will begin automatically. Timed run
will count down in minutes. Once run is complete, pump will stop and accumulated run time
will display.
运行延迟期间,泵壳上部的蓝色指示灯不停闪烁,剩余时间将会以分钟倒
计时出现在显示屏上,当剩余时间到0时,定时运行就自动开始。定时运行
将会以分钟倒计时。一旦运行完成,泵会停止,同时累积运行时间出现在
显示屏上。
•“Run Delay” will display first. Once delay is complete and the run starts, “Timed Run” will
display.
“Run Delay”首先显示。一旦延迟结束后运行开始,“Timed Run”就
显示。
When setting a timed run or run delay with a large number of minutes
in user setup functions, press with Sor T. This activates the speed count feature which
scrolls through timed run or run delay minutes in increments of 100.
当
setting a timed run
或
run delay
在用户设定功能区显示出来时,按

键和
S
或
T键.
14
这可以激活快速增加功能,这种功能将以100为单位滚动显示定时运行或运行延迟时间。
Setting a new run delay and timed run automatically clears accumulated run time.
设定新的运行延迟和定时运行将会自动清除累积运行时间。
Canceling a Timed Run and/or Run Delay
取消定时运行和/或运行延迟
With pump in a non-running state (no flashing blue LED):
1. Press STto enter user setup functions.
2. Press until flashing Set Timed Run and min appear on the display.
3. Press Tuntil time displays as 0.
4. Repeat for Run Delay if needed.
5. Press [ST] to exit user setup functions. Pump will be ready to run.
在泵处于非运行状态时(蓝色指示灯不闪烁)
1、按ST键进入用户设定功能
2、按键直到闪烁的Set Timed Run和min出现在显示屏上。
3、按T键直到时间显示为0
4、如果需要的话重复进入运行延迟
5、按[ST]键退出用户设定功能。泵准备好运行。
Selecting CLr in user setup functions after a sample run will clear accumulated run time only.
It will not clear Timed Run or Run Delay time settings.
样品运行后在用户设定功能选择 CLr 只会清除累积运行时间,而不会清除设定的定时运行或运行延
迟。
15
Calibration
校准
Calibration (High Flow: 1000 to 5000 ml/min)
校准(高流量:1000-5000ml/min)
1. Connect pump inlet to the outlet of a primary standard calibrator with
representative sample medium in line. With pump in a non-running state (no
flashing blue LED):
2. Press STto enter user setup functions.
3. Press
until ADJ and FLOW flash on display. Press Sto increase flow.
Press Tto decrease flow. Dashed lines will move up or down on the display
to indicate graphically the direction of the adjustment. Flow rate will not
display on pump LCD. Observe the calibrator to determine flow rate.
4. Once desired flow rate is indicated on the calibrator (within ± 5%), press [ST] to accept flow setting and
to exit user setup functions. The pump will be ready to run.
• Changing the flow rate in user setup functions will not clear accumulated run time.
• Changing the timed run and/or run delay settings in user setup functions will automatically
clear accumulated run time.
5. Disconnect the calibrator and tubing. Replace representative tubes with new unexposed media for sampling.
1、将泵进口通过一个有代表性的采样介质与初级标准校准器出口连接。然后在泵处于非运行状态时
(蓝色指示灯不闪烁):
2、按ST键进入用户设定功能
3、按键直到 ADJ 和FLOW 闪烁出现在显示屏上。按S键增加流量。按T键降低流量。显示屏上出现
的虚线会上下移动,以图形形象地表示调整的方向。流量不显示在泵的液晶显示屏上。观察校准器确定
泵流量。
4、一旦预期的流量出现在校准器上(± 5% 范围内)。按[ST]键接受设定的流量并退出用户设定功
能。泵已准备好运行。
在用户设定功能改变流量不会清除累积运行时间
在用户设定功能区改变定时运行和/或运行延迟会自动清除累积运行时间
5、将校准器与调节流量的管断开。用一个新的采样管用于采样。
Adjust flow with flow adjustment
screw on tube holder.
16
Calibration
校准
Calibration (Low Flow: 5 to 500 ml/min)
校准(低流量:5-500ml/min)
Requires Constant Press Controller (CPC) and Adjustable Low Flow Tube Holder -
see Accessories, Low Flow Adapter Kit on p. 15.
需要连续压力控制器(CPC)和可调低流量管固定器。
1. Set pump flow rate to approximately 1.5 L/min (see Setting Flow Rate). For multiple-tube sampling, the
pump flow rate setting must be greater than the sum of the required flow rates through all the tubes.
1
、设定泵流量约为
1.5L/min
(见设定流量)。对于多重管路采样,设定的泵流量应该比通过所有管路
需要的流量总和要大。
2. Use tubing on CPC to connect the pump inlet to the CPC outlet (the side of the CPC
without a label). Connect the inlet side of the CPC (marked “to sample”) to the
Adjustable Low Flow Tube Holder.
2、用连续压力控制器上的管将泵进口和压力控制器(CPC的侧面无标签)出口连
接起来。将CPC进口侧(标记为“到样品”)与可调低流量管固定器连接。
3. Label all tubes and ports if performing multiple-tube sampling.
3、如果运行多重管路采样 ,将所有的管和端口贴上标签。
4. Insert opened representative tubes into the rubber sleeve(s) of each port on the Adjustable Low Flow Tube
Holder. If any ports remain unused, place unopened tubes in them; it is important to “seal” unused ports.
4、将打开的采样管插入到每个可调低流量管路固定器端口的橡皮套内。如果有端口没有使用,插入一
只未开口的采样管。将不使用的端口 “密封”是很重要的。
5. Use tubing to connect the exposed end of one tube to a primary standard calibrator.
5、用软管将管的末端与初级标准校准器相连。
6. Turn on pump. Turn the flow adjustment screw (needle valve) on the tube holder until the calibrator
indicates the desired flow rate (do not adjust the flow rate of the pump). For multiple-tube sampling,
repeat this procedure for each port to calibrate the flow rate for each tube. Seal unused ports during
calibration.
6、打开泵。打开管路固定器上的流量调节螺丝(针形阀)打开,直到校准器出现预期的流量(不要调
节泵的流量)。对于多重管路采样,对每一个端口重复此步骤以校准每一个管的流量。在校准时密
封未使用的端口。
7. Disconnect the calibrator and tubing. Replace representative tubes with new unexposed tubes for sampling.
7、将校准器与管断开。用一新的采样管用于采样。
The CPC has two small inlet ports on the bottom of the unit. These ports should be inspected
periodically for blockage, which can occur when sampling in dusty environments. Blocked
ports will cause back pressure to increase. Clean ports with a small pick and use air to blow
away particles.
17
连续压力控制器在泵单元的底部有两个小的进口。这些端口应定期检查以防止堵塞,堵塞可能
发生在多尘的环境中采样后。堵塞的端口可能会导致背压增加。用小的尖针清除端口并用空气将颗
粒物吹去。
Long-duration color detector tubes require a special tube cover (Cat. No.
224-29T) that accommodates an in-line trap tube (Cat. No. 222-3D-2). The
trap tube protects the pump from caustic fumes that are often released
from detector tubes. Read closely all precautions when using these tubes.
Failure to use the necessary traps will damage the pump and void the
warranty.
长效检测指示管需要一特殊的管帽(货号:
NO224-29T
)以提供一致的捕集管(货号:
NO.222-3D-2
)。该捕集管保护泵不被由检测管释放的腐蚀性的烟雾损坏。当使用这些管采
样时应详细了解所有预防措施,忽视使用这些必须的管可能会损坏泵并导致质量保证无效。
Adjust flow with flow adjustment screw on tube holder.

Other manuals for AirChek XR5000

2

Other SKC Water Pump manuals

SKC AirChek XR5000 User manual

SKC

SKC AirChek XR5000 User manual

SKC Leland Legacy User manual

SKC

SKC Leland Legacy User manual

SKC 220 Series User manual

SKC

SKC 220 Series User manual

SKC AirChek2000 User manual

SKC

SKC AirChek2000 User manual
SKC 224-44XR User manual

SKC

SKC 224-44XR User manual
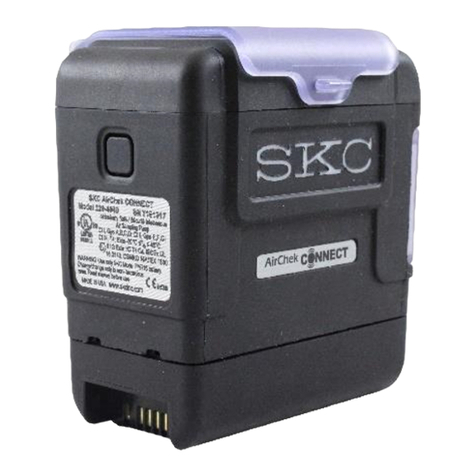
SKC AirChek Connect User manual

SKC

SKC AirChek Connect User manual
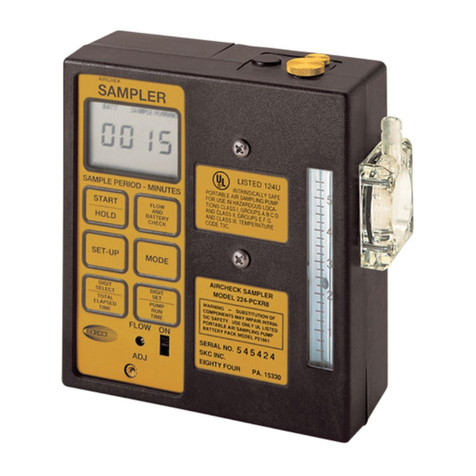
SKC 224-PCXR8 User manual

SKC

SKC 224-PCXR8 User manual

SKC 224-50MH User manual

SKC

SKC 224-50MH User manual
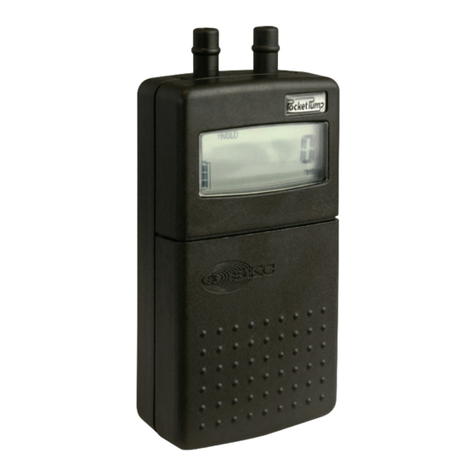
SKC 210-1000 Series User manual

SKC

SKC 210-1000 Series User manual
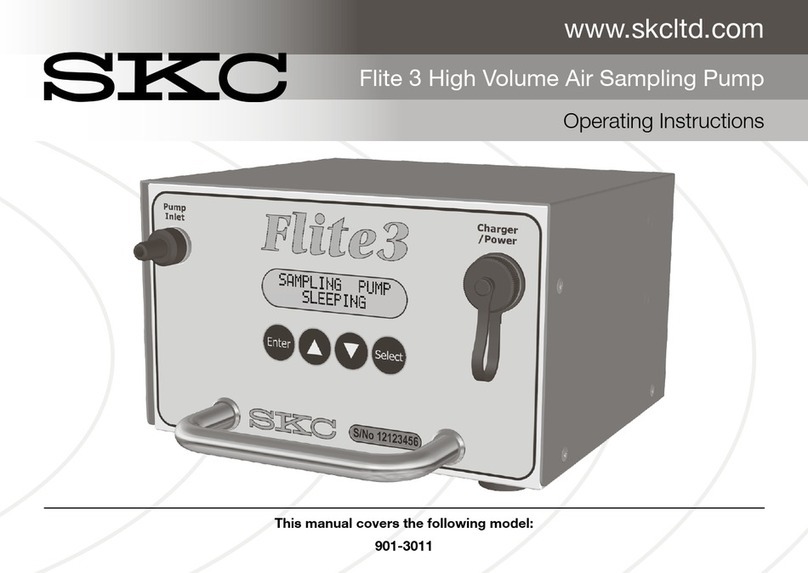
SKC Flite 3 User manual

SKC

SKC Flite 3 User manual
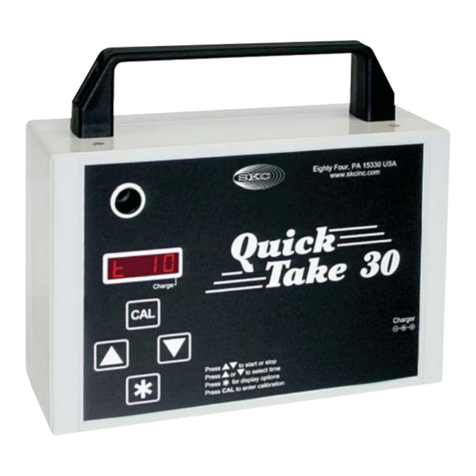
SKC QuickTake 30 User manual

SKC

SKC QuickTake 30 User manual
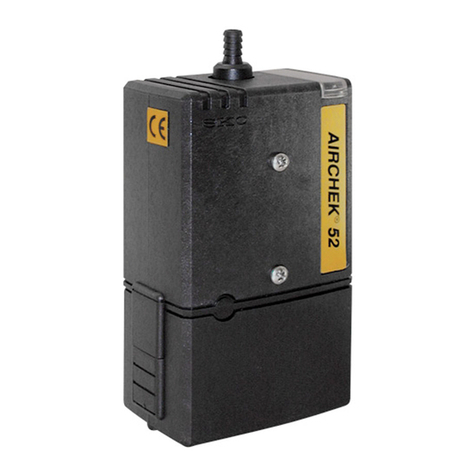
SKC AirChek 52 User manual

SKC

SKC AirChek 52 User manual
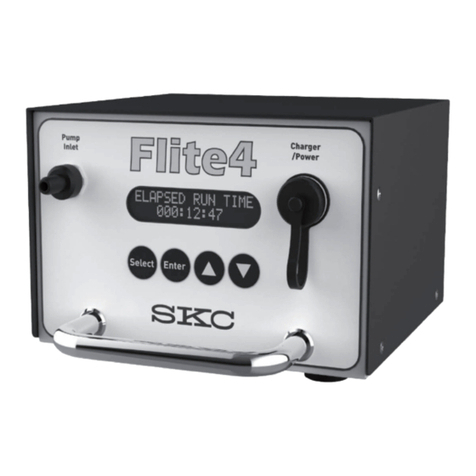
SKC Flite4 User manual

SKC

SKC Flite4 User manual
SKC 224-44XRM User manual

SKC

SKC 224-44XRM User manual
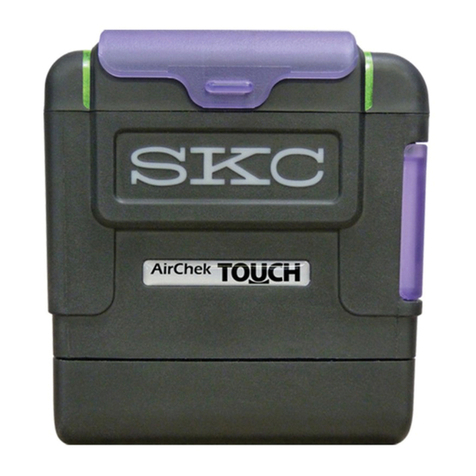
SKC AirChek TOUCH 220 Series User manual

SKC

SKC AirChek TOUCH 220 Series User manual

SKC QuickTake 30 User manual

SKC

SKC QuickTake 30 User manual

SKC Vac-U-Go 228-9605 User manual

SKC

SKC Vac-U-Go 228-9605 User manual

SKC 224-44MTX User manual

SKC

SKC 224-44MTX User manual
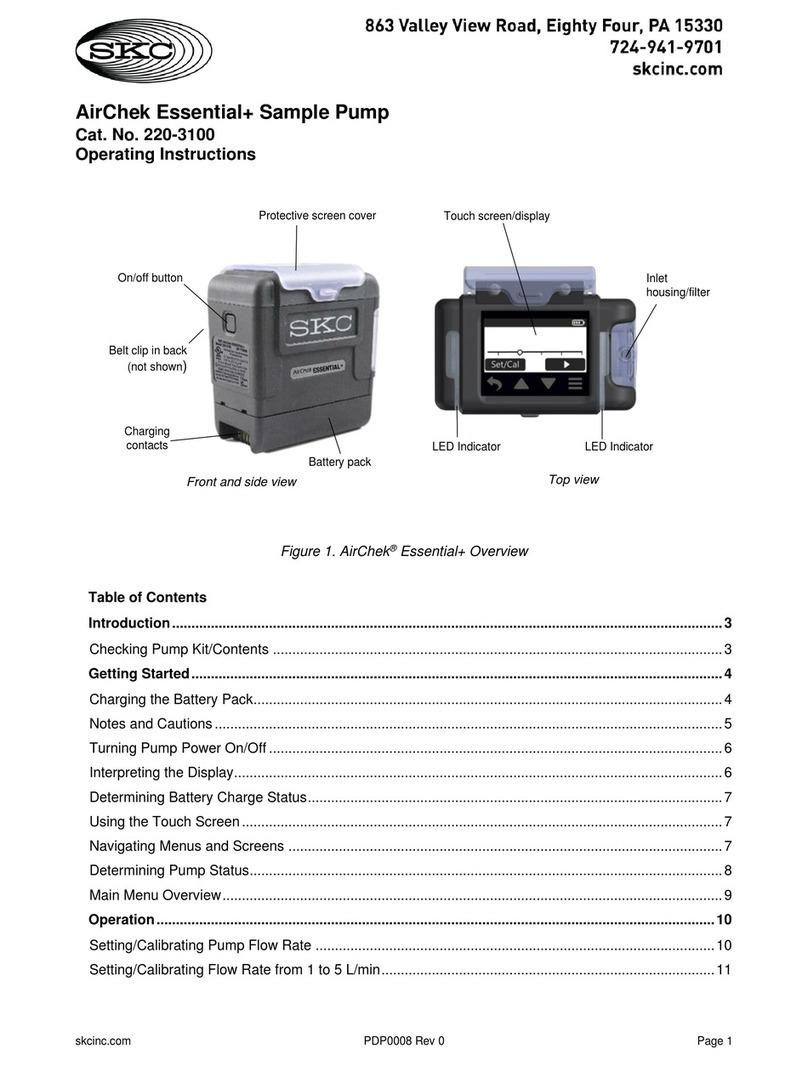
SKC AirChek 220-3100 User manual

SKC

SKC AirChek 220-3100 User manual
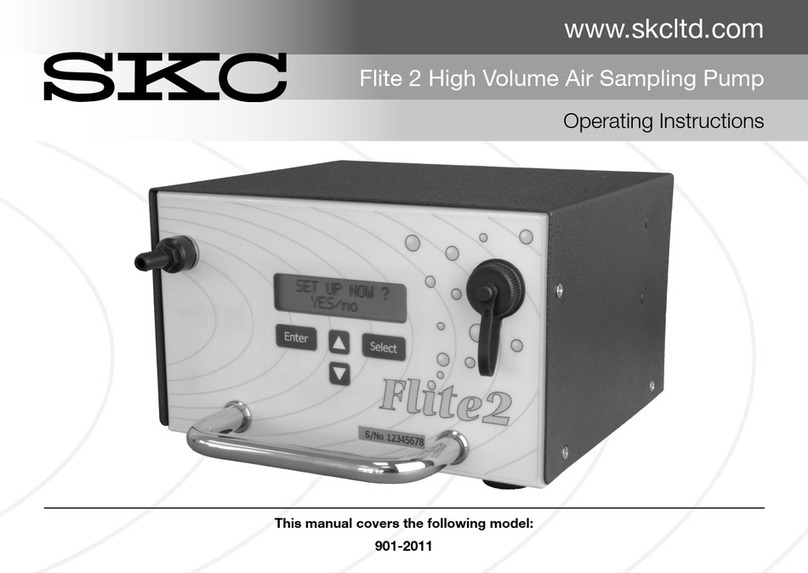
SKC Flite 2 User manual

SKC

SKC Flite 2 User manual

SKC 224-PCMTX8 User manual

SKC

SKC 224-PCMTX8 User manual

SKC Leland Legacy User manual

SKC

SKC Leland Legacy User manual

SKC 224-44XR User manual

SKC

SKC 224-44XR User manual

SKC Quick Take 15 User manual

SKC

SKC Quick Take 15 User manual

Popular Water Pump manuals by other brands
Little Giant 6EC-CIA-SFS installation guide
Little Giant

Little Giant 6EC-CIA-SFS installation guide

AL Tech RFR 400 operating instructions

AL Tech

AL Tech RFR 400 operating instructions

Little Giant CS-SS installation instructions

Little Giant

Little Giant CS-SS installation instructions

Ecoplus ECOair 1 instructions

Ecoplus

Ecoplus ECOair 1 instructions
Care Fusion MedSystem III Quick reference guide

Care Fusion

Care Fusion MedSystem III Quick reference guide

FLORABEST FGPS 1100 C3 Translation of the original instructions

FLORABEST

FLORABEST FGPS 1100 C3 Translation of the original instructions
Aqua PRO AS10000DF instructions

Aqua PRO

Aqua PRO AS10000DF instructions

Little Giant 8-CBA introduction

Little Giant

Little Giant 8-CBA introduction

Power Fist 8552937 user manual

Power Fist

Power Fist 8552937 user manual

Ecoflo EFWIFI33 owner's manual

Ecoflo

Ecoflo EFWIFI33 owner's manual

FLORABEST Set FGPA 1000 A1 Operation and safety notes

FLORABEST

FLORABEST Set FGPA 1000 A1 Operation and safety notes

Little Giant JPC Series manual

Little Giant

Little Giant JPC Series manual

ThePondguy MagFlo Series product manual

ThePondguy

ThePondguy MagFlo Series product manual

red lion RLMPFV12 owner's manual

red lion

red lion RLMPFV12 owner's manual

Kamoer F4 user manual

Kamoer

Kamoer F4 user manual

Tricel Pumping Chamber 2600 manual

Tricel

Tricel Pumping Chamber 2600 manual

BIANCO PUMPZ 2 Series manual

BIANCO PUMPZ

BIANCO PUMPZ 2 Series manual

National Vacuum Equipment 607 PRO Challenger Series owner's manual

National Vacuum Equipment

National Vacuum Equipment 607 PRO Challenger Series owner's manual

manuals.online logo
manuals.online logoBrands
  • About & Mission
  • Contact us
  • Privacy Policy
  • Terms and Conditions

Copyright 2025 Manuals.Online. All Rights Reserved.