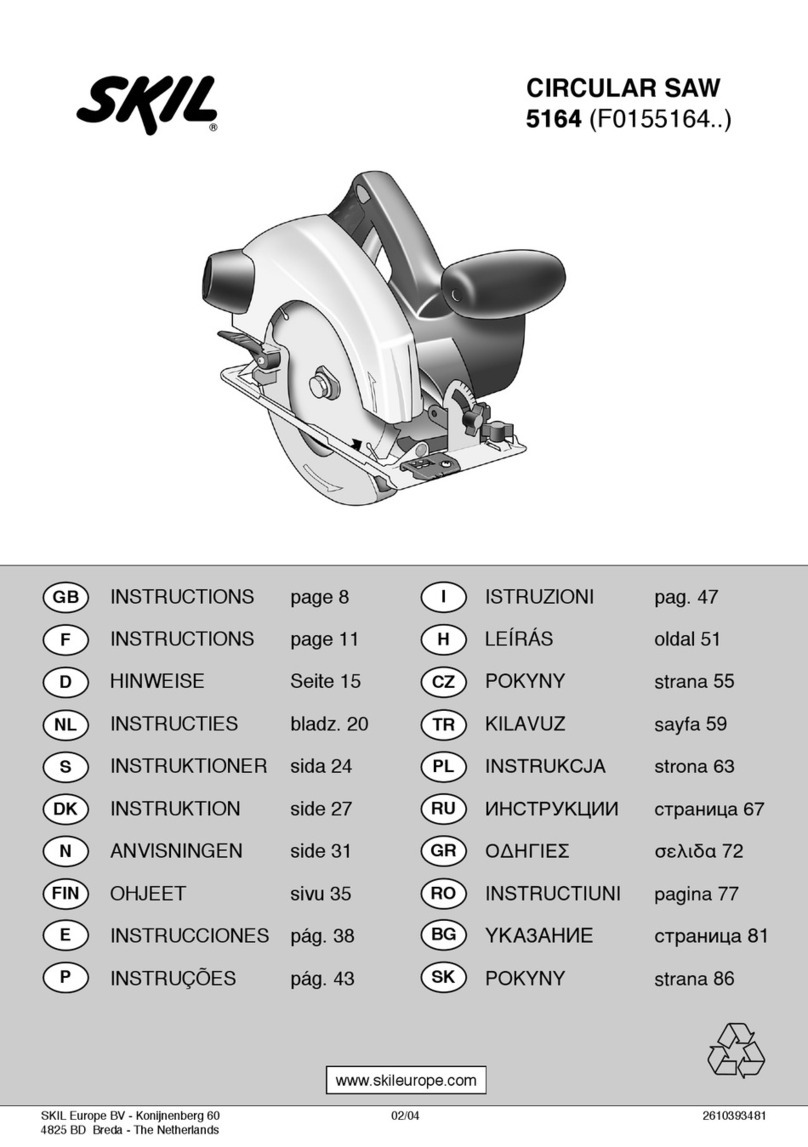
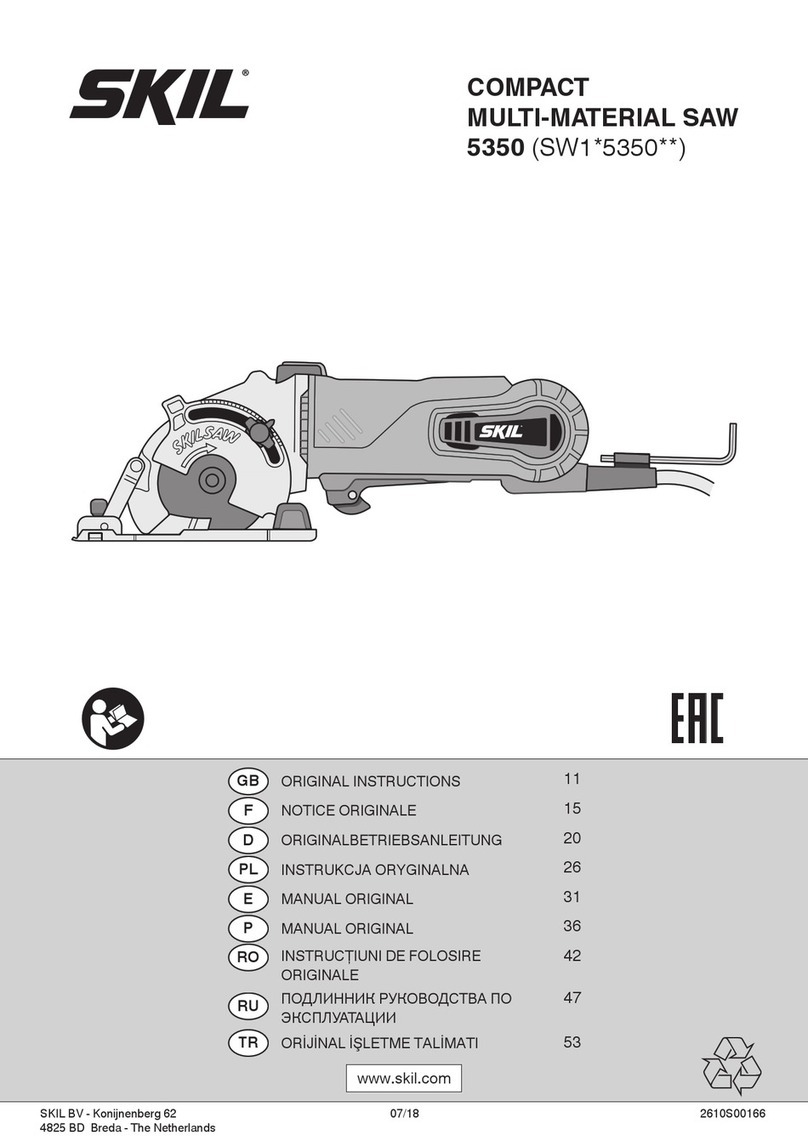
Skil Masters 3100 User manual

SKIL Europe BV - Konijnenberg 60 12/08 2610399062
4825 BD Breda - The Netherlands
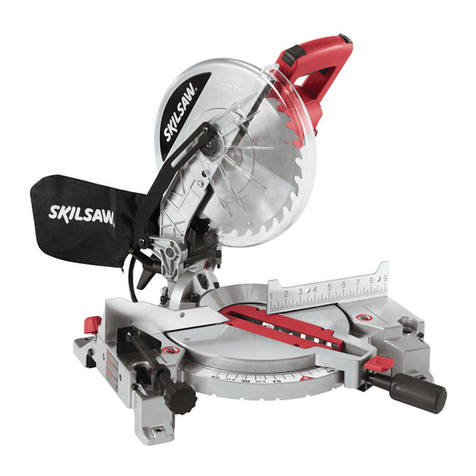
COMPOUND MITRE SAW
3100 (F0153100..)
www.skileurope.com
www.skilmasters.com
ORIGINAL INSTRUCTIONS. . . . . . . . . . . . 13
NOTICE ORIGINALE . . . . . . . . . . . . . . . . . 17
ORIGINALBETRIEBSANLEITUNG . . . . . . 22
ORIGINELE GEBRUIKSAANWIJZING. . . . 28
BRUKSANVISNING I ORIGINAL . . . . . . . . 33
ORIGINAL BRUGSANVISNING . . . . . . . . . 38
ORIGINAL DRIFTSINSTRUKS. . . . . . . . . . 42
ALKUPERÄISET OHJEET . . . . . . . . . . . . . 47
MANUAL ORIGINAL . . . . . . . . . . . . . . . . . 52
MANUAL ORIGINAL. . . . . . . . . . . . . . . . . . 57
ISTRUZIONI ORIGINALI . . . . . . . . . . . . . . 62
EREDETI HASZNÁLATI UTASÍTÁS. . . . . . 68
PÒVODNÍM NÁVODEM K POUÎÍVÁNÍ . . . 73
OR‹J‹NAL ‹fiLETME TAL‹MATI . . . . . . . . . 78
INSTRUKCJÑ ORYGINALNÑ. . . . . . . . . . . 82
ОРИГИНАЛНЬОЕ РУКОВОДСТВО
ПО ЭКСПЛУАТАЦИИ . . . . . . . . . . . . . . . . 88
ОРИГІНАЛЬНА ІНСТРУКЦІЯ
З ЕКСПЛУАТАЦІЇ . . . . . . . . . . . . . . . . . . . 94
ΠΡΩΤΟΤΥΠΟ Ο∆ΗΓΙΩΝ ΧΡΗΣΗΣ . . . . . . 99
INSTRUCØIUNI DE FOLOSIRE
ORIGINALE . . . . . . . . . . . . . . . . . . . . . . . 106
ОРИГИНАЛНО РЪКОВОДСТВО
ЗА ЕКСПЛОАТАЦИЯ . . . . . . . . . . . . . . . 111
PÔVODN¯ NÁVOD NA POUÎITIE . . . . . 117
ORIGINALNE UPUTE ZA RAD . . . . . . . . 122
ORIGINALNO UPUTSTVO ZA RAD . . . . 127
IZVIRNA NAVODILA . . . . . . . . . . . . . . . . 131
ALGUPÄRANE KASUTUSJUHEND . . . . 136
ORI˛INÅLÅ LIETO·ANAS PAMÅC±BA. . 141
ORIGINALI INSTRUKCIJA. . . . . . . . . . . . 146
GB
F
D
NL
S
DK
N
FIN
E
P
I
H
CZ
TR
PL
ME77
RU
UA
GR
RO
BG
SK
HR
SRB
SLO
EST
LV
LT

2
13100
2
13,4 kg
EPTA 01/2003
5500 /min RUBBER
254 mm
MAX.
30 mm
250 mm
MIN.
30 mm
Watt
1800
3
MAX mm 0°
0°
135
70
MAX mm
45°
0°
70
90
MAX mm
45°
0°
135
40
MAX mm
45°
45°
40
90
2,0 - 3,2 mm

3
Q
T
C
R
X
A
B
C
E
F
H
G
G
G
L
L
K
K
N
S
T
WD
V
M
PZ
S1
4

4
B
90°
5
E
F
6
G
G
G
7

5
H
8
L
K
9
M2
M1
N
M4M3
M
0

6
B
B
B
B
A
A
A
A
Max A x Max B
70 x 135 mm
40 x 135 mm
70 x 90 mm
40 x 90 mm
0°
0°
0°
0°
0°
0°
45°
45° 45°
45°
45°
45°
45°
!

7
E
F
0°
45° 45°
P
@
0°
45°
Q
R
#

8
0°
45°
0°
45° 45° +
$
C
LASS 2 LASE
R
LASER RADIA
TION
A
A
DO NOT ST
ARE
INT
T
T
O
BEA
M
CLASS 2 LASER PRODUCT
P
m
a
x < 1m
W
,
ª
650
IEC/EN 60825-1: 2007
ªª
=650
nm
=650nm
S
2
S1
%

9
T
A
C
^

10
V2
V1V
W
X
V4
V3
V
&
*

11
Q
R1
(
Q
R
R2
)

12
N1
N
¡
P1
P
™
R3
R
£
≤ ∞

13
GB
Compound mitre saw 3100
INTRODUCTION
• This tool is intended as a stationary machine for
lengthways and crossways cutting of wood with straight
cuts as well as angle cuts (horizontal mitre angles of
-45° to +45° as well as vertical bevel angles of 0° to 45°
are possible)
• Read and save this instruction manual 2
TECHNICAL SPECIFICATIONS 1
TOOL ELEMENTS 4
ASwitch handle
BLocking pin for transport
CSafety lever
DTransport handle
ELocking handle (mitre angles)
FLocking clamp (mitre angles)
GMounting holes
HDust bag
KExtension bars
LKnobs for mounting extension bars
MClamp for mounting workpiece
NFence
PMitre angle indicator
QLocking knob (bevel angles)
RBevel angle indicator
SLaser light opening
S1 On/off switch laser
TOn/off switch
VBlade wrench
WProtective guard
XSpindle-lock button
ZTable insert
SAFETY
GENERAL SAFETY INSTRUCTIONS
WARNING! Read all safety warnings and all
instructions. Failure to follow the warnings and
instructions may result in electric shock, fire and/or serious
injury. Save all warnings and instructions for future
reference. The term “power tool” in the warnings refers to
your mains-operated (corded) power tool or battery-
operated (cordless) power tool.
1) WORK AREA SAFETY
a) Keep work area clean and well lit.
Cluttered or dark areas invite accidents.
b) Do not operate power tools in explosive
atmospheres, such as in the presence of flammable
liquids, gases or dust. Power tools create sparks
which may ignite the dust or fumes.
c) Keep children and bystanders away while operating
a power tool. Distractions can cause you to lose
control.
2) ELECTRICAL SAFETY
a) Power tool plugs must match the outlet.
Never modify the plug in any way. Do not use any
adapter plugs with earthed (grounded) power tools.
Unmodified plugs and matching outlets will reduce risk
of electric shock.
b) Avoid body contact with earthed or grounded
surfaces such as pipes, radiators, ranges and
refrigerators. There is an increased risk of electric
shock if your body is earthed or grounded.
c) Do not expose power tools to rain or wet conditions.
Water entering a power tool will increase the risk of
electric shock.
d) Do not abuse the cord. Never use the cord for
carrying, pulling or unplugging the power tool.
Keep cord away from heat, oil, sharp edges or
moving parts. Damaged or entangled cords increase
the risk of electric shock.
e) When operating a power tool outdoors,
use an extension cord suitable for outdoor use.
Use of a cord suitable for outdoor use reduces the risk
of electric shock.
f) If operating a power tool in a damp location is
unavoidable, use an earth leakage circuit breaker.
Use of an earth leakage circuit breaker reduces the risk
of electric shock.
3) PERSONAL SAFETY
a) Stay alert, watch what you are doing and use
common sense when operating a power tool.
Do not use a power tool while you are tired or
under the influence of drugs, alcohol or medication.
A moment of inattention while operating power tools
may result in serious personal injury.
b) Use personal protective equipment. Always wear
eye protection. Protective equipment such as dust
mask, non-skid safety shoes, hard hat, or hearing
protection used for appropriate conditions will reduce
personal injuries.
c) Prevent unintentional starting. Ensure the switch is
in the off-position before connecting to power
source and/or battery pack, picking up or carrying
the tool. Carrying power tools with your finger on the
switch or energising power tools that have the switch
on invites accidents.
d) Remove any adjusting key or wrench before turning
the power tool on. A wrench or a key left attached to a
rotating part of the power tool may result in personal
injury.
e) Do not overreach. Keep proper footing and balance
at all times. This enables better control of the power
tool in unexpected situations.
f) Dress properly. Do not wear loose clothing or
jewellery. Keep your hair, clothing and gloves away
from moving parts. Loose clothes, jewellery or long
hair can be caught in moving parts.
g) If devices are provided for the connection of dust
extraction and collection facilities, ensure these are
connected and properly used. Use of dust collection
can reduce dust-related hazards.

14
4) POWER TOOL USE AND CARE
a) Do not force the power tool. Use the correct power
tool for your application. The correct power tool will
do the job better and safer at the rate for which it was
designed.
b) Do not use the power tool if the switch does not turn
it on and off. Any power tool that cannot be controlled
with the switch is dangerous and must be repaired.
c) Disconnect the plug from the power source and/or
the battery pack from the power tool before making
any adjustments, changing accessories, or storing
power tools. Such preventive safety measures reduce
the risk of starting the power tool accidentally.
d) Store idle power tools out of the reach of children
and do not allow persons unfamiliar with the power
tool or these instructions to operate the power tool.
Power tools are dangerous in the hands of untrained
users.
e) Maintain power tools. Check for misalignment or
binding of moving parts, breakage of parts and any
other condition that may affect the power tool’s
operation. If damaged, have the power tool repaired
before use. Many accidents are caused by poorly
maintained power tools.
f) Keep cutting tools sharp and clean.
Properly maintained cutting tools with sharp cutting
edges are less likely to bind and are easier to control.
g) Use the power tool, accessories and tool bits etc.,
in accordance with these instructions, taking into
account the working conditions and the work to be
performed. Use of the power tool for operations
different from those intended could result in a
hazardous situation.
5) SERVICE
a) Have your power tool serviced by a qualified repair
person using only identical replacement parts.
This will ensure that the safety of the power tool is
maintained.
SPECIFIC SAFETY INSTRUCTIONS FOR COMPOUND
MITRE SAWS
GENERAL
• Only use the tool for cutting wood
• Always saw a single workpiece (workpieces placed
one on the other or next to each other cannot be
properly clamped which may result in saw blade binding
or workpiece slipping during sawing)
• Inrush currents cause short-time voltage drops; under
unfavourable power supply conditions, other equipment
may be affected (if the system impedance of the power
supply is lower than 0,295 + j0,184 Ohm, disturbances
are unlikely to occur); if you need further clarification,
you may contact your local power supply authority
• Always disconnect plug from power source before
making any adjustment or changing any accessory
• This tool should not be used by people under the age of
16 years
• This tool is not suitable for wet cutting
OUTDOOR USE
• When used outdoors, connect the tool via a fault current
(FI) circuit breaker with a triggering current of 30 mA
maximum, and only use an extension cord which is
intended for outdoor use and equipped with a
splashproof coupling-socket
BEFORE USE
• Always check that the supply voltage is the same as the
voltage indicated on the nameplate of the tool (tools
with a rating of 230V or 240V can also be connected to
a 220V supply)
• Use completely unrolled and safe extension cords with
a capacity of 16 Amps (U.K. 13 Amps)
• Always mount the tool on a flat and stable working
surface (e.g. workbench)
• Wear protective glasses, hearing protection, and
protective gloves
• Dust from material such as paint containing lead, some
wood species, minerals and metal may be harmful
(contact with or inhalation of the dust may cause
allergic reactions and/or respiratory diseases to the
operator or bystanders); wear a dust mask and work
with a dust extraction device when connectable
• Certain kinds of dust are classified as carcinogenic
(such as oak and beech dust) especially in conjunction
with additives for wood conditioning; wear a dust
mask and work with a dust extraction device when
connectable
• Follow the dust-related national requirements for the
materials you want to work with
• Do not work materials containing asbestos (asbestos
is considered carcinogenic)
• Never use the tool without the original protection guard
system
• Check the protective guard for proper closing before
each use
• Do not operate the saw if the protective guard does not
move freely and close instantly
• Never clamp or tie the protective guard into the open
position
• Always firmly clamp the workpiece (do not work
with pieces that are too small to clamp)
• Always support the free ends of a long workpiece
• Never allow another person to hold or support the
workpiece while working; use the saw table extension
• Never use the tool without the table insert; replace a
defective or worn table insert
• Remove all obstacles on top of as well as underneath
the cutting path before you start cutting
• Avoid damage that can be caused by screws, nails and
other elements in your workpiece; remove them before
you start working
ACCESSORIES
• Never use grinding/cutting discs with this tool
• SKIL can assure flawless functioning of the tool only
when the correct accessories are used which can be
obtained from your SKIL dealer
• For mounting/using non-SKIL accessories observe the
instructions of the manufacturer concerned
• Use only accessories with an allowable speed matching
at least the highest no-load speed of the tool

15
• Never use saw blades made of high speed steel (HSS)
• Do not use a saw blade which is cracked, deformed or
dull
• Only use saw blades with a hole diameter which fits the
tool spindle without play; never use reducors or
adaptors to fit large-hole saw blades
• Protect accessories from impact, shock and grease
DURING USE
• Do not force the tool; apply light and continuous
pressure
• Keep fingers, hands and arms away from the
rotating saw blade
• Push spindle-lock button only when tool is at a
standstill
• When slotting, ensure that the saw blade does not get
jammed in the workpiece
• If the saw blade becomes blocked, switch off the tool
immediately and disconnect the plug; only then remove
the wedged workpiece
• In case of jamming or electrical or mechanical
malfunction, immediately switch off the tool and
disconnect the plug
• If the cord is damaged or cut through while working, do
not touch the cord, but immediately disconnect the plug
• Never use the tool when cord is damaged; have it
replaced by a qualified person
LASER RADIATION
• Do not look into the laser beam (laser radiation) 3
• Do not point the laser beam at persons or animals
• Do not use any magnifying optical tools (such as
magnifying glasses, telescopes, or binoculars) to view
the laser beam
• Do not operate the tool in the presence of flammable
liquids, gases or dust
• Do not operate the tool with children around
AFTER USE
• After switching off the tool, never stop the rotation of
the accessory by a lateral force applied against it
• Only remove cut-offs or other parts of the workpiece
from the cutting area when all moving parts have come
to a complete standstill
• The saw blade becomes very hot during use; do not
touch it before it has cooled down
WHEN CONNECTING NEW 3-PIN PLUG (U.K. ONLY):
• Do not connect the blue (= neutral) or brown (= live) wire
in the cord of this tool to the earth terminal of the plug
• If for any reason the old plug is cut off the cord of this
tool, it must be disposed of safely and not left
unattended
USE
• Transport/working position 5
For releasing the tool (working position)
- press handle A 4downward with one hand to
prevent tool arm from swinging upward unexpectedly
- pull out locking pin B 4with the other hand, rotate it
1/4 turn in either direction and release it in that
position
- guide the tool arm slowly upward
For securing the tool (transport position)
- press safety lever C 4while lowering the tool arm
with handle A to the stop
- release safety lever C and press handle A downward
with one hand to prevent tool arm from swinging
upward unexpectedly
- pull out locking pin B 4with the other hand, rotate it
1/4 turn in either direction and release it in that
position
- use transport handle D for carrying the tool
• Mounting locking handle for mitre angles 6
- screw locking handle E into the hole beneath locking
clamp F
! do not tighten the handle too firmly
• Mounting tool on working surface 7
! for safe handling always mount tool on a flat and
stable working surface (e.g. workbench)
- use 4 mounting holes G for attaching the tool with
suitable screws to the working surface
- you may also clamp the tool to the working surface
with commercially available screw clamps
• Dust/chip extraction 8
- mount dustbag H as illustrated
- empty dustbag regularly for optimal dust pick-up
performance
! never let the vacuum cleaner hose interfere with
the lower guard or the cutting operation
• Saw table extension 9
- use knobs L to fasten extension bars K (on either
side of the tool)
• Clamping the workpiece 0
! for optimum working safety always firmly clamp
the workpiece with the adjustable clamp supplied
- assemble clamp M as illustrated
- fasten assembled clamp into support hole M1 with
knob M2 (on either side of the tool)
- press the workpiece firmly against fence N
- adapt clamp to the workpiece with knob M3
- firmly clamp the workpiece by turning down knob M4
- do not work with workpieces that are too small to
clamp
! for maximum workpiece dimensions use table !
as reference
• Setting mitre angles @
- loosen locking handle E
- push down clamp F, rotate the saw table to the left or
right and set the desired mitre angle (from 0° to 45°)
by using indicator P
- release clamp F and tighten locking handle E
- for quick and precise setting of often used mitre
angles (0°, 15°, 22.5°, 31.6°, 45°) use the
corresponding indentations underneath the saw table
(ensure that clamp F engages in the desired
indentation)
• Setting bevel angles #
- loosen three-legged knob Q
- swing the tool arm to the left until bevel angle
indicator R points to the desired bevel angle
- hold the tool arm in this position and tighten knob Q

16
• Compound cuts $
- compound cuts require both a mitre angle setting
and a bevel angle setting
! always test out first on a piece of scrap material
• Laser line %
- for guiding tool along desired line of cut marked on
the workpiece
- switch on/off laser line by pressing switch S1
- before starting a job, check the alignment of the laser
line with the actual line of cut by making a trial cut on
a piece of waste material
! do not remove or damage warning label S2
• Operating the tool ^
- set tool into working position
! ensure that the workpiece is firmly clamped
against the saw table and fence N 4
! ensure that the saw blade will not come in
contact with fence N 4, clamp M 4or possible
interfering auxiliary stops
! cutting width is determined by width of blade
teeth and not by width of blade body
- connect plug to power source
- switch on the tool by pulling switch T into handle A
! switch T cannot be locked, so keep it depressed
during operation
- press safety lever C simultaneously for guiding the
tool arm downward
! do not cross your arms when operating the tool
arm
- saw through the workpiece with uniform advancing
! keep fingers, hands and arms away from the
rotating saw blade
! the tool should run at full speed before the blade
enters into the workpiece
- switch off the tool by releasing switch T
• Changing saw blade &
! disconnect the plug
- take blade wrench V from storage by loosening
screw V1
- remove cover plate screw V2 (including washer) by
using a Phillips screwdriver
- press safety lever C 4and rotate protective guard W
completely backwards
- push spindle-lock button X and hold it while you
remove blade bolt V3 by turning blade wrench V
CLOCKWISE (= in same direction as arrow printed on
saw blade)
- release spindle-lock button X
- remove flange V4 and saw blade
! change saw blade with saw teeth and arrow
printed on saw blade pointing in same direction
as arrow on protective guard W
- for mounting another saw blade handle vice-versa
- firmly tighten blade bolt V3 by turning blade wrench
V COUNTER-CLOCKWISE while pushing spindle-
lock button X
• Replacing table insert *
Replace a defective or worn table insert as follows:
! disconnect the plug
- rotate the saw table completely to the left
- remove all 4 screws as illustrated
- remove old table insert by first lifting it at the front
and then pulling it out completely
- place new table insert
! firmly tighten all 4 screws
• Checking/adjusting of 90° blade alignment (
! disconnect the plug
- rotate the saw table to the 0° position and lock in
place
- lower the tool arm and lock in place
- check for a 90° angle between blade and table with a
square
- if necessary, adjust the 90° blade alignment as
follows:
1) loosen three-legged knob Q
2) swing the tool arm to 45° and adjust screw R1 up
or down
3) swing the tool arm back to 0°, re-check with
square, and repeat if necessary
• Checking/adjusting of 45° blade alignment )
! disconnect the plug
- rotate the saw table to the 0° position and lock in
place
- lower the tool arm and lock in place
- loosen three-legged knob Q
- swing the tool arm to 45°
- check for a 45° angle between blade and table with a
mitre square
- check that bevel indicator R is on the 45° mark
- if necessary, adjust the 45° blade alignment as
follows:
1) swing the tool arm back to 0° and adjust screw R2
up or down
2) swing the tool arm back to 45°, re-check, and
repeat if necessary
• Checking/adjusting of 90° fence alignment ¡
! disconnect the plug
- rotate the saw table to the 0° position and lock in
place
- lower the tool arm and lock in place
- check for a 90° angle between blade and fence N
with a square (ensure the square contacts the saw
blade body and not its teeth)
- if necessary, adjust the 90° fence alignment as
follows:
1) loosen 4 hex screws N1
2) adjust fence until blade and fence have full contact
with the square
3) tighten 4 hex screws N1
• Adjusting of mitre angle indicator ™
! disconnect the plug
- set tool into working position
- loosen Phillips screw P1 that holds indicator P in
place
- position indicator P to align with the 0° mitre mark
- tighten Phillips screw P1
• Adjusting of bevel angle indicator £
! disconnect the plug
- loosen screw R3 and align indicator R to the 0° mark
- tighten screw R3

17
APPLICATION ADVICE
• Special workpieces
- ensure that curved or round workpieces are
especially secured against slipping
- at the cutting line no gap may exist between the
workpiece and the fence or saw table
- if necessary, fabricate a special fixture
• For working with floor mouldings illustration ≤can be
used as reference
• Always face the good side of the workpiece down to
ensure minimum splintering
• Only use sharp saw blades of the correct type
- quality of cut improves by the number of teeth
- carbide tipped blades stay sharp up to 30 times
longer than ordinary blades
• Vibration level
The vibration emission level stated at the back of this
instruction manual (indicated by an asterisk) has been
measured in accordance with a standardised test given
in EN 60745; it may be used to compare one tool with
another and as a preliminary assessment of exposure to
vibration when using the tool for the applications
mentioned
- using the tool for different applications, or with
different or poorly maintainted accessories, may
significantly increase the exposure level
- the times when the tool is switched off or when it is
running but not actually doing the job, may
significantly reduce the exposure level
! protect yourself against the effects of vibration by
maintaining the tool and its accessories, keeping
your hands warm, and organizing your work
patterns
MAINTENANCE / SERVICE
• Always keep tool and cord clean (especially the
ventilation slots at the back-end of the motor housing)
! disconnect the plug before cleaning
• Clean saw blade immediately after use (especially from
resin and glue)
! the saw blade becomes very hot during use;
do not touch it before it has cooled down
• If the tool should fail despite the care taken in
manufacturing and testing procedures, repair should be
carried out by an after-sales service centre for SKIL
power tools
- send the tool undismantled together with proof of
purchase to your dealer or the nearest SKIL service
station (addresses as well as the service diagram of
the tool are listed on www.skilmasters.com)
ENVIRONMENT
• Do not dispose of electric tools, accessories and
packaging together with household waste material
(only for EU countries)
- in observance of European Directive 2002/96/EC on
waste of electric and electronic equipment and its
implementation in accordance with national law,
electric tools that have reached the end of their life
must be collected separately and returned to an
environmentally compatible recycling facility
- symbol ∞will remind you of this when the need for
disposing occurs
F
Scie à onglets combinés 3100
INTRODUCTION
• Cet outil est une machine fixe, conçue pour effectuer
dans le bois des coupes droites longitudinales et
transversales ainsi que des angles d’onglet (il est
possible de réaliser des angles d’onglet horizontaux de
-45° à +45° et des angles de biseau verticaux de 0° to
45°)
• Lisez et conservez ce manuel d’instructions 2
SPECIFICATIONS TECHNIQUES 1
ELEMENTS DE L’OUTIL 4
ALevier de manoeuvre
BGoupille de verrouillage pour le transport
CLevier de sécurité
DPoignée de transport
EPoignée de blocage (angles d’onglet)
FBride de blocage (angles d’onglet)
GTrous de fixation
HSac à poussière
KRallonges
LBoutons pour montage des rallonges
MCollier de serrage pour montage de la pièce
NProtection
PIndicateur de l’angle d’onglet
QBouton de blocage (angles de biseau)
RIndicateur de l’angle de biseau
SOuverture du rayon laser
S1 Laser à enclenchement marche/arrêt
TInterrupteur marche/arrêt
VClé de lames
WProtège-main
XBouton de blocage de l’arbre
ZPlaque amovible

153
CE DECLARATION OF CONFORMITY We declare under our sole responsibility that this product is in conformity with the following
standards or standardized documents: EN 61 029, EN 55 014, in accordance with the provisions of the directives 2006/95/EC,
2004/108/EC, 98/37/EC (until Dec. 28, 2009), 2006/42/EC (from Dec. 29, 2009 on).
NOISE/VIBRATION Measured in accordance with EN 61 029 the sound pressure level of this tool is 95 dB(A) and the sound power
level 108 dB(A) (standard deviation: 3 dB), and the vibration 2.7 m/s2(hand-arm method; uncertainty K = 1,5 m/s2).
Technical file at: SKIL Europe BV (PT-SEU/PJE), 4825 BD Breda, NL.
CE DÉCLARATION DE CONFORMITÉ Nous déclarons sous notre propre responsabilité que ce produit est en conformité avec les
normes ou documents normalisés suivants: EN 61 029, EN 55 014, conforme aux réglementations 2006/95/CE, 2004/108/CE,
98/37/CE (jusqu’au 28.12.2009), 2006/42/CE (à partir du 29.12.2009).
BRUIT/VIBRATION Mesuré selon EN 61 029 le niveau de la pression sonore de cet outil est 95 dB(A) et le niveau de la puissance
sonore 108 dB(A) (déviation standard: 3 dB), et la vibration 2,7 m/s2(méthode main-bras; incertitude K = 1,5 m/s2).
Dossier technique auprès de: SKIL Europe BV (PT-SEU/PJE), 4825 BD Breda, NL.
CE KONFORMITÄTSERKLÄRUNG Wir erklären in alleiniger Verantwortung, daß dieses Produkt mit den folgenden Normen oder
normativen Dokumenten übereinstimmt: EN 61 029, EN 55 014, gemäß den Bestimmungen der Richtlinien 2006/95/EG,
2004/108/EG, 98/37/EG (bis 28.12.2009), 2006/42/EG (ab 29.12.2009).
GERÄUSCH/VIBRATION Gemessen gemäß EN 61 029 beträgt der Schalldruckpegel dieses Gerätes 95 dB(A) und der Schal-
leistungspegel 108 dB(A) (Standard- abweichung: 3 dB), und die Vibration 2,7 m/s2(Hand-Arm Methode; unsicherheit K = 1,5 m/s2).
Technische Unterlagen bei: SKIL Europe BV (PT-SEU/PJE), 4825 BD Breda, NL.
CE CONFORMITEITSVERKLARING Wij verklaren, dat dit product voldoet aan de volgende normen of normatieve documenten:
EN 61 029, EN 55 014, overeenkomstig de bepalingen van de richtlijnen 2006/95/EG, 2004/108/EG, 98/37/EG (tot 28-12-2009),
2006/42/EG (vanaf 29-12-2009).
GELUID/VIBRATIE Gemeten volgens EN 61 029 bedraagt het geluidsdrukniveau van deze machine 95 dB(A) en het
geluidsvermogen-niveau 108 dB(A) (standaard deviatie: 3 dB), en de vibratie 2,7 m/s2(hand-arm methode; onzekerheid K = 1,5 m/s2).
Technisch dossier bij: SKIL Europe BV (PT-SEU/PJE), 4825 BD Breda, NL.
CE KONFORMITETSFÖRKLARING Vi intygar och ansvarar för, att denna produkt överensstämmer med följande norm och
dokument: EN 61 029, EN 55 014, enl. bestämmelser och riktlinjema 2006/95/EG, 2004/108/EG, 98/37/EG (till 28.12.2009),
2006/42/EG (from 29.12.2009).
LJUD/VIBRATION Ljudtrycksnivån som uppmätts enligt EN 61 029 är på denna maskin 95 dB(A) och ljudeffektnivån 108 dB(A)
(standard deviation: 3 dB), och vibration 2,7 m/s2(hand-arm metod; onoggrannhet K = 1,5 m/s2).
Teknisk tillverkningsdokumentation finns hos: SKIL Europe BV (PT-SEU/PJE), 4825 BD Breda, NL.
CE KONFORMITETSERKLÆRING Vi erklærer under almindeligt ansvar, at dette produkt er i overensstemmelse med følgende
normer eller normative dokumenter: EN 61 029, EN 55 014, i henhold til bestemmelserne i direktiverne 2006/95/EF, 2004/108/EF,
98/37/EF (indtil 28.12.2009), 2006/42/EF (fra 29.12.2009).
STØJ/VIBRATION Måles efter EN 61 029 er lydtrykniveau af dette værktøj 95 dB(A) og lydeffektniveau 108 dB(A) (standard
deviation: 3 dB), og vibrationsniveauet 2,7 m/s2(hånd-arm metoden; usikkerhed K = 1,5 m/s2).
Teknisk dossier hos: SKIL Europe BV (PT-SEU/PJE), 4825 BD Breda, NL.
CE SAMSVARSERKLÆRING Vi erklærer at det er under vårt ansvar at dette produkt er i samsvar med følgende standarder eller
standard- dokumenter: EN 61 029, EN 55 014, i samsvar med reguleringer 2006/95/EF, 2004/108/EF, 98/37/EF (frem til 28.12.2009),
2006/42/EF (fra 29.12.2009).
STØY/VIBRASJON Målt ifølge EN 61 029 er lydtrykknivået av dette verktøyet 95 dB(A) og lydstyrkenivået 108 dB(A) (standard
deviasjon: 3 dB), og vibrasjonsnivået 2,7 m/s2(hånd-arm metode; usikkerhet K = 1,5 m/s2).
Tekniske underlag hos: SKIL Europe BV (PT-SEU/PJE), 4825 BD Breda, NL.
CE TODISTUS STANDARDINMUKAISUUDESTA Todistamme täten ja vastaamme yksin siitä, että tämä tuote en allalueteltujen
standardien ja standardoimisasiakirjojen vaatimusten mukainen EN 61 029, EN 55 014, seuraavien sääntöjen mukaisesti
2006/95/EY, 2004/108/EY, 98/37/EY (28.12.2009 asti), 2006/42/EY (29.12.2009 alkaen).
MELU/TÄRINÄ Mitattuna EN 61 029 mukaan työkalun melutaso on 95 dB(A) ja yleensä työkalun äänen voimakkuus on 108 dB(A)
(keskihajonta: 3 dB), ja tärinän voimakkuus 2,7 m/s2(käsi-käsivarsi metodi; epävarmuus K = 1,5 m/s2).
Tekninen tiedosto kohdasta: SKIL Europe BV (PT-SEU/PJE), 4825 BD Breda, NL.
CE DECLARACION DE CONFORMIDAD Declaramos bajo nuestra sola responsabilidad que este producto está en conformidad
con las normas o documentos normalizados siguientes: EN 61 029, EN 55 014, de acuerdo con las regulaciones 2006/95/CE,
2004/108/CE, 98/37/CE (hasta el 28.12.2009), 2006/42/CE (a partir del 29.12.2009).
RUIDOS/VIBRACIONES Medido según EN 61 029 el nivel de la presión acústica de esta herramienta se eleva a 95 dB(A) y el nivel de
la potencia acústica 108 dB(A) (desviación estándar: 3 dB), y la vibración a 2,7 m/s2(método brazo-mano; incertidumbre K = 1,5 m/s2).
Expediente técnico en: SKIL Europe BV (PT-SEU/PJE), 4825 BD Breda, NL.
GB
F
D
NL
S
N
FIN
E
08 SKIL Europe BV A. v.d. Kloot
DK

154
08 SKIL Europe BV A. v.d. Kloot
ЗАЯВЛЕНИЕ О СООТВЕТСТВИИ Мы с полной ответственностыо заявляем, что это изделие соответствует следующим
стандартам или станда ртизованным документам: EN 61 029, EN 55 014, в соответсувии с инструкциями 2006/95/EC,
2004/108/EC, 98/37/EC (до 28.12.2009), 2006/42/EC (начиная с 29.12.2009).
ШУМНОСТИ/ВИБРАЦИИ При измерении в соответствии co стандартoм EN 61 029 уровень звукового давления для этого
инструмента составляет 95 дБ (A) и уровeнь звуковой мощности - 108 дБ (A) (стандартное отклонение: 3 dB), и вибрации -
2,7 м/с2(по методу для рук; недостоверность K = 1,5 м/с2).
Техническая документация у: SKIL Europe BV (PT-SEU/PJE), 4825 BD Breda, NL.
RU
CE ВІДПОВІДНІСТЬ Ми заявляємо, що відповідність даного продукту наступним стандартам і регулюючим документам
повністю нашою відповідальністю: EN 61 029, EN 55 014, відповідно до положень директив 2006/95/EG, 2004/108/EG,
98/37/EG до 28.12.2009 p.), 2006/42/EG (після 29.12.2009 p.).
ШУМ/ВІБРАЦІЯ Зміряний відповідно до EN 61 029 рівень тиску звуку даного інструменту 95 дБ(А) i потужність звуку
108 дБ(А) (стандартне відхилення: 3 дБ), i вібрація 2,7 м/с2(ручна методика; похибка K = 1,5 м/с2).
Технічні документи в: SKIL Europe BV (PT-SEU/PJE), 4825 BD Breda, NL.
UA
CE ∆ΗΛΩΣΗ ΣYMBATOTΗΤΑΣ ∆ηλώνουµε υπευθύνως τι το προϊν αυτ είναι κατασκευασµένο σύµφωνα µε τους εξής
κανονισµούς ή κατασκευαστικές συστάσεις: EN 61 029, EN 55 014, κατά τις διατάξεις των κανονισµών της Κοινής Αγοράς
2006/95/EK, 2004/108/EK, 98/37/EK (έως 28.12.2009), 2006/42/EK (απ 29.12.2009).
ΘΟΡYΒΟ/ΚΡΑ∆ΑΣΜΟYΣ Μετρηµένη σύµφωνα µε EN 61 029 η στάθµη ακουστικής πίεσης αυτού του εργαλείου ανέρχεται
σε 95 dB(A) και η στάθµη ηχητικής ισχύoς σε 108 dB(A) (κοινή απκλιση: 3 dB), και ο κραδασµς σε 2,7 m/s2(µεθοδος
χειρς/βραχίονα - ανασφάλεια K = 1,5 m/s2).
Τεχνικς φάκελος απ: SKIL Europe BV (PT-SEU/PJE), 4825 BD Breda, NL.
GR
OÂWIADCZENIE ZGODNOÂCI CE Niniejszym oÊwiadczamy ponoszàc osobistà odpowiedzialnoÊç, ˝e produkt wykonany jest
zgodnie z nast´pujàcymi normami i dokumentami normalizujàcymi: EN 61 029, EN 55 014, z godnie z wytycznymi 2006/95/EU,
2004/108/EU, 98/37/EU (do 28.12.2009), 2006/42/EU (od 29.12.2009).
HA¸ASU/WIBRACJE Pomiarów dokonano zgodnie z normà EN 61 029 ciÊnienie akustyczne narz´dzia wynosi 95 dB(A) zaÊ poziom
mocy akustycznej 108 dB(A) (poziom odchylenie: 3 dB), zaÊ wibracje 2,7 m/s2(metoda d∏oƒ-r´ka; b∏àd pomiaru K = 1,5 m/s2).
Dokumentacja techniczna: SKIL Europe BV (PT-SEU/PJE), 4825 BD Breda, NL.
PL
CE DECLARAÇÃO DE CONFIRMIDADE Declaramos sob nossa exclusiva responsabilidade que este producto cumpre as
seguintes normas ou documentos normativos: EN 61 029, EN 55 014, conforme as disposições das directivas 2006/95/CE,
2004/108/CE, 98/37/CE (até 28.12.2009), 2006/42/CE (a partir de 29.12.2009).
RUÍDO/VIBRAÇÕES Medido segundo EN 61 029 o nível de pressão acústica desta ferramenta é 95 dB(A) e o nível de potência
acústica 108 dB(A) (espaço de erro: 3 dB), e a vibração 2,7 m/s2(método braço-mão; incerteza K = 1,5 m/s2).
Processo técnico em: SKIL Europe BV (PT-SEU/PJE), 4825 BD Breda, NL.
P
CE DICHIARAZIONE DI CONFORMITÀ Dichiaramo, assumendo la piena responsabilità di tale dichiarazione, che il prodotto è
conforme alle seguenti normative e ai relativi documenti: EN 61 029, EN 55 014 in base alle prescrizioni delle direttive 2006/95/EG,
2004/108/EG, 98/37/EG (fino al 28.12.2009), 2006/42/EG (a partire dal 29.12.2009).
RUMOROSITÀ/VIBRAZIONE Misurato in conformità al EN 61 029 il livello di pressione acustica di questo utensile è 95 dB(A) ed il livello
di potenza acustica 108 dB(A) (deviazione standard: 3 dB), e la vibrazione 2,7 m/s2(metodo mano-braccio; incertezza K = 1,5 m/s2).
Fascicolo tecnico presso: SKIL Europe BV (PT-SEU/PJE), 4825 BD Breda, NL.
I
CE MINÖSÉGI TANUSITVANY Teljes felelösségünk tudatában kijelentjük, hogy jelen termék a következö szabványoknak vagy
kötelezö hatósági elöírásoknak megfelel: EN 61 029, EN 55 014, a 2006/95/EK, 2004/108/EK, 98/37/EK (2009.12.28-ig), 2006/42/EK
(2009.12.29-tŒl kezdve) elöírásoknak megfelelöen.
ZAJ/REZGÉS Az EN 61 029 alapján végzett mérések szerint ezen készülék hangnyomás szintje 95 dB(A) a hangteljesítmény szintje
108 dB(A) (normál eltérés: 3 dB), a rezgésszám 2,7 m/s2 (kézre-ható érték; szórás K = 1,5 m/s2).
A mıszaki dokumentáció a következŒ helyen található: SKIL Europe BV (PT-SEU/PJE), 4825 BD Breda, NL.
H
CE STRVZUJÍCÍ PROHLÅ◊ENÍ Potvrzujeme na odpovπdnost, Ωe tento v¥robek odpovídå nåsledujícím normåm nebo normativním
podkladüm: EN 61 029, EN 55 014, podle ustanovení smπrnic 2006/95/ES, 2004/108/ES, 98/37/ES (do 28.12.2009), 2006/42/ES (od
29.12.2009).
HLUÇNOSTI/VIBRACÍ Mπ®eno podle EN 61 029 çiní tlak hlukové vlny tohoto p®ístroje 95 dB(A) a dávka hluçnosti 108 dB(A)
(standardní odchylka: 3 dB), a vibrací 2,7 m/s2(metoda ruka-paΩe; nepfiesnost K = 1,5 m/s2).
Technická dokumentace u: SKIL Europe BV (PT-SEU/PJE), 4825 BD Breda, NL.
CZ
CE STANDARDIZASYON BEYANI Ye¤ane sorumlu olarak, bu ürünün afla¤ıdaki standartlara veya standart belgelerine uygun
oldu¤unu beyan ederiz: EN 61 029, EN 55 014, yönetmeli¤i hükümleri uyarınca 2006/95/EG, 2004/108/EG, 98/37/EG (28.12.2009
tarihine kadar), 2006/42/EG (29.12.2009 tarihinden itibaren).
GÜRÜLTÜ//T‹TREfiIM Ölçülen EN 61 029 göre ses basıncı bu makinanın seviyesi 95 dB(A) ve çal›flma s›ras›ndaki gürültü 108 dB(A)
(standart sapma: 3 dB), ve titreflim 2,7 m/s2(el-kol metodu; tolerans K = 1,5 m/s2).
Teknik belgelerin bulundu¤u merkez: SKIL Europe BV (PT-SEU/PJE), 4825 BD Breda, NL.
TR

155
08 SKIL Europe BV A. v.d. Kloot
DECLARAØIE DE CONFORMITATE CE Declaråm pe proprie råspundere cå acest product este conform cu urmåtoarele standarde
sau documente standardizate: EN 61 029, EN 55 014, în conformitate cu regulile 2006/95/CE, 2004/108/CE, 98/37/CE (pânå la
28.12.2009), 2006/42/CE (începând cu 29.12.2009).
ZGOMOT/VIBRAØII Måsurat în conformitate cu EN 61 029 nivelul de presiune a sunetului generat de acest instrument este de
95 dB(A) iar nivelul de putere a sunetului 108 dB(A) (abaterea standard: 3 dB), iar nivelul vibraøiilor 2,7 m/s2(metoda mînå - braø;
incertitudine K = 1,5 m/s2).
Documentaøie tehnicå la: SKIL Europe BV (PT-SEU/PJE), 4825 BD Breda, NL.
RO
CE ДЕKЛАPAЦИЯ ЗA CБOTВETCTBИE Декларираме на изцяло наша отговорност, че това изделие е съобразено със
следните стандарти или стандартизирани документи: EN 61 029, EN 55 014, в съответствие с нормативната уредба на
2006/95/EG, 2004/108/EG, 98/37/EG (до 28.12.2009), 2006/42/EG (от 29.12.2009).
ШУМ/ВИБPAЦИИ Измерено в съответствие с EN 61 029 нивото на звуково налягане на този инструмент е 95 dB(A) а
нивото на звукова мощност е 108 dB(A) (стандартно отклонение: 3 dB), а вибрациите са 2,7 m/s2(метод ръка-рамо;
неопределеност K = 1,5 m/s2).
Подробни технически описания при: SKIL Europe BV (PT-SEU/PJE), 4825 BD Breda, NL.
BG
CE IZJAVA O USKLA ĐENOSTI Izjavljujemo uz punu odgovornost da je ovaj proizvod usklađen sa slijedeçim normama i
normativnim dokumentima: EN 61 029, EN 55 014, prema odredbama smjernica 2006/95/EG, 2004/108/EG, 98/37/EG (do
28.12.2009), 2006/42/EG (od 29.12.2009).
BUCI/ VIBRACIJAMA Mjereno prema EN 61 029, prag zvuãnog tlaka ovog elektriãnog alata iznosi 95 dB(A) a jakost zvuka
108 dB(A) (standardna devijacija: 3 dB), a vibracija 2,7 m/s2(postupkom na ‰aci-ruci; nesigurnost K = 1,5 m/s2).
Tehniãka dokumentacija se moÏe dobiti kod: SKIL Europe BV (PT-SEU/PJE), 4825 BD Breda, NL.
HR
CE IZJAVA O USKLA ĐENOSTI Pod punom odgovorno‰çu izjavljujemo da je ovaj proizvod usklađen sa sledeçim standardima ili
standardizovanim dokumentima: EN 61 029, EN 55 014, u skladu sa odredbama smernica 2006/95/EG, 2004/108/EG, 98/37/EG (do
28.12.2009), 2006/42/EG (od 29.12.2009).
BUKA/VIBRACIJE Mereno u skladu sa EN 61 029, nivo pritiska zvuka ovog alata iznosi 95 dB(A), a jaãina zvuka 108 dB(A)
(normalno odstupanje: 3 dB), a vibracija 2,7 m/s2(mereno metodom na ‰aci-ruci; nesigurnost K = 1,5 m/s2).
Tehniãka dokumentacija kod: SKIL Europe BV (PT-SEU/PJE), 4825 BD Breda, NL.
SRB
IZJAVA O USTREZNOSTI CE Odgovorno izjavljamo, da je ta izdelek v skladu z naslednjimi standardi ali standardnimi dokumenti:
EN 61 029, EN 55 014, v skladu s predpisi navodil 2006/95/ES, 2004/108/ES, 98/37/ES (do 28.12.2009), 2006/42/ES (od 29.12.2009).
HRUP/VIBRACIJA Izmerjeno v skladu s predpisom EN 61 029 je raven zvoãnega pritiska za to orodje 95 dB(A) in jakosti zvoka
108 dB(A) (standarden odmik: 3 dB), in vibracija 2,7 m/s2 (metoda ‘dlan-roka’; netoãnost K = 1,5 m/s2).
Tehniãna dokumentacija se nahaja pri: SKIL Europe BV (PT-SEU/PJE), 4825 BD Breda, NL.
SLO
CE VASTAVUSDEKLARATSIOON Kinnitame ainuvastutajana, et see toode vastab järgmistele standarditele või
normdokumentidele: EN 61 029, EN 55 014 vastavalt direktiivide 2006/95/EÜ, 2004/108/EÜ, 98/37/EÜ (kuni 28.12.2009),
2006/42/EÜ (alates 29.12.2009) nõuetele.
MÜRA/VIBRATSIOON Vastavalt kooskõlas normiga EN 61 029 läbi viidud mõõtmistele on antud seadme helirõhk 95 dB(A) ja
helitugevus 108 dB(A) (standardkõrvalekalle: 3 dB), ja vibratsioon 2,7 m/s2(käe-randme-meetod; mõõtemääramatus K = 1,5 m/s2).
Tehniline toimik saadaval aadressil: SKIL Europe BV (PT-SEU/PJE), 4825 BD Breda, NL.
EST
CE DEKLARÅCIJA PAR ATBILST±BU STANDARTIEM Mïs ar pilnu atbild¥bu pazi¿ojam, ka ‰is izstrÇdÇjums atbilst standartiem vai
standartizÇcijas dokumentiem EN 61 029, EN 55 014 un ir saska¿Ç ar direkt¥vÇm 2006/95/ES, 2004/108/ES, 98/37/ES (l¥dz
28.12.2009) un 2006/42/ES (no 29.12.2009).
TROKSNIS/VIBRÅCIJA Saska¿Ç ar standartu EN 61 029 noteiktais instrumenta rad¥tÇ trok‰¿a ska¿as spiediena l¥menis ir 95 dB(A)
un ska¿as jaudas l¥menis ir 108 dB (A) (pie tipiskÇs izkliedes: 3 dB), un vibrÇcijas intensitÇte ir 2,7 m/s2(strÇdÇjot rokas reÏ¥mÇ;
izkliede K = 1,5 m/s2).
TehniskÇ lieta no: SKIL Europe BV (PT-SEU/PJE), 4825 BD Breda, NL.
LV
CE ATITIKTIES DEKLARACIJA Mes atsakingai parei‰kiame, kad ‰is gaminys atitinka tokius standartus ir normatyvinius
dokumentus: EN 61 029, EN 55 014 pagal reglament˜ 2006/95/EB, 2004/108/EB, 98/37/EB (iki 2009-12-28), 2006/42/EB
(nuo 2009-12-29) nuostatas.
TRIUK·MINGUMAS/VIBRACIJA ·io prietaiso triuk‰mingumas buvo i‰matuotas pagal EN 61 029 reikalavimus keliamo triuk‰mo
garso slògio lygis siekia 95 dB(A) ir akustinio galingumo lygis 108 dB(A) (standartinis nuokrypis: 3 dB), ir vibracijos pagreitis rankos
pla‰takos srityje tipiniu atveju yra maÏesnis, kaip 2,7 m/s2(paklaida K = 1,5 m/s2).
Techninò byla laikoma: SKIL Europe BV (PT-SEU/PJE), 4825 BD Breda, NL.
LT
CE PREHLÁSENIE O ZHODE Vÿhradne na na√u vlastnú zodpovednos† prehlasujeme, Ωe tento vÿrobok zodpovedá nasledujúcim
normám alebo normovanÿm dokumentom: EN 61 029, EN 55 014, v súlade s predpismi 2006/95/EG, 2004/108/EG, 98/37/EG (do
28.12.2009), 2006/42/EG (od 29.12.2009).
HLUKU/VIBRÁCIÁCH Merané pod¬a EN 61 029 je úroveµ akustického tlaku tohto nástroja 95 dB(A) a úroveµ akustického vÿkonu je
108 dB(A) (√tandardná odch¥lka: 3 dB), a vibrácie sú 2,7 m/s2(metóda ruka - paΩa; nepresnosÈ K = 1,5 m/s2).
Súbor technickej dokumentácie sa nachádzajú na adrese: SKIL Europe BV (PT-SEU/PJE), 4825 BD Breda, NL.
SK
Other manuals for Masters 3100
1
Table of contents
Other Skil Saw manuals
Popular Saw manuals by other brands

General International
General International 90-140 M1 Setup & operation manual

Norton
Norton GC55 owner's manual

Powermatic
Powermatic HPS67 features and benefits

EINHELL
EINHELL TE-TS 315 U operating instructions

Porter-Cable
Porter-Cable Model 548 instruction manual

Charnwood
Charnwood W616 operating instructions