manuals.online logo
Brands
  1. Home
  2. •
  3. Brands
  4. •
  5. SKS Germany
  6. •
  7. Bicycle Accessories
  8. •
  9. SKS Germany 11610 User manual

SKS Germany 11610 User manual

GERMANY
123456
VORNE/FRONT
0 BAR / 0 PSI
1. 1.
1.
2.
2.
MAX.
MAX.
2.
MAX.
2.1.
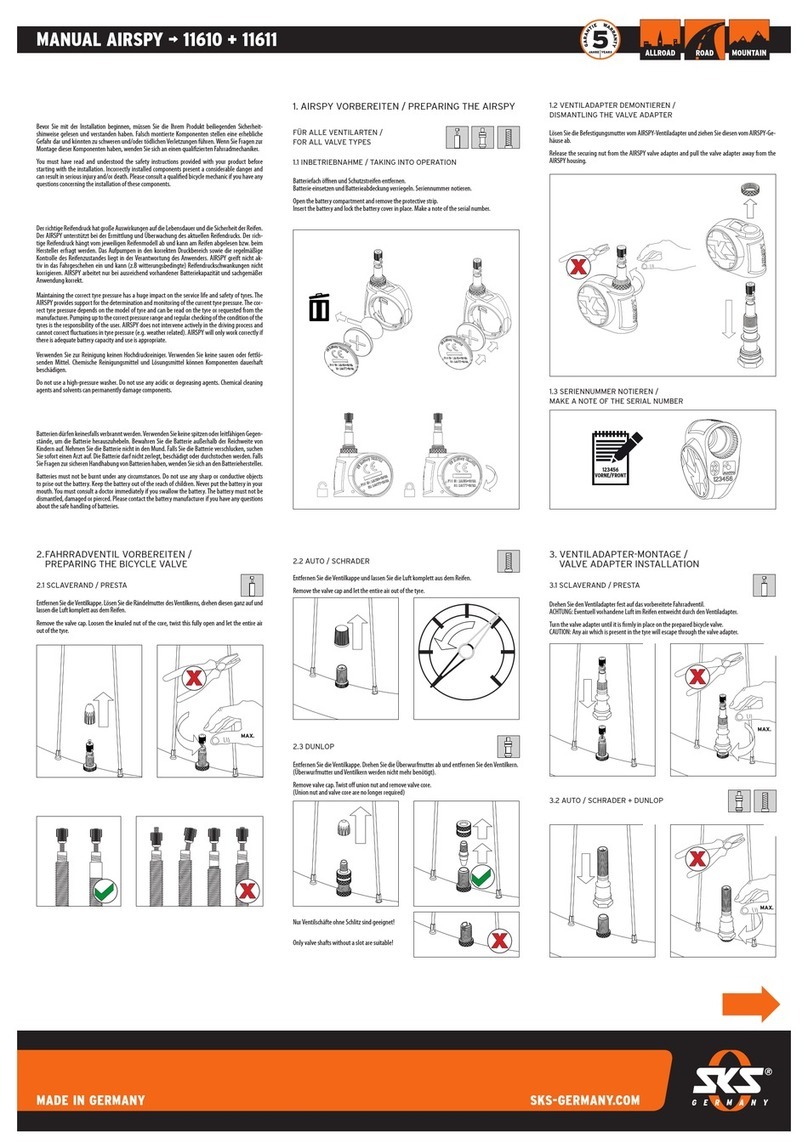
MANUAL ¬ AIRSPY ¬ 11610 + 11611
ALLROAD ROAD MOUNTAIN
You must have read and understood the safety instructions provided
with your product before starting with the installation. Incorrectly installed
components present a considerable danger and can result in serious injury
and/or death. Please consult a qualied bicycle mechanic if you have any
questions concerning the installation of these components.
Release the securing nut from the AIRSPY valve adapter and pull
the valve adapter away from the AIRSPY housing.
Maintaining the correct tyre pressure has a huge impact on the service life
and safety of tyres. The AIRSPY provides support for the determination and
monitoring of the current tyre pressure. The correct tyre pressure depends
on the model of tyre and can be read on the tyre or requested from the man-
ufacturer. Pumping up to the correct pressure range and regular checking
of the condition of the tyres is the responsibility of the user. AIRSPY does
not intervene actively in the driving process and cannot correct uctuations
in tyre pressure (e.g. weather related). AIRSPY will only work correctly if
there is adequate battery capacity and use is appropriate. Do not use a
high-pressure washer. Do not use any acidic or degreasing agents. Chem-
ical cleaning agents and solvents can permanently damage components.
Batteries must not be burnt under any circumstances. Do not use any sharp
or conductive objects to prise out the battery. Keep the battery out of the
reach of children. Never put the battery in your mouth. You must consult
a doctor immediately if you swallow the battery. The battery must not be
dismantled, damaged or pierced. Please contact the battery manufacturer
if you have any questions about the safe handling of batteries.
SAFETY INSTRUCTIONS
NOTE
WARNING
!
1. preparing the AIRSPY 1.2 Dismantling the valve adapter
1.1 Taking Iinto operation
Open the battery compartment and remove the protective strip.
Insert the battery and lock the battery cover in place.
Make a note of the serial number.
1.3 Make a note of the serial number
For all valve types
Remove the valve cap
and let the entire air out of the tyre.
2.2 AUTO / SCHRADER
Remove the valve cap. Loosen the knurled nut of the core, twist this
fully open and let the entire air out of the tyre.
Turn the valve adapter until it is rmly in place on the prepared
bicycle valve.
CAUTION: Any air which is present in
the tyre will escape through the valve adapter.
2.Preparing the bicycle valve 3. Valve adapter installation
2.1 SCLAVERAND / PRESTA 3.1 SCLAVERAND / PRESTA
3.2 AUTO / SCHRADER + DUNLOP
Remove valve cap. Twist off union nut and remove valve core.
(Union nut and valve core are no longer required)
CAUTION:
Only valve shafts
without a slot are suitable!
2.3 DUNLOP
MAX.
GERMANY
1.
MAX.
1.
3.
2.
4.
1 - 50 mm
3. 4.
5.
7.
9.
8.
6.
2.
BAR/PSI
MAX. 8,3 BAR / 120 PSI
MAX.
MAX.
0°C/32°F
z.B./e.g.: 1,85 BAR/26,8 PSI
40°C/104°F
z.B./e.g.: 2,15 BAR/31,2 PSI
20°C/68°F
z.B./e.g.:
2 BAR/29 PSI
Indoor
Outdoor
MANUAL ¬ AIRSPY ¬ 11610 + 11611
ALLROAD ROAD MOUNTAIN
The AIRSPY sensor housing should be tted in line with the spokes
and direction of travel of the bicycle to the extent that this is possi-
ble. The AIRSPY sensor housing can be rotated in small 10° steps
for this purpose.
Release the knurled nut of the AIRSPY valve core and open it
completely. Place the pump head completely on the AIRSPY valve
adapter and move the locking lever down. Pump the tyre up to the
desired pressure. Unlock the pump head and pull it away from the
AIRSPY valve adapter. Turn the knurled nut of the AIRSPY valve
core until it is tightly in position. Replace the valve cap.
4.AIRSPY Sensor housing installation
For all valve types
6.Setting tyre pressure 6.1 SCLAVERAND / PRESTA
GERMANY
Find out which anti-theft bracket length will t between the AIRSPY
and the spoke. Wrap the open end of the anti-theft bracket round
the spoke and place the other end on the AIRSPY sensor housing.
Fit the securing nut rmly on the valve adapter.
5.AIRSPY Anti-theft bracket installation Distance from AIRSPY to rim
For all valve types
The inuence that the temperature has on the tyre pressure:
The air temperature has a noticeable inuence on the tyre pressure.
A temperature increase of 1°C results in a pressure increase of
1/273 of the pressure that exists at 0°C. This should be taken into
account when adjusting the tyre pressure.
For example:
DIRECTION OF
TRAVEL
DIRECTION OF TRAVEL
GERMANY
MAX.
1.
3.
5.
7.
6.
2.
4.
TUBELESS
MAX. 8,3 BAR / 120 PSI
BAR/PSI
DICHTMITTEL
SEALANT
DICHTMITTEL
SEALANT
MANUAL ¬ AIRSPY ¬ 11610 + 11611
ALLROAD ROAD MOUNTAIN
For all valve types
Make sure that any dirt is removed from the AIRSPY sensor hous-
ing. Use a suitable coin to turn the battery cover through approx.
20 degrees anti-clockwise until the upper point on the battery cov-
er is aligned with the marking on the sensor housing. Remove the
battery cover and take out the empty battery.
The AIRSPY measures the tyre pressure during the journey and dis-
plays it on the SKS MYBIKE app, which is available free of charge
in the app stores.
DISPLAY ON GARMIN DEVICES
The AIRSPY Connect IQ app can be installed on a compatible de-
vice via the Garmin Connect IQ Store at https://apps.garmin.com
or the Garmin Connect Smartphone app, which is available in the
app stores. A list of compatible devices can be found there as well.
Instructions for using the AIRSPYs on a GARMIN device and for
connecting to the app can be found at https://www.sks-germany.
com/en/products/airspy-sv/ -> Manual
USING THE AIRSPY
The AIRSPY must be switched on so that a connection with the dis-
play device can be made. Move the running wheel to switch on the
AIRSPY. The AIRSPY switches off automatically after 10 minutes if
the bicycle is not moved. The data which are sent from AIRSPY to
the app are not saved by the SKS MYBIKE app.
Insert a new CR2032 battery into the sensor housing with the posi-
tive terminal facing the battery lid, t the battery cover and twist it in
a clockwise direction until the markings line up.
8.Battery change SKS MYBIKE APP
Place the pump head completely on the AIRSPY valve adapter and
move the locking lever down. Pump the tyre up to the desired pres-
sure. Unlock the pump head and pull it away from the AIRSPY valve
adapter. Screw on the valve cap.
The AIRSPY assembly must be removed from the valve shaft and
the Presta valve core of the bicycle valve must be unscrewed before
the tyre is lled with tubeless sealant through the valve shaft. Once
the tyre has been lled with sealant, re-insert the Presta valve core
and use the Presta valve tool to tighten it so that it is hand tight.
7.Filling with tubeless sealant
6.2 AUTO / SCHRADER + DUNLOP
SCLAVERAND / PRESTA

This manual suits for next models

1

Other SKS Germany Bicycle Accessories manuals

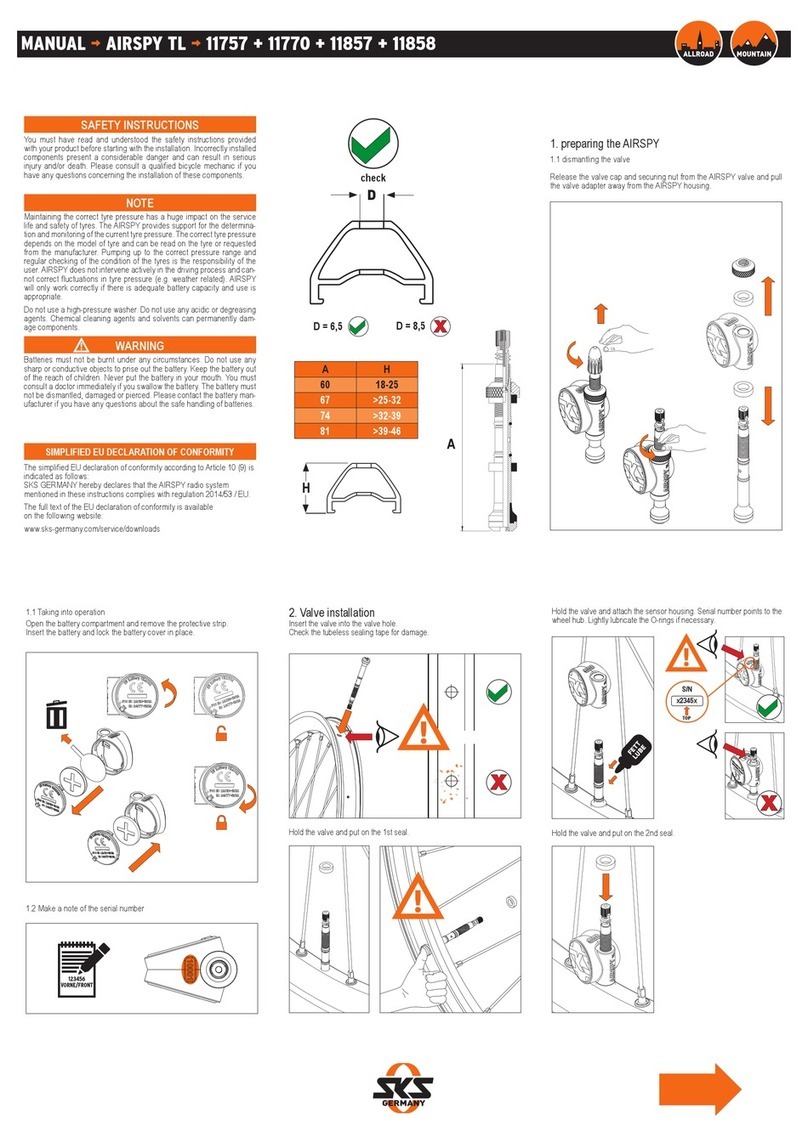
SKS Germany AIRSPY TL User manual

SKS Germany

SKS Germany AIRSPY TL User manual

SKS Germany KONUS 2.0 MOUNTING SYSTEM User manual

SKS Germany

SKS Germany KONUS 2.0 MOUNTING SYSTEM User manual

SKS Germany Mountain 11606 User manual

SKS Germany

SKS Germany Mountain 11606 User manual

SKS Germany AIRSPY 11610 User manual

SKS Germany

SKS Germany AIRSPY 11610 User manual

SKS Germany AIRCHECKER 10001 User manual

SKS Germany

SKS Germany AIRCHECKER 10001 User manual

SKS Germany 11949 User manual

SKS Germany

SKS Germany 11949 User manual

SKS Germany COMPIT User manual

SKS Germany

SKS Germany COMPIT User manual

SKS Germany COMPIT/E User manual

SKS Germany

SKS Germany COMPIT/E User manual

SKS Germany COMPIT User manual

SKS Germany

SKS Germany COMPIT User manual

SKS Germany INFINITY UNIVERSAL User manual

SKS Germany

SKS Germany INFINITY UNIVERSAL User manual

SKS Germany S-BOARD User manual

SKS Germany

SKS Germany S-BOARD User manual

SKS Germany COMPIT User manual

SKS Germany

SKS Germany COMPIT User manual

Popular Bicycle Accessories manuals by other brands

Wintec Ego WBC 300 Plus instruction manual

Wintec

Wintec Ego WBC 300 Plus instruction manual

Specialized S-WORKS CARBON HARDTAIL Instruction guide

Specialized

Specialized S-WORKS CARBON HARDTAIL Instruction guide

Emos XC-122 manual

Emos

Emos XC-122 manual

Flyer Intelligent Technology Panasonic instructions

Flyer

Flyer Intelligent Technology Panasonic instructions

Cateye DUAL CC-DU1OO user manual

Cateye

Cateye DUAL CC-DU1OO user manual

MAXTEK 79004 user guide

MAXTEK

MAXTEK 79004 user guide

Dedacciai Strada NERISSIMO owner's manual

Dedacciai Strada

Dedacciai Strada NERISSIMO owner's manual

DAHON TOURNADO PACKING - 2009 manual

DAHON

DAHON TOURNADO PACKING - 2009 manual

Evelo Atlas Assembly

Evelo

Evelo Atlas Assembly

Ergon GP1 Evo Installation and user instructions

Ergon

Ergon GP1 Evo Installation and user instructions

NiteRider Evolution user guide

NiteRider

NiteRider Evolution user guide

Xplova X3 quick start

Xplova

Xplova X3 quick start

Look CARBON FORK Mounting instructions

Look

Look CARBON FORK Mounting instructions

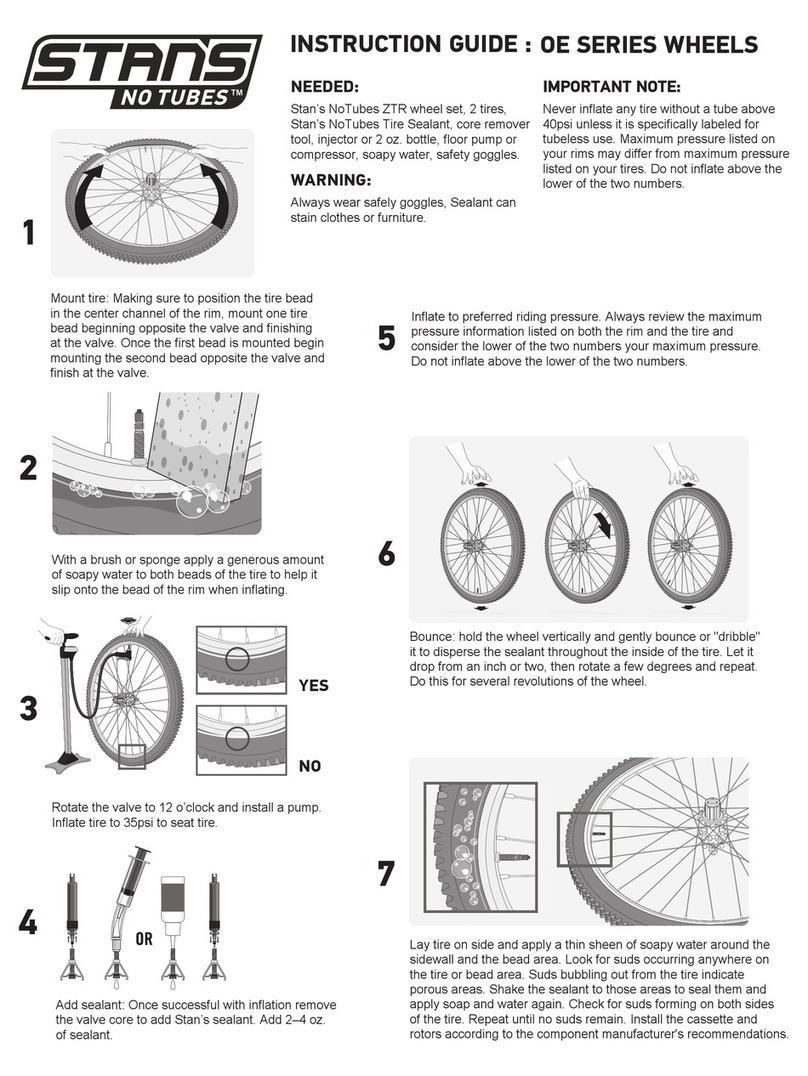
Stan's NoTubes OE Series Instruction guide

Stan's

Stan's NoTubes OE Series Instruction guide

SR Suntour RUX RC2 DH Setup guide

SR Suntour

SR Suntour RUX RC2 DH Setup guide

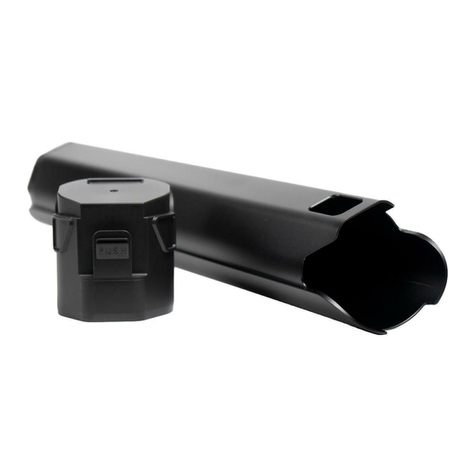
FAZUA Evation 1.0 Original instructions

FAZUA

FAZUA Evation 1.0 Original instructions

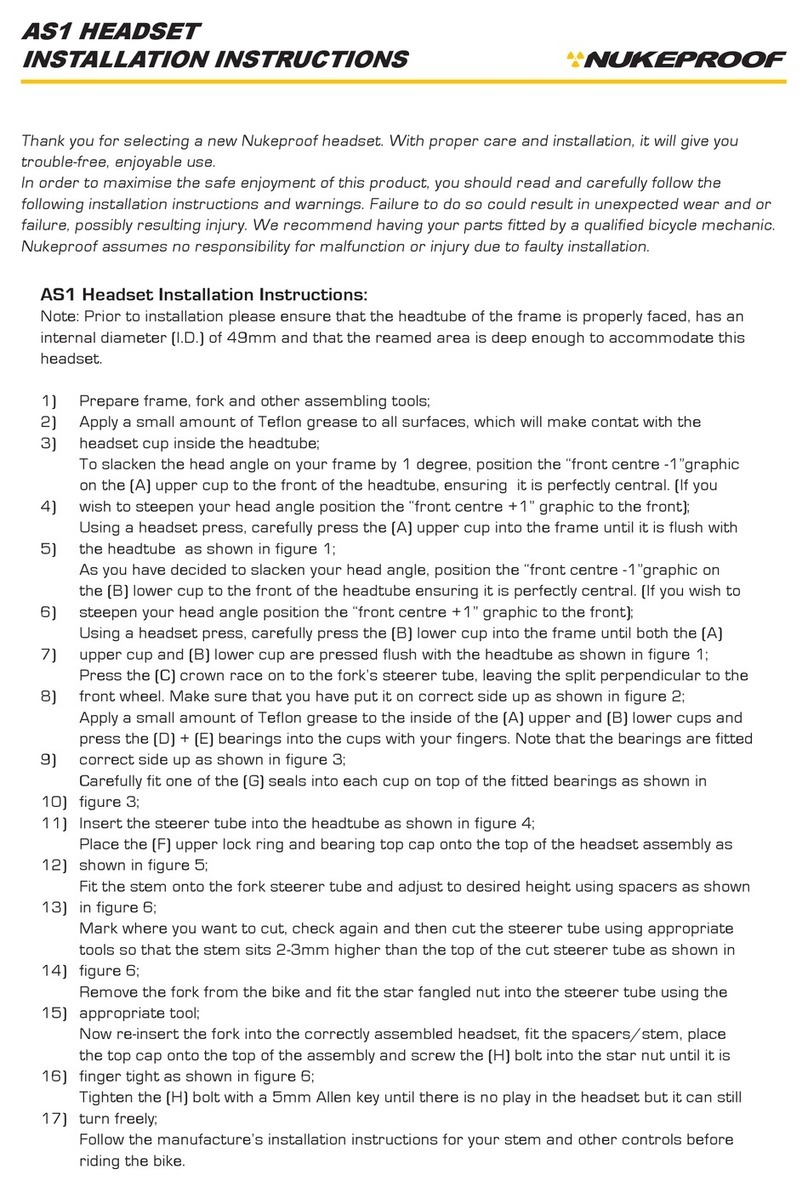
Nukeproof AS1 HEADSET installation instructions

Nukeproof

Nukeproof AS1 HEADSET installation instructions

DT SWISS O.L Technical manual

DT SWISS

DT SWISS O.L Technical manual

manuals.online logo
manuals.online logoBrands
  • About & Mission
  • Contact us
  • Privacy Policy
  • Terms and Conditions

Copyright 2025 Manuals.Online. All Rights Reserved.