Ergon GP1 Evo Guide
ERG_MAN_GP1_EVO_03_2023
Ergon Bike Ergonomics, RTI Sports GmbH, Am Autobahnkreuz 7, 56072 Koblenz / Germany, T +49 (0) 261 899998-28, F +49 (0) 261 899998-19,
[email protected], www.ergonbike.com. Ergon®is a worldwide trademark. Ergon reserve the right to change any products without prior notice.
Subject to misprints, errors and changes. Made in Germany.
(DE) Montage-/ Bedienungsanleitung – GP1 Evo Fahrrad-Lenkergrie
(EN) Installation and User Instructions – GP1 Evo Bicycle Grips
(FR) Instructions d’installation et d’utilisation – GP1 Evo Poignée de vélo
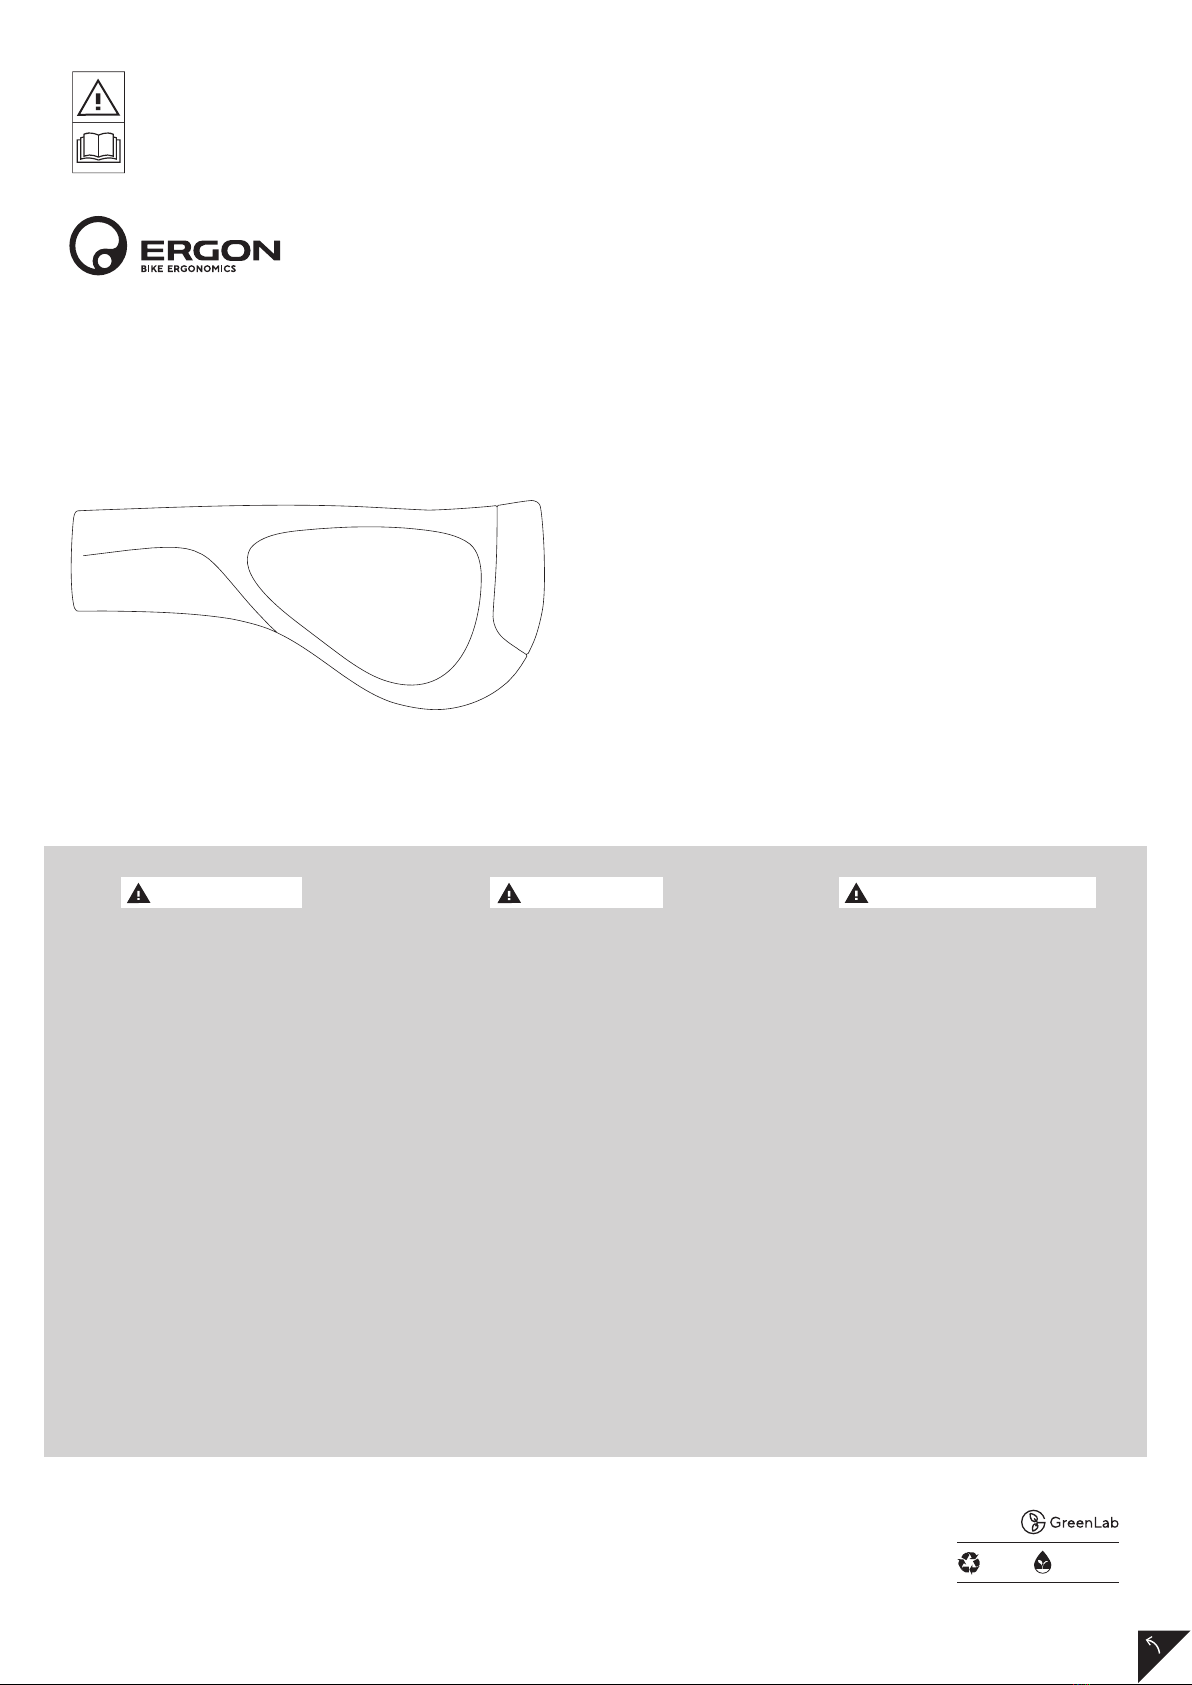
GP1 Evo
(DE) Warnung: Das Nichtbeachten der Warnhinweise in dieser
Anleitung kann Ihr Leben / Ihre Gesundheit gefährden.
(EN) Warning: Failure to follow the warning notices in these
instructions could lead to injury or endanger your life.
(FR) Avertissement: Le non-respect des avertissements présents
dans ce mode d’emploi peut entraîner des blessures graves ou
mortelles.
Diese Fahrrad-Lenkergrie müssen fachgerecht
montiert werden. Fragen Sie im Zweifelsfall eine
Fachwerkstatt.
Die Grie sind ausschließlich für die Montage an
Fahrrädern freigegeben. Von derVerwendung an
anderen Fahrzeugen, Geräten oder Gegenständen wird
ausdrücklich abgeraten – Unfallgefahr!
Jegliche Modikationen dieses Produkts sind unzulässig
und können unter Umständen ihre Sicherheit oder sogar
ihr Leben gefährden. Ein Sachmängelanspruch ist nach
einem unsachgemäßen Gebrauch (Modikation des
Produktes, Nichteinhalten derWarnhinweise dieser
Anleitung) nicht gegeben.
Bewahren Sie diese Anleitung nach der Montage zum
späteren Nachschlagen an einem sicheren Ort auf. Soll-
ten Sie dieses Produkt an eine dritte Person weiterge-
ben, so ist diese Anleitung oder eine Kopie beizulegen.
Bei Verlust kann die Anleitung unter
www.ergonbike.com heruntergeladen werden.
Bitte lesen Sie diese Anleitung
sorgfältig durch. Bei Fehlmontage
droht Sturzgefahr.
Please read these instructions
carefully. Failure to do so may lead
to injury.
Pour prévenir toute blessure, lire
attentivement les consignes qui
suivent.
These bicycle grips should be professionally tted. If
in doubt please consult a professional bicycle retailer.
This product is only suitable and intended to be used on
a bicycle. Use on other vehicles / for other purposes is
speci cally advised against and may result in injury.
This product must not be modi ed in any way. Doing so
may endanger your safety or life. The product warranty
does not cover modi ed products, or products used in a
way not intended or set out in this document. Failure to
follow all instructions will invalidate the warranty.
Please keep these instructions in a safe place to refer to
at a later date. Should you pass the product on to a third
person, please include these instructions or a copy
thereof. Should you misplace these instructions, a copy
can be downloaded at www.ergonbike.com.
Ces grips pour guidon de vélo doivent être montés
correctement. En cas de doute, adressez-vous à un
atelier spécialisé.
Ces grips pour guidon de vélo sont exclusivement vali-
dés pour un montage sur des vélos. Il est formellement
déconseillé de les utiliser sur d‘autres véhicules, ap-
pareils ou objets - risques d‘accident!
Toute modi cation de ce produit est interdite et peut le
cas échéant mettre en péril votre sécurité, voire votre
vie. Un emploi non conforme (modi cation du produit,
nonrespect des avertissements présents dans le présent
mode d‘emploi) supprime tout droit à la garantie.
Conservez ce mode d‘emploi en lieu sûr après le monta-
ge a n de pouvoir le consulter ultérieurement. Si vous
devez transmettre ce produit à une tierce personne,
veuillez y joindre le présent mode d‘emploi ou une copie.
En cas de perte, le mode d‘emploi peut être téléchargé
sur www.ergonbike.com.
(DE) (FR)(EN)
WARNUNG WARNING AVERTISSEMENT
100%
Paper
Printed
with Soy Ink
Please recycle

Erklärung Zeichen / Symbole in dieser Anleitung:
Schenken Sie den folgenden Symbolen besondere Beachtung bei der Montage.
Warnung: Dieses Symbol verweist auf einen wichtigen Montageschritt,
dessen Nichtbefolgen Ihr Leben / Ihre Gesundheit gefährden kann.
Information: Dieses Symbol kennzeichnet Zusatzinformationen, z.B. über
die Handhabung des Produkts.
Die oben geschilderten möglichen Konsequenzen werden in der Anleitung nicht immer
wieder geschildert, wenn diese Symbole auftauchen.
Lenker-Voraussetzungen:
• Es dürfen nur Lenker verwendet werden, die vom Hersteller für Außenklemmungen
freigegeben sind, den angegebenen Drehmomenten standhalten und einen
Außendurchmesser von 22,2 mm aufweisen. Bedingt durch Fertigungstoleranzen bei
der Lenker-Produktion ist es möglich, dass sich die Grie teilweise schwer auf den
Lenker schieben lassen.
• Die Grie benötigen einen ungekrümmten Montagebereich von mindestens
127 mm – Standard-Variante (lange Grie)
127 / 102 mm – Single Twist Shift Variante(langer / kurzer Gri)
Sicherheitshinweise:
• Anzugsdrehmoment: 3 Nm – die Klemmschrauben dürfen nicht überdreht werden.
• Die Grie dürfen sich nach der Montage nicht mehr von Hand verdrehen lassen.
• Nach 50 km bzw. nach der ersten Fahrt die Klemmschrauben nachziehen und
danach regelmäßig auf festen Sitz prüfen.
• Nach Stürzen sind alle Bauteile auf Beschädigungen zu überprüfen und eventuell
auszutauschen. Bei Fragen wenden Sie sich an Ihren Fachhändler.
• Nicht für die Verwendung mit Carbon-Lenkern geeignet.
• Achten Sie bitte darauf, dass der Lenker im Montagebereich gründlich mit Alkohol
o.ä. entfettet ist. Bei der Montage keine Carbonpaste verwenden!
Nach der Montage / Testfahrt:
• Verdrehen sich die Lenkergrie trotz einer korrekten Montage, sollten Sie einen
Lenker mit angerauter Oberfläche einsetzen.
• Überprüfen Sie nach der Montage der Grie, ob die Bremsgrie und die Schaltungs-
betätigungen ohne Veränderung der Handhaltung erreichbar sind und ob Sie alle
Funktionen Ihres Fahrrads weiterhin ohne Einschränkung nutzen können.
• Die für Sie komfortabelste Stellung der Ergon Handgrie können Sie mit Hilfe der
aufgedruckten Skala ermitteln. Führen Sie nach einigen kurzen Testfahrten hierzu die
folgenden Schritte 3 bis 6 erneut aus und verändern Sie hierbei den Positions-Winkel
in kleinen Schritten.
Bitte lesen Sie diese Anleitung sorgfältig durch. Bei Fehlmontage droht Sturzgefahr.
Explanation of signs / symbols used in these instructions.
Please pay particular attention to the following symbols when mounting the product.
Warning: This symbol indicates an important step which must be
followed. Failure to do so could cause injury or death.
Information: This symbol indicates additional information, for example
about how to handle the product.
The explanation here serves as a description of the possible consequences of not
following the instructions. These consequences wont always be repeated when the
symbols are used.
Handlebar requirements:
• These grips are only compatible with a handlebar which has been certied for the
grips given torque. The handlebar must conform to the standard external diameter of
22.2 mm. Tolerances in the manufacture of handlebars may mean that the grips may
not slide easily onto the handlebar.
• The grip requires a straight clear area on the handlebars of a minimum of
127 mm – Standard Variant (long grips)
127 / 102 mm – Single Twist Shift Variant (long / short grip)
Safety precautions:
• Torque: 3 Nm (2.2 ft-lb) – do not overtighten.
• Grips must not rotate once tted.
• Re-check the torque setting following the rst ride / 50 km of riding and then check
periodically to ensure that the screws are not loosening.
• Following any crashes or impacts, please check the parts of the grips for damage.
Check to see that the parts are still secure. Replace if necessary. In the event of any
questions, please contact your local retailer.
• Not suitable for use with carbon bars.
• Please ensure that the bar is suitably cleaned using alcohol or other degreasers.
Do not use carbon paste when mounting!
After tting / Test ride:
• Should the grips turn on the bar despite being tted according to these instructions,
it may be necessary to replace the handlebar with one with a rougher nish in the
grip area.
• Before riding for the rst time, ensure that the function of the brakes and gears has
not been restricted without having to change your hand position and that
all functions of the bicycle can be used as normal.
• To nd a comfortable position of your Ergon handle grips, there is a scale printed on
the clamp. Make a short test ride, and repeat the following steps 3 - 6 each time
turning the grip to nd a comfortable position.
Please read these instructions carefully. Failure to do so may lead to injury.
Explication des caractères / symboles dans le présent mode d‘emploi:
lors du montage, accordez une attention particulière aux symboles suivants.
Avertissement: ce symbole fait référence à une étape de montage importante
dont le non-respect peut mettre en danger votre vie / votre santé.
Information: ce symbole fait référence à des informations supplémentaires,
p. ex. sur la manipulation du produit.
Les conséquences éventuelles qui sont décrites ci-dessus ne sont pas toujours expli-
quées dans le mode d‘emploi quand ces symboles apparaissent.
Guidons recommandés:
• Seuls des guidons qui ont été validés par le fabricant pour des colliers de serrage
intérieurs, supportent les couples indiqués et présentent un diamètre extérieur de
22,2 mm peuvent être employés. Les tolérances de fabrication de la production de
certains guidons font en sorte qu’il peut être dicile d’y glisser les poignées.
• Les grips nécessitent une zone de montage droite d‘au moins
127 mm – Modèle Standard (grip long)
127 / 102 mm – Modèle Single Twist Shift (grip long / court)
Note de sécurité:
• Couple de serrage: 3 Nm- Les vis de serrage ne peuvent pas être serrées
exagérément.
• Une fois installés, les poignées de guidon ne doivent pas pivoter sur le guidon.
• Vérier le couple de serrage après la sortie initiale ou après 50 km. S’assurer
périodiquement que les vis ne se desserrent pas.
• À la suite à d’une chute ou de tout autre accident, les composantes des poignées
doivent être vériées et remplacées au besoin. Consultez votre détaillant pour toute
autre question.
• Ne pas utiliser avec des guidons en carbone.
• Assurez-vous de bien nettoyer le guidon avec de l’alcool ou tout autre dégraissant
approprié. Ne pas utiliser de pâte de montage carbone lors de l‘assemblage!
Après le montage / l‘essai routier:
• Si les grip tournent en dépit d‘un montage correct, il convient d‘utiliser un guidon à
extrémités graineuses.
• Avant de rouler pour la première fois, assurez-vous que les leviers de freins et de
vitesse sont à portée de main et que toutes les composantes de votre vélo fonction-
nent correctement.
• Vous pouvez déterminer la position des grips Ergon Die la plus confortable pour
vous en vous référant à l‘échelle imprimée. Après quelques courts essais, exécutez de
nouveau les étapes 3 à 6 et modiez légèrement l‘angle des positions.
Pour prévenir toute blessure, lire attentivement les consignes qui suivent.
(DE) WARNUNG
(EN) WARNING
(FR) AVERTISSEMENT
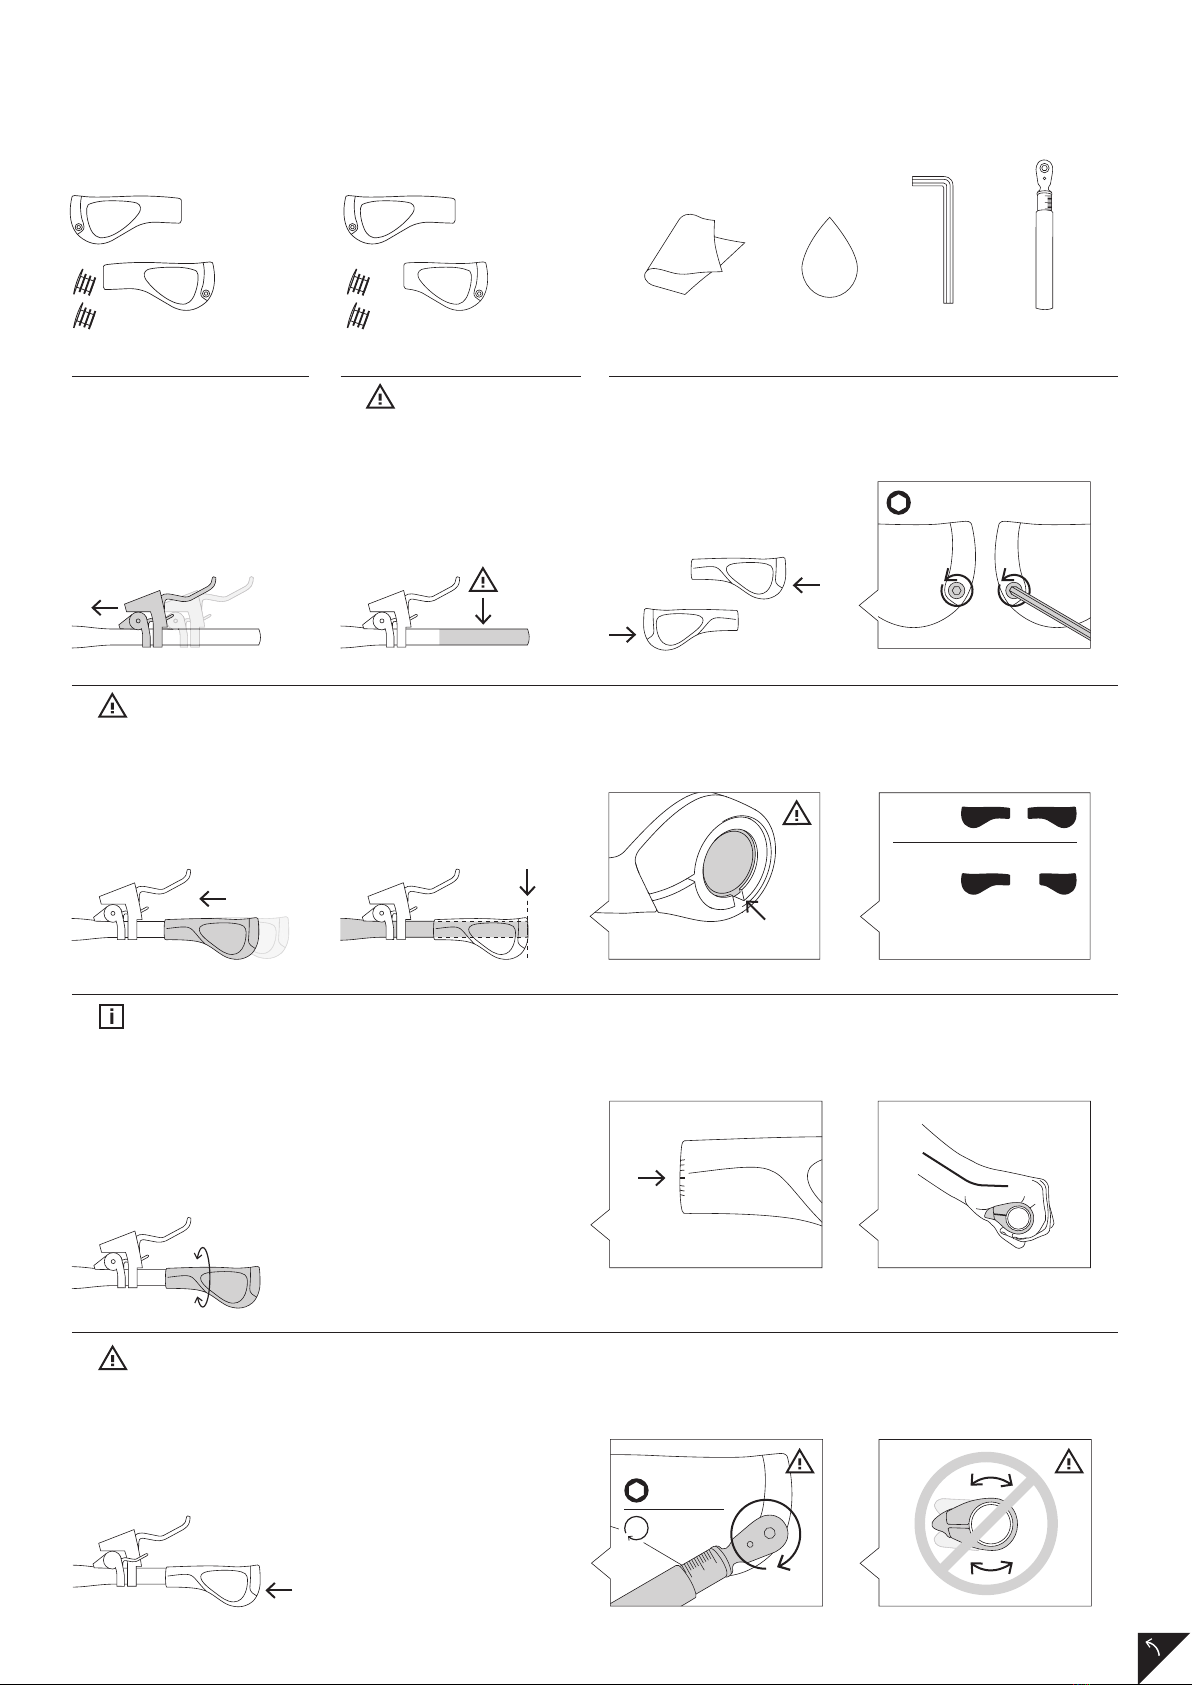
1. 2.
(DE) Schaltung / Bremshebel lösen.
(EN) Loosen shifter / brake lever.
(FR) Desserrer les leviers de frein et de
vitesse.
(DE) Lenker im Montagebereich mit
Alkohol / Isopropanol reinigen/entfetten.
(EN) Clean / degrease handlebar before
tting using isopropanol / alcohol.
(FR) Nettoyer et dégraisser le guidon au
niveau de la zone de montage avec de
l‘alcool ou de l‘Isopropanol.
3.
(DE) Schrauben beider Klemmen um 3–4
Umdrehungen lösen.
(EN) Loosen screws of both clamps by
about 3–4 turns.
(FR) Desserrez les vis des deux colliers
de serrage de 3–4 tours.
4.
(DE) Grie unbedingt komplett bis zum Lenkerende aufschieben, sonst droht
Sturzgefahr. Dabei auf die korrekte Anordnung von linkem und rechtem Gri achten.
(EN) Ensure that the grip is completely pushed on to the bar. Failure to do so will create
a safety issue. Please also take note of the left / right specic grips.
(FR) Enfoncez les grips à fond sur le guidon. Sinon, risque de chute. Attention à ne pas
confondre le grip gauche et le grip droit.
5.
(DE) Drehen Sie den Gri so, dass die Mittellinie der Grimarkierung nach oben zeigt.
Der Handballen sollte nun flächig aufliegen und das Handgelenk einen minimalen
Winkel aufweisen. Falls nötig, nehmen Sie eine Feinjustierung vor.
(EN) Rotate the grip so that the center line mark (located on the inner side of the grip)
points upwards. The palm of the hand should rest flat on the grip and the wrist should
have a minimal angle. If necessary, make small adjustments until comfortable
(FR) Tournez la poignée à ce que la ligne centrale du repère de la poignée soit orientée
vers le haut. La paume de la main doit maintenant reposer sur une surface plane et le
poignet doit présenter un angle minimal. Si nécessaire, procédez à un réglage n.
(DE) Schrauben mit Drehmomentschlüssel (3 Nm) anziehen. Die Grie dürfen sich
nach dem Anziehen nicht mehr verdrehen lassen.
(EN) Tighten the screw using a torque wrench (3 Nm / 2.2 ft-lb). You should not be able
to rotate the grip on the bar if tted correctly.
(FR) Serrer les vis avec une clé dynamométrique (3 Nm). Les grips ne peuvent plus
tourner après avoir été serrés à fond.
6.
(DE) Benötigtes Werkzeug / (EN) Required tools / (FR) Outils requis
ergonbike.com
%
ALC.
Nm / ft-lb
Auto-
Stop
4 mm
Auto-
Stop
3 Nm /
2.2 ft-lb
4 mm
(DE) Inhalt der Verpackung / (EN) Contents of packaging / (FR) Contenu du paquet
Standard
127 / 127 mm
Single Twist Shift
127 / 102 mm
left
right
left
right
Standard
Single
Twist
Shift

8.
(DE) Schaltung / Bremshebel gemäß den Herstellerangaben montieren.
(EN) Mount shifter / brake lever according to the manufacturers instructions.
(FR) Montez les leviers de vitesses / poignées de frein selon les
indications du fabricant.
7.
(DE) Beide Endstopfen einsetzen.
(EN) Insert the endplugs.
(FR) Insérez les bouchons d‘extrémité.
(FR)
Garantie:
Grâce à concept de verrouillage spécique, les poignées Ergon répondent en tous
points à la norme. Pendant les deux premières années suivant l‘achat de ce produit,
vous béné ciez d‘une garantie totale sur les vices cachés légaux (anciennement appe-
lée „garantie“). Gardez à l’esprit que les poignées de vélo sont soumises à l’usure et à la
perte de couleur, ce qui n’est pas couvert par la garantie pour matériel défectueux. En
cas de manquements, adressez-vous à votre revendeur Ergon en vous munissant de la
preuve d‘achat.
Veuillez consulter la politique de garantie complète en vigueur sur
www.ergonbike.com/warranty ou scanner votre code QR pour de plus amples
informations.
www.ergonbike.com/warranty
Nettoyage et entretien:
Pourvous assurer que les grips Ergon vous fournissent les meilleures performance pos-
sibles, nettoyez les régulierement avec de l’eau savoneuse. Rincez abondament. Évitez
à tout prix l’utilisation de produits à base de pétrole ou de solvants, d’huile et de graisse
lors de l’entretien de vos embouts de guidon.
Information sur les matériaux:
• Sans latex, sans BPA et HAP
• Résistance très élevée aux rayons UV
• Sans phtalates comme plasti ants; utilisaton de para nes médicalement approuvés
• Pigments respectant les critères de pureté selon résolutuion européenne AP(89)1
• Sans plomb, mercure, cadmium et chrome hexavalent (PBB, PBDE)
• Ne contient aucun contaminant, marque de contrôle SGS, approuvé par l’institut
Frésenius, certié par TÜV Sarre
(EN)
Warranty:
Ergon’s clamp system exceeds the industry standards by a large margin. During the rst
two years of ownership of the product (measured from the day of purchase) you have
full legal rights to a replacement should the product have a fault which makes it unu-
sable for the original purpose. Keep in mind that the bicycle grips are subject to wear
and color loss, which are not covered under liability for material defects. If you have any
cause to return the product please take it to a specialist bicycle retailer together with
proof of purchase.
Please see the current full warranty policy at
www.ergonbike.com/warranty or scan QR-code for details.
www.ergonbike.com/warranty
Care and Maintenance:
In order to ensure that your Ergon grips provide you with the best performance please
clean them regularly using warm soapy water. Rinse thoroughly. Do not use petroleum
based products or solvents, oil or grease on the grips for any reason.
Material Information:
• No Latex , BPA and PA used
• Extreme high UV resistance
• No Phthalates used. Only medically approved ‘white oil’ used in production.
• Pigments meet the purity standards of European Resolution AP(89)1
• No lead, mercury, cadmium and hexavalent chromium, PBB´s and PBDE´s used
• SGS TÜV certication (tested for toxins), tested by the Fresenius Institute / certied
by TÜV Saarland
(DE)
Gewährleistung:
Mit dem speziellen Klemmkonzept übertreen die Ergon Handgrie die Norm in allen
Punkten deutlich. Während der ersten zwei Jahre nach dem Kauf dieses Produkts ha-
ben Sie vollen Anspruch auf die gesetzliche Sachmängelhaftung (vormals Gewährleis-
tung). Bedenken Sie jedoch, dass Fahrradgrie einer natürlichen Abnutzung und einem
Farbverlust unterliegen, die nicht durch die Sachmängelhaftung abgedeckt werden.
Sollten Mängel auftreten, wenden Sie sich bitte unter Vorlage des Kaufbelegs an Ihren
Ergon-Fachhändler.
Detailliertere Informationen zur Sachmängelhaftung / Reklamation nden Sie online
unter www.ergonbike.com/warranty oder einfach QR-Code scannen.
www.ergonbike.com/warranty
Reinigung und Pflege:
Damit Sie mit Ihren Ergon Handgrien lange Freude haben, sollten Sie die Grie nur
mit handwarmem Seifenwasser reinigen und anschließend gut abspülen. Ergon Hand-
grie sollten nicht mit petroleumhaltigen Stoen wie mineralischen Ölen und Fetten
sowie scharfen Reinigern oder sonstigen Chemikalien in Kontakt gebracht werden.
Material Hinweis:
• Keine Verwendung von Latex, BPA und PAK
• Extrem hohe UV Stabilität
• Keine Verwendung von Phthalaten als Weichmacher; nur Verwendung
medizinischer Weißöle
• Pigmente entsprechen den Reinheitskriterien der europ. Resolution AP(89)1
• Keine Verwendung von Blei, Quecksilber, Cadmium, sechswertigem Chrom, PBB´s
und PBDE´s
• Verwendung eines SGS Prüfzeichen (schadstogeprüfte Sicherheit), geprüft vom
Fresenius Institut / zertiziert vom TÜV Saarland
ergonbike.com
right
left
Other Ergon Bicycle Accessories manuals


Popular Bicycle Accessories manuals by other brands


Specialized
Specialized Elite CylcoComputer user manual

Sigma
Sigma BC 16.16 manual

Playcore
Playcore Dero Setbacks installation instructions

VDO Cyclecomputing
VDO Cyclecomputing x3dw instruction manual

Cateye
Cateye RAPID X2 manual

buratti meccanica
buratti meccanica Clorofilla Trail Use and maintenance manual


