SKY-WATCHER SynGuider II User manual
SYNGUIDER ⅡUSER'S MANUAL
GETTING STARTED
3
1
4
9
15
060613V1
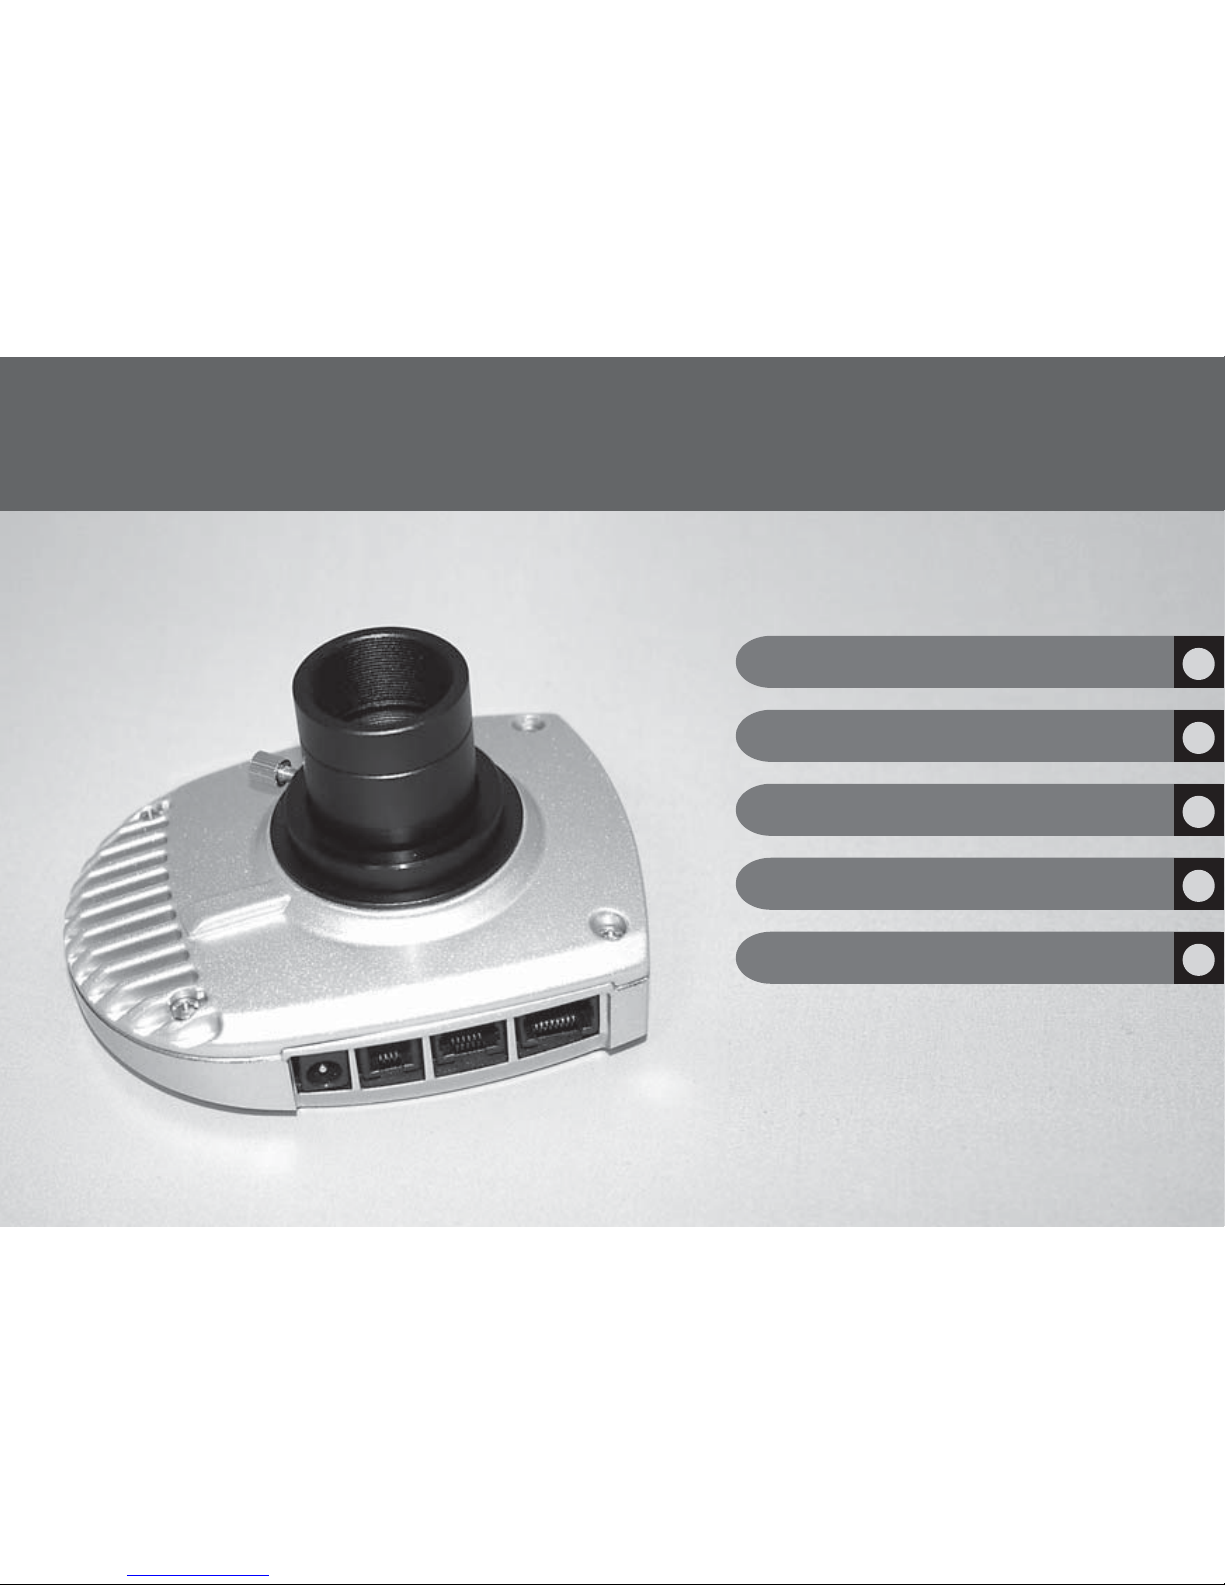
Thank you for choosing the SynGuider. The
SynGuider can guide an equatorial mount
without the help of a computer. It will
improve the image quality and help you
achieve pin-point stars in you long-exposure
photography.
BASIC OPERATIONS
OPERATION UNDER THE NIGHT SKY
SPECIFICATIONS
PREPARING THE SYNGUIDER
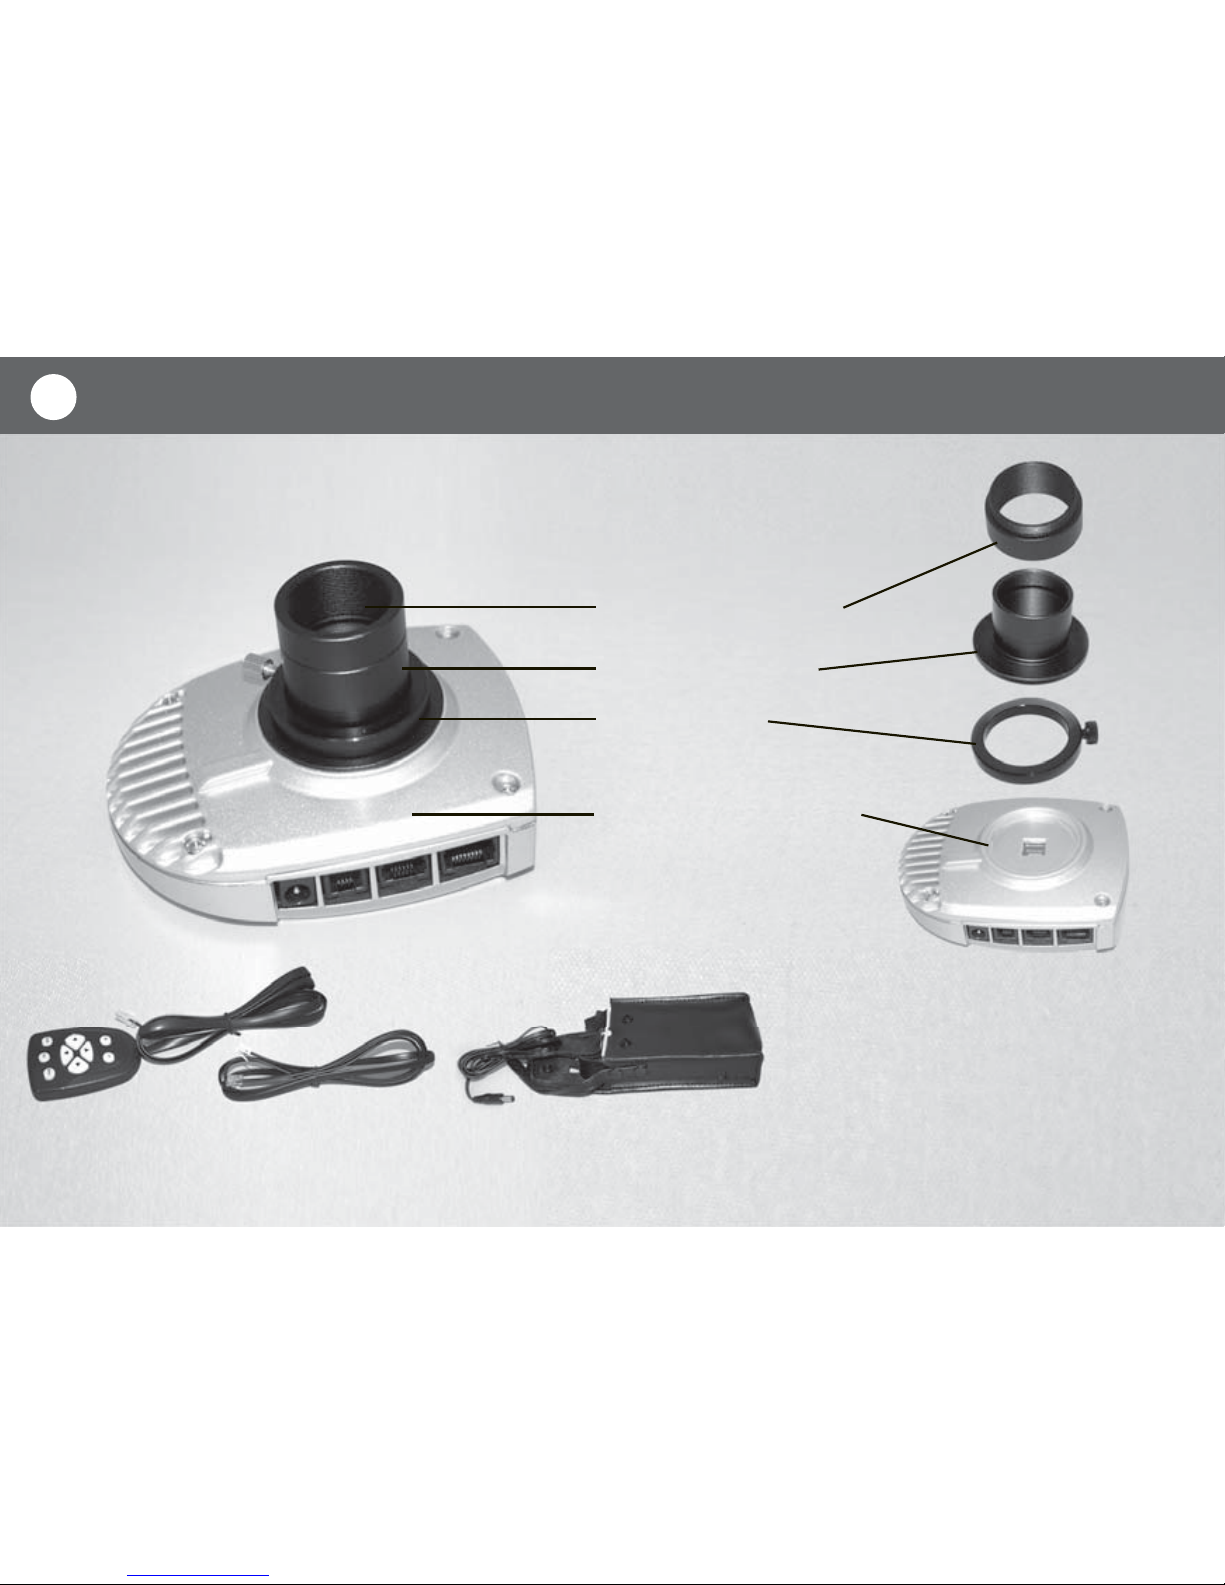
ABOUT THE SYNGUIDER II PACKAGE
SynGuider’s Main Body
Par Focal Ring
Hand Pad Guiding Cable Battery Case
M42-to1.25 Adapter
1.25” Extension Barrel
1
Please take some time to check your new SynGuider II package and become familiar
with each component. Some parts are installed on the SynGuider main body out of
the box. You will need to uninstall them before using the SynGuider.

SYNGUIDER II MAIN BODY
A
FRONT VIEW REAR VIEW
B
CD E F
2
G
A. M42 thread B. Image Sensor C. Power Jack D. USB Port
E. Autoguider Port F. Hand Pad Port G. LCD Screen
PREPARING THE SYNGUIDER
3
PREPARING THE POWER SUPPLY
User can use four D type 1.5V batteries (not included) with the battery case as the power
supply for SynGuider. To use a different power supply, it must match the following require-
ments:
DC 4.5V~14V output voltage, a +5V power supply is recommended.
150mA and up output current
2.1mm power plug, central positive
PREPARING THE IMAGING SYSTEM
The basic requirements for the equipment to use with SynGuider are:
Telescope Mount: Equatorial mount, or Alt-Az mount with a
wedge, with a dual-axis motor drive attached. The motor drive
must be able to accept “ST-4” compatible autoguiding signals.
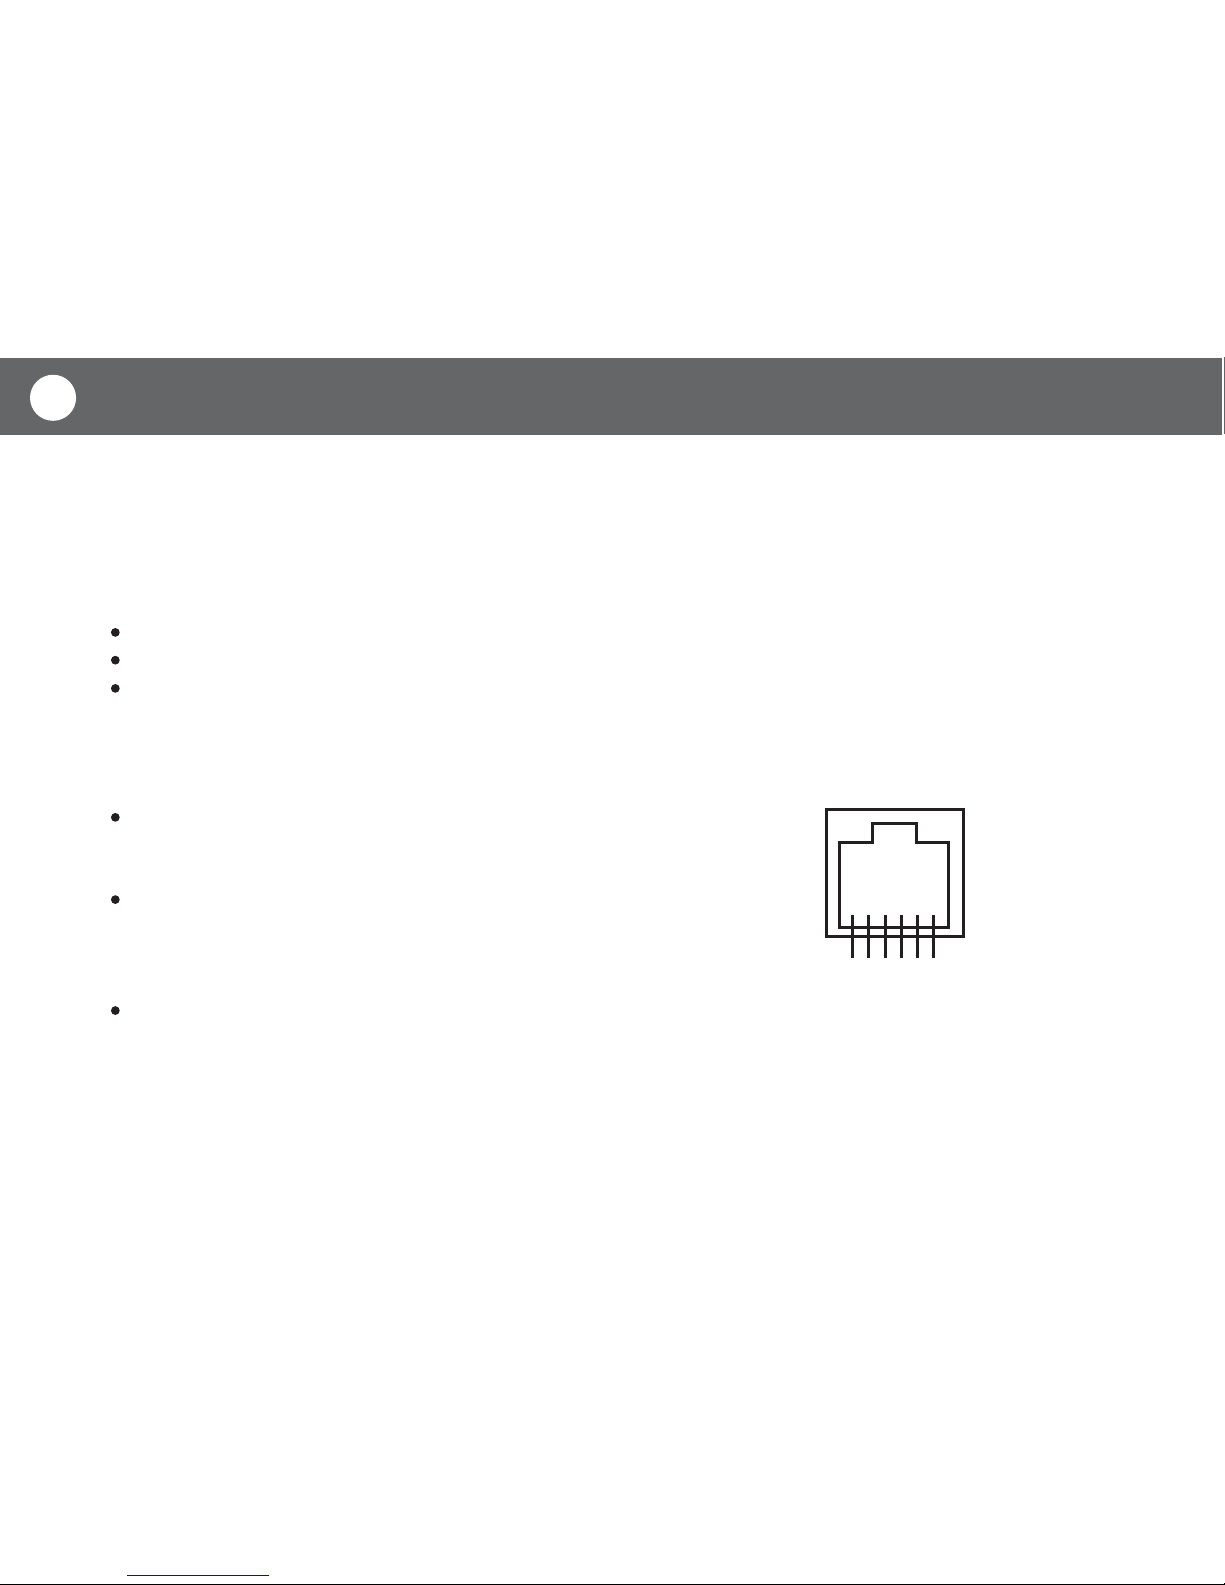
Connecting Cable: You may use the supplied dual RJ-12 plug
autoguiding cable if the pin configuration of your motor drive is
the same as the diagram shown on the right. An alternative cable
is required if the pin configuration of your motor drive is different.
Guide Scope: An additional telescope with a M42-0.75 thread or a 1.25” eyepiece holder is
required as guide scope. Larger aperture, at least 80mm, helps reduce the exposure time of
the SynGuide, thus yielding more accurate guiding result. The ideal focal length is between
400mm and 1200mm. An adjustable guide scope tube ring and a finderscope or red dot finder
are recommended for searching for a guide star.
654321
1= NC
2= Ground
3= +RA (left)
4= +DEC (up)
5= -DEC (down)
6= -RA (right)

BASIC OPERATIONS 4
It is highly recommended that you familiarize yourself with the basic operations of the SynGuider
indoors before going out under the dark sky.
Option 1: The SynGuider can be threaded onto a telescope with a M42 thread adapter. Gener-
ally, this installation method provides the most secure connection. It is best suited for the guide
scope equipped with a finderscope or a red dot finder.
Option 2: Install the M42-to-1.25 adapter to the main body of the autoguider, and then insert and
lock the autoguider into the 1.25 inch eyepiece holder on the guide scope. This installation
method is suitable for using a par-focal eyepiece to search for a guide star due to its convenience
in exchanging the SynGuider for an eyepiece.
ATTACHING SYNGUIDER TO A GUIDE SCOPE
There are two ways to install the SynGuider on a guide scope:
CONNECTING CABLES
Plug the hand pad into the 8 pin RJ-45 connector on the main body of the autoguider.
Plug one end of the guiding cable into the autoguider port on the autoguider and the other end
into the equatorial mount. Plug in the battery case or the power supply of your choice.
READING THE LCD DISPLAY
The LCD display is divided into two zones. The left half of the LCD screen displays text informa-
tion, such as the menu, data and the status of the device. The right half of the LCD screen displays
the image captured by the optical sensor. In the screen, stars are represented by dots.

BASIC OPERATIONS
5
USING THE HAND CONTROL
There are nine illuminated buttons on the hand pad:
Menu: Used to open up the main menu.
ESC: Used to cancel an operation or quit from the menu.
Enter: Used to enter a submenu or confirm an operation.
+: Used to increase the exposure time.
-: Used to decrease the exposure time.
Up/Down buttons: The function of these buttons depends on the
working mode of the autoguider:
Left/Right buttons: The function of these buttons depends on the working mode of the autoguider:
Preview Mode: Manually toggle the Dec+ and Dec- signal of
the ST-4 autoguider port.
Menu Mode: Scroll between the menu items.
Data Input Mode: Change the parameters.
“Manually Lock Guider Star” Mode: Move the small pick-up
crosshair vertically.
Guiding Mode: Set the Dec correction aggressiveness.
Preview Mode: manually toggle the RA+ and RA- signal of the ST-4 autoguider interface.
Menu Mode: The right button is to enter a submenu. The left button is to confirm a menu
operation. It performs as the Enter button.
Data Input Mode: The left button is to confirm a menu operation. It performs as the Enter button.
“Manually Lock Guider Star” Mode: Move the small pick-up crosshair horizontally.
Guiding Mode: Set the RA correction aggressiveness.
MENU ESC ENTER

BASIC OPERATIONS 6
OPERATING THE MENUS
Press the Menu button to activate the main menu tree. Use the UP or DOWN buttons to scroll
through the menu items. Press the ENTER or the RIGHT button to choose between the following
submenus:
LOCK Menu: This submenu is used to lock a star in SynGuider’s field of view (FOV) for later
guiding operation. After entering this submenu, use UP or DOWN button to choose from the
following options and then press ENTER or LEFT button to confirm:
ZM STAR or ZM CTR. Menu: These two menus are usable only when the SynGuider is working
under the preview mode. It is used to zoom in on the image. Using the UP/DOWN buttons,
choose between the zoom level 1 (the entier image), 2 (384X384 pixels of the image sensor), 3
(128X128 pixels of the image sensor) and 4 (64X64 pixels of the image sensor). After choosing
the level, press ENTER to confrim or ESC to keep the previous zoom level.
"ZM STAR" tries to use the position of the brightest star in the FOV of the SynGuider as the
center of the zoomed image, unless the star is too close to the edge of the image sensor. "ZM
CTR." always zooms at the center of the image sensor.
AUTO: the SynGuider will try to automatically lock the brightest star in the FOV.
MANUAL: the SynGuider will show a small pick-up crosshair in the image area of the LCD
display, where you can use the four direction buttons to move the crosshair onto or near a star.
Press ENTER to lock the SynGuider on the star.
UNLOCK: allow the SynGuider to exit from the locked mode or guiding mode and return to the
preview mode
Look to the upper left corner of the LCD display to find out which mode the
SynGuider is currently working under.

BASIC OPERATIONS
7
GUIDE Menu: This menu is used to activate or de-activate autoguiding. Use the UP/DOWN button
to choose from the following three options:
AUTO CAL: The SynGuider will start an auto-calibration routine prior to the start of autoguiding.
RESUME: The SynGuider will immediately start autoguiding with the previous guiding parameters.
STOP: The SynGuider will stop autoguiding and return to the locked mode.
CROSS Menu: This menu is used to turn on the crosshair on the LCD screen.
DEC BACKLASH Menu: To reduce the influence of Dec axis’ backlash during autoguiding, the
SynGuider can send a Dec+ or Dec- control for a pre-determined time when the SynGuider
changes the polarity of the Dec control signal. Once this menu is selected, you will see the current
setting displayed in the text zone of the LCD screen. Use UP/DOWN buttons to change the value.
Press ENTER or LEFT button to confirm. If your equatorial mount has no or minimal backlash, or if
you have done very accurate polar alignment, the Dec backlash should be set to 0.
NOISE Menu: This menu is used to set the cut-off value for the noise filter of the image sensor.
The proper noise level differs from exposure time, thus the SynGuider provide independent noise
level setting for each exposure time and will automatically use the corresponding nosie level when
the user change the exposure time.
Once this submenu is selected, you will see the current cut-off value displayed in the text zone of
the LCD, while the image zone of the LCD keeps refreshing.
If there is a short solid horizontal line shown in the upper or middle portion of the LCD's image
area, it means that the cut-off value is too low and you should increase it until you can see
reasonable amount of noise dots diversify evenly in the LCD's image area.

BASIC OPERATIONS 8
RESET Menu: This menu resets all the settings back to the factory default settings.
If there is no noise spot appear in the image zone of the LCD, it might mean that the cut-off
value is set too high and this might reduce the sensitivity of the SynGuider for detecting faint
stars. You should reduce the cut-off value until you can see some noise dots diversify evenly in
the image area.

9OPERATING UNDER THE NIGHT SKY
The key steps of operating the SynGuider are:
The following sections explains the practical operations of the SynGuider:
ADJUST FOCUS (PREVIEW MODE)
The SynGuider enters the PREVIEW mode as soon as the power is turned on. Following is an
example of what you will see.
Step 1: Adjust the focus (PREVIEW mode)
Step 2: Align the SynGuider with the mount (Very important. Do not skip)
Step 3: Find and lock a guide star (LOCKED mode)
Step 4: Start autoguiding (GUIDING mode)
PREVIEW
EXP 100
BRI 35
X 105
Y 68
ZOOM 1
X0 0
Y0 0
The left half of the LCD screen
displays text information.
The current mode
The right half of the screen
displays the image detected
by the sensor.
The current exposure
The brightness of the brightest star
The position of the brightest star
The current zoom level
The position of the center of the
image window in the sensor’s pixel
matrix
Stars are represented
by dots.
The brightest star is
framed.
Table of contents
Other SKY-WATCHER Accessories manuals

SKY-WATCHER
SKY-WATCHER synguider User manual

SKY-WATCHER
SKY-WATCHER DOB SynScan Operating instructions

SKY-WATCHER
SKY-WATCHER EQ6 User manual

SKY-WATCHER
SKY-WATCHER star adventurer mini User manual

SKY-WATCHER
SKY-WATCHER STAR ADVENTURER GTi User manual

SKY-WATCHER
SKY-WATCHER Star Adventurer 2i User manual

SKY-WATCHER
SKY-WATCHER EQ1 User manual

SKY-WATCHER
SKY-WATCHER EQ5 User manual


