manuals.online logo
Brands
  1. Home
  2. •
  3. Brands
  4. •
  5. SkyLink
  6. •
  7. Security System
  8. •
  9. SkyLink WD-434 Manual

SkyLink WD-434 Manual

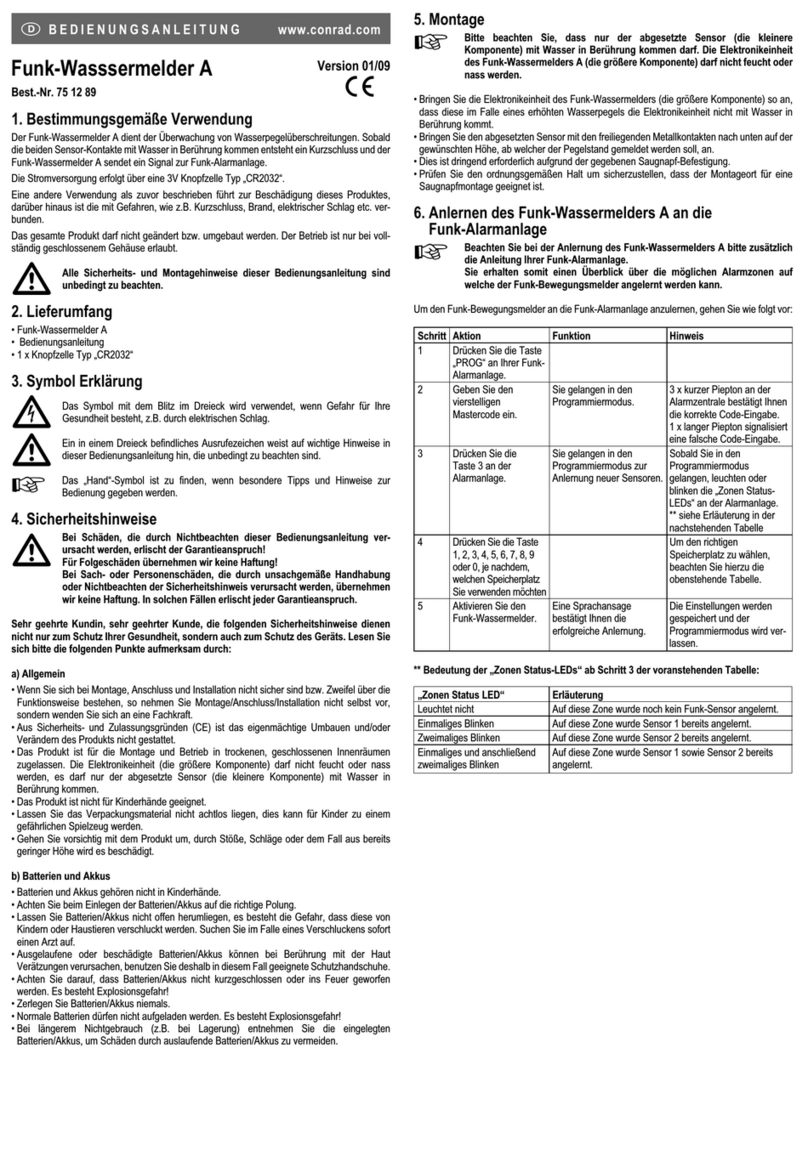
In order for the sensor to communicate with the receiver properly, the
sensor’s code must match with the receiver’s code. Code connectors 1
to 6 can be found by opening the top cover of the sensor and the back
cover of the receiver. User is required to set these code connectors
randomly and the code settings on the sensor and receiver must be the
same. Each position of the code connector can be set to “+”, “-” or “0”
position. Refer to the diagram below to set the code connectors
properly. If the connector is placed on the top and middle posts, that
column is set on “ + ”. If the connector is placed on the middle and bottom
posts, that column is set on “ - ”. If the connector is removed completely,
(not placed on any posts), it is set to “ 0 ”. (see diagram for examples of
how to set a column to the three different positions).
2. SET UP CODE CONNECTORS AND ZONE CONNECTORS
1. CODE CONNECTORS
Code Connectors on Receiver
Each receiver can work with up to 4 different sensors (to represent 4
different zones on the receiver). There are 2 connectors that determine
the zone number 1, 2, 3 and 4. These 2 connectors can be found by
opening the top plastic cover, near the code connectors with marking “A” &
“B”. Please follow table 1 to set the zone.
2. ZONE CONNECTORS
“+” in the tablemeans the connector for that position should be placed on
the posts.
“-“ in the table means the connector for that position should be removed.
A B
Zone 1 + +
Zone 2 +-
Zone 3 -+
Zone 4 - -
Note: If you experience interference from a nearby system, which could
accidentally trigger your system, please change the code settings on the
sensor and receiver. The code setting on the sensor and receiver should
still match after changing the code setting.
Table 1
After setting up all the connectors, both units are ready to be powered up.
Plug in the adapter to the receiver, the green LED will start flashing
indicating the receiver unit is powered up but no sensor is detected.
Remove the top cover of the sensor and insert the 3V lithium battery to
the sensor as shown in the diagram.
Plug in the adapter to the receiver
2. SET UP CODE CONNECTORS AND ZONE CONNECTORS (CONT)
‘+’ ‘-’
‘0’
Door/Window Alert Model WD-434
Sensor
The Door/Window Alert is designed to monitor any door or window
within your house. When the monitored window or door is opened, the
receiver will alert you. It will beep and flash.
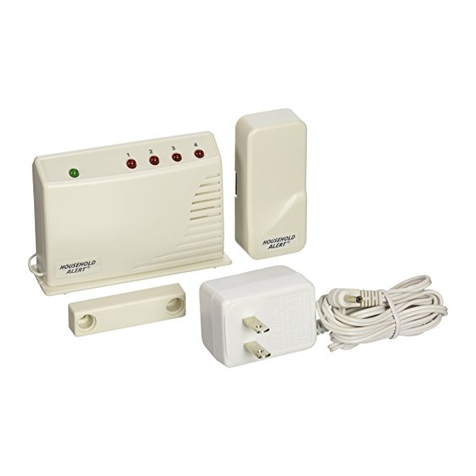
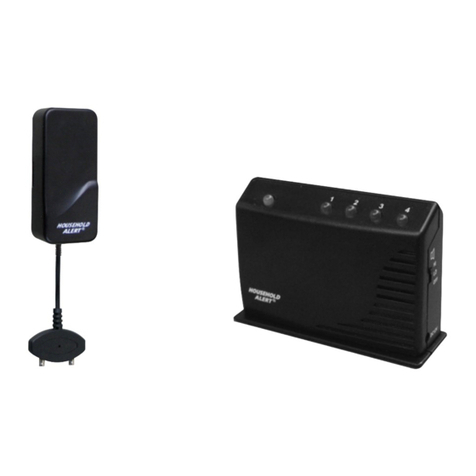
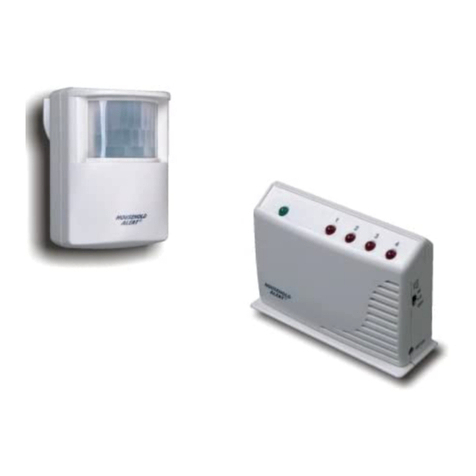
In this package, you should find a sensor, a magnet, a Household Alert®
receiver, an adapter, 3V lithium battery, a clip and other mounting
accessories.
Please follow the instructions below to set up the door / window sensor
and the receiver.
3V Lithium
battery
Mounting plate 2 pcs 3.5 x 18 screws
2 pcs 3.5 x 12 screws
Magnet
Household Alert®
Receiver
Clip
Adapter
Code Connectors on Sensor
Open the top cover
Zone
connectors
Before inserting the battery, keep the magnet away from the sensor.
After inserting the battery to the door / window sensor, the receiver will
beep and flash. If the door / window sensor is set to zone 1, zone 1 red
LED will flash. The beeping and flashing will continue until the magnetic
contact is close to the sensor.
You are now ready to install the sensor and the magnet to a door or
window.
Note: The receiver may not be able to receive the signal from the sensor
properly if they are too close to each other. Move the sensor further from
the receiver to test again.
Insert 3V lithium battery to the sensor
“+” positive
side up
When the magnetic contact is
closed, the receiver will not beep. When the magnetic contact is broken (open),
the receiver will beep and a LED will flash.
Clip
Note: A connector can be
removed with the clip,
as shown.
1. INTRODUCTION
3. POWER UP THE HOUSEHOLD ALERT®
RECEIVER AND DOOR/WINDOW SENSOR
6. BUZZER VOLUME
You can select the buzzer volume by switching
the volume switch to “HI” or “LO” position.
The buzzer can be disabled by switching to the
“OFF” position.
8. LOSS OF SIGNAL INDICATION
When the battery level on the sensor drops to a certain level, or the
sensor is out of the operating range, the receiver will show a “loss of
signal” indication. The red LED representing that zone will flash rapidly,i.e.
if zone 1 sensor islost, the zone 1 red LED will flash rapidly.
When the loss of signal indication occurs, move the receiver closer to
the corresponding sensor and trigger that sensor. If the red LED stops
flashing rapidly, that means the receiver or sensor needs to be
relocated. If the “loss of signal” indication persists, replace the battery
of that sensor.
9. OTHER HOUSEHOLD ALERT®SENSORS
The Household Alert®receiver can work with up to 4 different sensors:
garage door monitor sensors, door / window sensors, water sensors,
indoor/outdoor motion sensors, etc. Please visit www.skylinkhome.com
or contact us at [email protected] for more information of how
to fully utilize your Door/Window Alert.
10. WARRANTY
If, within one year from date of purchase, this product should become defective
(except battery), due to faulty workmanship or materials, it will be repaired or
replaced, without charge. Proof of purchase and a Return Authorization are required.
If you would like to order Skylink’s products or have difficulty getting them to work,
please :
1. visit our FAQ website at www.skylinkhome.com , or
2. email us at [email protected]
11. CUSTOMER SERVICE
CAPITAL PROSPECT LTD.
Rm.1303, 13/F, Block B, Veristrong Ind. Centre,
36 AuPuiWan Street, Fo Tan, Hong Kong
Tel: +852 2602-1318 Fax: +852 2602-4684
Email:[email protected]
http://www.skylinkhome.com
P/N. 101A258-001 Rev.1
©2005 SKYLINK GROUP
4. INSTALLATION
If the surface of the frame is flat enough,
double-sided foam tape is sufficient,
otherwise, it is recommended to use the
mounting plate and screwsas well.
After mounting the sensor, put the cover
back on with the Household Alert®logo in
the upright position.
SensorSensor
Magnet
Magnet
Double-sided
foam tape
Mounting plate and
screws (optional) Sensor
5. OPERATION
When the magnetic contact is broken, such as when the door or window
is open, the sensor will send a signal to the receiver, and the receiver will
beep and the corresponding zone red LED will flash.
If the sensor is set to zone 1, zone 1 red LED on the receiver will flash,
and the receiver will emit a continuous “single beep”, i.e. “beep” pause, “beep”,
pause…..etc.
If the sensor is set to zone 4, zone 4 red LED will flash, and the receiver will
emit a con-tinuous “4 beeps”, i.e. “beep beep beep beep” pause “beep beep
beep beep” pause ……etc.
By the number of beeps emitted by the receiver, user can identify which zone
is triggered.
7. MUTE
When a sensor is triggered for a long period of time, you may stop the
buzzerby pressingthe mutebutton. Whenanother signalcomes again, you
can disable the buzzer for all currently activated sensors by pressing the
mute button. The receiver will beep again if it receives another signal.
For instance, if you know the door / window sensor
will be on for a while when another family member
is cleaning the window, you may want to disable the
buzzer for this sensor. Then you can press the
“Mute” button after it starts to sound. If any other
sensor is triggered, the receiver will sound again.
The sensor should be mounted on the door / window frame and the
magnet should be mounted on the door / window itself. Mount the
sensor or magnet as high as possible.
You should find a grey alignment marking on one side of the sensor. The
magnet should be in contact with this marking when the door / window
is closed (Refer to Diagram A).
SELECT AMOUNTING LOCATION
Other SkyLink Security System manuals

SkyLink MOTION ALERT HA-318 User manual

SkyLink

SkyLink MOTION ALERT HA-318 User manual

SkyLink M9 User manual

SkyLink

SkyLink M9 User manual

SkyLink HA-300 User manual

SkyLink

SkyLink HA-300 User manual

SkyLink SK-200 User manual

SkyLink

SkyLink SK-200 User manual

SkyLink SA-001S User manual

SkyLink

SkyLink SA-001S User manual

SkyLink SA-001 User manual

SkyLink

SkyLink SA-001 User manual

SkyLink SK-250 User manual

SkyLink

SkyLink SK-250 User manual

SkyLink DIAL-ALERT AD-433S User manual

SkyLink

SkyLink DIAL-ALERT AD-433S User manual

SkyLink MULTI LINK PRO ML-001 User manual

SkyLink

SkyLink MULTI LINK PRO ML-001 User manual

SkyLink TOTAL PROTECTION ALARM SYSTEM SC-10 User manual

SkyLink

SkyLink TOTAL PROTECTION ALARM SYSTEM SC-10 User manual

SkyLink M4 User manual

SkyLink

SkyLink M4 User manual

SkyLink SC-100 Guide User manual

SkyLink

SkyLink SC-100 Guide User manual

SkyLink SW-433 User manual

SkyLink

SkyLink SW-433 User manual

SkyLink SC-100 Guide User manual

SkyLink

SkyLink SC-100 Guide User manual

SkyLink Monitoring Station MS-200 User manual

SkyLink

SkyLink Monitoring Station MS-200 User manual

SkyLink MA-103 User manual

SkyLink

SkyLink MA-103 User manual

SkyLink SK-200 User manual

SkyLink

SkyLink SK-200 User manual

SkyLink M6 User manual

SkyLink

SkyLink M6 User manual

SkyLink SC-100 Guide User manual

SkyLink

SkyLink SC-100 Guide User manual

SkyLink AA-433 Guide User manual

SkyLink

SkyLink AA-433 Guide User manual

SkyLink HA-434RTL User manual

SkyLink

SkyLink HA-434RTL User manual

SkyLink FS-101 User manual

SkyLink

SkyLink FS-101 User manual

SkyLink SA-103A User manual

SkyLink

SkyLink SA-103A User manual

SkyLink Household Aler HA-100 User manual

SkyLink

SkyLink Household Aler HA-100 User manual

Popular Security System manuals by other brands

American Dynamics AD2032 Installation and operating instructions

American Dynamics

American Dynamics AD2032 Installation and operating instructions

Aico EI169/160 Instruction leaflet

Aico

Aico EI169/160 Instruction leaflet

Eaton SM87BG Technical manual

Eaton

Eaton SM87BG Technical manual

ADEMCO VISTA-128B user guide

ADEMCO

ADEMCO VISTA-128B user guide

ABC Office Vector 06502 user guide

ABC Office

ABC Office Vector 06502 user guide

First Alert FA848C Installation and setup guide

First Alert

First Alert FA848C Installation and setup guide

NAPCO Magnum Alert 800 operating guide

NAPCO

NAPCO Magnum Alert 800 operating guide

Bosch Solution 6000-IP CC615GWF quick start guide

Bosch

Bosch Solution 6000-IP CC615GWF quick start guide

ADEMCO Counterforce CFV15P Programming guide

ADEMCO

ADEMCO Counterforce CFV15P Programming guide

Chiron Iris Touch Maintenance Guide

Chiron

Chiron Iris Touch Maintenance Guide

Solon Essentials AL00038 quick start guide

Solon

Solon Essentials AL00038 quick start guide

Vixen Horns VXS4006C installation guide

Vixen Horns

Vixen Horns VXS4006C installation guide

Data Aire MINI DATA ALARM PROCESSOR II Operation and maintenance manual

Data Aire

Data Aire MINI DATA ALARM PROCESSOR II Operation and maintenance manual

First Alert FA130CP user guide

First Alert

First Alert FA130CP user guide

Speaks z wave SSA1 instruction manual

Speaks z wave

Speaks z wave SSA1 instruction manual

GE 4 Series user guide

GE

GE 4 Series user guide

Encore ENXDVR-4C user manual

Encore

Encore ENXDVR-4C user manual

Teletek electronics CA824 installation manual

Teletek electronics

Teletek electronics CA824 installation manual

manuals.online logo
manuals.online logoBrands
  • About & Mission
  • Contact us
  • Privacy Policy
  • Terms and Conditions

Copyright 2025 Manuals.Online. All Rights Reserved.