manuals.online logo
Brands
  1. Home
  2. •
  3. Brands
  4. •
  5. SkyLink
  6. •
  7. Security System
  8. •
  9. SkyLink SC-100 Guide User manual

SkyLink SC-100 Guide User manual

Congratulations!
You have just purchased one of the most reliable and up-to-date wireless security systems on the market today.
We recommended you go through the User's Instructions to fully understand the system and plan your installation. If you
wish to set up the system immediately, please read this guide first.
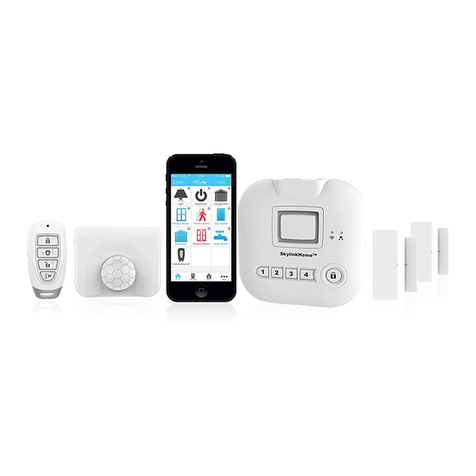
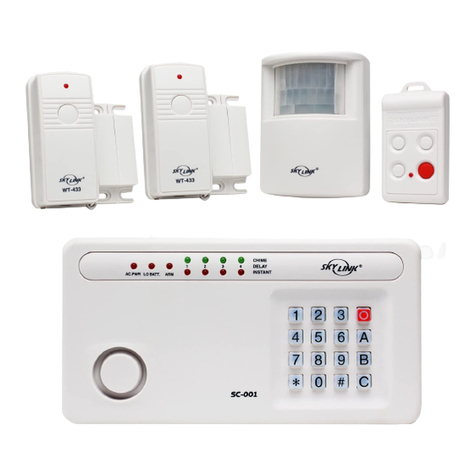
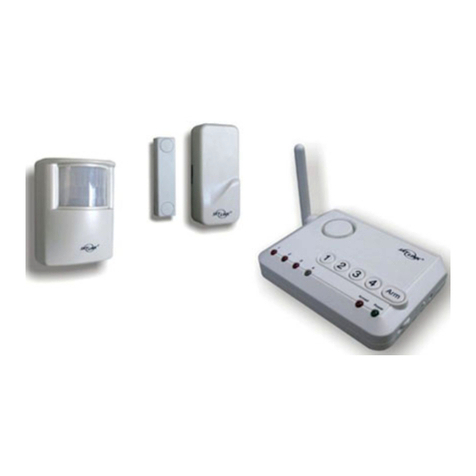
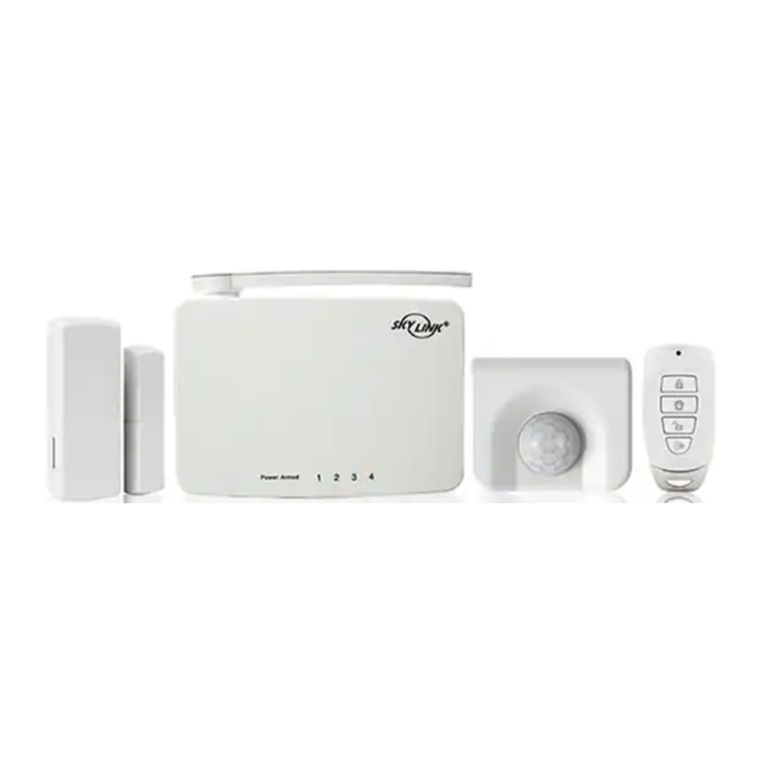
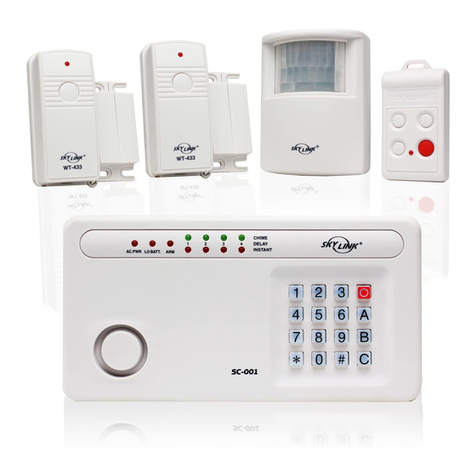
This quick guide describes the basic steps to install your SC-100 Total Protection Alarm System (control panel, two door/
windowsensors,motionsensorandkeychaintransmitter).
TEST THE COMPONENTS
It is advisable to test the function of each component and the system before they are
mountedtothedesiredposition.
Control Panel
1. RemovetheControlPanelfromthebox.
2. Open the Control Panel by pressing the two tabs on top with the front facing you.
(Diagram1)
3. Pullopenthefront.
4. ThreadtheAC adapter cord through the hole in the back of theunitandpluginto
thecircuitboardasshown.(Diagram2)
5. Insertthe9voltalkalinebattery. (Diagram 3)
6. Rotate the antenna from the inside position to a vertical position.
7. Close the cover carefully so that the cord and antenna are not cut.
8. Plug in the AC adapter into the power outlet.
Thered{ACPWR}lightand keypad backlight will go on.
9. Press [0][0][0][A][#] to set the Control Panel to Chime
Modefortesting.Thered{ARM}light and all 4 green
lightsabovethenumberswillgoon.
Door/Window Sensors
1. Removethetransmitter from the box. Pull out the battery protective strap.
2. Put the magnetic switch and magnet next to each other.
3. Separate the magnetic switch and magnet by more
than 1cm (3/8 inch), you should hear a two-tone chime
fromtheControlPanel.Thegreenlight1willflash.
4. Thedoor/windowsensorisworking.Putthemagneticswitchandmagnettogether.
Motion Sensor
1. Removethemotionsensorfromthebox.
2. Undothescrewonthebackofthemotionsensorandremovethecover
of the batterycompartment.Connecta 9V alkaline batterytotheconnector
wire.Thenclose thebatterycoverandre-insertthescrew.(Diagram4)
The Complete Alarm System Model SC-100
STEP1
AC PWR LO BATT. ARM
AC Power is
connected.
CHIME
DELAY
INSTANT
1 2 3 4
AC PWR LO BATT. ARM
Press 000# to
test your system.
CHIME
DELAY
INSTANT
1 2 3 4
AC PWR LO BATT. ARM
Separate the
magnetic contact.
CHIME
DELAY
INSTANT
1 2 3 4
Diagram1
Diagram2
Diagram3
Diagram4
QUICK SETUP GUIDE
Daily Operation
Function Keypad Keychain Remark
Command Transmitter
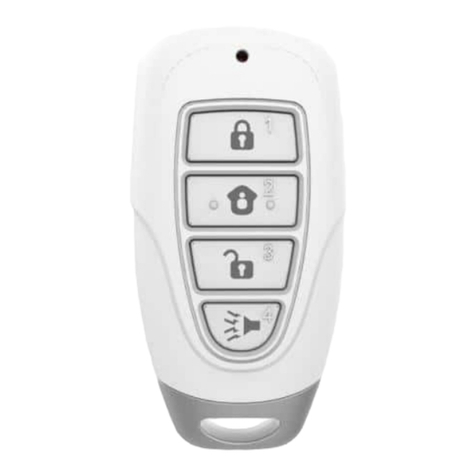
Disarm 000# Button#3 Set the system to DISARM from ARM
Chime 000A# Set the system to Chime Mode for testing
Away 000BC Button #1 Arm your system when you are the last person leaving
Sequence
After45 seconds:
Home 000C Button #2 Arm your system when someone remains
Sequence
After45 seconds:
Night 000AB Arm your system when there are people in your house
Sequence but no one is expected to enter or exit
AC PWR LO BATT. ARM
CHIME
DELAY
INSTANT
1 2 3 4
AC PWR LO BATT. ARM
CHIME
DELAY
INSTANT
1 2 3 4
AC PWR LO BATT. ARM
CHIME
DELAY
INSTANT
1 2 3 4
AC PWR LO BATT. ARM
CHIME
DELAY
INSTANT
1 2 3 4
AC PWR LO BATT. ARM
CHIME
DELAY
INSTANT
1 2 3 4
AC PWR LO BATT. ARM
CHIME
DELAY
INSTANT
1 2 3 4
AC PWR LO BATT. ARM
CHIME
DELAY
INSTANT
1 2 3 4
102A110
CUSTOMERSERVICE
17 Sheard Avenue, Brampton, Ontario, Canada L6Y 1J3
+800-304-1187 EST 9:00 to 17:00 (from Monday to Friday)
Fax:+800-286-1320
Email:[email protected] (Reply within 24 hrs)
http://www.skylinkhome.com
US Patent D410633, 6243000B1
©2004 SKYLINK GROUP
4. All components in your system can communicate to the Control Panel. Press [0][0][0][#] to disarm the system.
Disconnect the AC supply to the Control Panel. You can now mount the various components to their desired
locations.
Remarks: [0][0][0] is the MPIN (Master Personal Identification Number) set by the factory. Replace the [0][0][0] by the
currentMPINifyouhavechangedtheMPIN. Refer to the User's Instructions on how to change the MPIN.
CONTROL PANEL MOUNTING & CONNECTIONS
The Control Panel is designed to be mounted close to the door which you normally use to enter/exit your house. The
ControlPanelwould require a power outlet tofunctionproperly.
(Note: If there is no power outlet close to the door, you may install a Keypad Control close to the door and mount the
ControlPanelanywhereinyour house close to a power outlet. The Keypad Control KP-433 is available separately.)
Afteryouselecttheappropriatemountinglocation,
1. Mount the Control Panel in any of the three ways as follow:
i). Use double sided tape for temporary use such as testing.
ii). Hang on two screws mounted on the wall.
Iii) Screw the back onto the wall with 4 screws.
(seeUser'sInstructionsfordetailson mounting options)
2. Plug in the AC adapter into the power outlet. The red {AC PWR}light and keypad backlight will go on.
STEP2
Motion Sensor (Cont)
3. Entry the CHIME mode by pressing [0][0][0][A][#] on SC-001. Move your hand in front of the motion sensor. If the
motionis detected, the SC-001willbeep and the correspondingzoneLEDwill flash. The motionsensoris responding.
It takes about 20 seconds for the motion sensor to reset itself before it can send another signal.
Thereshouldbeno movement in the detected area during the 20 seconds.
4. Moveyourhandinfrontofthesensor.Youshould
hearatwo-tonechime from the Control Panel.
Thegreen light 2 will flash once.
5. Themotionsensorisworking.
Keychain Transmitter
1. Removethekeychaintransmitterfromthe box.
2. Press button #1 (button with 1 dot) for more than 1 sec. The red
{ARM}light will go on. Your keychain transmitter can communicate
withyourControl Panel.
3. Press button #3 (button with 3 dots) for more than 1 sec. The red
{ARM}lightwillgo off.
INSTALLING YOUR SENSORS
Door/Window Sensors
It is recommended to install one sensor on your front door and the other on your back door or window.
Each door/window sensor has 4 parts. You need the transmitter with magnetic switch and magnet.
You will only use the spacers when they are required.
STEP3
AC PWR LO BATT. ARM
Green LED in
Zone 2 lashes.
CHIME
DELAY
INSTANT
1 2 3 4
Door/Window Sensors (CONT)
1. Mountthetransmitterusingdoublesidedtapeorscrewsprovided.(seeUser'sInstructions
fordetailson mounting options)
2. Mountthemagneticswitchon the door/window frame.
3. Mount the magnet on thedoor/window beside the magnetic switch. Themagnetic switch and
magnet should be lined up with no more than 1cm (3/8 inch) gap in between.
4. Use spacer when mounting magnet on metal (such as metal doors or metal windows). Use
spacer on magnetic switch and magnet when mounting surfaces are not in line.
5. Keepsensorswithin 30 m (100 ft) of Control Panel
Motion Sensor
The motion sensor is most suitable for guarding the bedrooms. Use the motion sensor to
monitorthepassagewayleadingto the bedrooms or hallway.
1. Mountthe ball-head jointonthewallwith screws provided. (Diagram 5) Slide the back of
thesensorintotheball-headjoint.Themountinganglecanbe adjusted. (Diagram 6)
2. Keepsensorswithin 30 m (100 ft) of Control Panel
3. Walk in the detected area. If the motion is detected, a red light inside the sensor will glow.
If the red light does not glow, motion has not been detected and you should re-position the
sensor.
4. Repeatthis procedure until your motion is detected.Thereshouldbenomovementinthe
detectedareaduringthe20seconds.
Test the door/window sensor
3. Openthe door/windowwhereyou have installeddoor/windowsensor.
Youshould hear a two-tone chime from theControl Panel. The green light 1 will flash.
4. Thedoor/window sensor isworking.Closethe door/window.
Test the motion sensor
5. Walk in the detected area covered by the motion sensor. You should hear a two-tone chime from the Control Panel. The
green light 2 will flash once.
6. Themotionsensoris working
Note: Wait for 20 seconds after each activation, the motion sensor needs 20 seconds reset time.
Remarks: [0][0][0] is the MPIN (Master Personal Identification Number) set by the factory. Replace the [0][0][0] by the
currentMPINifyouhavechangedtheMPIN. Refer to the User's Instructions on how to change the MPIN.
Congratulations! Your security system is successfully installed and ready to use. Press [0][0][0][#] to disarm the system.
Refertothe command below for daily operation.
FINAL TEST YOUR SYSTEM
1. Turnon the power supply.
2. Press [0][0][0][A][#] to set the Control Panel to
ChimeModefor testing. The red {ARM}light and
all 4 green lights above the numbers will go on.
STEP4
AC PWR LO BATT. ARM
Press 000# to
test your system.
CHIME
DELAY
INSTANT
1 2 3 4
Diagram5
Diagram6
Other manuals for SC-100 Guide

3

This manual suits for next models

1

Other SkyLink Security System manuals

SkyLink AA-433 Guide User manual

SkyLink

SkyLink AA-433 Guide User manual

SkyLink WD-434 Manual

SkyLink

SkyLink WD-434 Manual

SkyLink Monitoring Station MS-200 User manual

SkyLink

SkyLink Monitoring Station MS-200 User manual

SkyLink WA-434RTL User manual

SkyLink

SkyLink WA-434RTL User manual

SkyLink MA-103 User manual

SkyLink

SkyLink MA-103 User manual

SkyLink DIAL-ALERT AD-433S User manual

SkyLink

SkyLink DIAL-ALERT AD-433S User manual

SkyLink HA-300 User manual

SkyLink

SkyLink HA-300 User manual

SkyLink SA-103A User manual

SkyLink

SkyLink SA-103A User manual

SkyLink SK-250 User manual

SkyLink

SkyLink SK-250 User manual

SkyLink M9 User manual

SkyLink

SkyLink M9 User manual

SkyLink SC-100 Guide User manual

SkyLink

SkyLink SC-100 Guide User manual

SkyLink SK-200 User manual

SkyLink

SkyLink SK-200 User manual

SkyLink M6 User manual

SkyLink

SkyLink M6 User manual

SkyLink AA-103 User manual

SkyLink

SkyLink AA-103 User manual

SkyLink Household Aler HA-100 User manual

SkyLink

SkyLink Household Aler HA-100 User manual

SkyLink SC-100 Guide User manual

SkyLink

SkyLink SC-100 Guide User manual

SkyLink SC-100 Guide User manual

SkyLink

SkyLink SC-100 Guide User manual

SkyLink SK-200 User manual

SkyLink

SkyLink SK-200 User manual

SkyLink SA-001 User manual

SkyLink

SkyLink SA-001 User manual

SkyLink M4 User manual

SkyLink

SkyLink M4 User manual

SkyLink MOTION ALERT HA-318 User manual

SkyLink

SkyLink MOTION ALERT HA-318 User manual

SkyLink MULTI LINK PRO ML-001 User manual

SkyLink

SkyLink MULTI LINK PRO ML-001 User manual

SkyLink SA-001S User manual

SkyLink

SkyLink SA-001S User manual

SkyLink HA-434RTL User manual

SkyLink

SkyLink HA-434RTL User manual

Popular Security System manuals by other brands

American Dynamics AD2032 Installation and operating instructions

American Dynamics

American Dynamics AD2032 Installation and operating instructions

Aico EI169/160 Instruction leaflet

Aico

Aico EI169/160 Instruction leaflet

Eaton SM87BG Technical manual

Eaton

Eaton SM87BG Technical manual

ADEMCO VISTA-128B user guide

ADEMCO

ADEMCO VISTA-128B user guide

ABC Office Vector 06502 user guide

ABC Office

ABC Office Vector 06502 user guide

First Alert FA848C Installation and setup guide

First Alert

First Alert FA848C Installation and setup guide

NAPCO Magnum Alert 800 operating guide

NAPCO

NAPCO Magnum Alert 800 operating guide

Bosch Solution 6000-IP CC615GWF quick start guide

Bosch

Bosch Solution 6000-IP CC615GWF quick start guide

ADEMCO Counterforce CFV15P Programming guide

ADEMCO

ADEMCO Counterforce CFV15P Programming guide

Chiron Iris Touch Maintenance Guide

Chiron

Chiron Iris Touch Maintenance Guide

Solon Essentials AL00038 quick start guide

Solon

Solon Essentials AL00038 quick start guide

Vixen Horns VXS4006C installation guide

Vixen Horns

Vixen Horns VXS4006C installation guide

Data Aire MINI DATA ALARM PROCESSOR II Operation and maintenance manual

Data Aire

Data Aire MINI DATA ALARM PROCESSOR II Operation and maintenance manual

First Alert FA130CP user guide

First Alert

First Alert FA130CP user guide

Speaks z wave SSA1 instruction manual

Speaks z wave

Speaks z wave SSA1 instruction manual

GE 4 Series user guide

GE

GE 4 Series user guide

Encore ENXDVR-4C user manual

Encore

Encore ENXDVR-4C user manual

Teletek electronics CA824 installation manual

Teletek electronics

Teletek electronics CA824 installation manual

manuals.online logo
manuals.online logoBrands
  • About & Mission
  • Contact us
  • Privacy Policy
  • Terms and Conditions

Copyright 2025 Manuals.Online. All Rights Reserved.