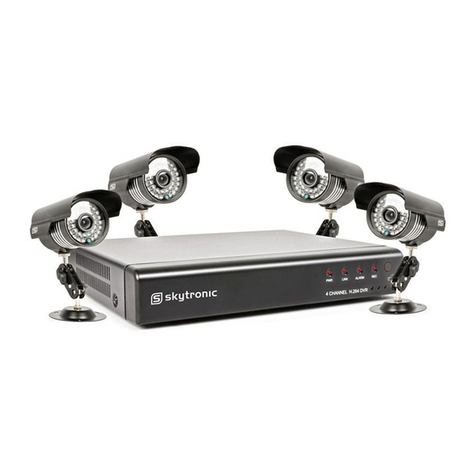
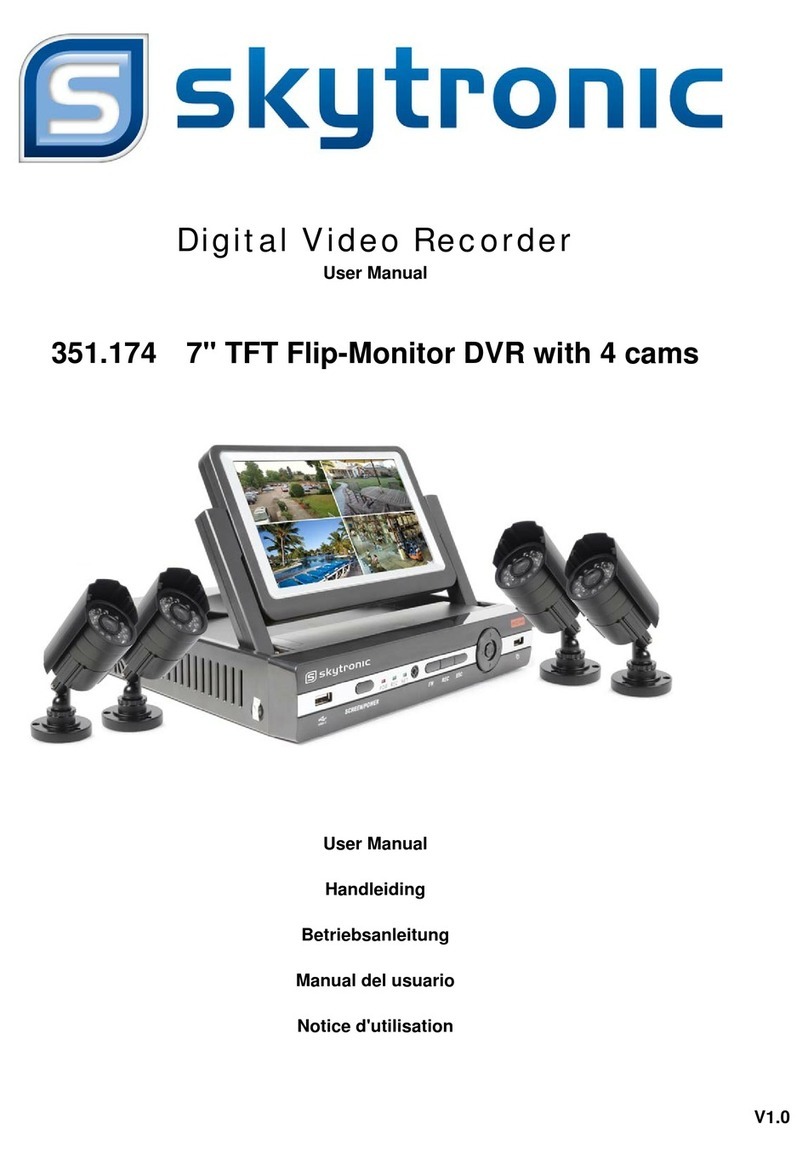
SKYTRONIC 351.180 User manual

Digital Video Recorder
Quick Operation Manual
351.180 19" TFT Prof.8ch DVR with 4 cams
Quick Operation Manual
Snelle handleiding
Kurze Betriebsanleitung
Manual de Operaciones Rápidas
Notice utilisation rapide V1.0

Declaration:
Incorrect description of technology and printing may be included in this manual, we’ll update it irregularly without prior
notice, on our website you can find the latest version. We’ll keep on improve the program or update the description of
manual.
Safety Precautions:
To avoid risks and possible loss of property, please be sure to follow the right operations printed in the manual.
Please place and use the product under the environment 0℃-55℃,avoid place it in humid environment.
Avoid direct sunlight or heat sources.
Avoid humid ,dusty or smoky environment.
Keep the device in horizontal installation condition.
Installing it in stable sites, avoid downfall.
Please don’t place other devices on the DVR.
Install DVR in well-ventilated sites, avoid blocking the vents.
Use it under rated input and output range.
Please don’t disassemble the DVR at will.
Installation
1.1 Open Package Check
First, please check whether any visible damage to the package appearance. The protective materials used for the
package of the DVR can protect most accidental clashes during transportation. Then, checking if all accessories are
equipped.
1.2 Back Panel Instructions
Instruction: Different models with different functions, please in kind prevail, details please refer to following table.
Identification Name Description
Video in Video input 1-8CH multi-channel video input(BNC)
Audio in Audio Input 1-8CH multi-channel audio input(RCA)
Video out Video output Video output
Audio out Audio output Audio output
HDMI HDMI port HDMI output
USB USB port
USB2.0,used for USB mouse, USB memory stick,
LAN LAN port
10/100M Adaptive Ethernet Card(RJ45)
485+、485- RS-485 port PTZ control
DC/AC Power input DC 12V/4A,
Power Power switch Power on/off
1.3 Connection of PTZ and DVR
Connect RS485 cable to RS485 port of DVR
Connect the video cable to DVR input port
Power on camera
Details please refer to (basic operation 2.5 PTZ control)
1.4 Connection Diagram

1. Adjustable foot
2. Location of the 500GB SATA hard Disk (included
3. BNC video inputs for connecting up to 8 cameras (4 units included).
4. RCA (phono) audio inputs for connecting audio sources (microphone type, not included)
corresponding to video inputs 1 to 4.
5. RCA (phono) audio and BNC video outputs for connecting external equipment such as speakers,
external monitors, etc. (not included).
6. USB ports for connecting the mouse (included) and/or removable storage media.
7. RJ45 socket for connecting to the Ethernet network.
8. Socket for mains adapter supplied.
9. Terminal block for connecting the wired inputs and outputs.
10. On/Off switch: Switches the monitor and DVR on or off.
11. SCREEN key: switches the LCD screen off or on again (but does not completely power down the DVR)
12. Right key: increases the current value in the LCD screen settings menu. Used for scrolling.
13. Left key: decreases the current value in the LCD screen settings menu. Used for scrolling.
14. MENU key: takes you into the LCD screen settings menu. Used for confirming your selection
15. AUTO key: automatically calibrates the screen
16. HDMI output for connecting to an additional monitor or television (not included)
17. RS232/RS485 terminal block for controlling PTZ cameras

18. Colour LCD screen
19. Infrared receiver for the remote control (included)
20. System on indicator light.
Basic Operation
2.1 Power ON
After correct installation and power on, the power indicator will be lighted, DVR automatic power on. Buzzer will make beep sound
after starting up, enter into multi-picture monitoring status, you can make operations and configuration now. DVR will start recording
if within set record time.
Main Menu introduction.
2.2 Power OFF
Method 1: Enter shut down interface [Main menu] > [Shutdown] > [Shutdown],select [Shutdown]
Method 2: Toggle the switch(10) on the rear to turn off the DVR and Monitor.
2.3 ON/OFF Screen
1. Short press [POWER/SCREEN] on the front panel.
2.4 Network Access
2.4.1 Network Setting
[MAIN MENU] > [CONFIGURATION] > [NETWORK],enter setting interface.
Cautions: if DHCP server exist in the network, please select ”automatic obtain IP
address” it’ll be advised. Otherwise, users can configure “IP, subnet mask,
Gateway and DNS according to the need.
[ network card ] users can select it according to your own requirements.
[ IP address ] To set IP address, default IP address:192.168.1.88.
[subnet mask] To set subnet mask of device. default subnet mask:255.255.255.0.
[default gateway] to set default gateway of device, default gateway:192.168.1.1. Network configuration interface

[DNS configuration] DNS, analyze domain name to IP address, the address is provided by your local network operators.
2.4.2 Browser Access
Please make sure that the DVR is connected to the network correctly first.
Open Internet Explorer browser, entering the IP address and port number of the
digital video recorder. For Example: DVR IP:192.168.1.88, then input:
http://192.168.1.88 into the address bar.
Note: Internet Explorer will automatically download the Plug-in if accessing DVR
for the first time, please allow installation or install it manually. (Details please refer
to《IE plug-in installation guide》.
2.4.3 Client Access
Client login
Install the client software on PC, double click [IMS200.exe], open network surveillance login dialog, enter” user name” and” password” (note: default“ user
name” and “password” : ”super”, please change it promptly after logging)
Add device Client software login interface
Click [ Setting ] > [ Admin config ] in the right side of software toolbar, add, edit, delete, search device by pop-up device editor. after adding device name,
device port, IP address, user name, password, click [ save ] to close the device management interface.
Start device
Double click the device name in device list, pop-up all the channels of it, then [double click] the selected channel to display video in preview zone. If need to
display all channels, drag the device name to preview zone directly.
2.5 Login in
You’ve to login in DVR first before operation and DVR system will offer relative
functions according to user permissions.
Instructions: preset user: admin, and it’s default administrator, password: 123456.
It’s possible to change password, but can’t change the user rights. The administrator
can add, delete or configure user parameters.
Login in interface
Password protection: continuous input 3 times wrong passwords, there’ll be alert tips. Continuous input 5 times wrong passwords,
account will be locked. system reboot or unlock after 30 minutes. For the sake of security, please change “username” and
“password” in [user management] timely after reboot.
2.6 Preview
After normal logging, it’ll enter multi-picture preview status, date ,time, channel name, record and alarm status are displayed under
the condition of preview
Functions description of state identifications:
Preview Interface
2.7 PTZ Control
Realize easily PTZ control operation by following steps
Step one: [MAIN MENU] > [OUTPUT] > [P/T/Z],set channel and protocol etc.
Step two: Right click mouse [menu] > [P/T/Z] enter the window of PTZ control.
[step] set the rotation range of PTZ, the bigger the number, the greater the range
will be, range: 1 ~ 8 .
[zoom] click and to adjust the magnification of camera.
[focus] click and to adjust the focus of camera PTZ Control interface.
[Iris] click and to adjust the iris of camera.
[set] enter function configuration menu.
2.8 Playback
Right click mouse [menu] > [Search],enter playback interface.
Caution: the HDD for storing recording files must be set to Read Only or Read-Write, to make sure the normal playback
Identification Description Identification Description
recording Tour switch(ON/OFF)
Motion detection Audio output switch(ON/OFF)
Screen freeze

Playback interface
Playing zone instructions
Index FUNCTION Description
1 Calendar
Click the calendar icon to show the record list (only the dates with green background take
records.)and then click a specific date to call the record. The list will be upgraded automatically.
2 Time Select record search start and end time.
3 Play Playback control: stop/play, pause, fast, slow, previous/next frame in pause.
4 Recoding
mode
Choose searched recording mode, including whole, outside alarm, motive detection, whole alarm
recording.
5 Channel Choose searched channel
6 Play Choose to play the previous or next file; choose to play the previous or next channel.
7 Search Choose the start time, channel, and click “search” will display results in the list.
8 Backup
Tick “ ”to choose backup file in file list box, click backup button,cancel backup file ---click
“√”from backup menu “√”.
9 Record List
128 video records shows in searching list choose file and press enter or double click mouse to
view record.
File type: R—normal record, A—alarm record; M—motion detection record.
10 Channel Choose the channel to playback.
Playing toolbar instruction
Button Description Button Description
Play/ Pause Slow play, support 2X slow play
Backwards,2 seconds each click Next frame
Stop Full screen
Forward, support 3X fast-forward
Special functions:
Precise playback:Enter [time query] message box,input the time (hour, minute, second) of recording file, recording type, Channel
Number, click [play] to play the recording file.
Digital zoom:drag out any size area by left button of mouse on the screen when playback under full screen condition ,click left button
to realize zoom playing of the area, click right button to exit zoom playing.
2.9 Front Panel Operation
Instructions: Functions of following digital video recorder front panel keys
Key Name Identification Function
ON/OFF POWER/SCREEN Long press 5 seconds to switch on/off DVR, short press to switch on/off screen

USB Port USB, mouse operation and other USB devices
Recording Switch Start recording
Direction Key
cursor direction key, to select menu options
up, down key, to allocate settings and figures, switch preview picture
left, right: switch selected controls
Enter Key Enter,/OK/menu Operation confirmation, Enter menu
Back/Cancel Esc go back, cancel current operation
PTZ Control PTZ Quick start PTZ menu
Mute MUTE MUTE
Function Key Fn Pop-up AUX functions window in appointed preview interface. [ Long press] to switch
the Input method, [short press] to delete characters in Text input BOX.
Power Indicator POW Red, light on, starting up state
Network Indicator NET light on when connect to network cable, flashing when IP conflict
Recording Indicator REC Light on when recording
Declaration
The quick operation manual only describes the basic operations, more details please refer to E-user manual in the CD;
We reserve the rights of final interpretation on doubts and disputes in the manuals.
The manual is used for multiple models as a reference, specific operations of each model can’t be listed here. If questions, welcome to contact
our customer service department, thank you!

Snelle Handleiding
Bedankt voor het kopen van onze digitale video recorder
Veiligheidsmaatregelen:
Om risico's en mogelijke verlies van eigendom te voorkomen, moet u ervoor zorgen om de juiste handelingen in de
handleiding te volgen
Gelieve het product niet te plaatsen en te gebruiken in de omgeving van 0℃-55℃, vermijd plaatsen in vochtige omgeving
Vermijd direct zonlicht of warmtebronnen
Apparatuur dient horizontaal gemonteerd/geïnstalleerd te worden.
Het installeren in stabiele webbrowsers, voorkomt vastlopen.
Gelieve niet andere apparatuur op het apparaat aan te sluiten.
Installeer de DVR in goed geventileerde plaatsen, Voorkom het blokkeren van de ventilatieopeningen.
Gebruik het onder nominale input en output range.
Gelieve de DVR systeem niet te demonteren.
Installatie
1.1Open Verpakkings Controle
Ten eerste, controleer op zichtbare schade. De beschermende materialen die worden gebruikt voor het pakket
van de DVR beschermen de meeste accidentele botsingen tijdens het transport.
Vervolgens controleren of alle accessoires zijn voorzien.
1.2Achterpaneel instructies
Instructie: Verschillende modellen met verschillende functies, kunnen per model wijzigen. Details vind u in het onderstaande tabel.
Identification Name Description
Video in Video input 1-8CH multi-channel video input(BNC)
Audio in Audio Input 1-8CH multi-channel audio input(RCA)
Video out Video output Video output
Audio out Audio output Audio output
HDMI HDMI port HDMI output
USB USB port USB2.0,used for USB mouse, USB memory stick,
LAN LAN port 10/100M Adaptive Ethernet Card(RJ45)
485+、485- RS-485 port PTZ control
DC/AC Power input DC 12V/4A,
Power Power switch Power on/off
1.3 Aansluiting van PTZ en DVR
Sluit de RS485 kabel aan naar de RS485 poort van de DVR
Sluit de video-kabel aan naar de DVR ingangspoort aan
Zet de speed camera aan
Voor details verwijzen wij u naar【fundamentele werking 2.5 PTZ-besturing】
Verklaring:
Onjuiste beschrijving van de technologie en afdrukken kunnen zijn opgenomen in deze handleiding, we zullen het
onregelmatig updaten zonder voorafgaande kennisgeving; de laatste versie kunt u vinden op onze website .

1.4Diagram aansluiting
1. Adjustable foot
2. Location of the 500GB SATA hard Disk (included
3. BNC video inputs for connecting up to 8 cameras (4 units included).
4. RCA (phono) audio inputs for connecting audio sources (microphone type, not included)
corresponding to video inputs 1 to 4.
5. RCA (phono) audio and BNC video outputs for connecting external equipment such as speakers,
external monitors, etc. (not included).
6. USB ports for connecting the mouse (included) and/or removable storage media.
7. RJ45 socket for connecting to the Ethernet network.
8. Socket for mains adapter supplied.
9. Terminal block for connecting the wired inputs and outputs.
10. On/Off switch: Switches the monitor and DVR on or off.
11. SCREEN key: switches the LCD screen off or on again (but does not completely power down the DVR)
12. Right key: increases the current value in the LCD screen settings menu. Used for scrolling.
13. Left key: decreases the current value in the LCD screen settings menu. Used for scrolling.
14. MENU key: takes you into the LCD screen settings menu. Used for confirming your selection
15. AUTO key: automatically calibrates the screen
16. HDMI output for connecting to an additional monitor or television (not included)

17. RS232/RS485 terminal block for controlling PTZ cameras
18. Colour LCD screen
19. Infrared receiver for the remote control (included)
20. System on indicator light.
Basic Operation
2.1Power ON
Na correcte installatie en inschakeling , zal de power indicator worden verlicht, DVR zal automatisch worden ingeschakeld. Bij het opstarten hoort u een
pieptoon, Multi-picture monitoring status treedt in. U kunt nu beginnen met het configureren van uw DVR systeem. DVR zal beginnen met opnemen indien het
binnen de ingestelde recordtijd is.
Hoofdmenu introductie.
2.2Power OFF
Methode 1: Voer uitgeschakeld-interface 【MAIN MENU】> 【Shutdown】> 【Shutdown】, selecteer 【shutdown】
Methode 2: Druk lang op 【POWER / SCREEN】op het voorpaneel
2.3ON/OFF Screen
1:Druk kort op de toets【POWER/SCREEN】op het frontpaneel of druk【SCR】op de afstandsbediening om aan / uit te schakelen op het scherm.
2:Dubbelklik op muiswiel om aan / uit te schakelen op het scherm.
2.4 Netwerktoegang
2.4.1 Netwerkinstelling
【MAIN MENU】> 【CONFIGURATION】> 【NETWERK】, betreedt het instellen interface.
Waarschuwingen: als DHCP-server in het netwerk bestaat, selecteert u "automatisch verkrijgen IP-adres"
wat geadviseerd wordt. Anders kunnen gebruikers configureren "IP, subnet mask, Gateway en DNS.
【NETWORK CARD】gebruikers kunnen selecteren op basis van uw eigen wensen.
【IP adres】Om het IP adres in te stellen, default IP address: 192.168.1.88.
【Subnet mask】Om subnet mask van het apparaat in te stellen. default subnet mask: 255.255.255.0.
【default gateway】Om default gateway van het apparaat in te stellen, default gateway:192.168.1.1. Netwerk configuratie interface.
【DNS configuratie】DNS, analyseren domeinnaam naar IP-adres, het adres is voorzien door lokale operators in uw netwerk.

2.4.2Browser Toegang
Zorg ervoor dat de DVR eerst correct is aangesloten op het netwerk.
Open Internet Explorer browser, het invoeren van het IP-adres en poortnummer van de digitale video recorder. Bijvoorbeeld: DVR IP: 192.168.1.88, voer: http:
//192.168.1.88 in de adresbalk.
Opmerking: Internet Explorer zal de Plug-in automatisch downloaden als de toegang tot de DVR voor de eerste keer in stand wordt gebracht. Graag de
installatie toestaan of installeer deze handmatig. (Details vindt u op《Internet Explorer plug-in installation guide》.
2.4.3Client Access
Client login
Installeer de client software op de PC, dubbelklik 【IMS200.exe】,open netwerk dialoog surveillance
login, voer "gebruikersnaam" en "paswoord" (opmerking: default "gebruikersnaam" en "paswoord": "super",
deze kunt u wijzigen direct na inloggen)
Toevoegen apparaat Client software login-interface
Klik 【SETTING】> 【Admin config】in de rechterkant van software toolbar, toevoegen, bewerken,
verwijderen, zoek apparaat door pop-up apparaat editor. Na het toevoegen van de naam van het apparaat,
de apparaat poort, IP-adres, gebruikersnaam, wachtwoord, klikt u 【save】om het apparaat management
interface te sluiten.
2.5Inloggen
U dient zich eerst in te loggen voordat u het systeem kunt configureren. Afhankelijk van de gebruiksrechten
kunt u functies in en uitschakelen. Voor ingestelde gebruiker: admin, en de standaard beheerder, paswoord:
123456. Het is mogelijk om het paswoord te veranderen, de gebruikersrechten kunnen niet veranderd worden.
Inloggen in interface
Wachtwoordbeveiliging: er komt een melding wanneer 3 maal de verkeerde wachtwoord wordt ingegeven. De account zal worden vergrendeld
wanneer 5 maal de verkeerde wachtwoord wordt ingegeven. Het systeem zal worden ontgrendeld na 30 minuten. U kunt het systeem ook opnieuw
opstarten. Omwille van de veiligheid wordt u aangeraden om de “gebruikersnaam” en “wachtwoord” in【gebruikersbeheer】te veranderen vlak na
het opnieuw opstarten.

2.6Voorbeeld
Na het gebruikelijke inloggen zal het in de Multi-picture modus komen met vertoning van datum, tijd, kanaal- naam, record en alarm status wat wordt
weergegeven onder de voorwaarde van voorvertoning.
Beschrijving van de identificaties van de verschillende toestanden:
Preview Interface
2.7 PTZ Control
Realiseer eenvoudige PTZ bediening door de volgende stappen
Stap één: 【MAIN MENU】> 【OUTPUT】> 【P / T / Z】, ingestelde kanaal en protocol etc.
Stap twee: Klik op de rechtermuisknop【menu】>【P/T/Z】kom in het veld van de PTZ- besturing.
【stap】stel de rotatie van PTZ, hoe groter het getal, hoe groter het bereik zal zijn. Instelmogelijkheid :
1 ~ 8.
【zoom】klik en In- en uitzoomen van camera
【focus】klik en om de focus van de camera PTZ Control interface aan te passen
【Iris】klik en om de iris van de camera aan te passen
【set】enter functie configuratiemenu。
2.8Playback
Klik op de rechtermuisknop【menu】>【Search】,enter playback interface.
Let op: de harde schijf voor het opnemen van bestanden moeten worden ingesteld op Alleen lezen of
Lees-Schijf om te zorgen voor een normale weergave.
Playback interface
Playing zone instructies:
Identification Description Identification Description
recording Tour switch(ON/OFF)
Motion detection Audio output switch(ON/OFF)
Screen freeze

Index Functie Omschrijving
1 Calendar
Klik op de kalender icoon om het record lijst te tonen (alleen de data met groene
achtergrond, take-records.) en klik vervolgens op een specifieke datum om het record op te roepen.
De lijst zal automatisch worden opgewaardeerd.
2 Time Selecteer de opname start en eindtijd.
3 Play Playback control: stop / play, pauze, snel, langzaam, vorige / volgende frame in pauze.
4 Recoding mode Kies gezochte opnamemodus, waaronder volledige, buiten alarm, beweeg detectie, geheel alarm
opname.
5 Channel Kies gezochte kanaal
6 Play Kies ervoor om het vorige of volgende bestand af te spelen; kiezen om de vorige of volgende kanaal
spelen.
7 Search Kies de starttijd, kanaal, en klik op 'Zoeken' om de resultaten in de lijst weer te geven.
8 Backup Klik op “ ”om het back-up bestand in het dossier keuzelijst te kiezen, klik op de terug knop,
om back-upbestand te annuleren ---klik“√”van back-up menu “√”.
9 Record List
128 video-opnamen worden getoond in het zoeken lijst, kies bestand en druk op Enter of dubbelklik
muis om dossier te bekijken.
Bestand type: R-normale record, A-alarm opnemen; M-bewegingsdetectie record.
10 Channel Kies het kanaal om af te spelen.
Het spelen van knoppenbalk instructie:
Knop Beschrijving Knop Beschrijving
Afspelen/ Pauze Langzaam afspelen, ondersteunt 2X langzaam
Achteruit, 2 seconden elke klik Volgende frame
Stop Volledig scherm
Voorwaarts, ondersteunt 3X snel-voorwaarts
Speciale functies:
Nauwkeurig afspelen: Enter 【time query】berichtvenster, voer de tijd (uur, minuten, seconden) van de opname bestand, het opnemen van het type,
kanaalnummer, klik 【PLAY】om de opname af te spelen.
2.9 Voorpaneel Bediening
Instructies: Functies van toetsen op het bedieningspaneel van digitale videorecorder
Key Name Identification Function
ON/OFF POWER/SCREEN 5 seconden lang indrukken om DVR uit te schakelen, druk kort op deze knop om het
scherm aan of uit te schakelen.
USB-poort USB, muisbediening en andere USB-apparaten
Opname schakelaar Start opname
Toetsrichting
Cursor richting toets, om menu opties te selecteren
omhoog, omlaag toets om de instellingen en de cijfers wijzen, schakelt voorvertoning
afbeelding
links, rechts: schakel tussen geselecteerde besturingselementen
Enter-toets Enter,/OK/menu Bevestigingsknop, Enter menu
Back/Cancel Esc Ga terug, de huidige bewerking annuleren
PTZ Control PTZ Quick start PTZ menu

Mute MUTE MUTE
Functie toets Fn
Pop-up AUX functies venster in aangewezen preview interface.【Druk lang op】om te
schakelen tussen invoer/methode,【Druk kort op】om karakters te verwijderen in tekstinvoer
vakje.
Power Indicator POW Rode indicatie LED gaat aan bij opstarten.
Network Indicator NET Licht op wanneer er verbinding wordt gemaakt met het netwerk kabel, knippert wanneer er
een IP-conflict is.
Recording Indicator REC Licht op tijdens het opnemen.
Start het apparaat
Dubbelklik op de naam van het apparaat in de lijst met apparaten, alle kanalen verschijnen, dan 【dubbel klik】om het geselecteerde kanaal in de preview-zone
weer te geven. Indien het nodig is om alle zenders weer te geven, sleept u de naam van het apparaat naar de preview zone om een voorbeeld van het gebied
rechtstreeks te vertonen.
Verklaring
De snelle handleiding beschrijft alleen de basishandelingen, meer details verwijzen wij u naar E-handleiding op de cd;
Wij behouden ons het recht van uiteindelijke interpretatie op twijfels en geschillen in de handleidingen
De handleiding wordt gebruikt op meerdere modellen als referentie, specifieke operaties van elk model worden hier niet vermeld. Als u vragen hebt, bent
u welkom om contact op te nemen met onze klantenservice, dank u!

Digital Video Recorder
Kurze Betriebsanleitung
Vielen Dank für den Kauf unseres digitalen Videorekorder
Sicherheitsmaßnahmen:
Um Risiken und möglichen Vermögensverlust zu vermeiden, bitten wir Sie, die richtigen Operationen im Handbuches folgen.
Sie bitte und verwenden Sie das Produkt in einer Umgebung 0 ℃-55 ℃, legen Sie sie in feuchter Umgebung zu vermeiden.
Vermeiden Sie direkte Sonneneinstrahlung oder Wärmequellen.
Vermeiden feuchten, staubigen oder rauchigen Umgebung.
Halten Sie das Gerät in waagerechte Montage Zustand.
Installieren Sie in stabile Websites, Untergang zu vermeiden.
Bitte stellen Sie keine anderen Geräte auf dem DVR.
Installieren Sie DVR in gut belüfteten Standorten, nicht zu blockieren Sie die Lüftungsschlitze.
Verwenden Sie es unter Nenn Ein- und Ausgangsbereich.
Sie bitte nicht den DVR am Willen zu zerlegen.
Installation
1.1 Paket öffnen prüfen
Zuerst überprüfen Sie bitte, ob sichtbare Schäden an der Verpackung Aussehen. Die Schutzmaterialien für die
Verpackung des DVR können die meisten zufälligen Zusammenstößen während des Transports zu schützen.
Dann überprüfen, ob alle Zubehörteile ausgestattet.
1.2 Rückseite Anleitung
Anleitung: Verschiedene Modelle mit unterschiedlichen Funktionen, bitte in der Art vorherrschen, Details siehe folgende Tabelle.
Identification Name Description
Video in Video input 1-8CH multi-channel video input(BNC)
Audio in Audio Input 1-8CH multi-channel audio input(RCA)
Video out Video output Video output
Audio out Audio output Audio output
HDMI HDMI port HDMI output
USB USB port USB2.0,used for USB mouse, USB memory stick
LAN LAN port 10/100M Adaptive Ethernet Card(RJ45)
485+、485- RS-485 port PTZ control
DC/AC Power input DC 12V/4A
Power Power switch Power on/off
1.3 Anschluss von PTZ und DVR
Connect RS485-Kabel von Speed Dome an RS485-Port des DVR
Erklärung:
Falsche Beschreibung der Technologie und der Druck kann in diesem Handbuch enthalten sein, werden wir es zu
aktualisieren, unregelmäßig, ohne vorherige Ankündigung, aktualisierte Inhalte werden in neuen Version ausgedruckt. wir
halten auf Verbesserung des Programms oder aktualisieren Sie die Beschreibung des Handbuchs. wenn jede
Nichtübereinstimmung, bitte in der Art vorherrschen!

Verbinden Sie die Videokabel der Speed-Dome, um DVR Eingangs-Port
Schalten Sie Speed-Dome-Kamera
Einzelheiten entnehmen Sie bitte 【grundlegende Bedienung 2.5 PTZ-Steuerung】
1.4 Anschlussdiagramm
1. Adjustable foot
2. Location of the 500GB SATA hard Disk (included
3. BNC video inputs for connecting up to 8 cameras (4 units included).
4. RCA (phono) audio inputs for connecting audio sources (microphone type, not included)
corresponding to video inputs 1 to 4.
5. RCA (phono) audio and BNC video outputs for connecting external equipment such as speakers,
external monitors, etc. (not included).
6. USB ports for connecting the mouse (included) and/or removable storage media.
7. RJ45 socket for connecting to the Ethernet network.
8. Socket for mains adapter supplied.
9. Terminal block for connecting the wired inputs and outputs.
10. On/Off switch: Switches the monitor and DVR on or off.
11. SCREEN key: switches the LCD screen off or on again (but does not completely power down the DVR)
12. Right key: increases the current value in the LCD screen settings menu. Used for scrolling.

13. Left key: decreases the current value in the LCD screen settings menu. Used for scrolling.
14. MENU key: takes you into the LCD screen settings menu. Used for confirming your selection
15. AUTO key: automatically calibrates the screen
16. HDMI output for connecting to an additional monitor or television (not included)
17. RS232/RS485 terminal block for controlling PTZ cameras
18. Colour LCD screen
19. Infrared receiver for the remote control (included)
20. System on indicator light.
Grundlegende Bedienung
2.1Power ON
Nach korrekter Installation und Einschalten wird der Power-Anzeige beleuchtet werden, DVR automatische Energie auf. Summer Signalton nach dem Start zu
machen, geben Sie in Mehrbild-Überwachungsstatus, können Sie Operationen und Konfiguration jetzt.DVR Aufnahme, wenn im Satz Rekordzeit starten wird,
zu machen.
Hauptmenü Einführung.
2.2Power OFF
Method 1:Enter shut down interface【Main menu】>【Shutdown】>【Shutdown】,select【shutdown】
Method 2:Long press【POWER/SCREEN】on the front panel
2.3ON/OFF Screen
1:Drücken Sie kurz 【POWER / SCREEN】auf der Frontplatte oder drücken Sie 【SCR】oder der Fernbedienung zum Ein- / Ausschalten des Bildschirms
2: Doppelklicken Sie auf dem Mausrad, um Ein- / Ausschalten des Bildschirms.
2.4 Network Access
2.4.1Network Setting
【MAIN MENU】>【CONFIGURATION】>【NETWORK】,betreten Einstellung Schnittstelle.
Vorsicht: Wenn DHCP-Server im Netzwerk vorhanden sind, wählen Sie bitte "IP-Adresse automatisch zu
erhalten", es wird empfohlen. Andernfalls können Benutzer IP, Subnetzmaske, Gateway und DNS je nach
Bedarf konfigurieren ".
【network card】Benutzer können es nach Ihren eigenen Anforderungen zu wählen.
【IP address】Um die IP-Adresse eingestellt, Standard-IP-Adresse: 192.168.1.88.
【subnet mask】Um die Teilnetzmaske des Geräts eingestellt. Standard-Subnetzmaske: 255.255.255.0.
【default gateway】um Standard-Gateway-Gerät eingestellt, Standard-Gateway:192.168.1.1. Netzwerkkonfigurationsoberfläche
【DNS configuration】DNS analysieren Domain-Namen zu IP-Adresse, die Adresse von Ihrem lokalen Netzbetreiber zur Verfügung gestellt.

2.4.2 Browser-Zugang
Bitte stellen Sie sicher, dass der DVR richtig an das Netzwerk angeschlossen ist erste.
Öffnen Sie IE-Browser, der Eingabe der IP-Adresse und Port-Nummer des digitalen Videorekorder. Zum Beispiel: DVR IP: 192.168.1.88, dann Eingabe: http:
//192.168.1.88 in die Adressleiste.
Hinweis:. IE wird automatisch die Plug-in, wenn Zugriff auf DVR zum ersten Mal, lassen Sie bitte Installation oder manuell installieren (Details finden Sie unter
"IE-Plug-in-Installationshandbuch".
2.4.3Client Zugang
Kunden-Login
Installieren Sie die Client-Software auf PCDoppelklicken Sie【IMS200.exe】,Überwachungsanmeldedialog offenes Netzwerk, geben Sie "Benutzername"
und "Passwort" (Anmerkung: default "Benutzername" und "Passwort": "super", ändern Sie sie bitte unverzüglich nach Protokollierung)
Gerät hinzufügen Client-Software Login-Schnittstelle
Klicken Sie auf 【Einstellung】> 【Admin Config】in der rechten Seite des Software-Werkzeugleiste hinzufügen, bearbeiten, löschen, suchen Gerät durch
Pop-up-Gerät-Editor. nach Zugabe von Gerätenamen, Geräteanschluss, IP-Adresse, Benutzername, Kennwort, klicken Sie auf 【speichern】, um den
Geräte-Management-Schnittstelle zu schließen.
2.5Login in
Sie haben, um in DVR loggen vor der ersten Inbetriebnahme und DVR-System wird relativ Funktionen
Akkordeon Sache zu Benutzerberechtigungen bieten. Anleitung: voreingestellte Benutzer: admin, und es ist
Standard-Administrator-Passwort: 123456. Es ist möglich, das Kennwort zu ändern, aber können die
Benutzerrechte nicht ändern. Administrator kann hinzufügen, löschen oder konfigurieren Sie
Benutzerparameter.
Melden Sie sich an Schnittstelle
Passwortschutz: Dauereingangs 3 mal falsch Passwörter, werde da Benachrichtigung Tipps. Dauereingangs fünfmal falsch Passwörter werden
Konto gesperrt werden. Neustart des Systems oder zu entsperren nach 30 Minuten. Aus Gründen der Sicherheit, ändern Sie "Benutzername" und
"Passwort" in der【Benutzerverwaltung】zeitnah nach dem Neustart.
2.6 Vorschau
Nach dem normalen Protokollierung, wird es Mehrfachbild-Vorschau-Status, Datum, Uhrzeit, Kanalnamen, Aufzeichnung und Alarmstatus geben unter der
Bedingung oder Vorschau angezeigt
Funktionen Beschreibung oder Zustand entifications:
Preview-Schnittstelle
Identifizierung Beschreibung Identifizierung Beschreibung
Aufzeichnung
Tour Schalter (ON / OFF)
Bewegungserkennung
Audioausgangsschalter (EIN /
AUS)
Bildschirm einfrieren

2.7 PTZ-Steuerung
Verwirklichen Sie einfach PTZ Steuerbetrieb durch folgende Schritte
Schritt eins:【MAIN MENU】>【OUTPUT】>【P/T/Z】,eingestellten Kanal und Protokoll usw.
Schritt zwei : Rechtsklick der Maus【menu】>【P/T/Z】geben Sie die Fenster der PTZ-Steuerung
【step】stellen Sie den Drehbereich des PTZ, desto größer die Zahl, desto größer ist der Bereich sein wird,
Bereich: 1 ~ 8.
【zoom】Klick und um die Vergrößerung der Kamera anzupassen
【focus】Klick und um den Fokus der Kamera PTZ-Steuerung-Schnittstelle einstellen
【Iris】Klick und die Iris der Kamera einstellen
【set】betreten Funktionsmenü-Konfiguration.
2.8 Wiedergabe
Rechtsklick der Maus 【Menu】> 【Search】treten Sie die Wiedergabe-Schnittstelle.
Achtung: die Festplatte zum Speichern von Aufnahmedateien müssen auf Nur Lesen oder Lesen-Schreiben, um sicherzustellen, dass die normale Wiedergabe
zu machen
Playback-Schnittstelle
Playing zone instructions:
Index Type Description
1 Kalender
Klicken Sie auf das Kalendersymbol in der Aufzeichnungsliste zeigen
(nur die Termine mit grünem Hintergrund nehmen Aufzeichnungen.), und klicken Sie dann auf einen
bestimmten Termin, um den Datensatz aufrufen. Die Liste wird automatisch aktualisiert.
2 Zeit Wählen Rekord Suche Start- und Endzeit.
3 Spielen Wiedergabesteuerung: Stop / Play, Pause, schnell, langsam, vorherigen / nächsten Rahmen in Pause.
4 Aufzeichnungsmodus
Wählen Sie suchten Aufnahmemodus, darunter insgesamt außerhalb Alarm, Motiv-Erkennung, ganze
Alarmaufzeichnung.
5 Kanal Wählen Sie suchten Kanal
6 Wiedergabe Wählen Sie, um das vorherige oder nächste Datei abzuspielen; wählen, um den vorherigen oder
nächsten Kanal zu spielen.
7 Suche Wählen Sie die Startzeit, Kanal, und klicken Sie auf "Suchen", werden die Ergebnisse in der Liste
anzuzeigen.
8 Sicherungskopie Tick “ ”um Backup-Datei in Listenfeld Datei auszuwählen, klicken Sie Backup-Taste,
Table of contents
Languages:
Other SKYTRONIC DVR manuals

SKYTRONIC
SKYTRONIC 351.158 User manual

SKYTRONIC
SKYTRONIC DVR User manual

SKYTRONIC
SKYTRONIC 351.136 User manual

SKYTRONIC
SKYTRONIC 351.154 User manual

SKYTRONIC
SKYTRONIC 351.174 User manual

SKYTRONIC
SKYTRONIC 351.158 User manual

SKYTRONIC
SKYTRONIC 351.154 User manual

SKYTRONIC
SKYTRONIC 351.124 User manual

SKYTRONIC
SKYTRONIC 351.142 User manual

SKYTRONIC
SKYTRONIC 351.157 User manual