SMART MDM600KIT Quick guide

All products are trademarks of Nostalgia Products Group, LLC.
Worldwide design & utility patented or patents pending.
© 2012 Nostalgia Products Group, LLC.
www.nostalgiaelectrics.com
(rev. 07/16/13)
2013
Exclusive Distributors
SMART (an SMA Worldwide plc Company)
SMA House, Langley Waters, Home Park
Kings Langley, Herts. WD4 8LZ
SMART Worldwide Ltd 2012 ©
www.smartworldwidefun.com

MDM600KIT
Mini Donut Bakery Kit
Kit para Hornear Mini Donuts
Máquina de Mini Donuts
Instructions and Recipes
Instrucciones y recetas
Instruções e Receitas


ENGLISH
2
Make every day a party!
Visit www.smartworldwidefun.com for more fun products.
CONTENTS
IMPORTANT PRECAUTIONS . . . . . . . . . . . . . . . . . . . . . . . . . . . . . 3
IMPORTANT SAFEGUARDS . . . . . . . . . . . . . . . . . . . . . . . . . . . . . 3
INTRODUCTION . . . . . . . . . . . . . . . . . . . . . . . . . . . . . . . . . . . . 4
PARTS & ASSEMBLY . . . . . . . . . . . . . . . . . . . . . . . . . . . . . . . . . . 5
HOW TO OPERATE . . . . . . . . . . . . . . . . . . . . . . . . . . . . . . . . . . 6
HELPFUL TIPS . . . . . . . . . . . . . . . . . . . . . . . . . . . . . . . . . . . . . 7
CLEANING & MAINTENANCE . . . . . . . . . . . . . . . . . . . . . . . . . . . . 7
RECIPES . . . . . . . . . . . . . . . . . . . . . . . . . . . . . . . . . . . . . . . . . 8
RETURNS & WARRANTY . . . . . . . . . . . . . . . . . . . . . . . . . . . . . . . 11
SAFETY
Appliance Specications:
220 Volts, 60 Hz, 750 Watts, ETL Approved
Your safety and the safety of others is very important.
We have provided many important safety messages in this manual and
on your appliance. Always read and obey all safety messages.
This is the safety alert symbol.
This symbol alerts you to potential hazards that
can kill or hurt you and others.
All safety messages will follow the safety alert symbol.
All safety messages will tell you what the potential hazard is, tell you how to reduce the
chance of injury, and tell you what can happen if the instructions are not followed.

ENGLISH
3
IMPORTANT PRECAUTIONS
1. NEVER immerse appliance or cord in water.
2. NEVER use near water.
3. NEVER use an abrasive sponge or cloth on the appliance.
4. NEVER leave appliance unattended while in use.
5. NEVER place anything other than what is intended to be cooked in the appliance.
6. Unplug appliance from outlet when not in use and when cleaning.
7. DO NOT place appliance in dishwasher.
8. Keep out of reach of children.
9. This appliance is NOT A TOY.
10. This appliance is not intended for use by young children or
the cognitively challenged without supervision.
11. Young children should be supervised to ensure that they do not play with the appliance.
IMPORTANT SAFEGUARDS
When using electrical appliances, basic safety precautions
should always be followed, including:
1. Read all instructions before operating this appliance.
2. DO NOT touch hot surfaces.
3. DO NOT use outdoors. FOR HOUSEHOLD USE ONLY.
4. To protect against risk of electrical shock, do not immerse cord,
plugs or appliance in water or any other liquid.
5. DO NOT operate any appliance with a damaged cord or plug, after the
appliance malfunctions, or if it is dropped or damaged in any manner. Return
the appliance to the nearest authorized service facility for examination,
or to a repair shop for electrical or mechanical adjustment.
6. The appliance manufacturer does not recommend the use of accessory
attachments other than what is supplied with the unit. They may cause injuries.
7. Close supervision is necessary when any appliance is used by or near children.
8. DO NOT place on or near a hot gas or electric burner, or in a heated oven.
9. DO NOT overload wall outlet, extension cords, or integral convenience
receptacles, as this can result in a risk of re or electric shock.
10. This appliance should not be used for purposes other than stated
in the instructions accompanying this appliance.
11. DO NOT leave unit unattended while in use or when plugged into an outlet.
12. Unplug from outlet when not in use and before removing parts for cleaning. Allow to cool
before putting on or taking o parts and before cleaning the appliance.
ENGLISH
4
13. A short power-supply cord is provided to reduce the risk resulting from
becoming entangled in or tripping over a longer cord. Do not let cord
hang over edge of table, countertop or touch hot surfaces.
14. Always plug cord into wall outlet before operation. There is no on/o switch. To turn
o, remove plug from wall outlet. Allow unit to cool completely before putting away.
15. Longer detachable power-supply cords or extension cords are available and
may be used if care is exercised in their use. Exception: An extension cord or
longer detachable cord is not recommended for use with this appliance.
16. If a long detachable power-supply cord or extension cord is used: 1) The marked
electrical rating of the cord or extension cord should be at least as great as the
electrical rating of the appliance; 2) If the appliance is of the grounded type,
the extension cord should be a grounding 3-wire cord; and 3) The longer cord
should be arranged so that it does not drape over the countertop or table top
where it can be pulled on by children or tripped over unintentionally.
17. This appliance has an approved plug. Do not attempt to modify the plug in any way.
18. Extreme caution should be used when moving an appliance with hot food.
19. Do not attempt to service this appliance yourself, as opening or
removing covers may expose you to dangerous voltage or other
hazards. Refer all servicing to qualied service personnel.
20. Pastries will be very hot. Use a spoon to carefully scoop them out.
21. Extreme caution must be used when opening and closing the Lid on this unit.
Use an oven mitt or pot holder when opening and closing the Lid for safety.
SAVE THESE INSTRUCTIONS!
INTRODUCTION
Thank you for purchasing the SMART MINI DONUT BAKERY KIT from SMART Worldwide.
Now you can cook delicious mini donuts, bagels and other pastries at home without the
mess and fuss of frying or turning on an oven. Use your favorite donut recipe or store-
bought mix to make pastries or mini bagels. Bake up to six mini donuts at a time. Use the
included shaker to decorate donuts with sprinkles and sugar, then display them on the
donut stacker. The MINI DONUT BAKERY KIT is great for snack time, party time or anytime!

ENGLISH
5
PARTS & ASSEMBLY
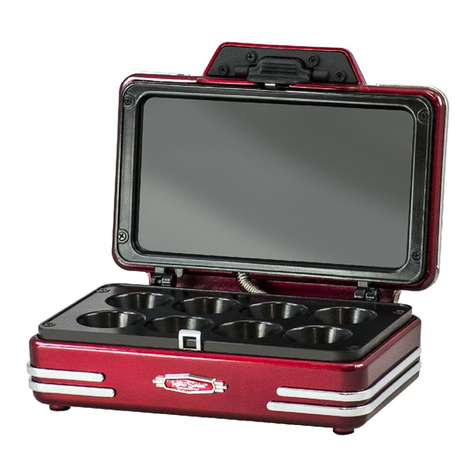
Your MINI DONUT BAKERY KIT is already fully assembled.
Parts
Main Unit
Shaker
Donut Stacker
Tin

ENGLISH
6
HOW TO OPERATE
1. Before rst use, wipe down all surfaces with a damp cloth and dry.
2. The Lower Nonstick Cooking Surface should be lightly coated with a small
amount of vegetable oil. This can be applied with a paper towel or with a
nonstick oil spray. The oil will help protect the nonstick quality of the cooking
surface. This should be done periodically to maintain the nonstick quality.
3. Find a dry, suitable, level surface near an electrical outlet.
4. Preheat the appliance by closing the Lid and plugging into an electrical outlet.
5. When the power is on, the Red Power Light will come on. The Green
Ready Light will stay o while the appliance is preheating.
6. The appliance should preheat for a minimum of 3 minutes. The Green
Ready Light will turn on when the appliance is ready to cook.
7. While the appliance is preheating, you may prepare the ingredients for your donuts.
8. Raise the Lid using an oven mitt or pot holder to prevent accidental burns.
9. Fill each of the six pastry wells in the Lower Nonstick Cooking Surface with mixture.
10. Close the Lid using a pot holder or oven mitt. Make sure Lid is locked.
11. Steam may be released from appliance during cooking. For your safety,
avoid contact with steam, as it is very hot and can cause burns.
12. The cooking time will range between 5-7 minutes, depending
on the thickness of mixture and personal taste.
13. Once the pastries have completed cooking, raise the Lid with a pot holder or oven mitt.
Remove the pastries from the Nonstick Cooking Surface with a plastic or wooden spoon.
DO NOT use metal utensils, as they may scratch and damage the Nonstick Cooking Surface.
14. If cooking more than one batch of pastries in a session, after removal of the rst
batch, lower the Lid to maintain heat until ready to cook the next batch.
15. As soon as you are nished cooking, unplug appliance and allow to cool.
16. Once the appliance is cool, follow the directions in the Cleaning and
Maintenance section to clean your MINI DONUT BAKERY KIT.

ENGLISH
7
HELPFUL TIPS
NEVER leave the unit unattended while operating.
Smoking
During rst use, you may notice slight smoking or a slight odor; this is normal
with most new appliances. The smoking and odor is caused by the residues
burning o the Nonstick Cooking Surface and the Heating Element. Allow
the appliance to preheat until smoke and odor no longer exists.
CLEANING & MAINTENANCE
Please take care of your MINI DONUT BAKERY KIT by following these
simple instructions and precautions. Cleaning is a snap.
• Disconnect from the electrical outlet by unplugging the appliance.
• Make sure the appliance is cool before cleaning.
• Clean the upper and lower Nonstick Cooking Surface
with a damp, non-abrasive cloth and dry.
• Wipe the exterior with a damp, non-abrasive cloth and dry.
• DO NOT put any parts in a dishwasher.
• NEVER immerse appliance or cord in water.
It is that simple!

ENGLISH
8
RECIPES
With the MINI DONUT BAKERY KIT you can create donuts using your favorite
donut recipe. You can even use pre-packaged mixes such as:
• Muns
• Cake
• Brownies
• Cupcakes
Simply follow the directions on the box, ll the individual sections in
the lower griddle, close lid and let cook for about 5-7 minutes. Soon
you will have delicious snacks and desserts ready to serve.
QUICK DONUTS
• 2 Cups Flour
• ¼ Cup Sugar
• 1 Egg
• 1 Tsp. Salt
• ½ Tsp. Baking Soda
• 1 Tsp. Nutmeg
• 1 Tsp. Baking Powder
• ¾ Cup Buttermilk
• ¼ Cup Vegetable Oil
Preheat the MINI DONUT BAKERY as directed.
Mix dry ingredients.
Stir in buttermilk, vegetable oil and eggs. Beat with a fork.
Carefully pour into pastry wells.
Close the Lid and cook for 5-7 minutes
until light golden brown in color.
Open Lid with a pot holder or oven mitt.
Remove each donut with wooden or plastic
spoon. Place on plate and serve.
You may also choose to sprinkle the donuts
holes with granulated sugar, powdered sugar
or cover with frosting and sprinkles.
DONUT GLAZE
• ¹/3 Cup Butter
• 2 Cups Powdered
Sugar
• 1½ Tsp. Vanilla
• 1 Tsp. Pure
Vanilla Extract
• 4 Tbsp. Hot Water
Melt butter in a saucepan over medium heat.
Stir in powdered sugar and vanilla until smooth.
Remove from heat, and stir in hot water one tablespoon
at a time until the icing is somewhat thin, but not watery.
Dip donuts into the glaze while still hot, and set
onto wire racks to drain o excess glaze.

ENGLISH
9
BLUEBERRY DONUTS
• 2 Cups All-Purpose,
Unbleached Flour
• ½ Cup Granulated
White Sugar
• 2 Tsp. Baking Powder
• 1 Cup Milk
• 1 Egg
• ¹/3 Cup Vegetable Oil
• ¾ Cup Fresh
Blueberries
Preheat the MINI DONUT BAKERY as directed.
In a large bowl, stir together milk, egg and oil.
Add our, baking powder, sugar, and blueberries.
Gently mix the batter just until blended.
Carefully pour into pastry wells.
Close the Lid and cook for 5-7 minutes
until light golden brown in color.
Open Lid with a pot holder or oven mitt.
Remove each donut with wooden or plastic
spoon. Place on plate and serve.
You may also choose to sprinkle the donuts
in granulated or powdered sugar.
CHOCOLATE CAKE DONUTS
• ¾ Cup Butter,
softened
• 1½ Cups White
Granulated Sugar
• 2 Eggs
• 1 Tsp. Pure
Vanilla Extract
• 1 Tsp. Instant Coffee
or Espresso Powder
• ½ Cup Buttermilk
• 1 Cup All-
Purpose Flour
• ½ Cup Cocoa Powder
• ¼ Tsp. Baking Powder
• ½ Tsp. Salt
Preheat the MINI DONUT BAKERY as directed.
Mix together the our, cocoa, coee,
baking powder, and salt. Set aside.
In a large bowl, cream together the butter
and sugar until light and uy.
Beat in the eggs one at a time, then stir in the vanilla.
Beat in the our mixture alternately with the buttermilk.
Carefully pour into pastry wells.
Close the Lid and cook for 5-7 minutes
until light golden brown in color.
Open Lid with a pot holder or oven mitt.
Remove each donut with wooden or plastic
spoon. Place on plate and allow to cool.
Once cool, frost or decorate as desired.

ENGLISH
10
RED VELVET CAKE DONUTS
• ¼ Cup Butter
• ¾ Cup White
Granulated Sugar
• 1 Egg
• ½ Cup Buttermilk
• 1 Tbsp. Red Food
Coloring
• ½ Tsp. Vanilla Extract
• ¾ Tsp. Baking Soda
• 1½ Tsp. Distilled
White Vinegar
• 1 Cup All-
Purpose Flour
• 2½ Tbsp.
Unsweetened
Cocoa Powder
• ½ Tsp. Salt
Preheat the MINI DONUT BAKERY as directed.
In a large bowl, beat the butter and sugar with
an electric mixer until light and uy.
Mix in the eggs, buttermilk, red food coloring and vanilla.
Stir in the baking soda and vinegar.
Combine the our, cocoa powder and salt;
stir into the batter just until blended.
Carefully pour mixture into pastry wells.
Close the Lid and cook for 5-7 minutes,
or until light golden brown.
Open Lid with a pot holder or oven mitt.
Remove each donut with wooden or plastic
spoon. Place on plate and allow to cool.
Once cool, frost or decorate as desired.
APPLESAUCE DONUTS
• ¾ Cup White Sugar
• 2 Tbsp. Butter,
softened
• 2 Eggs
• ¾ Cup Applesauce
• 4 Cups All-Purpose
Flour, sifted
• 2 Tsp. Baking Powder
• 1 Tsp. Salt
• ½ Tsp. Baking Soda
• ½ Tsp. Ground Mace
• ½ Tsp. Ground
Cinnamon
• ½ Cup Buttermilk
• ¼ Cup White Sugar
& Cinnamon Mixture
for topping
Preheat the MINI DONUT BAKERY as directed.
In a large bowl, beat together white sugar,
butter, eggs and applesauce.
In a separate bowl, stir together our baking
powder, salt, baking soda, mace and cinnamon.
Stir our mixture into the egg mixture
alternately with the buttermilk.
Mix until a sti dough is formed.
Carefully ll each pastry well with dough.
Close the Lid and cook for 5-7 minutes,
or until light golden brown.
Open Lid with a pot holder or oven mitt.
Remove each donut with wooden or plastic spoon.
Place on plate and sprinkle with sugar & cinnamon mixture.
Allow to cool & serve.

ENGLISH
11
RETURNS & WARRANTY
SHOULD YOUR UNIT NOT WORK OR IF DAMAGED WHEN YOU FIRST TAKE IT OUT
OF THE BOX, PLEASE RETURN IT TO THE PLACE OF PURCHASE IMMEDIATELY.
MINI DONUT BAKERY KIT / MDM600KIT
Distributed by:
SMART Worldwide
(An SMA Worldwide plc Company)
SMA House
Langley Waters, Home Park
Kings Langley, WD4 8LZ
Hertfordshire
United Kingdom
Phone: Please see website for details
Web: www.smartworldwidefun.com
Customer Service Inquiry
To submit a Customer Service inquiry, go to www.smartworldwidefun.com and
ll out the Customer Service Inquiry form and click the Submit button.
A representative will contact you as soon as possible.
This appliance is designed and built to provide many years of satisfactory performance
under normal household use. The distributor pledges to the original owner that should
there be any defects in material or workmanship during the rst 90 days of purchase,
we will repair or replace the unit at our option. Our pledge does not apply to damages
caused by shipping, mishandling or unit being dropped. A product deemed defective
either from manufacturing or being mishandled is up to the distributor’s discretion. In
order to obtain service under this warranty, please contact SMART Worldwide at the
website listed above or by lling out the Customer Service Inquiry Form located at www.
smartworldwidefun.com. This warranty does not apply to re-manufactured merchandise.
Please read these instructions carefully. Failure to comply with these instructions,
damages caused by improper replacement parts, abuse or misuse will void this
pledge to you and is being made in place of all other expressed warranties.
For more information, visit us online at www.smartworldwidefun.com
Like us on Facebook at www.facebook.com/SMARTWorldwide.
Follow us on Twitter @smartworldwide1
View us on YouTube at www.youtube.com/user/SmartWorldwideFun

12
ESPAÑOL
12
¡Convierta todos los días en una etsa!
Visite www.smartworldwidefun.com para ver más productos divertidos.
CONTENIDO
PRECAUCIONES IMPORTANTES . . . . . . . . . . . . . . . . . . . . . . . . . . 13
MEDIDAS IMPORTANTES . . . . . . . . . . . . . . . . . . . . . . . . . . . . . .13
INTRODUCCIÓN . . . . . . . . . . . . . . . . . . . . . . . . . . . . . . . . . . . . 14
PARTES Y ENSAMBLAJE . . . . . . . . . . . . . . . . . . . . . . . . . . . . . . . 15
CÓMO FUNCIONA . . . . . . . . . . . . . . . . . . . . . . . . . . . . . . . . . .16
CONSEJOS ÚTILES . . . . . . . . . . . . . . . . . . . . . . . . . . . . . . . . . . 17
LIMPIEZA Y MANTENIMIENTO . . . . . . . . . . . . . . . . . . . . . . . . . . . 17
RECETAS . . . . . . . . . . . . . . . . . . . . . . . . . . . . . . . . . . . . . . . . . 18
DEVOLUCIONES Y GARANTÍA . . . . . . . . . . . . . . . . . . . . . . . . . . .21
SEGURIDAD
Especicaciones del electrodoméstico:
220 Voltios, 60 Hercios, 750 Vatios, Aprobado por ETL
Su seguridad y la de otras personas es muy importante.
Hemos proporcionado numerosos mensajes de seguridad importantes en este manual
y en su electrodoméstico. Siempre lea y obedezca todos los mensajes de seguridad.
Este es el símbolo de alerta de seguridad.
Este símbolo le previene de peligros potenciales que pueden
causar la muerte o lesiones a usted y a otras personas.
Todos los mensajes de seguridad estarán antecedidos por el símbolo de alerta.
Todos los mensajes de seguridad le dirán de qué peligro potencial se trata, cómo reducir
la posibilidad de lesiones y qué puede ocurrir si no se obedecen las instrucciones.

13
ESPAÑOL
13
PRECAUCIONES IMPORTANTES
1. NUNCA sumerja el aparato ni el cable en agua.
2. NUNCA lo utilice cerca del agua.
3. NUNCA utilice ninguna esponja ni trapo abrasivo en el exterior del aparato.
4. NUNCA deje al aparato sin atención mientras se encuentra en uso.
5. NUNCA coloque nada en el aparato que no sea lo que se pretende cocinar.
6. Desenchufe el aparato del tomacorriente cuando no esté en uso o mientras se limpia.
7. NO ponga el aparato en un lavavajillas.
8. Mantenga fuera del alcance de los niños.
9. Este aparato NO ES UN JUGUETE.
10. Este aparato no está previsto para que sea utilizado por niños pequeños
ni por personas con problemas cognitivos, sin supervisión.
11. Se debe supervisar a los niños para asegurarse que no jueguen con el aparato.
MEDIDAS IMPORTANTES
Cuando utiliza aparatos eléctricos, siempre se deben seguir
algunas medidas básicas de seguridad que incluyen:
1. Lea todas las instrucciones antes de manejar este equipo.
2. NO toque supercies calientes.
3. NO lo utilice en el exterior. ÚNICAMENTE PARA USO DOMÉSTICO.
4. Para protegerlo de una descarga eléctrica, no sumerja el cable, los
enchufes ni el aparato en agua ni en ningún otro líquido.
5. NO utilice ningún aparato que tenga el cable o el enchufe dañado, luego de que
haya funcionado mal o si se cayó o dañó de alguna manera. Lleve el aparato
al local de service autorizado más cercano para que sea revisado, o a un local
de reparaciones para que le realicen un ajuste eléctrico o mecánico.
6. El fabricante del aparato no recomienda el uso de accesorios que no sean
los que vienen provistos con la unidad. Pueden causar daños.
7. Cuando un aparato es utilizado por un niño o cerca de un niño, se
recomienda enfáticamente la supervisión de un adulto.
8. NO lo apoye sobre una hornalla a gas o sobre un quemador eléctrico
caliente, ni cerca de ellos y tampoco dentro de un horno caliente.
9. NO sobrecargue el tomacorriente de la pared, los prolongadores,
ni los receptáculos integrales de conveniencia, ya que esto puede
resultar en un riesgo de incendio o descarga eléctrica.
10. Este aparato no debe ser utilizado para propósitos que no sean los
mencionados en las instrucciones que acompañan a este dispositivo.
11. NO deje la unidad sin atención mientras se encuentra en uso
o cuando está enchufada a un tomacorriente.

14
ESPAÑOL
14
12. Desenchufe del tomacorriente cuando no se encuentra en uso y
antes de quitar las partes para su limpieza. Deje enfriar antes de
ponerle o quitarle partes o antes de limpiar el aparato.
13. Para reducir el riesgo que pueda resultar de un estrangulamiento o tropiezo con un
cable largo, se proporciona un cable de energía eléctrica corto. NO deje que el cable
quede colgando del borde de una mesa o mesada, ni que toque supercies calientes.
14. Siempre enchufe el cable al tomacorriente antes de utilizarlo. La unidad no
tiene ningún interruptor para encender/apagar. Para apagar la unidad, quite
el enchufe del tomacorriente. Deje enfriar la unidad antes de guardarla.
15. Se pueden utilizar cables desmontables más largos o prolongadores de
suministro de energía si se tiene cuidado en su uso. Salvedad: No se recomienda
el uso de cables desmontables ni de prolongadores en esta unidad.
16. Si se utiliza un cable largo desmontable o un prolongador: 1) La clasicación
eléctrica marcada en el cable o prolongador deberá ser como mínimo la
misma clasicación eléctrica que la de la unidad; 2) Si la unidad es con
cable a tierra, el prolongador deberá tener un cable a tierra de 3 patas; y 3)
El prolongador deberá colocarse de manera que no quede colgando de la
mesada o mesa donde los niños puedan tirar de él o tropezarse sin querer.
17. Este aparato posee un enchufe polarizado (una paleta es más ancha que la otra).
Para reducir el riesgo de descarga eléctrica, el enchufe está diseñado para ser
ingresado en un tomacorriente polarizado de una única forma. Si el enchufe
no entra completamente, delo vuelta. Si aún no entra, comuníquese con un
electricista calicado. No intente modicar el enchufe de ninguna manera.
18. Se debe tener sumo cuidado al trasladar un aparato con comida caliente.
19. No intente reparar este aparato usted mismo, ya que al abrir o quitar
las tapas podría exponerse a voltajes peligrosos u otros riesgos. Remita
todas las reparaciones a personal de servicio técnico calicado.
20. Los alimentos estarán muy calientes. Utilice una cuchara para extraerlos con cuidado.
21. Se debe tener sumo cuidado al abrir y cerrar la Tapa de esta unidad.
Por cuestiones de seguridad utilice una manopla para horno o
agarrador de recipientes calientes cuando abre o cierra la Tapa.
¡GUARDE ESTAS INSTRUCCIONES!
INTRODUCCIÓN
¡Gracias por comprar el Kit para hornear mini donuts de SMART Worldwide. Ahora
podrá cocinar deliciosas mini donas, rosquillas y otros tipos de masas en su casa, sin
ni siquiera tener que encender el horno. Utilice su receta de donas favorita o mezclas
envasadas para elaborar pastelitos o mini rosquillas. Hornee hasta seis mini donas
por vez. Utilice el mezclador incluido para decorar las donas con granas y azúcar,
luego colóquelas en el apilador de donas. ¡El KIT PARA HORNEAR MINI DONUTS es
genial para el momento de los bocadillos, para estas y para cualquier ocasión!

15
ESPAÑOL
15
PIEZAS Y ENSAMBLAJE
Su KIT PARA HORNEAR MINI DONUTS ya viene completamente armado.
Partes
Unidad Principal
Mezclador
Apilador de Donas
Lata

16
ESPAÑOL
16
CÓMO FUNCIONA
1. Antes de utilizarla por primera vez, limpie todas las
supercies con un paño húmedo y luego seque.
2. Deberá recubrir levemente la Supercie de Cocción Antiadherente con una pequeña
cantidad de aceite vegetal. Puede aplicarse con una toallita de papel o con aceite en
aerosol. El aceite ayudará a proteger la calidad antiadherente de la supercie de cocción.
Esto deberá realizarse periódicamente para mantener la calidad antiadherente.
3. Encuentre una supercie seca, apropiada y estable cerca de un tomacorriente eléctrico.
4. Precaliente el aparato cerrando la Tapa y enchufándolo al tomacorriente eléctrico.
5. Cuando se encienda, aparecerá la Luz Roja de Encendido. La Luz Verde
se mantendrá apagada mientras el dispositivo precalienta.
6. El aparato deberá precalentar durante un mínimo de 3 minutos. La Luz
Verde se encenderá cuando el aparato está listo para cocinar.
7. Mientras precalienta el aparato, podría ir preparando
los ingredientes para elaborar sus donas.
8. Levante la Tapa utilizando una manopla de horno o agarrador de
objetos calientes, para evitar quemaduras accidentales.
9. Rellene con mezcla cada uno de los seis huecos para bollos de
masa en la Supercie de Cocción Antiadherente Inferior.
10. Cierre la Tapa utilizando un agarrador de objetos calientes o una
manopla para horno. Asegúrese de que la Tapa esté trabada.
11. Podría salir vapor del aparato durante la cocción. Por su seguridad, evite el contacto
con el vapor, ya que estará muy caliente y podría causar quemaduras.
12. El tiempo de cocción variará entre 5 y 7 minutos, dependiendo
del tipo de masa que se cocina y el gusto personal.
13. Una vez que haya terminado de cocinarse la masa, levante la Tapa con un agarrador
de objetos calientes o manopla para horno. Extraiga la de masa de la Superficie de
Cocción Antiadherente con una cuchara de Madera o de plástico. NO utilice utensilios
metálicos, ya que pueden rallar o dañar la Superficie de Cocción Antiadherente.
14. Si cocina más de una tanda de masa, luego de extraer la primera tanda, baje la Tapa
para mantener el calor hasta que la siguiente tanda esté lista para ser cocinada.
15. Apenas termine de cocinar, desenchufe el aparato y deje enfriar.
16. Una vez que el aparato esté frío, siga las instrucciones de la sección Limpieza
y Mantenimiento para limpiar su KIT PARA HORNEAR MINI DONUTS.

17
ESPAÑOL
17
CONSEJOS ÚTILES
NUNCA deje la unidad sin atención mientras esté funcionando.
Humo
Durante el primer uso, podría observar un poco de humo u olor; esto es normal
en la mayoría de los aparatos nuevos. El humo y olor se generan por los residuos
que se queman sobre la Supercie de Cocción Antiadherente y el Elemento de
Calentamiento. Deje precalentar el aparato hasta que ya no haya más humo ni olor.
LIMPIEZA Y MANTENIMIENTO
Por favor, cuide su KIT PARA HORNEAR MINI DONAS siguiendo las siguientes
instrucciones y precauciones simples. La limpieza toma muy poco tiempo.
• Desconecte del tomacorriente eléctrico desenchufando el aparato.
• Asegúrese de que el aparato se enfríe antes de limpiar.
• Limpie la parte superior e inferior de la Supercie de Cocción
Antiadherente con un paño húmedo, no abrasivo y luego seque.
• Limpie el exterior con un paño húmedo, no abrasivo y luego seque.
• NO coloque ninguna parte en un lavavajillas.
• NUNCA sumerja el aparato ni el cable en agua.
¡Es así de simple!

18
ESPAÑOL
18
RECETAS
Con el KIT PARA HORNEAR MINI DONUTS usted puede elaborar donas utilizando su receta
de donas favorita. Incluso puede utilizar mezclas pre-envasadas como por ejemplo:
• Muns
• Tortas
• Brownies
• Madalenas
Simplemente siga las instrucciones de la caja, rellene las secciones individuales
de la plancha inferior, cierre la tapa y deje cocinar durante 5 a 7 minutos.
Pronto obtendrá deliciosos aperitivos y postres listos para servir.
DONAS RÁPIDAS
• 2 Tazas de Harina
• ¼ Taza de Azúcar
• 1 Huevo
• 1 Cucharadita de Sal
• ½ Cucharadita de
Bicarbonato de Sodio
• 1 Cucharadita de
Nuez Moscada
• 1 Cucharadita de
Polvo de Hornear
• ¾ Tazas de Crema
de Leche
• ¼ Taza de Aceite
Vegetal
Precaliente el KIT PARA HORNEAR MINI
DONUTS según se indica.
Mezcle los ingredientes secos. Bata la crema de leche,
el aceite vegetal y los huevos. Mezcle con un tenedor.
Vierta suavemente en los huecos donde va la masa.
Cierre la Tapa y cocine durante 5 a 7 minutos, hasta
que tomen un color marrón suave dorado.
Abra la Tapa con un agarrador de objetos calientes o una
manopla para horno. Extraiga cada dona con una cuchara
de Madera o de plástico. Coloque en un plato y sirva.
También podría pasar las donas por azúcar granulada,
azúcar en polvo, o cubrir con glaseado y espolvorear.
DONUT GLAZE
• ¹/3Taza de Manteca
• 2 Tazas de Azúcar
Impalpable
• 1½ Cucharaditas
de Vainilla
• 1 Cucharadita
de Extracto de
Vainilla Puro
• 4 Cucharadas de
Agua Caliente
Derrita la Manteca en una cacerola a fuego medio.
Vierta el azúcar impalpable y la vainilla y
mezcle hasta que quede parejo.
Retire del fuego y vierta el agua caliente, una cucharada por
vez, hasta que el glasé quede bastante no, pero no acuoso.
Sumerja las donas en el glaseado mientras
esté caliente y dispóngalas sobre una rejilla
para que drene el exceso de glasé.
Table of contents
Languages:
Other SMART Kitchen Appliance manuals

SMART
SMART SBM10 User manual

SMART
SMART SMART Breakfast Master SBM2000 User manual

SMART
SMART RKP530 Quick guide

SMART
SMART CFF1000 Quick guide

SMART
SMART SSM24 Technical specifications

SMART
SMART PW01 User manual

SMART
SMART PT300 Quick guide

SMART
SMART RCKM700SMART Quick guide

SMART
SMART HSB590 User manual

SMART
SMART GCM600SMART Quick guide