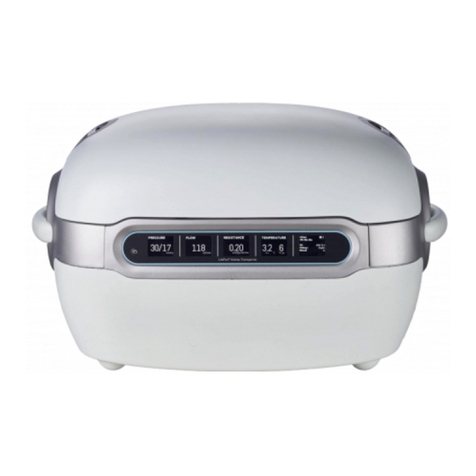
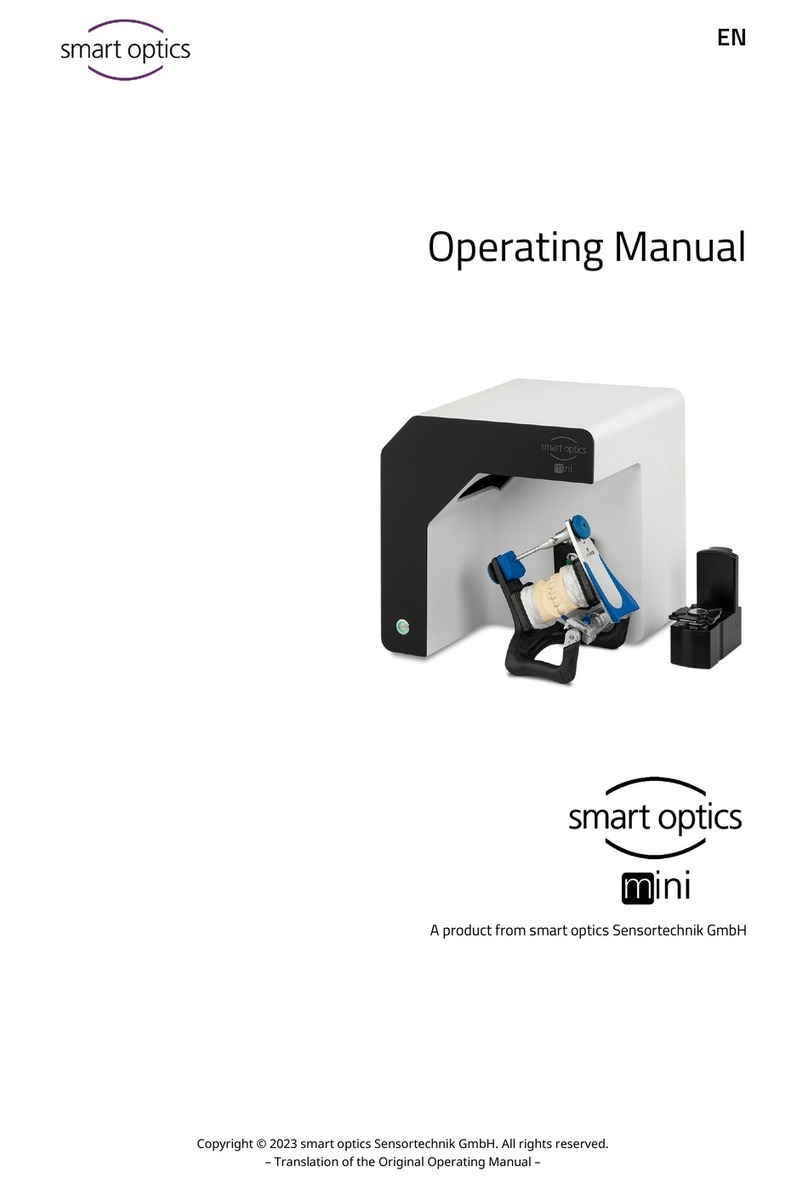
Smartoptics mono Scan User manual

Copyright © 2019 smart optics Sensortechnik GmbH. All rights reserved.
– Translation of the original Operating Manual –
Operating Manual
Software Version
3.2
Audiology Scanners
mono Scan duo Scan duo Scan Touch free Stage ds Production
Products from smart optics Sensortechnik GmbH

Copyright © 2019 smart optics Sensortechnik GmbH. All rights reserved.
– Translation of the original Operating Manual –
Legal notice
Dear customer,
Thank you for choosing a product from smart optics!
If you have read this manual and need further information or have specific questions
concerning the device, please contact your vendor (reseller or smart optics). The technical
support of smart optics is available to our resellers and our direct customers.
We wish you much joy with your scanner!
Your smart optics team
CHANGES AND SERVICE
We reserve the right to implement product changes as part of continuous improvement
and technical progress and to make changes to this documentation. You can find the
current version of this documentation on our homepage:
www.smartoptics.de.
Please note that the current version of this documentation may contain information
which does not apply to older devices.
For the benefit of the environment, the operating manual is provided in electronic form.
Upon request, we would however be pleased to send you a printed copy of the operating
manual. Please send an email to support@smartoptics.de.
BRANDS AND TRADEMARKS
FlyCapture and UpdatorGUI are registered trademarks of Point Grey Research, Inc.
Noah and HIMSA are registered trademarks of HIMSA II K/S, Copenhagen, (Denmark),
Minneapolis (USA).
IPRO is a registered brand of IPRO GmbH, DE-71229 Leonberg.
PYLON is a registered brand of Basler AG, DE-22926 Ahrensburg.
Windows, .NET Framework and Visual C++ are registered trademarks of Microsoft
Corporation.
Where products belonging to other owners are referenced, we wish to point out that
these are brands of the relevant owners that are protected by copyright laws.
Royalty-free icons and illustrations from the Flaticon.com, Fotolia.com, Freepik.com and
Pixabay.com image agencies were used in this Operating Manual.

Audiology Scanners Operating Manual
Document Version: 3.2 10-2019 Page 3
Table of contents
1About this manual ........................... 5
1.1 Introduction........................................ 5
1.2 Graphic symbols and highlighting of
important information ........................ 6
Warnings ............................................ 71.2.1
Figures ................................................ 71.2.2
Software controls................................ 81.2.3
Units of measurement and numbers ... 91.2.4
2For your safety ............................... 10
2.1 Intended use..................................... 10
Material properties............................ 102.1.1
Non-intended use ............................. 102.1.2
2.2 General safety instructions................ 10
User qualification .............................. 102.2.1
Constructive protective measures...... 112.2.2
Protection against injuries ................. 122.2.3
Protection against material damages. 152.2.4
2.3 Symbols on the device ...................... 17
Warnings .......................................... 182.3.1
3Scope of delivery ........................... 19
3.1 Optional accessories (chargeable)...... 20
4Device components........................ 21
4.1 Front view......................................... 21
4.2 Internal view ..................................... 23
4.3 Object holders and accessories.......... 24
4.4 Connections and type plate
(rear view)........................................ 25
5Setup and commissioning of the
scanner............................................ 26
5.1 Choosing a workstation .................... 26
5.2 Unpacking the scanner ..................... 26
Removal of the needle protection from5.2.1
the object holders .............................27
5.3 Connecting the scanner ....................28
6Installation of aural Scan...............29
6.1 Setup execution ................................29
6.2 Loading of calibration data................32
7Positioning of the auditory canal
impression.......................................35
7.1 Removing and inserting object
holders..............................................36
7.2 Mounting of the auditory canal
impression.........................................37
8The basics of scanning ...................39
8.1 Working with STL files.......................39
8.2 Operating principle of the scanner ....39
8.3 The 3D viewer ...................................40
Mouse functions ...............................418.3.1
Functions of the icons .......................428.3.2
Keyboard functions ...........................438.3.3
9Scanning auditory canal
impressions .....................................45
9.1 Naming scans....................................45
Naming rules.....................................469.1.1
9.2 Starting a scan ..................................48
9.3 Checking and saving the scan ...........49
Repeating a scan ...............................509.3.1
9.4 Cancelling a scan ..............................51
9.5 Scanning a barcode...........................51
9.6 Correcting the result of a scan ..........53
Rescanning of areas that have not been9.6.1
captured ...........................................53

Audiology Scanners Operating Manual
Document Version: 3.2 10-2019 Page 4
Matching a rescan ............................ 559.6.2
Automatic filling of not captured areas9.6.3
......................................................... 55
Cutting the 3D image ....................... 569.6.4
10 Data transfer via the “FTP Upload”
module............................................ 57
10.1 “FTP Upload” settings....................... 57
10.2 Changing the FTP connection
information....................................... 59
10.3 Uploading data to an FTP server........ 60
11 Changing software settings.......... 63
11.1 “General” settings............................ 63
11.2 “3D viewer” settings ........................ 66
11.3 “Scanning” settings.......................... 70
11.4 “Matching” settings ......................... 71
12 Module activation.......................... 74
13 Icons, menu items and shortcuts .. 75
13.1 Icons................................................. 75
13.2 Menu................................................ 76
13.3 Shortcuts .......................................... 77
14 Device maintenance....................... 79
14.1 Axis calibration ................................. 79
Procedure in case of a faulty axis14.1.1
calibration......................................... 80
14.2 3D calibration ................................... 81
Performing the 3D calibration ........... 8114.2.1
Possible causes for the failure of the 3D14.2.2
calibration......................................... 85
14.3 Cleaning the scanner ........................ 86
15 Installing software updates .......... 88
15.1 Uninstalling the previous version....... 88
15.2 Installing an update...........................90
Activation code renewal....................9115.2.1
16 The Noah interface.........................92
16.1 Noah interface setup .........................92
16.2 Scanning with Noah ..........................94
16.3 Viewing scans from inside Noah........95
17 Faults and Repairs ..........................97
17.1 Troubleshooting ................................97
Response in case of a defect .............9717.1.1
Solving connection problems.............9817.1.2
Solving calibration problems17.1.3
(holes/overlappings)...........................99
Further known problems .................10017.1.4
Important file paths.........................10117.1.5
17.2 Serial numbers ................................103
17.3 Spare parts......................................103
18 Environmentally-friendly
disposal .........................................103
18.1 Disposal of the packaging ...............103
18.2 Disposal of the device......................104
19 Technical specifications ...............105
20 Declaration of CE conformity ......106
20.1 mono Scan......................................106
20.2 duo Scan.........................................107
20.3 duo Scan Touch ..............................108
20.4 free Stage .......................................109
20.5 ds Production ..................................110
21 Quick guide...................................111
Index .......................................................114

Audiology Scanners Operating Manual
Document Version: 3.2 10-2019 Page 5
1About this manual
Please read through this operating manual carefully. Keep the operating manual in a
safe place. If you pass on the product to somebody else, please make sure that you
hand them the operating manual as well.
smart optics accepts no liability for damages due to failure to comply with the
operating manual.
1.1
Introduction
The scanners of the “Audiology” product family are 3D scanners for digitizing
auditory canal impressions, matched to your individual volume requirements:
The classic duo Scan is designed for everyday use in the shop. The duo Scan Touch
offers an even better workflow due to its touchscreen operation.
The free Stage is the only scanner open at the front and on one side, so without a lid,
and equipped with a touch sensor allowing operation on the device itself.
The high-end model ds Production is particularly suited for permanent use under
production conditions.
The mono Scan is the only scanner limited to single auditory canal impressions per
scan. This low-priced model is therefore ideal for low production volumes.
All audiology scanners work with the aural Scan software and use the open data
formats STL, MSH or ASCII as output.
All Audiology scanners from smart optics are equipped with an interface to Noah, the
“standard for integrated hearing care software” from HIMSA (Hearing Instrument
Manufacturers' Software Association). This interface allows the integration of
aural Scan into the Noah client.
For information about Noah, please visit:
www.himsa.com/en-us/products/noahsystem4information.aspx
The widely used auditory acoustics winIPRO software is also compatible with all
Audiology scanners.
For information about winIPRO, please visit:
www.haag-streit.com/ipro-gmbh/en/hearing-aid-dispensers/software/

Audiology Scanners Operating Manual
Document Version: 3.2 10-2019 Page 6
1.2
Graphic symbols and highlighting of important information
In this manual, graphic symbols and text highlights are used to present the
information more clearly. In this way you may understand the instructions better.
A triangle on the left indicates a step involving an action.
A checkmark on the left tells you what the outcome should be if you have
followed one or more steps correctly.
1. An element in a sorted list
— An element in an unsorted list
Important statements are highlighted in bold type.
Important
KEYWORDS
are highlighted with capital letters in bold type.
ENTER The names of keys on the keyboard keys are written in upper case.
Hints for using the mouse are illustrated with a symbol showing the mouse button to
be pressed.
Cross-references within a manual are highlighted with a book icon. Cross-references
act as hyperlinks in the electronic version. Click on the number to follow the link. The
page navigation of the PDF reader returns you to the starting point ("Previous view"
or "Back").
This icon points towards functions or modules that can be purchased in
addition to the scope of delivery.
Variants in operation and functionality which do not apply to every
model described in this manual are marked with this symbol.
TIP
The information icon is used to highlight tips on operation and
information that require your special attention.
The manufacturer of the product is indicated by the factory symbol.
Page NN

Audiology Scanners Operating Manual
Document Version: 3.2 10-2019 Page 7
Warnings
Warnings are categorized into four levels depending on the severity of the possible
consequences.
NOTICE
This combination of signal word and symbol warns you about
possible material damage that might occur if the instructions are not
followed correctly.
CAUTION
This combination of signal word and symbol warns you about
possible minor injuries that might occur if the instructions are not
followed correctly.
WARNING
This combination of signal word and symbol warns you about severe
to lethal injuries that might occur if the instructions are not followed
correctly.
DANGER
This combination of signal word and symbol warns you of dangerous
situations which could lead directly to death or severe injuries.
Figures
Figures showing equipment and screenshots from the software are used for
illustration purposes.
The images shown in this manual may differ from the appearance of your actual
device or from the software supplied with your device. The screenshots show realistic
examples but do not contain actual data.

Audiology Scanners Operating Manual
Document Version: 3.2 10-2019 Page 8
Software controls
The software controls are highlighted as follows:
OK Names of buttons in the software are shown with a coloured
background.
Name Names of fields in the software are highlighted in bold type.
File | New Names of menu items are separated by a vertical line.
Name.txt File and path names are highlighted by the font used.

Audiology Scanners Operating Manual
Document Version: 3.2 10-2019 Page 9
Units of measurement and numbers
In this manual the numbers are given according to the decimal system with decimal
places.
Units of measurement comply with the legal units in Germany as well as the
international system of units (SI).
Further information as well as measurement converters can be found on the Internet.
Measurement Unit Abbreviation
Mass/weight
Kilogram
Gram
kg
g
Length Meter
Centimeter
Millimeter
Micrometer
m
cm
mm
µ
Angle
Degree
°
Time
Hour
Minute
Second
h
m
s
Electrical power
Watt
W
Electrical voltage
Volt
Alternating current
V
AC
Electrical frequency Hertz
Gigahertz
Hz
Ghz
Electrical current
Ampere
A
Protection class
International Protection
IP
1st digit: solids protection,
2nd digit: fluids protection
Temperature
Degree Celsius
°
Memory (PC)
Random-Access Memory
RAM
Data volume
Megabyte
Gigabyte
MB
GB
CAD data format Standard Triangulation Language
STL
American Standard Code for
Information Interchange
ASCII
Mesh
MSH
Point Cloud Measurement PCM
Picture element
Pixel
Megapixel
Px (monitor), dpi (print)
Mpx

Audiology Scanners Operating Manual
Document Version: 3.2 10-2019 Page 10
2For your safety
2.1
Intended use
The intended use of the smart optics Audiology scanners is the optical three-
dimensional measurement of human auditory canal impressions.
Material properties
Audiology scanners scan molding materials with a dry, opaque surface. Reflective or
dark surfaces can be scanned if they are previously treated with 3D Scan Spray.
Non-intended use
Audiology scanners are not intended to scan other objects, impressions made of
transparent materials or living organisms.
Audiology scanners are not suitable for use in an environment heavily burdened by
emissions (e.g. dust or paint).
smart optics strongly recommends not to use the scanner for any unintended use.
smart optics assumes no liability for damages due to an improper use of the scanner
and/or non-observance of the safety instructions indicated in these operating
instructions
2.2
General safety instructions
User qualification
Users who set up, commission or operate a smart optics scanner require special
knowledge for the safe operation of the scanner. This knowledge can be acquired by
means of the following measures:

Audiology Scanners Operating Manual
Document Version: 3.2 10-2019 Page 11
1.
Read and follow these operating instructions, in particular the instructions concerning
setup, commissioning and cleaning of the scanner.
2.
If possible, take part in a training course (offered optionally by the vendor).
3.
Comply with local laws, regulations, occupational safety and accident prevention rules
concerning your scanner’s workplace.
4.
Make sure that all devices and cables pass the periodic safety checks for electrical
appliances. Replace damaged devices and cables immediately. Make sure that the
technical specifications of power cables are adequate.
Constructive protective measures
The scanner has been developed and manufactured in compliance with the applicable
safety standards and with the greatest possible care to ensure safe operation and to
protect the user against injuries. In particular, constructive measures include:
1.
The scanner switches off the power supply to the interior of the scanner automatically
after brief inactivity or when the lid is opened. Power is only switched on again after
the user has restarted activity.
2.
An ongoing scanning process is interrupted automatically when the lid is opened.
Moving parts in the scanner's interior are stopped to prevent injuries when placing
hands inside the scanner. Automatic power switch off prevents accidental restarting
or continued running of the motors.
3.
A fuse to protect the device from overvoltage is integrated into the device.

Audiology Scanners Operating Manual
Document Version: 3.2 10-2019 Page 12
Protection against injuries
Despite the protective measures included in the design, some residual risks that might
lead to injuries cannot be excluded. In this section you will learn what measures you
can take to protect yourself and other people.
WARNING
Risk of injury due to electric shock
Fire hazard due to short circuit
A technical defect of the cable or of individual components of the
scanner can cause an electric shock or a short circuit. This can result
in a fire.
Make sure that the scanner and the cables do not come into
contact with water/moisture. Should this however happen at
some time, disconnect the power plug immediately. Then dry
the affected parts with a soft microfibre cloth.
Do not work with defective devices or cables under any
circumstances.
Operate electrical equipment only at the recommended
operating temperatures.
Only use the supplied cable or the corresponding spare parts.
If electrical devices are not used over a longer period, such as
overnight, turn them off and disconnect the power plug from
the socket.
WARNING
Health hazard due to magnetic fields
The scanner and its accessories include magnetic components.
Magnetic fields can be health-damaging.
Persons with implants, in particular heart pacemakers, may only
operate the scanner and its accessories with express medical
permission.

Audiology Scanners Operating Manual
Document Version: 3.2 10-2019 Page 13
WARNING
Health hazard due to structured light (only applicable to
scanners without a lid)
The scanner works with structured light. Constant visual contact with
structured light can trigger epileptic seizures, migraine or similar
conditions.
Individuals suffering from such conditions should cover the
scanner during operation.
CAUTION
Risk of falling due to packaging materials
The scanner is extensively packaged for protection against transport
damages. The packaging can be an obstacle during setup and can
cause falls.
Do not leave packaging materials lying on the ground.
Before transporting, move all obstacles out of the way.
CAUTION
Risk of hand injuries due to the lid or the mechanical parts of
the scanner
Your hands can get crushed by the lid or the mechanical parts of the
scanner.
Always hold the lid (if present) by its handle to open or close it.
Only open the lid (if present) slowly. Otherwise it will fall down
again, because there is no resistance in the closing mechanism.
Always open the lid (if present) up to the stop.
Only put your hands inside the scanner when the axes have
stopped. Should the axes not stop with the lid open or at the
end of a scanning process, turn off the scanner and disconnect
the power plug.

Audiology Scanners Operating Manual
Document Version: 3.2 10-2019 Page 14
CAUTION
Hand injuries due to sharp needles
The object holders for mounting the auditory canal impressions are
fitted with sharp needles. You can easily prick yourself with these
needles.
Hold the object holders only from the side.
Do not press on the needles from above.
CAUTION
Health hazard due to LED light with high blue content (only
applies to scanners without lid)
Recent studies show that light with a high blue content can lead
to permanent retinal damage or contribute to it. White LED light
also has a high blue content. Users should therefore avoid
prolonged visual contact with white or blue LED light.
The scanner emits white light or blue light with each
measurement. You can protect your eyes by covering the
scanner during operation.
Wearers of glasses can protect their eyes with glasses with a
blue light filter.
CAUTION
Injury due to entanglement of clothing, jewellery or hair (only
applies to scanners without lid)
Loose clothing, jewellery or long hair can get entangled in the lid or
the mechanical parts of the scanner. Due to motion, objects and hair
can get entangled inside the scanner. This can lead to injury.
Do not wear any loose garments such as shawls and ties, or
jewellery like long necklaces, at the scanner’s workplace.
Comb your hair into a firm pigtail, for example.
However, should a piece of clothing, hair or jewellery get
entangled among the moving parts of the device, turn the
scanner off immediately. Disconnect the power plug before
removing the entangled part.

Audiology Scanners Operating Manual
Document Version: 3.2 10-2019 Page 15
Protection against material damages
Despite the protective measures included in the design, some residual risks that might
lead to material damages (loss of data or damage to devices) cannot be excluded. In
this section you will learn what measures can be taken against material damages.
NOTICE
Damage to optical and electronic components due to touching,
humidity, dirt and cleaning
The optical and electronic components in the interior of the scanner
are highly sensitive. Any touch, as well as dirt, moisture and cleaning
agents can damage them.
Do not touch any optical and electronic components.
Protect the optical and electronic components against soiling by
closing the lid or covering the scanner.
Never use the 3D scan spray inside the scanner.
If the optical or electronic components have to be cleaned, do
not do it yourself. Please contact your reseller or smart optics.
NOTICE
Data loss due to a too long USB cable
The transfer of data between the scanner and the PC is affected by
the length of the USB cable.
Only use the supplied USB cable or a spare part with the
corresponding length (Max. 2 meters).
NOTICE
Measuring errors due to vibrations
The base (table, workbench, etc.) on which the scanner stands must
not vibrate. Vibration will cause inaccurate measurement results.
Place the scanner on a sturdy, stable base able to support at
least twice the weight of the scanner.
NOTICE

Audiology Scanners Operating Manual
Document Version: 3.2 10-2019 Page 16
Measuring errors due to reflections on the measured object
(only applies to scanners without lid)
Strong ambient light leads to unwanted reflections on the measured
object. This affects the accuracy of the measurements.
Select a workplace away from a window or not affected by high
levels of artificial lighting.
If no other work place is available, cover the opening during the
scanning process, e.g. with light-tight foil.
NOTICE
Measuring errors due to unsuitable climatic conditions
The scanner is designed solely for use inside dry, closed rooms. Precise
measurement results are only achieved by the scanner under suitable
climatic conditions. Too much heat causes measurement errors and
overheating of the scanner. Overheating can permanently damage
the scanner.
Only operate the scanner at temperatures of 15°C - 30°C.
Only operate the scanner in low humidity conditions.
Avoid direct sun exposure at the workplace.
Reduce cold, heat and high humidity, e.g. through the use of air
conditioners or sun protection.
NOTICE
Material damages due to moisture
Constant contact with moisture can damage sensitive materials.
Only operate the scanner at a dry workplace.
Avoid any contact with water/moisture. Should this however
happen at some time, disconnect the power plug. Immediately
wipe off any water/moisture using a soft microfibre cloth.

Audiology Scanners Operating Manual
Document Version: 3.2 10-2019 Page 17
NOTICE
Data loss due to magnetic fields
The scanner and its accessories include magnetic components. Metal-
containing technical devices and data carriers, e.g. credit cards, can
be impaired in their function or even permanently damaged through
contact with magnets.
Make sure there is an adequate distance between metal-
containing technical devices/data carriers and the magnet.
2.3
Symbols on the device
Warning - Risk of cuts
This symbol indicates the object holders used to attach the auditory
canal impressions. Due to the nature of their design, these are very
pointed and sharp. Always proceed with great care when handling
the object holders.
Do not touch
This symbol refers to the calibrated optical system. This must never
be touched or cleaned as it could be damaged in the process.
CE label
The CE label on the type plate documents that the European
directives that are applicable to the device were complied with at the
time of issue of the CE certificate.
Fuse
This symbol on the type plate documents an integrated overvoltage
device.
USB
This is the symbol for a USB connection; also for a camera
connection as well as for a USB plug.

Audiology Scanners Operating Manual
Document Version: 3.2 10-2019 Page 18
Warnings
The meaning of the warning symbols placed on
the device is explained on an adhesive label in
several languages.

Audiology Scanners Operating Manual
Document Version: 3.2 10-2019 Page 19
3Scope of delivery
The scope of delivery comprises the following parts:
Contents of the transport box:
1 scanner
Object holder (needle adapter)
1 piece, silver (mono Scan)
2 pieces, silver (duo Scan, duo Scan Touch, free Stage)
2 pieces blue and 2 pieces red (ds Production)
1 power cable (2.5 meters, AC 110/230 V)
1 USB cable (1.8 meters, type A/B)
1 installation data carrier
Contents of the installation data carrier:
aural Scan Software, Noah interface included
Calibration data for the scanner
Digital operating manual and setup instructions for the Noah interface

Audiology Scanners Operating Manual
Document Version: 3.2 10-2019 Page 20
3.1
Optional accessories (chargeable)
Item number Item name Description
90036 PC Dell Optiplex Computer (with pre-installed
software)
90296 Object holder (needle
adapter), 1 piece, silver Replacement or additional item
90195 Object holder (needle
adapter), 1 piece, blue Replacement or additional item
90303 Object holder (needle
adapter), 1 piece, red Replacement or additional item
90276 FTP upload Software module
90410 3D calibration object Object for use with the “3D
calibration” function
90347 Software update Update for a single license
90066 Warranty extension
Optional 12-month extension,
valid as of the 3rd year after
delivery.
You can purchase spare parts and chargeable accessories from your vendor (reseller or
smart optics).
For safety reasons, please use only the replacement or additional items mentioned
here (except for PCs).
For parts that are not listed as optional accessories, e.g. cables, please replace them
with commercially available products with the same technical specifications.
PCs must meet the technical specifications.
Page 105
Other manuals for mono Scan
2
This manual suits for next models
4
Table of contents
Other Smartoptics Medical Equipment manuals
Popular Medical Equipment manuals by other brands

Timago
Timago JMC-C 2005 Instructions for use

OCENCO
OCENCO M-20 quick start guide

ZAMST
ZAMST FILMISTA KNEE Instructions for use

Orliman
Orliman THERA GO TGO350 INSTRUCTIONS FOR USE, STORAGE AND WARRANTY

Ferno
Ferno SCOOP EXL Stretcher User and maintenance manual

Mortara Instrument
Mortara Instrument Ambulatory X-12 Operator's manual