SmartRG SR616ac User manual

/ Gateway User Manual
Model:SR616ac
Release 1.1 April 2018
501 SE Columbia Shores Boulevard, Suite 500
Vancouver, Washington 98661 USA
+1 360 859 1780 / smartrg.com

Table of Contents
Welcome! 4
Purpose & Scope 4
Intended Audience 4
Getting Assistance 4
Copyright and Trademarks 4
Disclaimer 4
Getting Familiar with your Gateway 5
LED Status Indicators 5
Connections 5
External Buttons 6
2.4GHz and 5GHz Buttons 6
Reset Button 6
Installing your Gateway 6
Logging in to your Gateway's UI 7
Device Info 7
Summary 7
WAN 8
Statistics 9
LAN 9
WAN Service 10
xTM 11
xDSL 12
Route 16
ARP 17
DHCP 18
CPU & Memory 19
Advanced Setup 19
Layer2 Interface 19
ATM Interface 19
PTM Interface 22
ETH Interface 23
WAN Service 24
PPP over Ethernet WAN Service 25
IP over Ethernet WAN Service 34
Bridging 43
VPN 46
L2TP Client Configuration 46
PPTP Client 49
Ethernet Config 53
LAN 54
IPv4 Autoconfig 58
IPv6 Autoconfig 61
Local VLAN Setting 63
NAT 64
Virtual Servers 64
Port Triggering 67
DMZ Host 70
ALG 71
Multi NAT 71
Security 72
IP Filtering - Outgoing 72
IP Filtering - Incoming 74
MAC Filtering 75
Parental Control 77
Time Restriction 77
Url Filter 79
Quality of Service 80
QoS Queue 81
QoS Classification 83
QoS Port Shaping 85
Routing 86
Default Gateway 86
Static Route 87
Policy Routing 88
RIP 89
DNS 90
DNS Server 90
Dynamic DNS 92
DNS Config 92
DSL 93
UPnP 96
DNS Proxy 97
Interface Grouping 98
IP Tunnel 99
IPv6inIPv4 100
IPv4inIPv6 100
Certificate 101
Local 101
Trusted CA 104
Power Management 105
Multicast 105
Managing group exception lists 107
Wireless 108
Basic 108
Security 110
Open and Shared Authentication 112
802.1X Authentication 113
WPA2 and Mixed WPA2/WPA Authentication 114
WPA2-PSK and Mixed WPA2/WPA-PSK
Authentication 116
MAC Filter 117
Wireless Bridge 118
Advanced 119
Station Info 123
Wifi Insight 123
Site Survey 125
Channel Statistics 126
Metrics 126
Voice 128
VoIP Status 128
SIP Basic Setting 128
SIP Advanced Setting 131
SMARTRG INC. PROPRIETARY AND CONFIDENTIAL. ALL RIGHTS RESERVED. COPYRIGHT © 2018 2

Table of Contents
SIP Star Code Setting 136
SIP Extra Setting 136
SIP Debug Setting 138
SIP Black Filter 140
Diagnostics 141
Diagnostics 141
Ethernet OAM 142
Diagnostic Tools 145
Ping 145
Traceroute 147
Start / Stop DSL 148
Management 149
Settings 149
Backup 149
Update 150
Restore Default 151
System Log 151
Security Log 154
SNMP Agent 155
Management Server 156
TR-069 156
STUN Config 158
XMPP Connection 160
Internet Time 161
Access Control 162
Passwords 162
Access List 163
Services Control 164
User Profile 165
Logout Timer 165
Update Software 166
Reboot 167
Logout 168
Appendix: FCC Statements 169
FCC Interference Statement 169
FCC Radiation Exposure Statement 169
FCC - PART 68 169
Ringer Equivalency Number Statement 170
IC CS-03 statement 170
Canada Statement 170
5GHz 171
Revision History 172
SMARTRG INC. PROPRIETARY AND CONFIDENTIAL. ALL RIGHTS RESERVED. COPYRIGHT © 2018 3

SMARTRG INC. PROPRIETARY AND CONFIDENTIAL. ALL RIGHTS RESERVED. COPYRIGHT © 2018 4
Welcome!
Thank you for purchasing this SmartRG product.
SmartRG offers solutions that simplify the complex Internet ecosystem. Our solutions include hardware, software, applications,
enhanced network insights, and security delivered via a future-proof operating system. Based in the USA, SmartRG provides local,
proactive software development and customer support. We proudly offer the best, most innovative broadband gateways available.
Learn more at www.SmartRG.com.
Purpose & Scope
This Gateway User Manual provides SmartRG customers with installation, configuration and monitoring information for the
SR516acSR616ac gateway.
Intended Audience
The information in this document is intended for Network Architects, NOC Administrators, Field Service Technicians and other
networking professionals responsible for deploying and managing broadband access networks. Readers of this manual are assumed to
have a basic understanding of computer operating systems, networking concepts and telecommunications.
Getting Assistance
Frequently asked questions are provided at the bottom of the Subscribers page of the SmartRG Web site.
Subscribers: If you require further help with this product, please contact your service provider.
Service providers: if you require further help with this product, please open a support request.
Copyright and Trademarks
Copyright © 2017 by SmartRG, Inc. Published by SmartRG, Inc. All rights reserved.
The contents of this publication may not be reproduced in any part or as a whole, transcribed, stored in a retrieval system,
translated into any language, or transmitted in any form or by any means, electronic, mechanical, magnetic, optical, chemical,
photocopying, manual, or otherwise, without the prior written permission of SmartRG, Inc.
Disclaimer
SmartRG does not assume any liability arising out of the application or use of any products, or software described herein. Neither
does it convey any license under its patent rights nor patent rights of others. SmartRG further reserves the right to make changes to
any products described herein without notice. This publication is subject to change without notice.
Any trademarks mentioned in this publication are used for identification purposes only and may be properties of their respective
owners.

SMARTRG INC. PROPRIETARY AND CONFIDENTIAL. ALL RIGHTS RESERVED. COPYRIGHT © 2018 5
Getting Familiar with your Gateway
This section contains a quick description of the gateway's lights, ports, and buttons to help you get familiar with the model.
LED Status Indicators
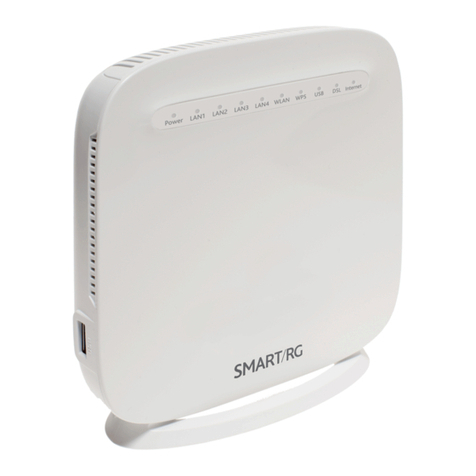
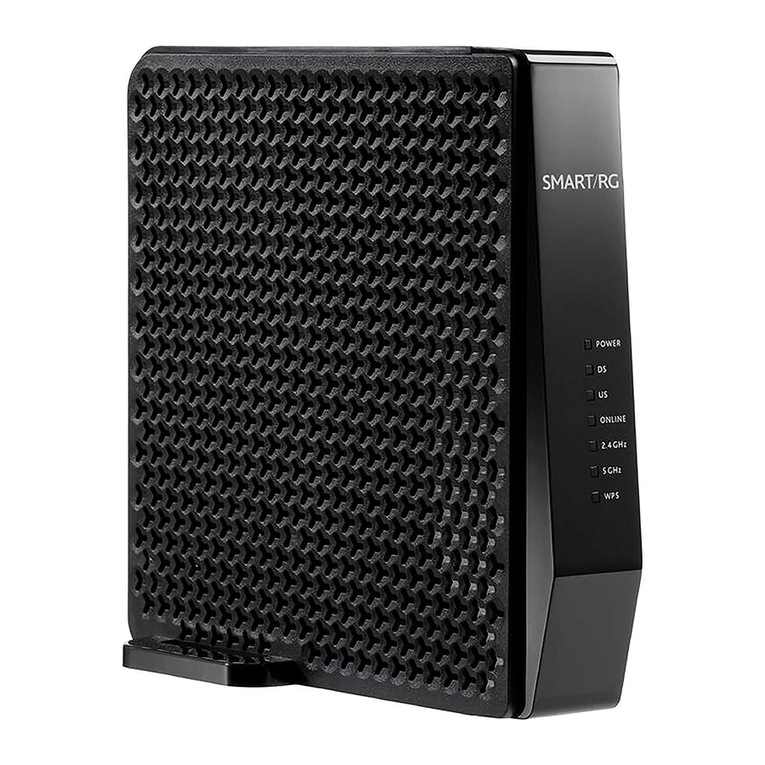
The indicator lights (LEDs) on the front of the SR616ac gateway
can help you understand the state of your gateway.
Legend: Green Green Blinking Red
LED Action Explanation
All LEDs except those
listed below Feature enabled &/or working correctly
Data being transferred
POWER Unit is booting up & preparing for use. When the unit is ready, the light changes to green.
Device powered on and ready for use
DSL DSL connected
INTERNET DSL sync acquired and gateway on line
Data being transferred
Internet authentication / connection has failed
Connections
The ports located on the back of the gateway and the buttons and ports located on the left side of the gateway, are described
below.
Feature Description
Rear panel
DSL This grey RJ11 port is used to connect your gateway to an Internet provider via a DSL service.
Phone 1 - 2 These grey RJ11 ports can be used to connect your gateway to an Internet provider via a telephone line.
LAN 1 - 4 The yellow RJ45 ports can be used to connect client devices such as computers and printers to your gateway.
WAN The blue RJ45 port is used to hard-wire your gateway to another network device.
For models with both WAN and DSL ports, when your Internet connection is via DSL, you can configure the WAN port to
function as an additional LAN port. For detailed instructions, see the Ethernet Mode section of this manual.
USB 1 Can transfer data, act as a printer interface, and handle a 3G accessory.
Power Use only the power supply included with your gateway. Intended for indoor use only.

SMARTRG INC. PROPRIETARY AND CONFIDENTIAL. ALL RIGHTS RESERVED. COPYRIGHT © 2018 6
Feature Description
Left side
On/Off Power switch.
5GHz Enables or disables the 5GHZ wireless function.
2.4GHz Enables or disables the 5GHZ wireless function.
External Buttons
Smart RG gateways provide push-button controls on the exterior for critical features. These buttons provide a convenient way to
toggle the Wi-Fi radio on and off or reset the gateway. These controls are described below.
2.4GHz and 5GHz Buttons
These buttons are located on the left side of the gateway and control the Wi-Fi radio functions.
To turn a wireless radio on or off, press the related button for 3-5 seconds. For example, to turn the 2.4 GHz radio on or off, press
the 2.4GHz button for3-5 seconds.
To enable WPS, press the related button and hold it for 8-10 seconds.
Reset Button
The Reset button is a small hole in the back of the gateway with the actual button mounted beneath the surface. This style of push-
button prevents the gateway from being inadvertently reset during handling.
Warning: Do not press the Reset button unless you are sure that you want to clear the current settings.
Reboot your Gateway
Press the Reset button briefly with a paper clip or similar tool to reboot the device.
Perform FRESET
Press the Reset button for 10 seconds to factory reset your gateway.
Set your Gateway to CFE Mode
Press the Reset button for 15 seconds to put your gateway into CFE mode.
Installing your Gateway
1. Connect one end of the included phone cable to the DSL port on the gateway and connect the other end to the wall
jack.
2. Connect one end of an Ethernet cable to a LAN port of the gateway and connect the other end to your PC.
3. Plug the power adapter to the wall outlet and then connect the other end of it to the Power port of the gateway.
4. Turn on the unit by pressing the On/Off button on the left side of the gateway.
Your gateway is now automatically being set up to connect to the Internet. This process may take a few minutes to complete before
you can begin using your Internet applications (browser, email, etc.).
If you are unable to connect to the Internet, confirm that all cable connections are in place and the router’s power is turned on.

SMARTRG INC. PROPRIETARY AND CONFIDENTIAL. ALL RIGHTS RESERVED. COPYRIGHT © 2018 7
Logging in to your Gateway's UI
To configure the SmartRG gateway's settings, access the gateway's embedded UI.
1. Open a Web browser on your computer.
2. In the address field, enter http://192.168.1.1 (the default IP address of the DSL gateway). The authentication dialog
box appears.
3. Enter the user name and password. The default user name and password of the super user are admin and admin. The
username and password of the common user are user and user. It is recommended that you change these default
values after logging in to the DSL gateway for the first time.
4. Click OK. The Network Status page appears.
5. To view the log for this gateway, click View log at the bottom of the page. The log appears in a separate window.
6. To log into the GUI, click Manage gateway (advanced). The gateway interface appears, showing the Device Info
summary page.
Device Info
In this section, you can view data about your gateway and network, and configure DHCP, ARP, and WAN interfaces.
Summary
On this page, you can view device information such as the board ID, software and voice service version, and information about your
WAN connection such as the upstream rate and the LAN address.
When you log into the gateway GUI, the Device Info summary page appears.
You can also reach this page by clicking Device Info >Summary in the left menu.

SMARTRG INC. PROPRIETARY AND CONFIDENTIAL. ALL RIGHTS RESERVED. COPYRIGHT © 2018 8
WAN
The WAN status screen provides a high level overview of the connection between your Internet Service Provider and your gateway
device. The WAN interface can physically be DSL or Ethernet and supports a number of Layer 2 and later configuration options
covered later in this document.
In the left navigation bar, click Device Info >WAN. The following page appears.

SMARTRG INC. PROPRIETARY AND CONFIDENTIAL. ALL RIGHTS RESERVED. COPYRIGHT © 2018 9
The fields on this page are defined below.
Field Name Description
Interface The connection interface (Layer 2 interface) through which the gateway handles the traffic.
Description The service identifier such as pppoe_0_1_1.35.
Type The service type. Options are PPPoE,IPoE, and Bridge.
VlanMuxId The VLAN ID. Options are Disabled or 0-4094.
IPv6 The state of IPv6. Options are Enabled,Disabled, and N/A.
Igmp Pxy The state of the IGMP proxy. Options are Enabled,Disabled, and N/A.
Igmp Src Enbl The state of the IGMP source. Options are Enabled and Disabled.
MLD Pxy The state of the MLD proxy. Options are Enabled,Disabled, and N/A.
MLD Src Enable The state of the MLD source. Options are Enabled,Disabled, and N/A.
NAT The state of NAT. Options are Enabled and Disabled.
Firewall The state of the Firewall. Options are Enabled and Disabled.
Status The status of the WAN connection. Options are Disconnected,Unconfigured,Connecting, and Connected.
IPv4 Address The obtained IPv4 address.
IPv6 Address The obtained IPv6 address.
Statistics
In this section, you can view network interface information for LAN, WAN Service, xTM and DSL. Data is updated at 15-minute
intervals.
LAN
On this page, you can view the received and transmitted bytes, packets, errors and drops for each LAN interface configured on your
gateway. All local LAN Ethernet ports, Ethernet WAN ports and wireless interfaces are included.
In the left navigation bar, click Device Info >Statistics. The Statistics - LAN page appears.
To reset these counters, click Reset Statistics near the bottom of the page.

SMARTRG INC. PROPRIETARY AND CONFIDENTIAL. ALL RIGHTS RESERVED. COPYRIGHT © 2018 10
The fields on this page are defined below.
Field Name Description
Interface Available LAN interfaces. Options are LAN1 -LAN4,ETHWAN,5GHz Band, and 2.4 GHz Band.
Received &Transmitted columns
Bytes The total number of packets in bytes.
Pkts The total quantity of packets.
Errs The total quantity of error packets.
Drops The total quantity of dropped packets.
WAN Service
On this page, you can view the received and transmitted bytes, packets, errors and drops for each WAN interface for your gateway.
All WAN interfaces configured for your gateway are included.
In the left menu, click Device Info >Statistics >WAN Service. The Statistics - WAN page appears where you can view detailed
information about the status of your WAN.
To reset the counters, click Reset Statistics near the bottom of the page.

SMARTRG INC. PROPRIETARY AND CONFIDENTIAL. ALL RIGHTS RESERVED. COPYRIGHT © 2018 11
The fields on this page are defined below.
Field Name Description
Interface Available WAN interfaces.
Description The service description. Options are pppoe,ipoe, and b, followed by the identifier for each service.
Received &Transmitted columns
Bytes The total number of packets in bytes.
Pkts The total quantity of packets.
Errs The total quantity of error packets.
Drops The total quantity of dropped packets.
xTM
On this page, you can view the ATM/PTM statistics for your gateway. All WAN interfaces configured for your gateway are included.
In the left navigation bar, click Device Info >Statistics >xTM. The Interface Statistics page appears.
To reset these counters, click Reset near the bottom of the page.
The fields on this page are defined below.
Field Name Description
Port Number Statistics for Port 1, or both ports if bonded.
In Octets Total quantity of received octets.
Out Octets Total quantity of transmitted octets.
In Packets Total quantity of received packets.
Out Packets Total quantity of transmitted packets.
In OAM Cells Total quantity of received OAM Cells.
Out OAM Cells Total quantity of transmitted OAM Cells.
In ASM Cells Total quantity of received ASM Cells.
Out ASM Cells Total quantity of transmitted ASM Cells.
In Packet Errors Total quantity of received packet errors.
In Cell Errors Total quantity of received cell errors.

SMARTRG INC. PROPRIETARY AND CONFIDENTIAL. ALL RIGHTS RESERVED. COPYRIGHT © 2018 12
xDSL
On this page, you can view the DSL statistics for your gateway. All xDSL (VDSL or ADSL) interfaces configured for your gateway are
included. The terms and their explanations are derived from the relevant ITU-T standards and referenced accordingly.
1. In the left navigation menu, click Device Info >Statistics >xDSL. The following page appears.

SMARTRG INC. PROPRIETARY AND CONFIDENTIAL. ALL RIGHTS RESERVED. COPYRIGHT © 2018 13
2. To run an xDSL (BER) test, follow the instructions in "Running xDSL (BER) tests".
3. To reset the counters, click Reset Statistics near the bottom of the page.
The fields on this page are defined below.
Field Name Description
Synchronized Time Time when the last synchronization was performed.
Number of
Synchronizations
Number of synchronizations performed.
Mode xDSL mode that the modem has trained under, such as VDSL2+, G.DMT, etc.
Traffic Type Connection type. Options are ATM,PTM and ETH.
Status Status of the connection. Options are Up,Disabled,NoSignal, and Initializing.
Link Power State Current link power management state (e.g., L0, L2, L3).
Downstream and Upstream columns
Line Coding (Trellis) State of the Trellis Coded Modulation. Options are On and Off.
SNR Margin (0.1 db) Signal-to-noise ration (SNR) margin is the maximum increase (in dB) of the received noise power, such that
the modem can still meet all of the target BERs over all the frame bearers. [2]
Attenuation (0.1 db) Signal attenuation is defined as the difference in dB between the power received at the near-end and
that transmitted from the far-end. [2]
Output Power (0.1 dBm) Transmit power from the gateway to the DSL loop relative to one Milliwatt (dBm).
Attainable Rate (Kbps) Typical obtainable sync rate, i.e., the attainable net data rate that the receive PMS-TC and PMD
functions are designed to support under the following conditions:
lSingle frame bearer and single latency operation.
lSignal-to-Noise Ratio Margin (SNRM) to be equal or above the SNR Target Margin.
lBER not to exceed the highest BER configured for one (or more) latency paths.
lLatency not to exceed the highest latency configured for one (or more) latency paths.
lAccounting for all coding gains available (e.g., trellis coding, RS FEC) with latency bound.
lAccounting for the loop characteristics at the instant of measurement. [2]
Rate (Kbps) Current net data rate of the xDSL link. Net data rate is defined as the sum of all frame bearer data rates
over all latency paths. [2]
Downstream and Upstream columns for DSL-specific fields only
B (# of bytes in Mux Data
Frame)
Nominal number of bytes from frame bearer #n per Mux Data Frame at Reference Point A in the current
latency path.
M (# of Mux Data Frames
in FEC Data Frame
Number of Mux Data Frames per FEC Data Frame in the current latency path.
T (# of Mux Data Frames
over sync bytes)
Ratio of the number of Mux Data Frames to the number of sync bytes in the current latency path.
R (# of redundancy
bytes in RS codeword)
Number of Reed Solomon redundancy bytes per codeword in the current latency path. This is also the
number of redundancy bytes per FEC Data Frame in the current latency path.
S (# of data symbols over
which the RS code word
spans)
Number of data symbols included within the RS code word.

SMARTRG INC. PROPRIETARY AND CONFIDENTIAL. ALL RIGHTS RESERVED. COPYRIGHT © 2018 14
Field Name Description
L (# of bits in each data
symbol)
Number of bits included within each data symbol.
D (interleaver depth) Interleaving depth in the current latency path.
I (interleaver block size
in bytes)
Interleaving block size in the current latency path.
N (RS codeword size) The number of bits per codeword.
Delay (msec) PMS-TC delay in milliseconds of the current latency path (or the lowest latency path when running dual-
latency paths).
INP (DMT symbol) Input level for DMT-managed DSL environments.
OH Frames Number of xDSL OH Frames transmitted/received.
OH Frame Errors Number of xDSL OH Frames transmitted/received with errors.
(End of DSL-specific field group)
Super Frames The number of xDSL Super Frames transmitted/received.
Super Frame Errors The number of xDSL Super Frames transmitted/received with errors.
RS Words Number of Reed-Solomon-based Forward Error Correction (FEC) codewords transmitted/received.
RS Correctable Errors Number of Reed-Solomon-based FEC codewords received with errors that have been corrected.
RS Uncorrectable Errors Number of Reed-Solomon-based FEC codewords received with errors that were not correctable.
HEC Errors Count of ATM HEC errors detected. As per ITU-T G.992.1 and G.992.3, a1-byte HEC is generated for each
ATM cell header. Error detection is implemented as defined in ITU-T I.432.1 with the exception that any
HEC error shall be considered as a multiple bit error, and therefore, HEC Error Correction is not
performed. [1],[2]
OCD Errors Total number of Out-of-Cell Delineation errors. ATM Cell delineation is the process which allows
identification of the cell boundaries. The HEC field is used to achieve cell delineation. [4] An OCD Error is
counted when the cell delineation process transitions from the SYNC state to the HUNT state. [2]
LCD Errors Total number of Loss of Cell Delineation errors. An LCD Error is counted when at least one OCD error is
present in each of four consecutive overhead channel periods and SEF (Severely Errored Frame) defect is
present. [2]
Total Cells Total number of cells (OAM and Data cells) transmitted/received.
Data Cells Total number of data cells transmitted/received.
Bit Errors Total number of Idle Cell Bit Errors in the ATM Data Path. [3]
Total ES Total number of Errored Seconds. This parameter is a count of 1-second intervals with one or more CRC-8
anomalies. [4]
Total SES Total number of Severely Errored Seconds. An SES is declared if, during a 1-second interval, there are 18
or more CRC-8 anomalies in one or more of the received bearer channels, LOS (Loss of Signal) defects, SEF
(Severely Errored Frame) defects, or LPR (Loss of Power) defects. [4]
Total UAS Total number of Un-Aavailable Seconds.
This is a count of 1-second intervals for which the xDSL line is unavailable. The xDSL line becomes
unavailable at the onset of 10 contiguous SESs (included in the unavailable time).
Once unavailable, the xDSL line becomes available at the onset of 10 contiguous seconds with no SESs
(excluded from unavailable time). [4]

SMARTRG INC. PROPRIETARY AND CONFIDENTIAL. ALL RIGHTS RESERVED. COPYRIGHT © 2018 15
References
[1] ITU-T Recommendation G.992.1 (1999), Asymmetric digital subscriber line (ADSL) transceivers
[2] ITU-T Recommendation G.992.3 (2005), Asymmetric digital subscriber line transceivers 2 (ADSL2)
[3] ITU-T Recommendation G.997.1 (2006), Physical layer management for digital subscriber line (DSL) transceivers
[4] ITU-T Recommendation I.432.1 (1999), B-ISDN user-network interface – Physical layer specification: General characteristics
Running xDSL (BER) tests
1. Scroll to the bottom of the page and click xDSL BER Test. The ADSL BER Test dialog box appears.
2. In the Tested Time field, select the duration in seconds and click Start. Options range from 1 second to 360 seconds.
The default is 20 seconds.
The test transfers idle cells containing a known pattern and compares the received data with this known pattern.
Comparison errors are tabulated and displayed. To stop the test, click Stop.

SMARTRG INC. PROPRIETARY AND CONFIDENTIAL. ALL RIGHTS RESERVED. COPYRIGHT © 2018 16
3. When the test completes, a success dialog box appears.
Note: If the Error Ratio reaches e-5, you cannot access the Internet.
Route
On this page, you can view the LAN and WAN route table information configured in your gateway for both IPv4 and IPv6
implementation.
In the left navigation bar, click Device Info >Route. The following page appears.

SMARTRG INC. PROPRIETARY AND CONFIDENTIAL. ALL RIGHTS RESERVED. COPYRIGHT © 2018 17
The fields on this page are defined below.
Field Name Description
Destination Destination IP addresses.
Gateway (For IPv4 only) Gateway IP address.
Subnet Mask (For IPv4 only) Subnet Mask.
Next Hop (For IPv6 only) Identifies the next server in the IPv6 path, if any.
Flag Status of the flags.
Metric Number of hops to reach the default gateway.
Service Service type.
Interface WAN/LAN interface.
ARP
On this page, you can view the MAC address and IP address information for the devices connected to the gateway.
In the left navigation bar, click Device Info >ARP. The following page appears.

SMARTRG INC. PROPRIETARY AND CONFIDENTIAL. ALL RIGHTS RESERVED. COPYRIGHT © 2018 18
The fields on this page are defined below.
Field Name Description
IP address IP address of the host.
Flags Each entry in the ARP cache is marked with a status flag. Options are Complete,Permanent, and Published.
MAC Address MAC address of the host.
Device System level interface by which the host is connected. Options are: br(#),atm(#),eth(#), and ptm(#).
DHCP
On this page, you can view the host name, the IP address assigned by the DHCP server, the MAC address corresponding to the IP
address, and the DHCP lease time.
In the left navigation bar, select Device Info >DHCP. The following screen appears.
The fields on this page are defined below.
Field Name Description
Hostname Host name of each connected LAN device.
MAC Address MAC address for each connected LAN device.
IP Address IP address for each connected LAN device.
Connection Type Type of connection for each LAN devices, such as Ethernet.
IP Address Assignment Type of IP address assignment, such as DHCP.
Status Status of the connection. Options are Active and Inactive.
Expires In Time until the DHCP lease expires for each LAN device.

SMARTRG INC. PROPRIETARY AND CONFIDENTIAL. ALL RIGHTS RESERVED. COPYRIGHT © 2018 19
CPU & Memory
On this page, you can view the CPU and memory data for the gateway.
In the left navigation bar, click Device Info >CPU & Memory. The following page appears, showing the current usage and history.
The information refreshes automatically.
Advanced Setup
In this section, you can configure network interfaces, UPnP, quality of service, and other features.
Layer2 Interface
In this section, you can configure the network interfaces for your gateway.
ATM Interface
On this page, you can configure Asynchronous Transfer Mode / Permanent Virtual Circuit (ATM/PVC) settings for your gateway. You
can customize latency options, link type, encapsulation mode and more.
Note: Devices (gateways) on both ends of the connection must support ATM / PVC.
1. In the left navigation bar, click Advanced Setup >Layer2 Interface >ATM Interface and then click Add. The following
page appears.

SMARTRG INC. PROPRIETARY AND CONFIDENTIAL. ALL RIGHTS RESERVED. COPYRIGHT © 2018 20
2. Modify the settings as needed, using the information in the table below.
3. Click Apply/Save to commit your changes. The new interface appears on the DSL ATM Interface Configuration page.
4. To remove an interface, click the Remove checkbox next to it and then click the Remove button.
The fields on this page are defined below.
Field Name Description
VPI Enter a Virtual Path Identifier. A VPI is an 8-bit identifier that uniquely identifies a network path for ATM cell
packets to reach its destination. A unique VPI number is required for each ATM path. This setting works with
the VCI. Each individual DSL circuit must have a unique VPI/VCI combination. Options are 0-255. The default is
zero (0).
VCI Enter a Virtual Channel Identifier. A VCI is a 16-bit identifier for a unique channel. Options are 32-65535. The
default is 35.
Note:1-31 are reserved for known protocols.
Other manuals for SR616ac
1
Table of contents
Other SmartRG Gateway manuals

SmartRG
SmartRG SR300n User manual

SmartRG
SmartRG SR555ac User manual

SmartRG
SmartRG SR10 User manual

SmartRG
SmartRG SR515ac User manual

SmartRG
SmartRG SR905ac User manual
SmartRG
SmartRG SR655AC User manual

SmartRG
SmartRG SR360n User manual

SmartRG
SmartRG SR808ac User manual

SmartRG
SmartRG SR570ac User manual

SmartRG
SmartRG SR516ac User manual

SmartRG
SmartRG SR516ac User manual

SmartRG
SmartRG SR360n User manual

SmartRG
SmartRG SR350n User manual

SmartRG
SmartRG SR808ac User manual

SmartRG
SmartRG SR501 User manual

SmartRG
SmartRG SR10 User manual

SmartRG
SmartRG SR506n User manual
SmartRG
SmartRG SR905acv User manual
SmartRG
SmartRG SR616ac User manual
SmartRG
SmartRG SR505n User manual