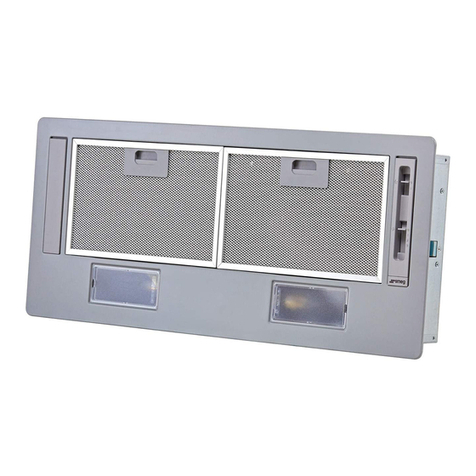
Smeg KDH12WLD User manual

IT
LIBRETTO DI USO
EN
USER MANUAL
FR
MANUEL D’UTILISATION
DE
BEDIENUNGSANLEITUNG
NL
GEBRUIKSAANWIJZING
ES
MANUAL DE USO
PT
LIVRO DE INSTRUÇÕES PARA UTILIZAÇÃO
RU
РУКОВОДСТВО ПО ЭКСПЛУАТАЦИИ
SV
BRUKSANVISNING
DA
BRUGSVEJLEDNING
PL
INSTRUKCJA UŻYTKOWANIA
NO
BRUKSVEILEDNING
FI
KÄYTTÖOHJEET
AR
KDH12WLD

IT
.................................................................................................................. 3
EN
.................................................................................................................. 8
FR
................................................................................................................ 13
DE
................................................................................................................ 19
NL
................................................................................................................ 24
ES
................................................................................................................ 29
PT
................................................................................................................ 34
RU
................................................................................................................ 39
SV
................................................................................................................ 45
DA
................................................................................................................ 50
PL
................................................................................................................ 55
NO
................................................................................................................ 61
FI
................................................................................................................ 66
AR
................................................................................................................ 71

8
1. SAFETY INFORMATION
For your safety and correct
operation of the appliance,
read this manual carefully before
installation and use.Always keep
these instructions with the ap-
pliance even if you move or sell
it. Users must fully know the
operation and safety features of
the appliance.
The wire connection has to
be done by specialized
technician.
• The manufacturer will not be
held liable for any damages
resulting from incorrect or im-
proper installation.
• The minimum safety distance
between the cooker top and
the extractor hood is 650 mm
(some models can be installed
at a lower height, please refer
to the paragraphs on working
dimensions and installation).
• If the instructions for installa-
tion for the gas hob specify a
greater distance, this must be
respected.
• Check that the mains voltage
corresponds to that indicated
on the rating plate xed to the
inside of the hood.
• Means for disconnection must
be incorporated in the xed
wiring in accordance with the
wiring rules.
• For Class I appliances, check
that the domestic power supply
guarantees adequate earthing.
• Connect the extractor to the
exhaust ue through a pipe of
minimum diameter 120 mm.
The route of the ue must be
as short as possible.
• Regulationsconcerningthedis-
charge of air have to be fullled.
• Do not connect the extractor
hood to exhaust ducts carrying
combustion fumes (boilers, re-
places, etc.).
• If the extractor is used in con-
junction with non-electrical
appliances (e.g. gas burning
appliances), a sufcient degree
of aeration must be guaranteed
in the room in order to prevent
the backow of exhaust gas.
When the cooker hood is used
in conjunction with appliances
supplied with energy other than
electric,thenegativepressurein
the room must not exceed 0,04
mbar to prevent fumes being
drawn back into the room by
the cooker hood.
• This suction Hood can be used
in combination with a Gas hob
withthefollowingcharacteristics:
• Total maximum power 12.4kW.
• 5 burners as shown in the gure.
2,6kW 1,9kW
1,9kW
5kW
1kW
EN

9
• Total maximum power 7.7kW.
• 4 burners as shown in the gure.
1,9kW
1,1kW
1,9kW
2,8kW
• Total maximum power 4.7kW.
• 2 burners as shown in the gure.
1,9kW
2,8kW
1,9kW
2,8kW
• Total maximum power 9.4kW.
• 4 burners as shown in the gure.
1,9kW
2,8kW
1,9kW
2,8kW
• Total maximum power 7.5kW.
• 4 burners as shown in the gure.
1,75kW
1,75kW
1kW
3kW
• Total maximum power 7.5kW.
• 4 burners as shown in the gure.
1,75kW
1,75kW
1kW
3kW
• Total maximum power 4.75kW.
• 2 burners as shown in the gure.
1,75kW
3kW
1,75kW
3kW
• The air must not be discharged
into a ue that is used for ex-
haustingfumesfromappliances
burning gas or other fuels.
• If the supply cord is damaged, it
mustbereplacedfromtheman-
ufacturer or its service agent.
• Connect the plug to a socket
complying with current regula-
tions, located in an accessible
place.
• With regards to the technical
and safety measures to be
adopted for fume discharging
it is important to closely follow
the regulations provided by the
local authorities.
WARNING:Beforeinstalling
the Hood, remove the pro-
tective lms.
• Useonlyscrewsandsmallparts

10
in support of the hood.
WARNING:Failureto install
the screws or xing device
in accordance with these
instructions may result in
electrical hazards.
• Do not look directly at the light
through optical devices (binoc-
ulars, magnifying glasses…).
• Do not ambè under the range
hood; risk of re.
• This appliance can be used
by children aged from 8 years
and above and persons with
reduced physical, sensory or
mentalcapabilitiesorlackofex-
perience and knowledge if they
have been given supervision or
instructionconcerninguse ofthe
appliance in a safe way and un-
derstand the hazards involved.
Children shall not play with the
appliance. Cleaning and user
maintenanceshallnotbemade
bychildrenwithoutsupervision.
• Children should be supervised
to ensure that they do not play
with the appliance.
• The appliance is not to be used
by persons (including children)
with reduced physical, sensory
or mental capabilities, or lack
of experience and knowledge,
unless they have been given
supervision or instruction.
Accessible parts may be-
come hot when used with
cooking appliances.
• Clean and/or replace the Filters
after the specied time period
(Fire hazard). See paragraph
Care and Cleaning.
• There shall be adequate ven-
tilation of the room when the
range hood is used at the same
time as appliances burning gas
or other fuels (not applicable to
appliances that only discharge
the air back into the room).
• The symbol on the product
or on its packaging indicates
that this product may not be
treated as household waste.
Instead it shall be handed
over to the applicable col-
lection point for the recycling
of electrical and electronic
equipment. By ensuring this
product is disposed of correctly,
you will help prevent potential
negative consequences for
the environment and human
health, which could otherwise
be caused by inappropriate
waste handling of this product.
For more detailed information
about recycling of this product,
please contact your local city
ofce, your household waste
disposal service or the shop
where you purchased the
product.
The connection cables must
be positioned and anchored
in such a way that the con-
nections are not under any
strain during cleaning and

11
maintenance, in compliance with
standard 60335-2-31.
• In the event of any obstruction
to the ap, press On/Off for 2
seconds to open it.
• Do not use multi-plug adapters
and/or extension leads.
• Donotmodifythecharacteristics
of the appliance.
2. USE
• The extractor hood has been designed
exclusively for domestic use to eliminate
kitchen smells.
• Never use the hood for purposes other
than for which it has been designed.
• Never leave high naked ames under
the hood when it is in operation.
• Adjust the ame intensity to direct it onto
the bottom of the pan only, making sure
that it does not engulf the sides.
• Deep fat fryers must be continuously
monitored during use: overheated oil
can burst into ames.
3. CARE AND CLEANING
- The Activated Charcoal odour lter can
be regenerated. Follow the instructions
provided on the Kit itself both for the
regeneration method and for the repla-
cement times.
- The grease lters must be cleaned
every 2 months of operation, or more
frequently in the case of particularly
intensive use. They can be washed in
a dishwasher (Z).
=
- Control lights, if present.
• Clean the hood using a damp cloth and
neutral liquid detergent.

12
4.
CONTROLS
A
C
D
B
Button Function Display
A
Press briey: opens the door and turns the motor on at speed
one.
Displays 1
Press and hold for approximately 2 seconds:
- Opens/closes the door.
- If the door is open, turns the motor off and closes the door.
- When the panel is moving the display shows the following
animation:
NOTES: If the door encounters an obstacle during movement
it will stop and the display will show:
To restore movement simply press button Aagain and hold it
for approximately 2 seconds.
Displays 1
-
B
Reduces the speed of the motor in 4 steps: P - 3 - 2 - 1.
P = Intensive speed is timed to run for 6 minutes.
Displays P, 3, 2, or 1
With the motor turned off: with the lter alarm active, it is
possible to perform a Reset by pressing and holding this button
for approximately 3 seconds.
Filter alarm:
- Saturation of the Metal Grease Filter is indicated after 100
hours in operation.
- Saturation of the Activated Charcoal Filter is indicated after
200 hours in operation.
Displays 8three times.
Displays F xed.
Displays F ashing.
C
Increases the speed of the motor in 4 steps: 1 - 2 - 3 - P.
P = Intensive speed set to run for 6 minutes.
Displays 1, 2, 3, or P
With the motor turned off: press and hold for approximately 2
seconds to activate/deactivate the activated charcoal lter alarm.
Displays Ctwice
= Activated
Displays Conce
= Deactivated
D
Delay function
Press briefly: activates / deactivates the Delay Function,
switching the motor off after 15 minutes.
This function cannot be activated if Intensive Speed is active.
The function can be deactivated by pressing button Dor button A.
Flashing LED = fun-
ction activated.
Fixed LED = function
deactivated.
Table of contents
Other Smeg Ventilation Hood manuals

Smeg
Smeg SHC590N User manual

Smeg
Smeg KR37X User manual

Smeg
Smeg SHIG910X User manual

Smeg
Smeg SET160X User manual

Smeg
Smeg KD90 series User manual

Smeg
Smeg KSEG5 User manual

Smeg
Smeg KSE66A User manual

Smeg
Smeg Dolce&Gabbana Divina Cucina User manual

Smeg
Smeg SA550X60 User manual

Smeg
Smeg PUM60X User manual

Smeg
Smeg SHR900X User manual

Smeg
Smeg KD61XE User manual

Smeg
Smeg KCM900POE User manual

Smeg
Smeg KV694R User manual

Smeg
Smeg KSET600 Technical manual

Smeg
Smeg Portofino KPF9AN User manual

Smeg
Smeg KV26P User manual

Smeg
Smeg Victoria Aesthetic KT90PE User manual

Smeg
Smeg KSED65X Technical manual

Smeg
Smeg K2 User manual