manuals.online logo
Brands
  1. Home
  2. •
  3. Brands
  4. •
  5. Smith & Noble
  6. •
  7. Window Blind
  8. •
  9. Smith & Noble Sheer Elegance User manual

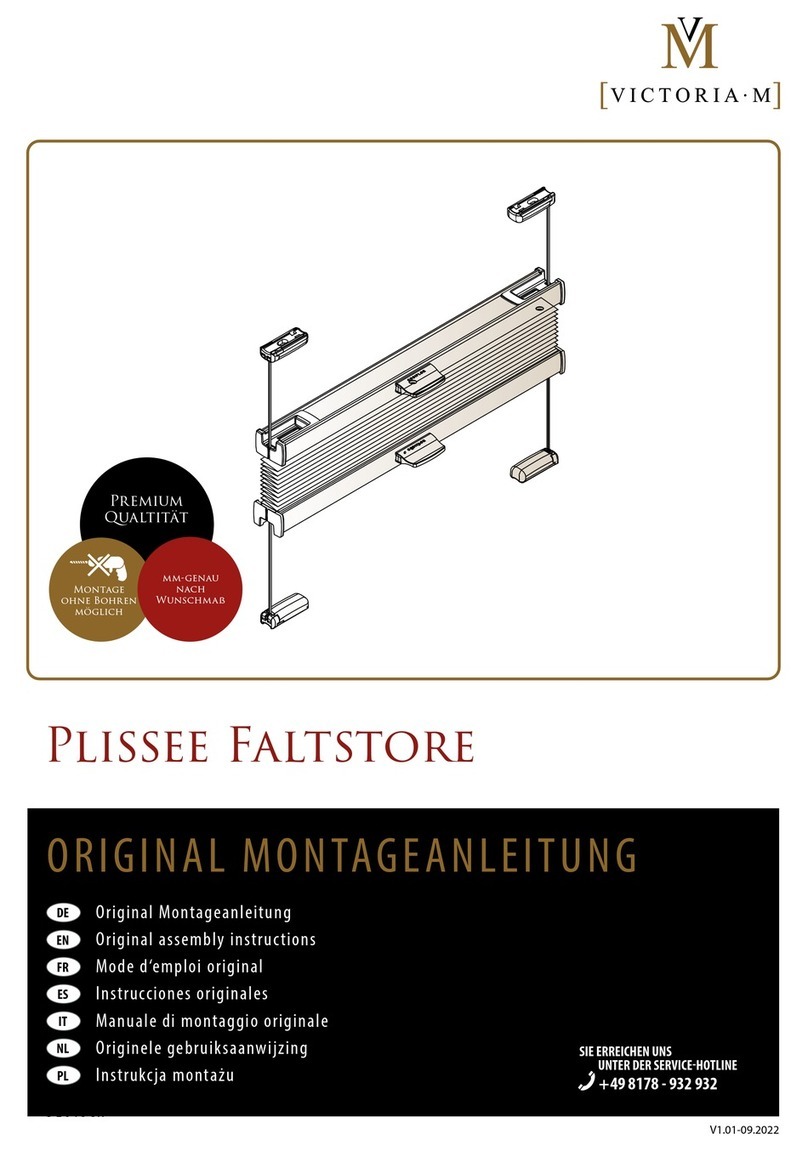
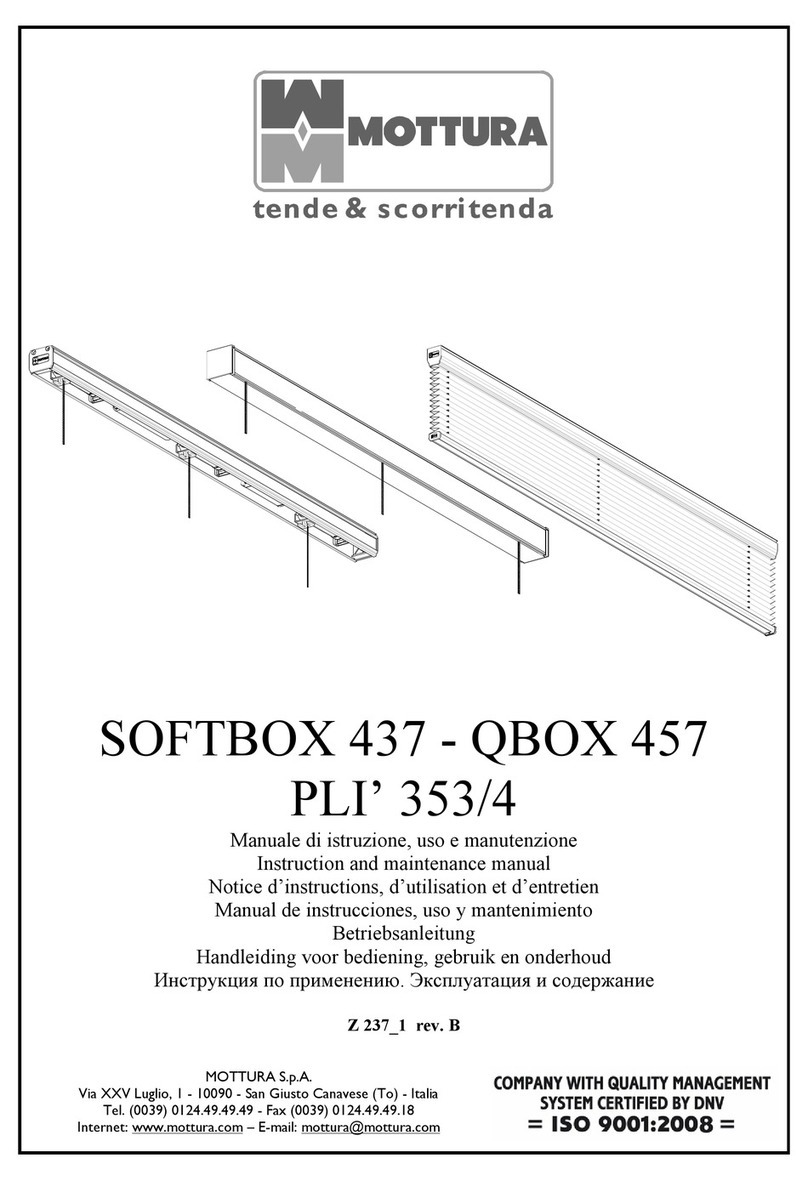
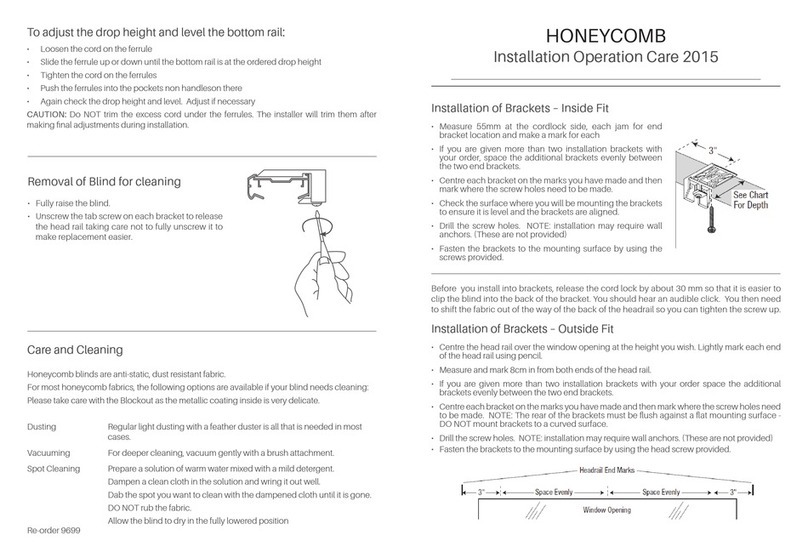
Smith & Noble Sheer Elegance User manual

smith+noble®
Sheer Elegance
•Step by Step Installation
•Troubleshooting Tips
•Easy Care Instructions
Customer Service 800.780.8889 or visit us online at smithnoble.com
America’s Leading Resource for Window Treatments™
Step 2a - Inside mount
The mounting brackets should be
positioned 4" in from the edge of the
window frame on each side.There has to
be a minimum 1" of space between the
back of the mounting bracket and the
nearest obstruction such as a window
handle, lock, etc.This space is to allow the
vanes to rotate properly.Attach the
mounting brackets using the bracket shims
and screws provided. Proceed to step 3.
Step 2b - Outside mount
Center the headrail over the window
opening at the desired height. Mark the
position of the ends of the headrail on the
wall. Attach the mounting brackets to the
wall 4" inches in from the marks making
sure the mounting brackets are level with
each other. Proceed to step 3.
VALANCE
RETURN
OUTSIDE MOUNT
BRACKET
(WITH VALANCE)
WAND
FABRIC PANELS
HEADRAIL
VALANCE
DUST COVER
molly
bolt
self drilling
anchor
toggle
bolt
screws
(included)
Thank you for purchasing from
Smith+Noble.Your new shadings have
been custom- crafted to your exact
window dimensions from the highest
quality materials. Once in your windows,
they will provide you with a lifetime of
beauty and trouble-free use.
Installing your new shadings is easy.
Simply follow our step-by-step
instructions.We recommend that you
read through all the instructions before
you start. If you have questions, our
customer service representatives are
available from 5am to 7pm Mon-Fri or
7am to 4pm Sat-Sun Pacific time at
800.780.8889.
Getting Started
Remove the shadings from the packaging.
Do not dispose of packaging until the
shadings are operating to your
satisfaction.
Check the diagram to make sure you
haveall the parts indicated for the
appropriate type of installation.
Tools you will need to install your
shadings: pencil, screwdriver, level and a
drill with 1⁄16"drill bit.
Your brackets must be securely attached
to the mounting surface.When screwing
into a surface, the included screws must
hit wood studs. Otherwise, use a secure
fastener as illustrated (not included).
Wallboard or Plaster:
Use a secure fastener designed for hollow
wall applications.
Metal: Pre-drill holes and use the
included screws.
Concrete, Stone, Brick or Tile: Use
amasonry drill and appropriate plugs,
anchors or screws.
✱When selecting a fastener,make sure it
is designed to supportthe weight of the
product being installed. Follow the
fastener manufacturer’s instructions for
proper installation of the fastener.
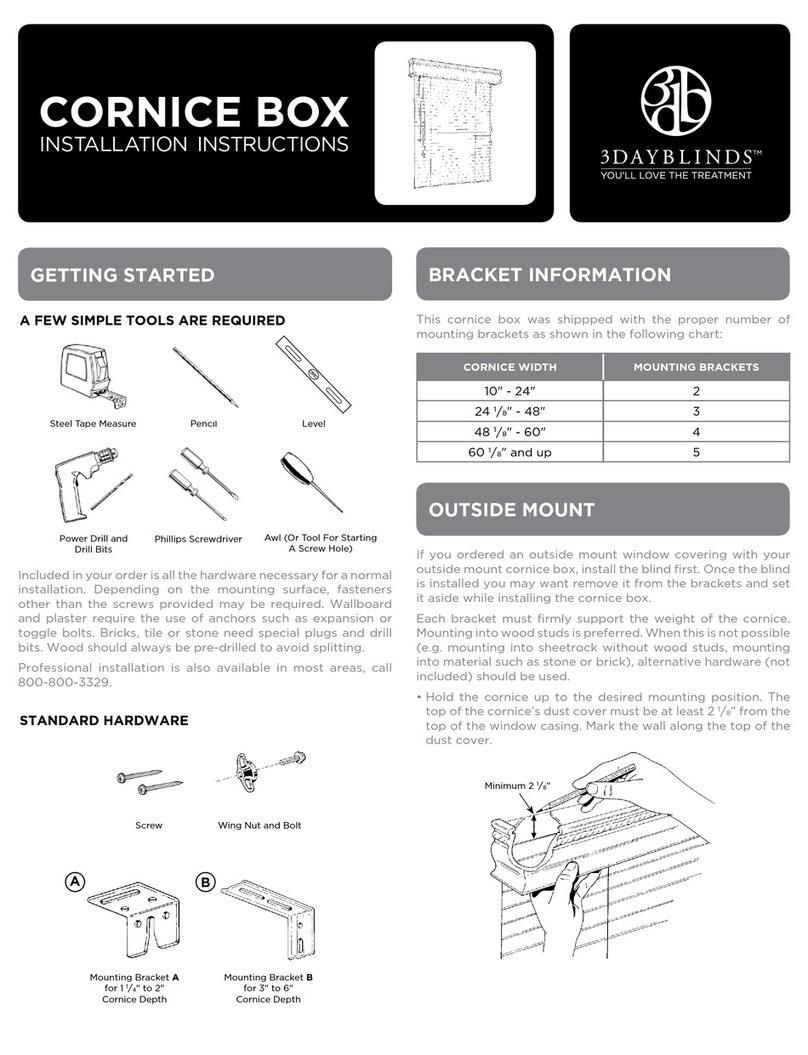
INSIDE MOUNT
BRACKET
(WITH VALANCE)
OUTSIDE MOUNT
BRACKET
(WITHOUT VALANCE)
STEP 1 Your New Blind
S T E P 2 Attaching Your Brackets
INSIDE MOUNT WITH VALANCE
INSIDE MOUNT WITHOUT VALANCE
For Ceiling Mount
Center the headrail over the window opening. Mark the position of the ends of the headrail
on the ceiling. Attach the mounting brackets to the ceiling 4" in from marks.
INSIDE MOUNT
BRACKET
(WITHOUT VALANCE)
The cord tension pulley can be mounted to the wall for outside mounts or
to the window sill for inside mounts. Choose the position for your
application. Makesurethe drawcordmoves freely through the pulley
mechanism.Attach with the screws provided. Proceed to step 5.
Position the headrail facing
you with the controls
located on the side you
ordered (left or right).With
brackets installed and
aligned with each other,
place the front lip of the
headrail into the front edges
of the brackets. Rotate the
back of the headrail up into
the brackets to snap into
place. Proceed to step 4.
Larger shadings may require
additional brackets. If this is
the case, space the additional
brackets equally along the top
of the window opening and
aligned with the end brackets.
INSIDE MOUNT OUTSIDE MOUNT
STEP 3 Installing the Headrail
STEP 4 Installing the Cord Tension Pulley
Step 2b - Outside mount
Center the headrail over the
window opening at the desired
height. Mark the position of the
ends of the headrail on the wall.
Attach the mounting brackets to
the wall 4" inches in from the
marks making sure the mounting
brackets are level with each other.
Proceed to step 3.
OUTSIDE MOUNT WITH VALANCE
ONE WAY DRAW
SPLIT DRAW
Once the cord tension pulley
is installed it may be necessary
to remove additional slack
from the cord. Draw the
carriers back to the stacked
position. Locate the cord tail
in front of the lead carrier.
Grasp the cord, loosen the
adjusting screw and pull the
cord until tension is
established.Tighten the
adjusting screw. Check the
operation of the track by
traversing it open then closed.
If the track is difficult to
traverse, loosen the adjusting
screw, release some of the
tension and recheck. Once
proper tension is reached, cut
off the excess cord leaving a
1⁄2"tail.
STEP 5 Draw Cord AdjustmentSTEP 2 Attaching Your Brackets
If you ordered the Room Darkening upgrade for your Sheer
Elegance panels, please be sure to read through all of Step 6
beforebeginning installation.
Note: When installing a Split Stack shade, separate the left fabric
panels from the right fabric panels.There should be an equal amount
of panels for each side with the same amount of billows.Treat each
side as a separate shade when installing the fabric panels.
Step 6a: Removeafabric panel from a polybag and carefully
remove the low-tack tape from fabric panel.
Step 6b: Lay the wrapped fabric on a clean smooth surface and
unfold the fabric byflipping the slip sheet end for end until the top
of the fabric is reached.
Step 6c: Carefully removethe low-tack tape from the top of the
fabric panel and discard the slip sheet.
Step 6d: Unfold the top layers of the fabric panel and identify the
left and right side of the fabric panel. Labels are placed at the top left
and top right side of the panel just below the plastic Fabric Hangers.
The round yellow label is the left side of the panel and the round red
label is the right side.The left and right Fabric Hangers are halves of
aFabric Hanger set.
Step 6e: Starting from the left end, one by one grasp and orient
each of the Fabric Hangers so the sheer billows of the fabric
between each Fabric Hanger is facing you.
Note: Handle the fabric with care to
prevent any damage to the fabric panel.
Installing Light Filtering Panels
Step 6f1: Starting from the left end side of
the track and fabric panel, one by one insert
the Fabric Hangers into the carriers of the
track so the billows of the fabric are facing
the inside of the room.This is done by
simply positioning the hole in the Fabric
Hanger below the carrier and pushing it
up until the Fabric Hanger is snapped and
secured inside the carrier.
NOTE: Be sure not to stretch the fabric
when inserting the hangers into the
carriers.
STEP 6 Fabric Installation
Do not remove protective film until
installation is complete. Install the track and
vanes before attaching the valance.
If valance comes with returns, snap the
return labeled Right onto the right end of
the valance. Snap the return labeled Left
onto the left end of the valance. Insert the
dustcover top of the valance into the forks on the front of the mounting
brackets. Center the valance over the headrail. Push in on the valance until
the dustcover is completely seated in the forks.
Pull on the tilt chain or wand to rotate the vanes.To traverse the vanes,
rotate the vanes to the open position and pull the draw cord or wand to
open and close. Never draw the vanes without rotating them to the
open position.This can cause severedamage to the headrail mechanism.
Step 6g6: Repeat all steps for remaining panels. On the very last carrier, fully
snap the Fabric Hanger into the carrier.
Installing Room Darkening Vanes
Step 6g7: Take a Room Darkening Vane and reach behind the fabric to place
the hole on the Room DarkeningVane onto the hook of theVane Hanger.
NOTE: Depending on the desired direction of tilt, the curved surface
of the vane should be oriented so it faces the room when the fabric
is tilted.
Step 6g8: To install the remaining Room
DarkeningVanes, repeat step 1. Separate the
panels (every 3, 4, or 5 billows) to slide the
Room DarkeningVanes between the fabric in
order to reach behind the fabric.
STEP 7 Attaching the Valance
Operating Your Shading
(These steps areneeded only if a fabric panel needs to be
repositioned during install or for cleaning, or replacement)
1. Grasp the fabric hanger with two hands on each side of
the carrier stem.
2. Push the fabric hanger up into the carrier stem. Push
the top of the fabric hanger on an angle towards the short
side of the carrier stem and pull down and out.
NOTE: Do not let the fabric hang freely. Hold the hangers that have been
removed while removing the next hanger.
3.When removing a hanger that connects two panels (This can be found
bylocating the separation between billows of connecting panels) follow
steps 1 and 2.Then carefully separate the two halves of the hanger by
sliding your finger between them and unsnapping the halves.
Removing Your Vanes and Headrail
Step 6f2: When the last Fabric Hanger on the right side of the panel is
reached do not slide a Vane Hanger onto the carrier or fully snap the
Fabric Hanger into the carrier. Instead, push the Fabric Hanger up into
the carrier so it rests in the end of the carrier and so the fabric does not
hang freely. If the end Fabric Hanger is fully snapped into the carrier, it
cannot be properly attached to the next panel. If the end Hanger is fully
snapped into the carrier, then refer to RemovingYour Vanes and Headrail.
Step 6f3: Repeat steps A-E for the next panel.
Step 6f4: Connect the 1st and 2nd panels.
This is done by removing the last Fabric
Hanger on the right side of the 1st panel
(already hanging) from the carrier and
snapping it to the Fabric Hanger on the left
end of the 2nd panel. Make sure the tabs on
the Fabric Hanger from the 2nd panel fully snap into the holes on the
Fabric Hanger from the 1st panel.
NOTE: For Split Stack, be sure NOT to connect the two center Fabric
Hangers in the middle that separates the shade into a left and right side.
Step 6f5: Repeat steps F1-F4 to install the second panel.
Step 6f6: Repeat all steps for remaining panels. On the very last carrier,
fully snap the Fabric Hanger into the carrier.
STEP 6 Fabric Installation (continued)
Installing Room Darkening Vane Hangers
NOTE:The following steps should be performed at the same time as the
preceeding instructions for Installing Light Filtering Panels.
Step 6g1: Starting from the left end side of the track
and fabric panel, slide a Vane Hanger onto the left side
of the carrier if your desired tilt direction is to the right.
Slide theVane Hangers on the right side of the carriers
stems if the desired direction of tilt is to left and insert
the fabric hangers into the carriers of the track so the
billows of the fabric are facing the inside of the room.
Then simply positioning the hole in the Fabric Hanger
below the carrier and pushing it up until the Hanger is
snapped and secured inside the carrier.
NOTE: Be sure not to stretch the fabric when inserting
the hangers into the carriers.
Step 6g2: When the last Fabric Hanger on the right side of the panel is
reached do not slide aVane Hanger onto the carrier or fully snap the
Fabric Hanger into the carrier. Instead, push the Fabric Hanger up into
the carrier so it rests in the end of the carrier and so the fabric does not
hang freely. If the end Fabric Hanger is fully snapped into the carrier, it
cannot be properly attached to the next panel. If the end Hanger is fully
snapped into the carrier, then refer to RemovingYour Vanes and Headrail.
Step 6g3: Repeat steps A-E for the next panel.
Step 6g4: Connect the 1st and 2nd panels.
This is done by removing the last Fabric
Hanger on the right side of the 1st panel
(already hanging) from the carrier and
snapping it to the Fabric Hanger on the left
end of the 2nd panel. Make sure the tabs on
the Fabric Hanger from the 2nd panel fully
snap into the holes on the Fabric Hanger
from the 1st panel.
NOTE: For Split Stack, be sure NOT to
connect the two center Fabric Hangers in the
middle that separates the shade into a left and right side.
Step 6g5: Repeat steps G1-G4 to install the second panel.
NOTE: Make sure the far left and far rightVane Hangers are on the
inside of the ends of the fabric.This will ensure that the Rooms
DarkeningVanes will be on the inside of the fabric billows.
Warranty
Smith+Noble Shadings are covered by a limited lifetime warranty.
This warranty covers any defects in materials or workmanship so long as
the product is measured and installed according to instructions. Every
Smith+Noble window treatment is designed to provide a lifetime of
trouble free use.In the unlikely event that warranty service is ever needed,
simply call customer service at 800.780.8889.Our customer service
representatives will arrange for a repair as quickly as possible.
Item SN2006-01/07
The sheer fabric may temporarily appear wrinkled upon initial
installation. Although we package the fabric panels carefully, wrinkles
sometimes occur during shipping.The wrinkles will dissipate over a short
period of time. If you do not see an improvement after 24 hours, or the
wrinkles are severe, you can steam the sheer.
All parts of the Drapery Sheer Vertical can be cleaned with a feather
duster or a standard vacuum.We recommend doing either of the two
regularly to keep your Drapery Sheer Vertical looking new.
Spills and stains can be lightly blotted with a cloth or damp sponge. More
difficult stains may require gentle washing in water with mild soap. For
this, remove the fabric panels from the carriers (see Section IX), and
submerge, soak and rub lightly. Lay flat to dry or place back in window.
The fabric panels can be steamed if they become wrinkled.
Drapery Sheer Verticals can be ultrasonically cleaned.
ToVacuum: Use brush or dust head attachment.
ToDust: Use soft, clean cloth.
Children and pets can become entangled in Shading
cords, causing a safety hazard.To help prevent possible
injuries, cords should always be secured with the enclosed
tension pulley. Chains should be secured out of the reach
with a cleat. For further assistance call Smith+Noble
customer service at 800.780.8889.
Problem: Fabric Panel is wrinkled.
Repair: Remove wrinkles by steaming the sheer.
Problem:When the fabric panels are closed they slant.
Cause:The headrail is not level.
1.The inside mount mounting surface may not be level.
2.Wings nuts are not allowing the headrail to sit properly in the mounting clip.
3. Mounting clips slid out of position during bracket installation.
Repair 1: Level mounting surface with shims.
Repair 2: Place the wing nut up so that it does not interfere with the mount-
ing clip.
Repair 3: Slide mounting clip as far forward as it will go in the bracket.The
rivet used to attach the clip should be at the back of the slot in the clip.
Problem:Traverse cord is drooping from the track when the vanes are stacked.
Cause:Traverse cord is too long or Cord Tensioner is not set correctly.
Repair: Move cord tensioner down to create more tension or shorten traverse
cord. See cord adjustment section (see SectionV) for instructions on adjusting
cordlength.
Troubleshooting
Safety
Care and Cleaning

Other Smith & Noble Window Blind manuals

Smith & Noble Board User manual

Smith & Noble

Smith & Noble Board User manual

Smith & Noble Rod User manual

Smith & Noble

Smith & Noble Rod User manual

Smith & Noble Rod User manual

Smith & Noble

Smith & Noble Rod User manual

Smith & Noble Skylight User manual

Smith & Noble

Smith & Noble Skylight User manual

Smith & Noble Cellular Shades User manual

Smith & Noble

Smith & Noble Cellular Shades User manual

Smith & Noble Motivia Motorization User manual

Smith & Noble

Smith & Noble Motivia Motorization User manual

Smith & Noble Metal Blinds User manual

Smith & Noble

Smith & Noble Metal Blinds User manual

Smith & Noble Faux Wood Blinds User manual

Smith & Noble

Smith & Noble Faux Wood Blinds User manual

Smith & Noble Metal Blinds User manual

Smith & Noble

Smith & Noble Metal Blinds User manual

Popular Window Blind manuals by other brands

SolarGaps SGV1C80-6-W Series Operation manual

SolarGaps

SolarGaps SGV1C80-6-W Series Operation manual

Beme Decopolitan instructions

Beme

Beme Decopolitan instructions

Erfal Creativ plus Assembly instructions

Erfal

Erfal Creativ plus Assembly instructions

rollease acmeda Easy Spring Air installation manual

rollease acmeda

rollease acmeda Easy Spring Air installation manual

Draper Motorized FlexShade Installation & operation instructions

Draper

Draper Motorized FlexShade Installation & operation instructions

Hella TOP MINI plus RvA Installation instructions and instructions for use

Hella

Hella TOP MINI plus RvA Installation instructions and instructions for use

Hella TOP FOAM Installation instructions and instructions for use

Hella

Hella TOP FOAM Installation instructions and instructions for use

CHICOLOGY SNAP-N'-GLIDE quick start guide

CHICOLOGY

CHICOLOGY SNAP-N'-GLIDE quick start guide

Rollo Rieper Duette VS1 Mounting instructions

Rollo Rieper

Rollo Rieper Duette VS1 Mounting instructions

Dometic Oceanair Skyvenetian Installation and operating manual

Dometic

Dometic Oceanair Skyvenetian Installation and operating manual

Isotra SYSTEM 25 CONTROL AND MAINTENANCE MANUAL

Isotra

Isotra SYSTEM 25 CONTROL AND MAINTENANCE MANUAL

SOMFY Sonesse 40 RTS Guide

SOMFY

SOMFY Sonesse 40 RTS Guide

MHZ s-enro SE 72/1 installation instructions

MHZ

MHZ s-enro SE 72/1 installation instructions

Vista Simplicity ROLLER SHADES quick start guide

Vista

Vista Simplicity ROLLER SHADES quick start guide

Blinds Direct Plaswood Venetian installation guide

Blinds Direct

Blinds Direct Plaswood Venetian installation guide

Hella TERRA SIDE Installation instructions and instructions for use

Hella

Hella TERRA SIDE Installation instructions and instructions for use

Schrader VERTIKAL MONO Mounting instruction

Schrader

Schrader VERTIKAL MONO Mounting instruction

SKILTEC 5A Product information manual

SKILTEC

SKILTEC 5A Product information manual

manuals.online logo
manuals.online logoBrands
  • About & Mission
  • Contact us
  • Privacy Policy
  • Terms and Conditions

Copyright 2025 Manuals.Online. All Rights Reserved.