manuals.online logo
Brands
  1. Home
  2. •
  3. Brands
  4. •
  5. SOMFY
  6. •
  7. Controllers
  8. •
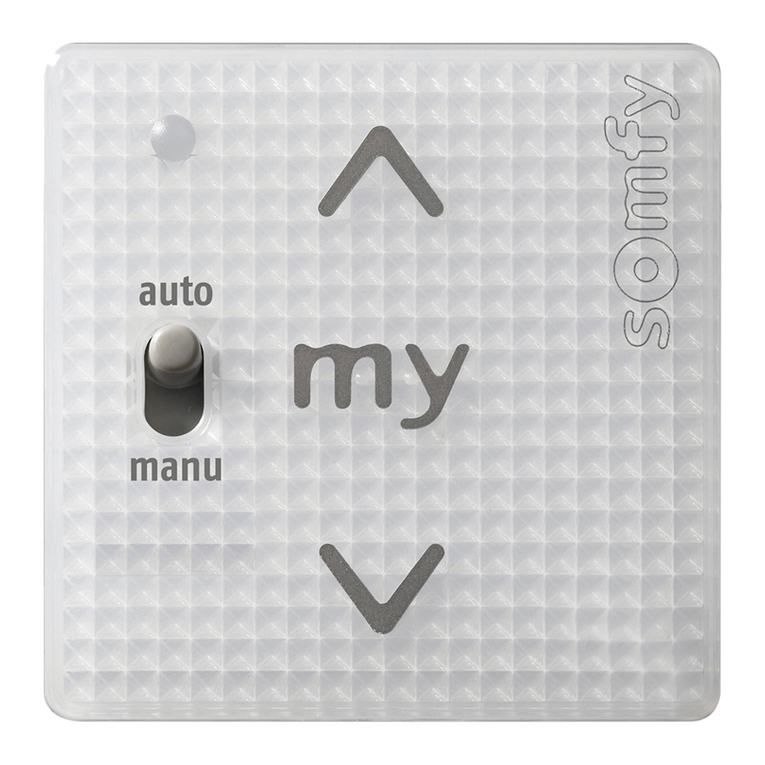
  9. SOMFY HOME MOTION Smoove RS100 io User manual

SOMFY HOME MOTION Smoove RS100 io User manual

EN - SOMFY hereby declares that this product is in compliance with the essential requirements and other
relevant provisions of Directive 1999/5/EC. A declaration of conformity can be found at the Internet address
www.somfy.com/ce.
A B
15 m
868.95 MHz
Somfy SAS, capital 20.000.000 Euros, RCS Annecy 303.970.230 . Copyright © 2014 Somfy SAS. Somfy SAS. All rights reserved. 09/2014
C
B
D
2
1
PROG.
Smoove RS100 io PROG.
ON / OFF
g
b
c
a
D
io-homecontrol®provides advanced and secure radio technology that is easy to install.
io-homecontrol®labelled products communicate with each other, improving comfort,
security and energy savings.
www.io-homecontrol.com
A
E
C
h
f
d
e
Ref. 5120458A
Smoove RS100 io
80 mm
80 mm
2
1
F
Ø 3 mm
55 mm
55 mm
60 mm
3
PL Instrukcja
EN Instructions
l60g$m
www.io-homecontrol.com
PL - SOMFY oświadcza niniejszym, że urządzenie jest zgodne z podstawowymi wymogami i innymi
stosownymi przepisami dyrektywy 1999/5/EC. Deklaracja zgodności jest dostępna pod agresem Internetowym
www.somfy.com/ce.
System io-homecontrol®wykorzystuje zaawansowaną, bezpieczną, technologię
bezprzewodową i jest łatwy w montażu. Produkty wyposażone w io-homecontrol®
komunikują się ze sobą, zapewniając uzytkownikowi większy komfort, bezpieczeństwo i
oszczędność energii.
tel. +48 22 50 95 30
e-mail: [email protected]
Internet: www.somfy.pl
Somfy Sp. z o.o.
ul. Marywilska 34J
03-228 Warszawa
All reproduction, use, distribution of this software, in whole or in part, by any means, without SOMFY SAS’s prior written approval, is strictly forbidden.
1. Introduction
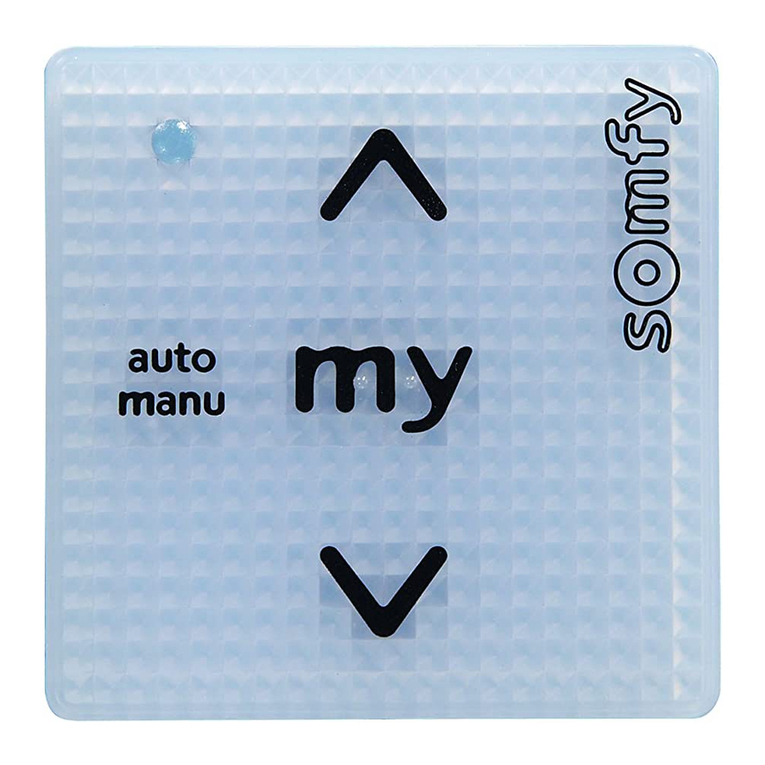
Smoove RS100 io is a
wallmounted wireless radio control
point to be used exclusively in local
area for controlling roller shutters
equipped with the S&SO-RS100 io motor
using io-homecontrol
®
radio technology.
Smoove RS100 io can be used together with
frames and intermediate trim which comply
with the DIN 49075 standard.
2. Safety
2.1. Safety and liability
Before installing and using this product,
please read this guide carefully.
This Somfy product must be installed
by a home motorisation and automation
professional, for whom this guide is
intended. Moreover, the installer must
comply with standards and legislation in
the country in which the product is being
installed, and inform his customers of the
operating and maintenance conditions for
the product.
Any use outside the sphere of application

as with all usage not consistent with these
instructions, Somfy accepts no liability and
the Somfy warranty is invalidated.
Before beginning installation, check that this
product is compatible with the associated
equipment and accessories.

To avoid damage to the Smoove RS100 io:
1)
Avoid impacts!
2)
Do not drop!
3)
Do not spill liquid on the product or immerse
it in liquid.
4)
Do not use abrasive products or solvents to
clean it.
3. Contents
$Figure A
Q. Description
1Mounting plate for
Smoove RS100 io or
Mounting plate for
Smoove RS100 io IN io
A
B
1Somfy frame C
1Smoove RS100 io io module D
4. Set up
4.1. The Smoove RS100 io in detail
$Figure B
a) Touch-sensitive key (raise)
b) Touch-sensitive key (stop, go to
favourite position).
c) Touch-sensitive key (lower).
d) “Green” indicator light showing that the
module’s keys and buttons have been
activated.
e) “Battery low” indicator light.
f) Standard or discreet mode selector.
g) On/Off button.
h) PROG button.
4.2 ON/OFF button
$Figure C
The ON/OFF button activates or deactivates
the touch-sensitive keypad as described
below. However, the PROG button remains
active:
Hold the button down until
the acoustic signal stops:
the indicator light glows
constantly:
- the touch-sensitive keys are
active
Hold down the button until the
acoustic signal stops and the

- the touch-sensitive keys are
inactive
To avoid wasting battery power, it is
advisable to switch the module to OFF
until it is installed on the wall.
To avoid accidentally sending
commands, it is advisable to switch the
module to OFF during programming.
4.4. Programming the Smoove RS100 io

a local io control point
Refer to the guide for the io motor.
4.5. Adding/Deleting a
Smoove RS100 io io
$Figure D
The procedures for adding or deleting an
io control point are the same.
To add or delete a Smoove RS100 io, use the
local io control point already associated
with the end product.
If necessary, activate the Smoove RS100 io
module; see section “ON/OFF button”
Position the end product at its half-way
position.
1)
Press and hold the PROG button on the
Somfy io local control point already
associated, until the end product moves
back and forth: the io motor or io receiver is
now in programming mode for 10 minutes.
2)
      
Smoove RS100 io: the end product moves
back and forth: the Smoove RS100 io is
programmed or deleted.
If necessary activate the module
Smoove RS100 io see section “ON/OFF button”.
5. Installation
$Figure E
The use of radio appliances (e.g. Hi-Fi
radio headphones) operating on the
same frequency may cause interference
and reduce the product’s performance.
-
The building in which the product is used
may reduce the radio range. The radio range
is 15 m line-of-sight.
Never install the Smoove RS100 io near
or on metal surfaces or with a metal
frame, as this can reduce the radio range.
      
Smoove RS100 io.
This product must be installed on an internal
wall and Somfy recommends that the wall

Leave the module in the mounting plate or in the
frame during the different programming phases
to make it easier to perform the operations.
Do not rest the module on its front panel
(the side with the keys) to avoid
accidentally sending commands.
Operation is only guaranteed if the
module is operated using clean, dry
hands (no gloves).
5.1 Installation of the Smoove RS100 io
control point
$Figure F
1)

recommends using 3 mm countersunk head
screws).
2)
Place the frame on the mounting plate.
3)
Clip the module onto the assembly (frame +
mounting plate).
EN
1. Wprowadzenie
2. Bezpieczeństwo
2.1. Bezpieczeństwo i odpowiedzialność
pecjalne zalecenia bezpieczeństwa
Zalecenia używania Smoove RS100 io:
1)
Unikać uderzeń!
2)
Nie upuszczać!
3) Nie polewać i nie zanurzać w płynie
.
4)
Do czyszczenia nie używać
rozpuszczalników i substancji ściernych.
3. Zawartość zestawu
1Płytka montażowa dla
Smoove RS100 io lub
płytka montażowa dla
Smoove RS100 io IN
A
B
1Ramka Somfy C
1Moduł Smoove RS100 io D
4. Ustawianie
4.1. Opis Smoove RS100 io
$Rysunek B
a) Przełącznik dotykowy (
4.2 Przycisk ON/OFF
$Rysunek C
Przyciski ON/OFF aktywują i wyłączają przy-
ciski dotykowe, jak opisano poniżej. Przycisk
PROG cały czas pozostaje aktywny:
ON =
Aktywacja
przycisków
Wcisnąć przycisk do momentu
ustania sygnału dźwiękowego:
kontrolka świeci się ciągłym
światłem:
- przyciski dotykowe są
aktywne
OFF =
Wyłączenie
Wcisnąć przycisk do momentu
ustania sygnału dźwiękowego:
kontrolka miga:
- przyciski dotykowe są
nieaktywne
Dla oszczędzania baterii, zaleca się
ustawić moduł, do czasu zainstalowania
na ścianie, w stan wyłączenia OFF.
Przed rozpoczęciem programowania
zaleca się ustawienie przełącznika na
OFF, co zapobiegnie wysyłaniu
przypadkowych sygnałów sterujących.
Postępować według instrukcji napędu io.
Dla aktywacji modułu Smoove RS100 io patrz
opis w sekcji“Przycisk ON/OFF”.
5. Instalacja
Dla zachowania dobrego zasięgu
radiowego nigdy nie należy instalować
nadajnika Smoove RS100 io na meta-
lowym podłożu ani w metalowej ramce.
Przed ostateczną instalacją nadajnika
Smoove RS100 io, należy sprawdzić zasięg
radiowego sterowania.
Nadajnik powinien być zainstalowany na
płaskiej ścianie wewnętrznej.
Sterowanie jest możliwe tylko przy
używaniu czystych, suchych dłoni (bez
rękawiczek).
5.1 Instalacja sterownika Smoove
RS100 io
$Rysunek F
1)
Umocować płytkę wkrętamiyzaleca
PL
Smoove RS100 io jest
naściennym, radiowym nadajnikiem w
technologii io do lokalnego sterowania,
roletami wyposażonych w napęd
S&SO-RS100 io.
$Rysunek A
Iloć
.
Opis
dotykowy
Przed instalacją i użytkowaniem produktu
należy uważnie zapoznać się z instrukcją.
Zabronione jest użytkowanie produktu poza
zakresem stosowania okreśonym przez
Somfy. Nieprzestrzeganie wskazówek
zawartych w niniejszej instrukcji spowoduje
zwolnienie producenta od
odpowiedzialności oraz utratę gwarancji.
Przed rozpoczęciem instalacji należy
sprawdzić kompatybilność tego produktu
z dołączonym wyposażeniem i akcesoriami.
kraju oraz przekazać użytkownikowi
informacje dotyczące warunków
użytkowania i konserwacji produktu.
4.4. Programowanie Smoove RS100 io
do produktu nie posiadającego
jeszcze lokalnego sterownika io
It is advisable to do next steps with
deactivated keypad.
Jest to opisane w dalszej części
instrukcji.
4.5. Dodanie/Kasowanie Smoove RS100
$Rysunek D
Procedury dodania i skasowania nadajnika io są
takie same.
Dla dodania lub skasowania Smoove RS100 io,
użyć pilota już przypisanego do danego
produktu.
W razie potrzeby aktywować moduł Smoove
RS100 io; patrz sekcja “Przycisk ON/OFF”
Ustawić osłonę w pozycji środkowej.
1) Wcisnąć przycisk
PROG na lokalnym pilocie
Somfy, przypisanym już do produktu, do
momentu krótkiego ruchu napędu io: napęd
lub odbiornik io jest wprowadzony na 10
minut w stan programowania.
2) Krótko nacisnąć przycisk PROG na

Smoove RS100 io: napęd wykona krótki
ruch: Smoove RS100 io został
zaprogramowany lub skasowany.
-Konstrukcja budynku moze mieć wpływ na
zasięg sterowania radiowego.
Standardowy
zasięg radiowy wynosi 15 m.
w górę)
c) Przełącznik dotykowy (w dół).
b) Przełącznik (stop lub
do pozycji komfortowej).
Smoove RS100 io może być instalowany
razem z ramką i elementami spełniającymi
normę DIN 49075.
Ten produkt powinien być instalowany
przez specjalistę z zakresu instalacji
elektromechanicznych i automechaniki,
dla którego jest przeznaczona niniejsza
instrukcja. Podczas instalacji należy
stosować się do norm i przepisów w danym
d) Zielone swiatło kontrolki sygnalizuje
aktywowanie przełaczników i przycisków
modułu.
e) Kontrolka “Bateria rozładowana”.
f) Przełącznik trybów standard lub cichy.
g) Przycisk On/Off.
h) Przycisk PROG.
Dla uniknięcia przypadkowego wysłania
sygnałów sterujących, nie należy kłaść
sterownika przyciskami w dół.
Umieścić moduł nadajnika na jego
miejscu z ramką i płytka montazową.
3)
użycie 3 mm wkrętów stożkowych).
2 )
Umieścić ramkę na płytce montażowej.
ON =
To activate
keypad
OFF =
To deactivate
keypad
$Rysunek E
Używanie w pobliżu innych urządzeń
radiowych (słuchawki bezprzewodowe),
na tej samej częstotliwości 443 MHz,
może zakłócać sterowanie.
Wykonywanie kolejnych etapów
programowania jest łatwiejsze, jeżeli nadajnik
jest na płytce montażowej lub w ramce.
6. Use
6.1 Information on sound
Pressing a key causes a “clicking” sound!
Pressing more than one key at the same time
causes a more high-pitched sound.
6.2. Favourite position ( )
$Figure G
Refer to the guide for the io motor or for
the io receiver to make sure it supports this
function.
  : the end product is
activated to reach the favourite position (my).
6.3. Programming or modifying the
favourite position (my)
$Figure H
1)
Position the end product in the desired
favourite position ( ) using the keys
or .
2)
Press until the end product moves
back and forth: the favourite position ( )
is now programmed.
6.4. Deleting the favourite position (my)
$Figure I
1)
 : the end product
is activated and stops in the favourite
position (my).
2)
Press again until the end product
moves back and forth: the favourite position
is now deleted.
6.5. STOP function
$Figure J
      
: the associated end product stops
automatically.
6.6. Buttons and
 or : the end product is
activated.
6.7. Standard or discreet mode
selector
$Figure K
Each time the mode selector is pressed,
control of the roller shutter switches from
standard mode to discreet mode and vice
versa.
The original setting for Smoove RS100 io is
standard mode.
1)
Standard mode:

next commands , and are sent
in standard mode: the roller shutter moves
quickly. This mode remains active until the
next time the mode selector is pressed.
2)
Discreet mode:

next commands , and are sent in
discreet mode to reduce the sound level of the
roller shutter. This mode remains active until
the next time the mode selector is pressed.
If the roller shutter is moving, pressing
the mode selector immediately switches
the roller shutter into the new mode
selected.
Mode switching is not available in the
programming phase.
6.8 Battery low
The “Battery low” indicator lights up when the
battery power level is low.
7. Tips and recommendations
7.1. Questions about the Smoove RS100 io?
Observations Possible
causes Solutions
The selected
product does
not react at
all when a
key on the
control point is
pressed.
The battery
is low. Replace it.
The keys are
not activated. Press the ON/OFF
button to activate
the touch-sensitive
keys.
The control
point is not
programmed.
See section
Adding/Deleting a
Smoove RS100 io.
External radio
equipment
is interfering
with the radio
reception.
Turn off any radio
appliances nearby.
7.2. Replacing the battery
$Figure L
1)
Unclip the frame with its Smoove RS100 io
module.
2)
Push the old battery out of its housing using
a plastic object.
3)

the face marked with a plus sign (+) visible.
4)
Push the battery fully into its housing.
5)
Clip the frame and the Smoove RS100 io
module on again.
6)
Press a key on the front panel. If the
indicator light lights up, then the battery has
been replaced correctly.
7.3. Replacing a lost or broken
io control point
$Figure M
This reset deletes all control points, however it
does not delete the sensors and the favourite
position.
Apply the double power cut only for the
end product to be reset.
-
Set the end product to the halfway position.
1)
Cut the power supply for 2 seconds.
2)
Switch the mains power supply back on for
5 to 15 seconds.
3)
Cut the power supply for 2 seconds.
4)
Switch the power supply back on:

The end product moves for a few
seconds.
If the end product is in the upper or lower
end limit position it will move back and

To avoid accidentally sending
commands, it is advisable to switch the
module to OFF during programming.
5)
Press the PROG button on the new
Smoove RS100 io until the end product
moves back and forth: all of the io control
points are now deleted and the new
io control point is programmed.
-
Follow the procedures in the “Set up”
section to add io control points.
8. Technical data
Radio frequency: 868.95 MHz,
io-homecontrol®
Safety level: Category III
Operating
temperature: 0°C to + 60°C + 32°F
to + 140°F
Dimensions of the
Somfy frame (A) in
mm (h x w x d): 80 x 80 x 10
Dimensions of
Module (B) in mm (h
x w x d): 50 x 50 x 10
Power supply: 1 x 3V battery type
CR 2430
Protection rating IP 30
Batteries or accumulators have to be
separated from other type of waste
and must be recycled through your
local treatment and recycling system.
EN
Copyright © 2014 Somfy SAS. All rights reserved. 09/2014
6. Użytkowanie
6.1 Sygnały dźwiękowe
6.3. Programowanie lub korekta pozycji
komfortowej (my)
$Rysunek H
1)
Ustawić osłonę w wybranej pozycji
komfortowej ( ) używając
lub .
)
dotychczasowej pozycji komfortowej (my).
6.5. Funkcja STOP
$Rysunek J
Osłona jest w ruchu Krótko nacisnąć:
Fabryczne ustawienie Smoove RS100 io jest
na tryb standardowy.
1)
Tryb standardowy:
Szybkie miganie zielonej kontrolkiPolecenia
,
2)
Tryb cichy:
Naciśnięcie selektora trybów podczas
ruchu osłony, powoduje natychmiastową
zmianę trybu.
Podczas programowania nie jest
możliwa zmiana trybu.
6.8 Rozładowana bateria
Świecąca kontrolka “Rozładowana bateria”
sygnalizuje rozładowanie się baterii.
7. Porady techniczne i zalecenia
7.1. Nieprawidłowe działanie Smoove RS100
Bateria jest
rozładowana
Przyciski nie
są aktywne
Nacisnąć przycisk
ON/OFF dla
aktywowania
przycisków
Nadajnik nie
jest zaprogra-
mowany
Patrz sekcja
Dodanie/Kasowanie
Smoove RS100 io.
Pracujące w
pobliżu
urządzenia
emitują
zakłócenia.
Wyłączyć
zakłócające
urządzenia radiowe.
7.2. Wymiana baterii
$Rysunek L
1)
Odłączyć ramkę z modułem Smoove
RS100 io.
2)
Przy pomocy plastykowego elementu
wyjąć starą baterię z zasobnika.
3) Użyć nowej, identycznej baterii w
położeniu z widocznym znakiem plus
(+).
4)
Wsunąć baterię do zasobnika.
5)
Połączyć ramkę z modułem nadajnika
Smoove RS100 io.
6)
Nacisnąć przycisk na przedniej części
panelu. Zapalenie się kontrolki potwierdzi
prawidłową wymianę baterii.
7.3. Zastąpienie zgubionego lub
uszkodzonego nad

ajnika io
$Rysunek M
Operacja resetu usunie wszystkie zapamiętane
sterowniki, ale nie usunie przypisanych czuj-
ników i ustawienia pozycji komfortowej.
Podwójne odłączenie zasilania
wykonywać tylko przy resetowaniu.
-
Ustawić roletę w środkowym położeniu.
1)
Odłączyć zasilanie na 2 sekundy.
2) Załączyć zasilanie na czas
5 do 15
sekund.
3)
Odłączyć zasilanie na 2 sekundy.
4) Załączyć ponownie zasilanie
:

Przez kilka sekund roleta porusza się.
Dla rolety w skrajnym położeniu będzie
wykonany tylko krótki ruch w obu
kierunkach
5)
Wcisnąć przycisk PROG w nowym
nadajniku Smoove RS100 io, do momentu
krótkiego ruchu rolety: wszystkie piloty
jednokierunkowe
8. Dane techniczne
Częstotliwość radia:868.95 MHz,
io-homecontrol®
Stopień zabezpiecz.: III
Zakres temperatur:0°C do + 60°C
Wymiary ramki (A)
wmm (wys x szer x
grub):80 x 80 x 10
Wymiary modułu (B)
wmm (wys x szer x
grub): 50 x 50 x 10
Zasilanie:1 x 3V bateria typ
CR 2430
Stopień ochrony IP 30
Baterie i akumulatory muszą być oddzielone
od innych rodzajów śmieci i poddane
recyklingowi za pośrednictwem
lokalnego punktu zbiórki surowców.
PL
Dla uniknięcia przypadkowego
sterowania podczas programowania
zaleca się ustawić moduł w tryb OFF.
-Dla dodania pilota postępować według
wskazówek w sekcji "Uruchamianie".
Objawy Przyczyny Rozwiązanie
zostały skasowane,
a przypisany jest tylko nowy pilot.
Powolne miganie zielonej kontrolki
Polecenia i są
wykonywane w trybie cichym.napędu.
Wybrany tryb pozostaje aktywny do czasu
następnego naciśnięcia przełącznika trybów.
6.6. Przycisk i
Krótko nacisnąć lub : napęd lub
odbiornik zostaje aktywowany.
6.7. Przełącznik trybów standardowy lub
cichy
$Rysunek K
Każde naciśnięcie selektora trybów powoduje
ustawienie trybu przeciwnego niż dotychcza-
sowy.
2)
Wcisnąć do momentu krótkiego
poruszenia się osłony: pozycja komfortowa
została zaprogramowana
Naciśnięcie przycisku wywołuje dźwięk
kliknięcia!Naciśnięcie kilku przycisków
jednocześnie powoduje bardziej piskliwy
sygnał.
6.2. Pozycja komfortowa ( )
$Rysunek G
Sprawdzić w instrukcji, czy dany napęd lub
odbiornik obsługuje ustawienie komfortowe.
Krótko nacisnąć :produkt został
aktywowany do ustawienia w pozycji (my).
Wymienić baterię.
i
są wysyłane w
trybie standardowym: osłona porusza się
szybko. Ten tryb utrzymuje się do momentu
kolejnego naciśnięcia przycisku.
6.4.Skasowanie pozycji komfortowej
$Rysunek I
1)
Krótko nacisnąć : osłona ustawi się w
2) Wcisnąć
do momentu krótkiego ruchu
osłony: pozycja komfortowa została
skasowana.
Wybrana
osłona nie
reaguje na
próby
sterowania
nadajnikiem.
osłona zatrzymuje się automatycznie.
The images are not contractually binding. - 2/2
2
1
H
my
2
1
I
my
my
my
G
my
my
24
135
M
2 sec.
OFF
2 sec.
OFF
10 sec.
ON ON
24
135
6
L
3 V type CR 2430
J
1
K
2
…… …… …

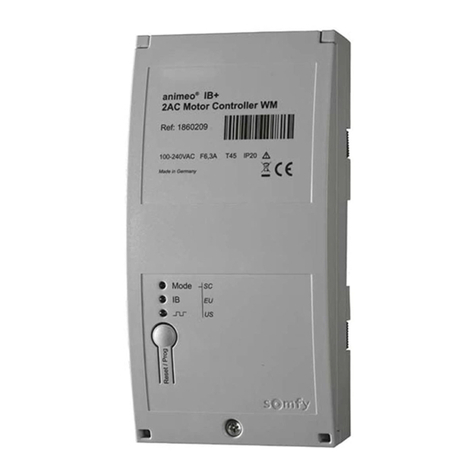
Other SOMFY Controllers manuals

SOMFY J4 RTS Assembly instructions

SOMFY

SOMFY J4 RTS Assembly instructions

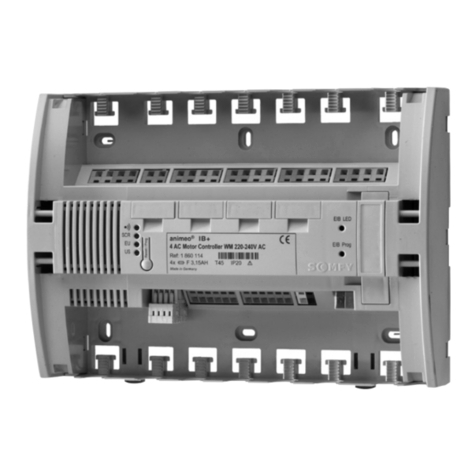
SOMFY Animeo IB+ 4 DC 2A Motor Controller User manual

SOMFY

SOMFY Animeo IB+ 4 DC 2A Motor Controller User manual

SOMFY FTS Series User manual

SOMFY

SOMFY FTS Series User manual

SOMFY animeo IB+ 1860209 User manual

SOMFY

SOMFY animeo IB+ 1860209 User manual

SOMFY Animeo IB+ User manual

SOMFY

SOMFY Animeo IB+ User manual

SOMFY animeo LON 1870453 User manual

SOMFY

SOMFY animeo LON 1870453 User manual

SOMFY INTEO INIS RT User manual

SOMFY

SOMFY INTEO INIS RT User manual

SOMFY animeo IB + User manual

SOMFY

SOMFY animeo IB + User manual

SOMFY animeo IB + 1860085 User manual

SOMFY

SOMFY animeo IB + 1860085 User manual

SOMFY Situo 1 RTS User manual

SOMFY

SOMFY Situo 1 RTS User manual

SOMFY CONTROL BOX 3S RTS User manual

SOMFY

SOMFY CONTROL BOX 3S RTS User manual

SOMFY Altus RTS User manual

SOMFY

SOMFY Altus RTS User manual

SOMFY animeo LON 4 DC/E User manual

SOMFY

SOMFY animeo LON 4 DC/E User manual

SOMFY animeo IP 1860201 User manual

SOMFY

SOMFY animeo IP 1860201 User manual

SOMFY animeo KNX 4 User manual

SOMFY

SOMFY animeo KNX 4 User manual

SOMFY Smoove UNO IB+ User manual

SOMFY

SOMFY Smoove UNO IB+ User manual

SOMFY INIS UNO User manual

SOMFY

SOMFY INIS UNO User manual

SOMFY tilt wirefree ir User manual

SOMFY

SOMFY tilt wirefree ir User manual

SOMFY animeo IP 1822314 User manual

SOMFY

SOMFY animeo IP 1822314 User manual

SOMFY 5058465B Installation guide

SOMFY

SOMFY 5058465B Installation guide

SOMFY animeo Compact User manual

SOMFY

SOMFY animeo Compact User manual

SOMFY animeo IB+ 4 AC Motor Controller WM 100-120 V... User manual

SOMFY

SOMFY animeo IB+ 4 AC Motor Controller WM 100-120 V... User manual

SOMFY animeo IB 9011809 User manual

SOMFY

SOMFY animeo IB 9011809 User manual

SOMFY Chronis io User manual

SOMFY

SOMFY Chronis io User manual

Popular Controllers manuals by other brands

Walchem WDP420 instruction manual

Walchem

Walchem WDP420 instruction manual

iNels JA3-018M quick start guide

iNels

iNels JA3-018M quick start guide

Laversab 6300-M4 user manual

Laversab

Laversab 6300-M4 user manual

dixell XC650C instruction manual

dixell

dixell XC650C instruction manual

Eagle A3 Pro quick start guide

Eagle

Eagle A3 Pro quick start guide

Taie FY400 Operation manual

Taie

Taie FY400 Operation manual

Miele H 4640 User instructions

Miele

Miele H 4640 User instructions

Eliwell ID 971 manual

Eliwell

Eliwell ID 971 manual

TECshow NAVIGATOR 3 user manual

TECshow

TECshow NAVIGATOR 3 user manual

Mercoid MPCJR Series Specifications-installation and operating instructions

Mercoid

Mercoid MPCJR Series Specifications-installation and operating instructions

McQuay MicroTech III RAH Operation and maintenance manual

McQuay

McQuay MicroTech III RAH Operation and maintenance manual

PENGWYN 485-1P-JS Technical manual

PENGWYN

PENGWYN 485-1P-JS Technical manual

Exalto CT3N user manual

Exalto

Exalto CT3N user manual

Wisenet SPC-1010 user manual

Wisenet

Wisenet SPC-1010 user manual

nVent RAYCHEM TCONTROL-CONT-03 OPERATING AND INSTALLATION Manual

nVent RAYCHEM

nVent RAYCHEM TCONTROL-CONT-03 OPERATING AND INSTALLATION Manual

AfterBurner GPIO CAPABILITY user manual

AfterBurner

AfterBurner GPIO CAPABILITY user manual

Epson RC700 manual

Epson

Epson RC700 manual

Vestax VMC-004 owner's manual

Vestax

Vestax VMC-004 owner's manual

manuals.online logo
manuals.online logoBrands
  • About & Mission
  • Contact us
  • Privacy Policy
  • Terms and Conditions

Copyright 2025 Manuals.Online. All Rights Reserved.