manuals.online logo
Brands
  1. Home
  2. •
  3. Brands
  4. •
  5. SOMFY
  6. •
  7. Controllers
  8. •
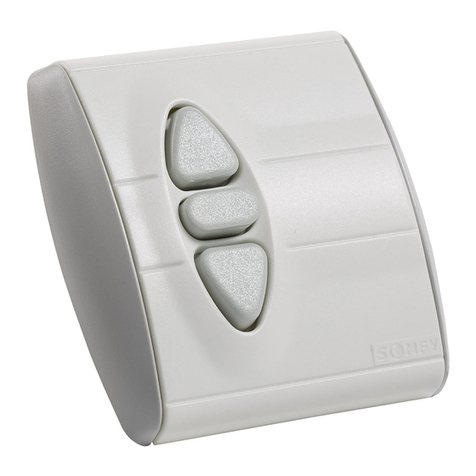
  9. SOMFY Situo 1 RTS User manual

SOMFY Situo 1 RTS User manual

The Situo1RTS allows the user to control a
group of one or more end-products.
The Situo 5 RTS can be used to control up to
two or five groups of one or more end-products
respectively.
1. Safety and liability
1. 1. Liability
Before installing and using this product, please
read this guide carefully. This Somfy product
must be installed by a home motorisation
and automation professional. Furthermore,
the installer must comply with standards and
legislation in the country in which the product
is being installed, and inform his customers of
the operating and maintenance conditions for
the product. He must give them this guide. Any
use outside the sphere of application defined
by Somfy is forbidden. Doing so would void the
warranty and release Somfy of all liability, as
would any failure to comply with the instructions
given herein. Never begin installing without first
checking the compatibility of this product with
the associated equipment and accessories.
1. 2. Safety instructions
Keep the SituoRTS out of the reach of
children.
Never drop, knock, puncture or immerse
the SituoRTS in liquid.
Do not use abrasive products or solvents
to clean them.
2. The Situo1RTS and Situo5RTS in
detail (Figure
A
)
a
a
Up button
b
b
STOP / my button
c
c
Down button
d
d
Key press indicator light(s)
e
e
Group selector switch
f
f
PROG. button
g
g
Wall mount
3. Selecting groups on the
Situo5RTS (Figure
B
)
Before using the Situo5RTS, ensure that
the right group is selected.
Press the group selector switch
e
e
repeatedly
to select the right group. The indicator light
d
d
corresponding to the group switches on
individually before all the indicators switch on
together for the selection of the last group.
4. Adding/Removing a Situo RTS
To store the first control: refer to the
instructions for the RTS receiver or drive.
To add or remove the Situo RTS to/from an
end-product
(
Figure
C
)
1) On the individual control already associated
with the end-product:
• Press the PROG. button (≈ 2 s) until the
end-product moves back and forth.
2) On the SituoRTS to be added or removed:
For the Situo5RTS, first select the right
group.
• Briefly press the PROG.button: the
end-product moves back and forth. The
Situo RTS has been added or removed.
EN
Situo1RTS
Situo5RTS
EN
INSTRUCTIONS
KO
사용 설명서
www.somfy.com
Ref.5128235A
Somfy SAS
50 avenue du Nouveau Monde
F - 74300 Cluses
www.somfy.com
1)
2)
1/2
2 s
2 s
A
C
B
Situo1RTS
Situo1RTS
Situo5RTS
Situo5RTS
f
f
a
a
b
b
c
c
d
d
f
f
a
a
b
b
c
c
d
d
e
e
g
g
0.5 s
0.5 s
Situo 1 RTS를 사용하면 사용자가 1개
이상의 제품으로 구성된 1개의 그룹을
제어할 수 있습니다.
Situo 5 RTS는 1개 이상의 완제품으로 구성된
1~5개의 그룹을 제어할 수 있습니다.
1.
안전 및 책임
1. 1.
책임
본 제품을 설치 및 사용하기 전에 본 설명서를
주의해서 읽고 숙지하십시오. 본Somfy 제품은
반드시 가정용 전동 모터 및 홈 오토메이션 설치
기사가 설치해야 합니다. 또한 설치 기사는 본
제품이 설치되는 국가의 표준과 규정을 준수해야
하고, 고객에게 본 제품의 작동 및 유지보수
조건을 전달해야 합니다.
설치 기사는 고객에게
본 설명서를 전달해야 합니다. Somfy에서 명시한
적용 범위 이외의 모든 사용은 금지됩니다.
이러한 경우 여기에 명시된 지침을 준수하지 않은
것이기 때문에 보증이 무효화되고 Somfy는 모든
책임으로부터 면제됩니다.
관련 장비 및 부속품에
대한 본 제품의 호환성을 확인하기 전에 절대
설치를 시작하지 마십시오.
1. 2.
안전 지침
SituoRTS를 어린이 손이 닿지 않는 곳에
보관하십시오.
SituoRTS를 절대 떨어뜨리거나 충격을
가하거나 구멍을 뚫거나 액체에 담그지
마십시오.
연마 제품이나 솔벤트를 사용해 제품을
청소하지 마십시오.
2. Situo1RTS
및
Situo5RTS
세부
정보
(
그림
A
)
a
a
올림 버튼
b
b
정지 / my 버튼
c
c
내림 버튼
d
d
작동 표시등
e
e
그룹 선택 스위치
f
f
PROG. 버튼
g
g
벽걸이
3. Situo5RTS
에서 그룹 선택
(
그림
B
)
Situo 5 RTS를 사용하기 전에 원하는
그룹이 선택되었는지 확인하십시오.
그룹 선택 스위치
e
e
를 반복해서 눌러 원하는
그룹을 선택하십시오. 그룹에 해당하는 표시등
d
d
가 개별적으로 켜진 후 마지막 그룹의 선택을
위해 모든 표시등이 함께 켜집니다.
4. Situo RTS
추가
/
복사
/
제거
최초 리모컨 설정 방법은 모터라인 수신기,
슬림 모터라인 수신기, 모듈 DC RTS 수신기
또는 알투스 모터, 소니스 모터의 리모컨
설정 방법을 참고하세요.
제품에
Situo RTS
추가
,
복사 또는 제거
(
그림
C
)
1)
이미 제품에 연결된 다른 RTS 리모컨을 사용하여,
• 제품이 앞뒤로 작동할 때까지 PROG. 버튼을
누르십시오(약 2초). 그러면 새로운 Situo 5
RTS 추가 및 제거를 할 준비가 됩니다.
2) 추가, 복사 또는 제거할 SituoRTS
Situo5RTS의 경우 먼저 원하는 그룹을
선택하십시오.
• 새로 추가하거나 삭제할 리모컨의 PROG.
버튼을 짧게 누릅니다. 제품이 짧게 왕복
작동합니다. Situo RTS가 추가, 복사 또는
제거가 됩니다.
KO
2/2
Copyright © 2016 Somfy SAS. All rights reserved. SomfySAS, capital 20.000.000 Euros, RCSAnnecy303.970.230 - 05/2016 - Images are not contractually binding
H
I
FG
< 0,5 s.
< 0,5 s.
> 0,5 s.
> 0,5 s.
< 0,5 s.
< 0,5 s.
> 0,5 s.
> 0,5 s.
CR2430
CR2430
< 0,5 s.
< 0,5 s.
> 5 s.
> 5 s.
< 0,5 s.
< 0,5 s.
> 5 s.
> 5 s.
3)
3)
5)
5)
8)
8)
2)
2)
4)
4)
6)
6)
J
1)
1)
E
1
1
3
3
2
2
7)
7)
1
1
1
1
2
2
D
25.5mm
25.5mm
2
1
3
5. Attaching the wall mount
(Figure
D
)
Referring to the diagram, open the wall mount
and fix it to a flat surface using a screwdriver
and an M3-type screw.
Do not use an electric screwdriver.
6. Use
6. 1. / buttons (Figure
E
)
6. 2. STOP/ button (Figure
F
)
-Briefly press to stop the end-product
from activating.
- If the end-product has been stopped, briefly
press to activate it until the favourite
position (my)
(Figure
G
)
.
6. 3. Setting, modifying or deleting
the favourite position (my)
(Figure
H
)
- Place the end-product in the required
position and press (≈ 5 s) to set the
favourite position (my).
- Place the end-product in the favourite
position (my) and press (≈ 5 s) to delete
it
(Figure
I ).
7. Replacing the last broken or lost
control point
To replace the last broken or lost RTS control
point, contact a home motorisation or
automation professional.
8. Replacing the battery (Figure
J )
Referring to the diagram, open the Situo1RTS
or Situo 5 RTS, replace the battery and then
close.
Separate storage cells and batteries
from other types of waste and recycle
them via the local collection facility.
9. Technical data
Radio frequency: 447 MHz (Korea)
Radio range: 20m between two walls
Operating temperature: 0°C to +50°C
Power supply: 1 CR2430 3 V battery.
EN
5.
벽걸이 장착
(
그림
D
)
그림에 따라 벽걸이를 열고 드라이버와 M3 타입
나사를 사용해 평평한 표면에 고정하십시오.
전동 드라이버를 사용하지 마십시오.
6.
사용
6. 1. /
버튼
(
그림
E )
6. 2.
정지
/
버튼
(
그림
F )
- 를짧게 눌러 제품 작동을 멈추십시오.
- 제품이 작동을 멈추면 를 짧게 눌러 사용자
선호 위치(my)까지 작동하십시오
(
그림
G
)
.
6. 3.
사용자 선호 위치
(my)
설정
,
변경
또는 삭제
(
그림
H
)
- 제품을 원하는 위치에 놓고 를 눌러
(약5초) 사용자 선호 위치(my)를 설정하십
시오.
- 제품을 사용자 선호 위치(my)에 놓고 를
눌러(약5초) 삭제하십시오
(
그림
I
).
-사용자 선호 위치 변경은 이미 설정된
위치를 삭제 후 새로운 사용자 선호 위치를
설정하십시오.
7.
고장 났거나 분실한 리모컨 교체
고장 났거나 분실한 RTS 리모컨을 교체하려면
전동 모터 및 홈 오토메이션 설치 기사에게
문의하시기 바랍니다.
8.
배터리 교체
(
그림
J )
그림에 따라 Situo 1 RTS 또는 Situo 5 RTS를
열고 배터리를 교체한 다음 닫으십시오.
배터리를 다른 종류의 폐기물과 분리한
다음 지역 수거 센터를 통해 재활용하십
시오.
9.
기술사양
무선 주파수: 447 MHz (한국)
무선 범위: 두 벽을 통과할 경우 20m
작동 온도: 0°C ~ +50°C
전원 공급 사양: 1 CR2430 3 V 배터리
KO
이 기기는 가정용(B급) 전자파적합기기로서 주로 가정에서
사용하는 것을 목적으로 하며, 모든 지역에서 사용 할 수
있습니다.
SFY-Telis1RTSPURE, SFY-Telis4RTSPURE
1. 기기의 명칭(모델명) Situo 1 RTS Pure, Situo 5 RTS Pure
2. 인증 받은 자의 상호 (주)솜피(031-600-5250, www.somfy.co.kr)
3. 제조국: 튀니지

Other manuals for Situo 1 RTS

3

This manual suits for next models

1

Other SOMFY Controllers manuals

SOMFY animeo LON 1860277 User manual

SOMFY

SOMFY animeo LON 1860277 User manual

SOMFY Animeo Series User manual

SOMFY

SOMFY Animeo Series User manual

SOMFY Altus RTS User manual

SOMFY

SOMFY Altus RTS User manual

SOMFY tilt wirefree ir User manual

SOMFY

SOMFY tilt wirefree ir User manual

SOMFY CB 230 RTS User manual

SOMFY

SOMFY CB 230 RTS User manual

SOMFY IGC User manual

SOMFY

SOMFY IGC User manual

SOMFY animeo IB+ 4 User manual

SOMFY

SOMFY animeo IB+ 4 User manual

SOMFY Animeo Series User manual

SOMFY

SOMFY Animeo Series User manual

SOMFY Animeo KNX/EIB WM Series User manual

SOMFY

SOMFY Animeo KNX/EIB WM Series User manual

SOMFY J4 RTS Assembly instructions

SOMFY

SOMFY J4 RTS Assembly instructions

SOMFY Animeo IB+ User manual

SOMFY

SOMFY Animeo IB+ User manual

SOMFY SKYMAX animeo WM/DRM 220-240 V AC User manual

SOMFY

SOMFY SKYMAX animeo WM/DRM 220-240 V AC User manual

SOMFY Smoove 1 Tw io User manual

SOMFY

SOMFY Smoove 1 Tw io User manual

SOMFY Chronis Smart RTS User manual

SOMFY

SOMFY Chronis Smart RTS User manual

SOMFY animeo IB+ 4 AC Motor Controller WM 220-240 V... User manual

SOMFY

SOMFY animeo IB+ 4 AC Motor Controller WM 220-240 V... User manual

SOMFY HOME MOTION Smoove RS100 io User manual

SOMFY

SOMFY HOME MOTION Smoove RS100 io User manual

SOMFY INTEO INIS RT User manual

SOMFY

SOMFY INTEO INIS RT User manual

SOMFY animeo IB+ 1860087 User manual

SOMFY

SOMFY animeo IB+ 1860087 User manual

SOMFY animeo User manual

SOMFY

SOMFY animeo User manual

SOMFY animeo KNX 4 User manual

SOMFY

SOMFY animeo KNX 4 User manual

SOMFY 1860286 User manual

SOMFY

SOMFY 1860286 User manual

SOMFY animeo IB+ 1860049 User manual

SOMFY

SOMFY animeo IB+ 1860049 User manual

SOMFY Axroll User manual

SOMFY

SOMFY Axroll User manual

SOMFY animeo IP 1822314 User manual

SOMFY

SOMFY animeo IP 1822314 User manual

Popular Controllers manuals by other brands

White Rodgers 1131 installation instructions

White Rodgers

White Rodgers 1131 installation instructions

Superior Electric STABILINE WHR5206 instructions

Superior Electric

Superior Electric STABILINE WHR5206 instructions

PlaneWave Instruments EFA instructions

PlaneWave Instruments

PlaneWave Instruments EFA instructions

KNX Push Button RF+ operating instructions

KNX

KNX Push Button RF+ operating instructions

Mitsubishi Electric MELSEC iQ-F FX5 user manual

Mitsubishi Electric

Mitsubishi Electric MELSEC iQ-F FX5 user manual

Chamberlain Security+ CLLA1 Owner's instructions

Chamberlain

Chamberlain Security+ CLLA1 Owner's instructions

Linear LTC3300-1 manual

Linear

Linear LTC3300-1 manual

Siemens FC18 Series operating manual

Siemens

Siemens FC18 Series operating manual

KEBCO COMBIVERT F5 installation manual

KEBCO

KEBCO COMBIVERT F5 installation manual

Samson FOUNDATION 3730-5 Mounting and operating instructions

Samson

Samson FOUNDATION 3730-5 Mounting and operating instructions

Hitachi FL.NET user manual

Hitachi

Hitachi FL.NET user manual

Pentair AVID XA+ Installation & operating instructions

Pentair

Pentair AVID XA+ Installation & operating instructions

Acuity Brands nLight rIO quick start guide

Acuity Brands

Acuity Brands nLight rIO quick start guide

ZTW Beast SL 45A user manual

ZTW

ZTW Beast SL 45A user manual

ARCA 814 Series Operating and maintenance manual

ARCA

ARCA 814 Series Operating and maintenance manual

Neotec NT7070 manual

Neotec

Neotec NT7070 manual

Lindab UltraLink FTCU technical information

Lindab

Lindab UltraLink FTCU technical information

Martem TELEM-AGC-L user manual

Martem

Martem TELEM-AGC-L user manual

manuals.online logo
manuals.online logoBrands
  • About & Mission
  • Contact us
  • Privacy Policy
  • Terms and Conditions

Copyright 2025 Manuals.Online. All Rights Reserved.