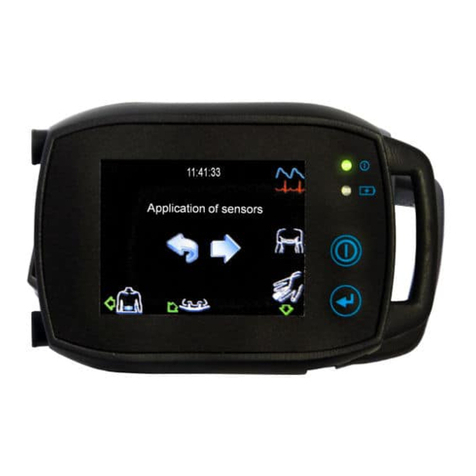
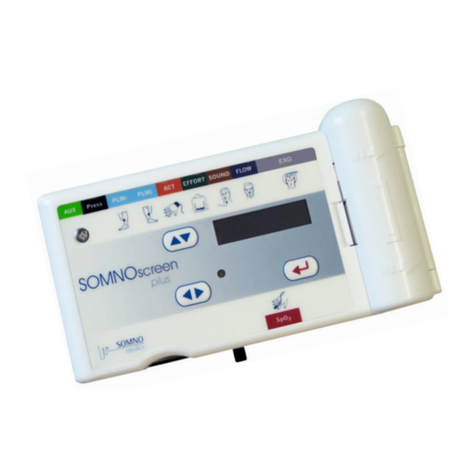
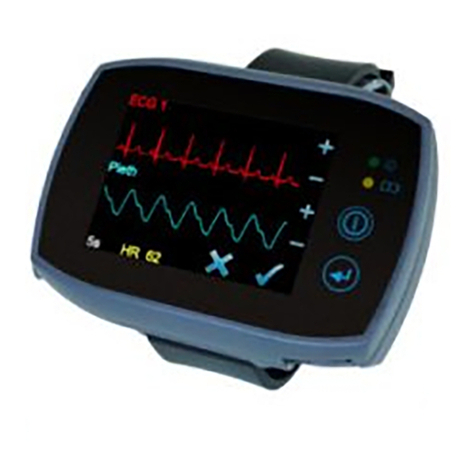
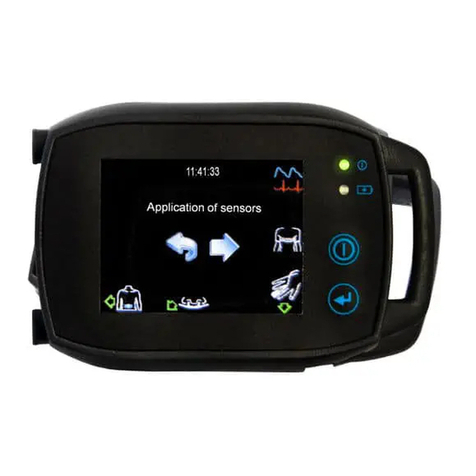
SOMNOmedics SOMNOtouch PSG User manual

-1-
SOMNOtouch™ PSG
I
NSTRUCTION MANUAL
SOMNOmedics America Inc. –815 Ponce de Leon Blvd., Suite
P-209 –Coral Gables, FL 33134
Toll free: 866 361 9937
info@somnomedics-diagnostics.com
www.somnomedics-diagnostics.com

-2-
SOMNOmedics America Inc. –815 Ponce de Leon Blvd., Suite
P-209 –Coral Gables, FL 33134
Toll free: 866 361 9937
www.somnomedics-diagnostics.com
Rev. 0
01.04.2019
All proper names marked with TM are
copyright protected by SOMNOmedics.

-3-
Content
1Introduction .................................................................................................................................... 4
Intended Use.............................................................................................................................. 4
Patients....................................................................................................................................... 4
2About SOMNOtouch™ PSG .......................................................................................................... 5
Model and Device number ......................................................................................................... 5
Elements of keyboard................................................................................................................. 6
3Safety instruction........................................................................................................................... 7
4Operation ........................................................................................................................................ 9
Preparing a new measurement .................................................................................................. 9
Application of the sensors ........................................................................................................ 11
Starting a new case online ....................................................................................................... 15
Starting der SOMNOtouchTM PSG straight from the Display ................................................... 19
Display during recording........................................................................................................... 21
Settings of the SOMNOtouch TM............................................................................................... 24
Manual abortion of the recording.............................................................................................. 26
DOMINO Software.................................................................................................................... 26
5Troubleshooting........................................................................................................................... 27
6Maintenance.................................................................................................................................. 27
Maintenance rate...................................................................................................................... 27
Cleaning and disinfection ......................................................................................................... 27
Use and Maintenance of the Rechargeable Battery ................................................................ 28
Functional Testing of the integrated Pulse Oximeter ............................................................... 28
7Service........................................................................................................................................... 29
Technical specification ............................................................................................................. 29
Lifetime..................................................................................................................................... 29
Advice on the electromagnetic compatibility ............................................................................ 30
Interference .............................................................................................................................. 32
Warranty................................................................................................................................... 32
Disposal of application parts and batteries and/ or the device................................................. 32
Accessories and Spare Parts................................................................................................... 33
Firmware Update...................................................................................................................... 33
Contact ..................................................................................................................................... 34
Notes.................................................................................................................................... 35

-4-
1 Introduction
The SOMNOmedics team would like to thank you for purchasing this product. We are confident that you
will enjoy using the SOMNOtouch™ PSG for many years. The SOMNOtouch™ has been developed by
SOMNOmedics to meet the highest quality control standards available.
Caution: Federal law restricts this device to sale by or on the order of a physician.
In order to obtain the best results from your system, we recommend that you carefully read this
instruction manual before connecting the SOMNOtouch™ PSG to a patient.
Advice and suggestions to improve the functionality of the device and this manual we will be gratefully
accepted.
Warning: Take care in arranging patient and sensor cables to avoid risk of patient entanglement or
strangulation. To minimize the risk of patient strangulation, the sensor and electrode cables
must be carefully placed and secured.
Technical Specifications are subject to change without notice.
The Initialisation of the System and Analysis of the Data must be performed by Trained Operators.
Measurements can be performed in professional healthcare facilities or at the Patients’ home. When
used at the Patients’ home, the Patient should be carefully instructed on how to use and care for the
system.
Please also hand out to the patient a copy of the enclosed Patient Instruction Manual. The initialized
device will automatically start recording the measurement at the pre-set time. The data transfer and
the analysis must be performed by the doctor or qualified physiologist.
The SOMNOtouch™ PSG may not be worn during swimming and showering.
Please refer to the safety instructions in chapter 3.
Intended Use
The SOMNOtouch PSG is a portable physiological signal recorder. It is indicated for use in the
recording, displaying, monitoring, printing, and storage of biophysical parameters for the purpose of
assisting in the diagnosis of sleep disorders and sleep related respiratory disorders of adult patients.
The device is intended to be prescribed for use by a physician in the office, sleep laboratory or
patient’s home. This device is NOT designed to be used in life support situations.
Patients
The SOMNOtouch™PSG and its components may only be used as follows:
- For adults only
- Excluded are monitored and intensive care patients

-5-
2 About SOMNOtouch™ PSG
Abb. 1: Operation and sensor connections of the SOMNOtouchTM PSG
Model and Device number
Immediately upon receipt, make sure that the device is not damaged, that the ordered accessories are
enclosed according to the delivery note and that the model name on the delivery note matches the
model name on the type plate (on the back of the device; Abb. 2).
Abb. 2: Label
External Signal-
input (AUX)
Interface/
Charging port
External Signal-
input (AUX)
Pressure sensor connection
SpO2 Sensor connection
Patient marker
Internal buzzer,
body position sensor
+ acceleration sensor
(x, y, z direction)
Internal buzzer
On/ Off Button
SpO2 sensor connection
Pressure sensor connection
Internal Effort
Sensor

-6-
Label of the SOMNOtouch™- Notes, symbols and classification
HF-Transmitter with integrated Bluetooth Protocol.
Read the instruction manual very carefully before you start working with the device
Protection Class: BF
The CE icon shows that the device complies with the applicable regulations of the
EU and that the conformity was declared by the manufacturer.
IP22
This device complies with the IP-Protection-Class “22”
Information, Symbols, Icons and Classifications on the Type Label of the SOMNOtouchTM PSG
Do not dispose electronic devices in the domestic waste.
The power supply meets the requirements of protection class II and does not need
any additional protective conductor connection.
The power supply is intended for indoor use only.
The CE icon shows that the device complies with the applicable regulations of the
EU and that the conformity was declared by the manufacturer.
Follow the instruction manual
Elements of keyboard
Picture
Description
Function
Status LED 1
Recording
Green LED
Yellow LED
Idle Mode
off
off
Waiting Mode
off
off
Recording Mode
1x /s
off
Initialisation / data transfer
on
off
Error during initialisation
2s on
+ buzzer

-7-
Status LED 2
Charging
When this LED is Yellow, the battery
is being charged
When this LED gets off, the battery is
fully charged
When this LED is off, no charge is
taking place.
Patient Marker
The patient uses the button as a
Marker during the measurement. To
place a marker for denoting an event
(going to bed, getting up, taking
medication, etc.) the patient pushes
this button.
On/Off
If the device is connected to the
computer via the docking station, it
will switch into initialisation mode
when this button is pressed.
If the device is off, it is turned on by
pressing this button.
A longer press on the button when in
the menu turns the device off.
During a measurement the display
can be switched on by pressing this
button.
3 Safety instruction
This instruction manual is regarded as part of the instrument and should always be
kept on hand.
The SOMNOtouch™ is NOT designed to be used in a Life Support situation, surgical
rooms, intensive care units, or in emergency vehicles.
The SOMNOtouch™ must be applied only under instruction of a physician.
The SOMNOtouch™ has no audible alarms for monitoring Pulse and SpO2.
The SOMNOtouch™ must be able to measure the pulse properly to obtain accurate
SpO2measurement. Verify that nothing is hindering the pulse measurement before
relying on the SpO2measurement.
Fingernail polish may reduce light transmission and thereby affect SpO2accuracy.
The pulse oximetry device integrated in SOMNOtouch™ is calibrated to determine
the percentage of arterial oxygen saturation of functional haemoglobin. Significant
levels of dysfunctional haemoglobin such as carboxyhemoglobin or methemoglobin
may affect the accuracy of the measurement.

-8-
Cardiogreen and other intravascular dyes, depending on the concentration, may
affect the accuracy of the SpO2measurement.
Check all cables and connections for damage before using this device.
Damaged parts must be replaced immediately. Please contact SOMNOmedics or
your SOMNOmedics Distributor.
If the device or a sensor is damaged (e.g. broken case) it has to be taken out of
service.
Misuse of the pulse oximeter sensor with an increased pressure over a prolonged
period can lead to a barotrauma.
For patients with pacemakers we recommend placing the device on the abdominal
region rather than the thoracic region. We recommend placing the device at least 7
inches away from the pacemaker. Following these placement guidelines, there is no
indication for complications in patients with a pacemaker.
On patients with cardiac pacemakers or other implanted stimulators, the active
impedance analysis of all EXG channels may be affected and MUST be turned off in
the Montage Settings of DOMINO.
Do not use Radio Transmitters and Receivers, High Frequency Devices, CB-Radio
Systems, Cellular Phones, Microwave Ovens, etc. within a distance of 30 cm (in
accordance with IEC 60601-1-2) to device..
Only sensors designed and supplied by SOMNOmedics may be used with this unit.
All sensors are provided unsterile and should never be sterilized.
This device is not to be used on broken skin. If this device comes in contact with
broken skin/blood, do not reuse this device and discard.
Only accessories recommended by SOMNOmedics are allowed to be connected to
the SOMNOtouch™.
This device is not designed for usage in Explosive Environmental Conditions.
It is very important to protect the SOMNOtouch™ from temperatures below 0°C and
above 50°C. Furthermore the SOMNOtouch™ may not be worn during swimming and
showering.
Operate the device in an environment with the humidity between 15 and 93% non-
condensing.
This device complies with the IP Protection Class “IP22”.
Do not use an autoclave for disinfection and sterilization of the SOMNOtouch™ or
any of its accessories, cables and sensors.
Follow the manufactures instructions when using disinfectants. Keep to the
prescribed dose and contact time. Use protective gloves when using aggressive
disinfectant agents.
There was no testing conducted to demonstrate the moisture retention filter for nasal
cannula (SEN123) used is effective in preventing cross-contamination.
Chemicals which are used for cleaning the unit should be stored, prepared and kept
ready in their own marked containers to avoid confusions.

-9-
Long-term storage of this device should only be in a closed and dry room to avoid
condensation caused by thermal fluctuations. Do not store the SOMNOtouch™ in
places of high temperature exceeding 35° C or under direct sunlight or in front of a
stove. Be sure not to store it under frozen condition. Please also avoid the areas of
high humidity.
Opening the case, repairing or modifying the SOMNOtouch™ in any way will void
the guarantee and might affect the safety of the device. Only SOMNOmedics and its
authorised distributors may repair the unit.
Never charge the internal battery with a docking station other than the one supplied
by SOMNOmedics, otherwise the battery may be damaged.
The Docking Station should only be used with the supplied power supply XP-Power
VEP15US12 from SOMNOmedics.
Connect the Docking Station to a freely accessible socket. In case of a fault it should
be possible to unplug it easily. When using SOMNOmedics accessories with an
external plug-in power supply, make sure that the plug-in power supplies are placed
outside the patient environment.
The device is not to be used while the battery is being charged.
The body strap is made of material commonly used in clothing and non-medical
watchbands, however if redness or swelling of the skin occurs where the band is in
contact, please discontinue use immediately and consult your physician.
Avoid using the device in close proximity to other equipment or in stacked
combination with other equipment. This could lead to improper operation. However,
if necessary, in the manner described above, this device and the other devices
should be observed to verify that they are working properly.
4 Operation
Preparing a new measurement
Connect the SOMNOtouchTM PSG device to the docking station which needs to be connected by
USB-cable to the computer and have a plugged-in power supply.
Click on the ‘Initialisation symbol of the DOMINO panel (No. 1).
Abb. 3 Initialisation icon in DOMINO panel
The ‘Preparing new recording’ window will appear in which you can enter the patient data (see Abb. 21
, Page 15). Click on ‘Next’ or the ‘Date’ tab after entering the patient data.

-10-
Abb. 4 ‘Preparing new recording’ window: ‘Date’ tab
Activate the ‘Manual Start’ checkbox, enter the intended recording duration and select ‘Next’ or the
‘Montage’ tab.
The DOMINO software contains assemblies for all EEG options. If you need other sensors, you can
adapt the montage. For further information please read the DOMINO main IFU
Abb. 5 Preparing new recording’ window: ‘Montage’ tab
Select a montage for the SOMNOtouchTM PSG and make sure the ‘Online Mode ON’ checkbox is
activated.
Chose the ‘Initialise Flash Card’ button and remove the SOMNOtouchTM PSG from the docking station.
To start the recording directly on the SOMNOtouchTM PSG see chapter 4.4 Starting der
SOMNOtouchTM PSG straight from the Display

-11-
Application of the sensors
The main device should be placed on top of light clothes (nightshirt, pyjamas) and should not be in
direct contact with the skin.
Note: Carefully attach straps and sensor cables to the patient to prevent strangulation. If necessary,
additionally secure the sensor cables with adhesive strips.
Please note: The sensors must be plugged in and out without turning them.
Abb. 6 Plug in the sensors.
a) Clean the bone-covering parts of the skin to which you attach the
ECG electrodes with alcohol pads. Connect the ECG electrodes (e.g.
SEN004) to the push button electrodes of your sensor. Attach one
ECG electrode below each of the left and right clavicles and one
ECG electrode to the fifth intercostal space on the left side of your
body. Then let the patient put on a T-shirt and lead the cable out of
the cutout of the T-shirt.
b) Attach the SOMNOtouchTM to the patients ‘chest using the thorax belt (effort belt)
Abb. 8 Thorax-Belt
c) Connect the connector of the combination sensor for abdominal belt, ECG and PLM with the
SOMNOtouchTM to the corresponding connection socket (standard application: see arrow)
Attach the Effort strap over the T-shirt to the patient's abdomen. (Abb. 10).
Abb. 7 Application of the ECG electrodes

-12-
Clean the skin areas to which you attach the PLM electrodes with alcohol pads.
Connect the PLM electrodes (e.g. SEN012) to the push-button electrodes of your
sensor. The electrodes are then attached to the front shin muscle (Abb. 11(4)) of
the respective leg, at approx. half height (50%) between the knee and ankle.
d) Attach the SpO2 sensor to one finger on the left hand (Abb. 11(5)) and attach the nasal cannula
(Abb. 11 (6)).
SpO2 Sensor
This finger clip sensor must be attached to the most suitable finger by trial and error. The upper side of
the sensor is marked by the embossing of a finger as shown in the following image. Create a strain relief
for the sensor cable with adhesive tape.
Note: Nail polish can influence the accuracy of SpO2 measurement.
Nasal cannula
Abb. 9 Threading the Effort Belt
Abb. 10 Attaching the effort belt to the
abdomen
Abb. 12 Application of the SpO2 sensor
Abb. 11 Attaching the sensors

-13-
Put the nasal cannula on the patient. Make sure that the sensor element openings colored red in the
following illustration are in the nostrils. Then, connected the nasal cannular together with the filter
(screwed onto the other end of the nasal cannula) to the LuerLock connector of the SOMNOtouchTM.
Note: Nasal cannulas are for single use only.
e) Anlegen der EEG-Optionen
Clean the areas where the electrodes are to be applied with Nuprep paste.
Attach the electrodes to the patient as shown in the illustrations and then connect them to the
appropriate slots on the headbox. The positions of the electrodes are marked on the headbox.
Then connect the connecting cable of the headbox to the still free AUX input of the device.
1) R&K Headbox
Plug the electrode cables according to the application plan into the R&K Headbox (Abb. 15
right)
2) AASM Headbox
Abb. 15 AASM compliant application plan
Plug the electrode cables according to the application plan into the AASM-Headbox:
Abb. 13 Application of the nasal cannula
Abb. 14 Application plan R&K Headbox

-14-
Abb. 16 AASM-Headbox
3) 6-chanal-EEG module
Abb. 17 Application plan for 6-chanal-EEG-module.
Plug the electrode cables according to the application plan into the EXG-Headbox:
Abb. 18 EXG-Headbox for 6-chanal-EEG-Module with ECG.
4) Application of the Headbox
The headbox can be fastened to the thoracic belt or an (optional) shoulder belt with the clip at its back.
To fasten the headbox at the thorax, the opening of the clip has to point downwards (Abb. 19, left).
Abb. 19 Headbox-Rückseite.

-15-
To fasten the headbox to the shoulder belt, the opening of the clip has to point to the left (Abb. 19, right).
Note: To turn the clip please remove the screws, turn the clip for 90° to the right and tighten the screws
again.
Starting a new case online
Click on the ‘Online’ symbol of the DOMINO panel (no. 4).
Abb. 20 Online Icon in DOMINO panel
The ‘New Recording’ window will appear in which you can enter the patient data.
Existing patient data can be imported by clicking on the ‘DB’ button and searching for the corresponding
patient.
Abb. 21 Online Mode: ‘Patient’ tab
Click on ‘Next’ or the ‘Montage’ tab after entering the patient data".
Choose a montage.
(For SOMNOtouchTM PSG the same montage as during the device initialisation has to be selected)

-16-
Abb. 22 Online Mode: ‘Montage’ tab"
1
Lists the available montages
2
Shows the type of device for which the selected montage was prepared
(Please note: The device type of the montage and that of your hardware must be the same.)
3
Lists any previously created analysis templates or analysis- / raw data profiles linked to the
selected montage
4
Shows the sensor application on a virtual patient
5
Online-Mode needs to be activated.
6
With ‘ADC’ and ‘TxLink’ additional channels from external boxes can be selected for the
recording.
7
Configures the channels of the external box (vgl. Point 6)
Click on ‘Next’ or the ‘Recording’ tab.
Klicken Sie auf "Weiter" oder die Registerkarte "Aufnahme". The recording on the SOMNOtouchTM
PSG device has to be started already.
2
1
3
4
5
6
7

-17-
Abb. 23 Online Mode: ‘Recording’ tab
1
Set the recording duration
2
Shows the maximum online recording time depending on the capacity of the hard disk
3
Program an online recording with ‘Auto Start’ if desired and/or the optional ‘Signal Check’
(Please note: an online connection will need to be established to activate this feature,
see 10)
4
Comments can be entered if necessary
5*
Activate the video recording
6*
Enter IP address of the camera as well as user name and password
7*
Choose the video format according to the camera type in use.
(Please note: sound is neither recorded nor can the clips be cut in MJPG)
8*
Enter the IP address, COM port or USB port of the data receiver
9*
The system needs to be paired if you are using a Bluetooth system
(Select ‘Search SOMNOscreen BT’, choose your device and ‘Set as default SOMNOscreen
BT’ to pair your system)
10
If a connection is established, the current capacity of the rechargeable battery will be
displayed and the checkbox ‘Initialize Flash Card’ can now be selected.
11*
Auto processing can be activated and configured
* After the recording starts the setting will be automatically saved for the next measurement.
1
2
3
4
5
6
7
8
9
10
11
11

-18-
Confirm with „OK“ .
For the SOMNOtouchTM PSG the following window appears in which ‘Connect to running record’ need
to be selected.
Abb. 24 Start online recording for SOMNOtouchTM PSG
Please note: The device has already started recording, but the data is not yet stored on the computer.
Start the online recording by selecting the "Start recording" button.
Abb. 25 Signal view before starting online recording
If the video option has been activated, the video recording will start automatically when the online
recording starts (see Abb. 26 : )
Abb. 26 : Video window during online recording

-19-
1
Digital zoom
The zoomed view will be saved only. This is why the software will swap back to the not
zoomed view automatically after a few seconds.
2
Stop video recording
Stops recording the video on the hard disk drive. You can still watch the patient on the
monitor. The video recording can be started again manually at any time.
3
Pan tilt zoom function and optical zoom
This option is available for camera VID34 only.
4
Intercom
This is an optional function which allows the medical staff in the recording room to give
instructions to the patient in his room via an integrated speaker in the camera. The ‘Intercom’
button has to be pressed down continuously when speaking. The sound on the video
recording will be disabled when the intercom is being used to avoid acoustic feedback.
5
Mute function
This option switches off the sound.
Starting der SOMNOtouchTM PSG straight from the Display
Press the ON/OFF button to activate the device. The following menu will be displayed (
Abb. 27).
Abb. 27 Start-Display SOMNOtouchTM
To start the recording initialised on PC, please press the start button.
If you start a recording not previously initialised on PC, it is possible that there is still a non-transferred
recording on the device. It will be overwritten by a new initialisation! If there’s a non-transferred
measurement on the device, the following information appearst (Abb. 28)
Note: Always transfer the recordings before an anew initialisation

-20-
Abb. 28 Information “Non-transferred measurement”
Otherwise, after you have pressed the "Start" button, an information window will appear (Abb. 29) with
the details of the patient's name, the selected assembly, body size, start time and duration. Check that
this matches the data initialized on the PC.
Abb. 29 Start-Menü
For a “Manual Start” the Start time is by default set to
“now”, for “Auto start” it is the programmed time.
Press to get back to the start display.
To continue and get to the sensor application (Abb. 30 , press the right arrow. There you can see which
sensors have to be connected for the selected mounting. A flashing arrow indicates that the sensor has
not yet been connected.
Abb. 30 Sensor application
You can start the recording via the arrow to the right.
Press the icon at the top right to go to the signal control before (Abb. 29).
There you can see the signals of the sensors and you can check on their quality. Depending on the
position of the signal display you can have a look at the other signals by pressing the downward or
upward arrow.
Sensor application
This manual suits for next models
1
Table of contents
Other SOMNOmedics Medical Equipment manuals

SOMNOmedics
SOMNOmedics SOMNOtouch NIBP Flow User manual

SOMNOmedics
SOMNOmedics SOMNOwatch plus User manual

SOMNOmedics
SOMNOmedics SOMNOtouch RESP User manual

SOMNOmedics
SOMNOmedics NIBP User manual

SOMNOmedics
SOMNOmedics SOMNOwatch User manual

SOMNOmedics
SOMNOmedics SOMNO HD Eco User manual

SOMNOmedics
SOMNOmedics SOMNO HD NGD050 User manual

SOMNOmedics
SOMNOmedics SOMNOtouch RESP User manual

SOMNOmedics
SOMNOmedics SOMNOwatch plus BP User manual

SOMNOmedics
SOMNOmedics SOMNOwatch plus R User manual