rn
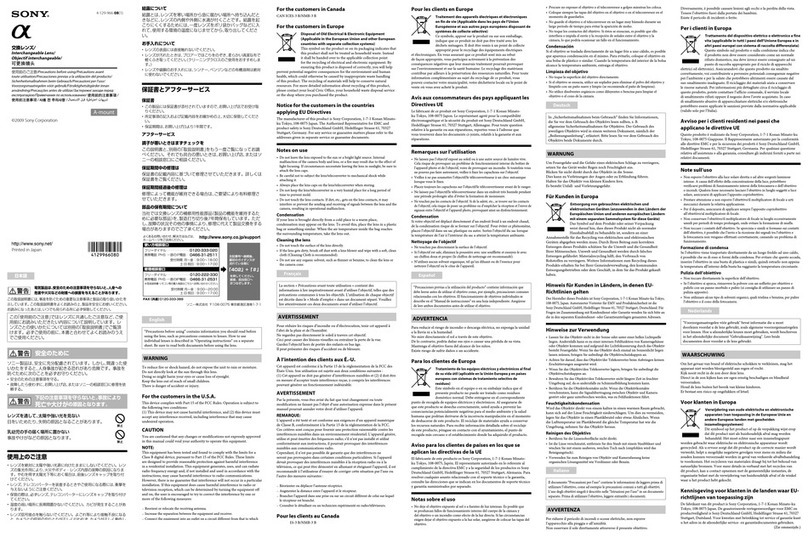
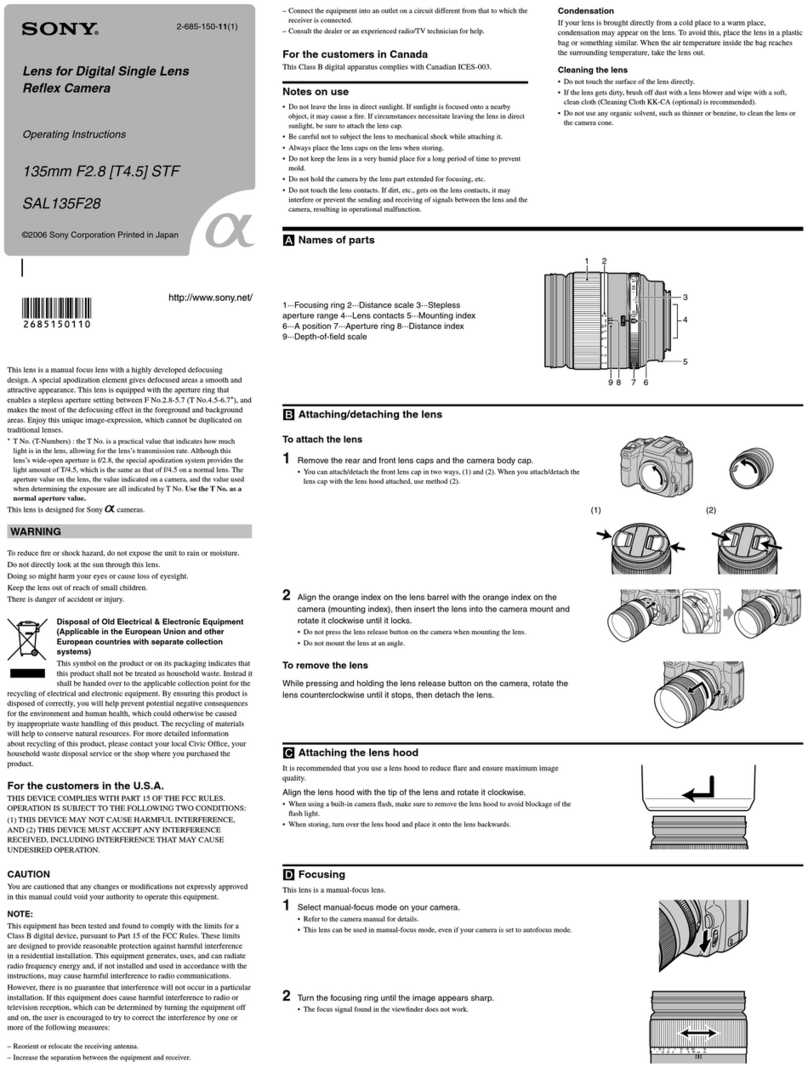
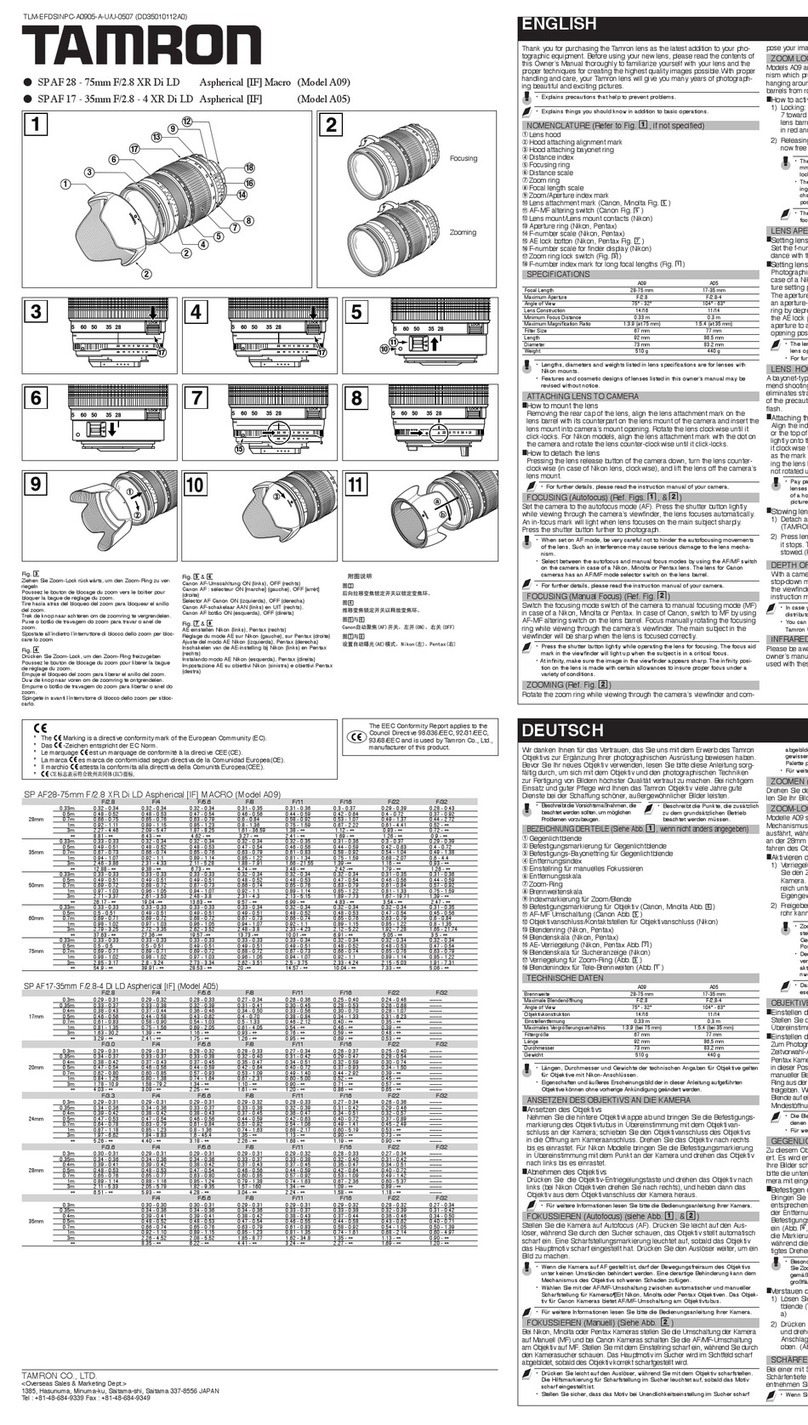
Attaching/detaching
the
lens
This Illanual is for usc with several different
knses
This
lens is
designed
for Sony
ex.
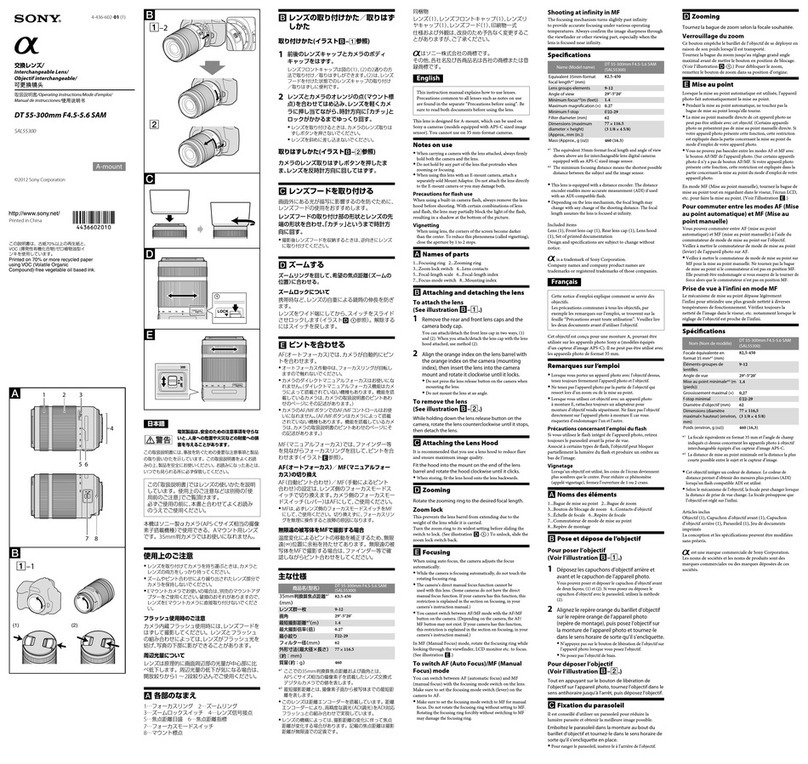
cameras. To attach the lens (See illustration
m-rn.)
WARNING
To reduce lire
or
shock hazard,
do
not expose Ihe unit
10
rain
or
moisture.
Do
not directly look at the sun through this lens.
Doing so might harm your eyes
or
cause
loss
of
eyesight.
Keep the lens out
of
reach
of
small children.
There is
danger
of
accident
or
injury.
1Remove the rear and front lens caps and the camera body
cap.
o
You
can attach/detach the front lens cap
in
tWO
ways.
(1)
and (2). Wilen you
attaeh/deta<."h
the lens cap with the lens hood attached. use method (2).
2Align the orange index on the lens barrel with the orange
index on the camera (mounting index), then insert the lens
into the camera mount and rotate
it
clockwise until
it
locks.
:a
Disposal
of
Old Electrical &Electronic Equipment
(Applicable in the European Union and other
European countries with separate collection
systems)
This
symbol on the product or on its packaging indicates that
__
this product shall not be treated as household waste. Instead
it
shall be handed
over
to
tht: applicable I::ollt:ction point for the
recycling
of
eleclrical
and
electronic equipment. By ensuring this product is
disposed
of
correctly. you will help prevent potemial negalive
consequences
for the environment and
human
health. which
could
otherwise
be caused
by inappropriate waste handling
of
this product.
The
recycling
of
materials
will
help
to
conserve natural resources. For more detailed information
about recycling
of
this product. please contact your local Civic Office, your
household waste disposlll service
or
the
shop
where you purchased the
product.
For
the
customers
in
the
U.S.A.
THIS DEVICE
COMPLIES
WITH
PART
15
OF
THE
FCC
RULES
OPERATION
IS
SUBJECT
TO
THE
FOLLOWING
TWO
CONDITIONS
(I)
THIS
DEVICE
MAY NOT
CAUSE
HARMFUL
INTERFERENCE.
AND
(2)
THIS
DEVICE
MUST
ACCEPT
ANY
INTERFERENCE
RECEIVED.
INCLUDING
INTERFERENCE
THAT
MAY
CAUSE
UNDESIRED
OPERATION.
CAUTION
You are l'llutioned that any
changes
or
modifications not expressly approved
in
this manual
could
void your authority to operate Ihis equipment.
NOTE:
oDo
not
press the lens release hunon on the camera when mounting lhe lens
oDo
not
mount the lens
at
an
angle
To
remove the lens (See illustration m-[g].)
While pressing and holding the lens release button on the
camera, rotate the lens counterclockwise until
it
stops, then
detach the lens.
[!J
Attaching
lens
hood
It
is
recommended
that you use alens hood to reduce flare and ensure
maximumirnagequality.
•The 50mm F2.8 Macro does not include
an
external lens hood. The lens harrel
functions as alens hood by design
100mm F2.8 Macro:
Fit the hood into the mount on the end of the lens barrel and
rotate the hood clockwise until it clicks.
35mm F1.4
G:
Align the red line on the lens hood with the red dot on the lens.
Turn the hood clockwise until the red dot on the hood meets the
red dot on the lens and
it
clicks into place.
oWhen using abuilt-in camera flash. make sure to remove the lens hood
to
avoid
blockage
of
the nash light.
oIfamarking (red line. red dot. etc.)
is
provided. allach the
kns
hood prope.rly
Otherwise. the lens hood may interfere with the desired effect or may appear
in
pictures.
oWhen storing. tum over the lens hood and place
it
onto
Ihe
lens backwards
This
equipment has been tested and found
to
comply
with the limits for a
Class
Bdigital device. pursuant to Part
15
of
the
FCC
Rules.
These
limits
are
designed
to provide reasonable protection against harmful interfcrcnt:e
in arcsidential installation.
This
equipment generates. uses. and can radiate
radio frequency energy and.
if
not installed and used in accordance with the
instructions. may
cause
harmful interference to radio communications.
However. there is no guar:mtee that interference will not
occur
in
aparticular
installation. If this equipment
does
cause
harmful interference to radio
or
television reception. which can be determined by turning the
cquipment
off
and on. the user is encouraged to try
to
correct the interference by
one
or
more
of
the following measures:
I!J
Focusing
When
using the
auto
focus. the
camera
f(K:uses the lens automatically.
When
focusing manually. set your
camera
[0
Ihe manual focus and rotate the
focusing ring while looking Ihrough the vicwfinder.
The
focus signal in the
viewfinder indicates the current degree
of
(he focus.
oThe focusing ring can be rotated slightly past the infinity to provide accurate
focusing under various operating temperatures. Do
not
rotate the focusing ring
all the way to the end when focusing manually even at infinity. Look through the
vkwfinder and set the focus precisely.
Focus-hold
button
m-{2)
-Rl'Oricnt or relocate thc recciving alllenna.
-lnercase thc separation between the equipment and receiver.
-Connect thc equipment
inlO
an outlet on acircuit
difTcrcnt
from that to which the
recciver
is
connected.
-Consult the dealer or an
eXJX'rieneed
mdiorrv
technician for help.
While the focus-hold button is pressed.
auto
focus function is suspended
and
the focus is fixed for shooting.
oThe function
of
tht:
focus-hold button l:an be l:hanged on l:ameras wilh l:ustom
function capability. Refer to the camera manuals for details
Focus-range limiter
m-(3)
Depth-of-field scale
For quick focusing. the focusing range can be limited to close
or
far range,
depending on the distance 10 your subject.
To focus on subjects at
close
range (see Ihe table above), set focus anywhere
near the subject and then set the focus-range limiter to LIMIT: the focusing
range is limited
10
Close-focusing range. Likewise. when shooting subjects
at far range. set the focus anywhere near the subject and then set the focus-
range limiter to LIMIT: the focus r.mge is limited
to
Far-focusing range. Set
the focus-range limiler to
FULL
to allow the
entire
focusing range.
oSet the focus-range limiler to FULL. when shooting asubjcct betwecn thc Close
and Far focusing mnges
3Ocm-oo
59cm-oo
Far-focusing range
35-54cm
20-
27cJTI
Close-focusing range
Notes
on
use
This
Class
Bdigital apparatus
complies
with
Canadian
ICES-003.
oDo
not
leave the lens
in
direct sunlight. If sunlight
is
focused onto anearby
object.
it
may cause a
fire.
If circumstances necessitate leaving the lens indirect
sunlight. be sure to attach the lens cap.
o
Be
careful not to subject the lens to Illechanieal shock while
<:Ill
aching
it.
oAlways place the lens caps on the lens when storing.
oDo
not
keep the lens
in
a
\"el)'
humid place for along period
of
time to prevent
mold
oAfter
<:IlIaching
the lens, do
not
cany
the camera by holding the lens.
oDo not touch the lens
cont<:lcts.
[f dirt. etc.. gets on
Ihe
lens contacts.
it
may
interfere or prevent the sending and receiving of signals between
Ihe
lens and the
Camera. rcsuliing
in
operational malfunClion.
For
the
customers
in
Canada
Precaution
for
flash
use
With certain
of
lens/flash combinations. the lens may partially block the light
of
the flash. resulting
in
ashadow at the bottom
of
the picture. When using a
built-in
camera
flash. make sure to remove the lens hood and shoot from at
least 1m (3.3feet) away from
your
subject.
When
focus is set
on
asubject. ,lilything
at
til<:ll
same
distance will
appear
sharp. and anything within acertain range before
and
beyond the subject will
also
appear in focus: this is clliled depth
of
field. Depth
of
field
depends
on
the subject distance and aperture you
choosc
and is indicated by the lines on
the depth-of-field scale
corresponding
to the aperture
Vignetting
When you usc lens. the corners
of
the screen
become
darker than the center.
To reduce this
phenomena
(called vignctting). close the aperture by I
to
2
stops.
Condensation
Macro
lens
depth
of
field
(50mm
F2.8 Macro, lOOmm F2.8
Macro)
Refer to the depth-of-ficld
tabk
iii
for details 011 depth
of
field
oThe depth-of-field scale and depth-of-lidd t,lble
iii
is
for 35mm-foml<lt
e<:lmcras.
The depth-of-field
is
shallowcr when you
usc
Digital Single Lens
Reflex Camems equipped with
an
APS-C sized image sensor.
If
your
lens
is
broughl directly from acold place to awarm place.
condensation may appear on the lens. To avoid this. place the lens in aplastic
bag
or
something similar. When the air temperature inside the bag reaches
the surrounding temperature. take the lens out.
lEI
Macro
photography
(50mm
F2.8
Macro, 100mm
F2.8
Macro)
Cleaning
the
lens
oDo
nOl
touch the surface of the lens directly.
oIf the lens gets dirty. brush offdust with alens hlower and wipe with
<:I
soft.
clean cloth (Cleaning
ClOth
KK-CA (optional)
is
rewmmended)
oDo
nOI
usc any organic solvent. such as thinner or benzine. to clean the lens or
the camera cone
Magnification
ratios
The
magnification scale is located on the extending section
of
the lens barrel.
TIle line on the magnification scale which the
edge
of
the oUler lens
b<lrrel
overlaps indicates the current magnification ratio
(I:
1
in
illustration
m)
o
As
the magnification increases,
Ihe
canll:ra
is
more vulnerable
to
shaking. Usc a
Iripod to
Stelldy
the camera when shooting.
m
Names
of
parts
I
...
Focusing ring 2...
Dist<:ln('C
index J...Lens
conta{."ts
4
...
Depth-of-field
scale 5
...
Distance scale 6
...
Focus-hold button 7
...
Focus-range
limiter'
8...Mounting index
,50mnl F2.8 Macro.
lOOtllm
F2.8 Macro only
Exposure
Compensation
(when
using
a
hand-held
exposure
meter,
etc.)
As the magnification increases. the amount
of
light reaching the image sensor
decreases.
This
is automatically
compensated
in all autoexposure modes.
or
in
the manual
exposure
mode as long as the
exposure
is adjusted ,Iccording to
the
camera's
meter index.
[f
your
camera
is set to the manual
exposure
mode
and
you are using ahand-held
exposure
meter.
or
if your
camera
is set to the
manual
exposure
mode
and
you are using the Mlmual Flash Control function
available
on
some
external flash units. refer to the exposure compensation
table [!).
and
adjust
exposure
accordingly.
[!J Exposure compensation table
aExposure correction
bMagnification ratios
cDistance
(E.g.. when adjusting by the
apenure.
+2 means
opening
the aperture 2more
stops.)
