The
Sony
VP-5030
is
a
compact
and
lightweight
videocassette
player
which
plays
back
a
video
cassette
recorded
using
any
video
system:
EIA
standard
NTSC443
color
system
and
CCIR
standard
PAL
or
SECAM
color
system.
The
system
is
selected
by
the
SYSTEM
SELECT
switch
on
the
front
panel.
The
VP-5030
incorporates
the
very
latest
technology,
and
you
will
find
that.
being
able
to
operate
all
functions
on
the
front
panel
is
very
convenient.
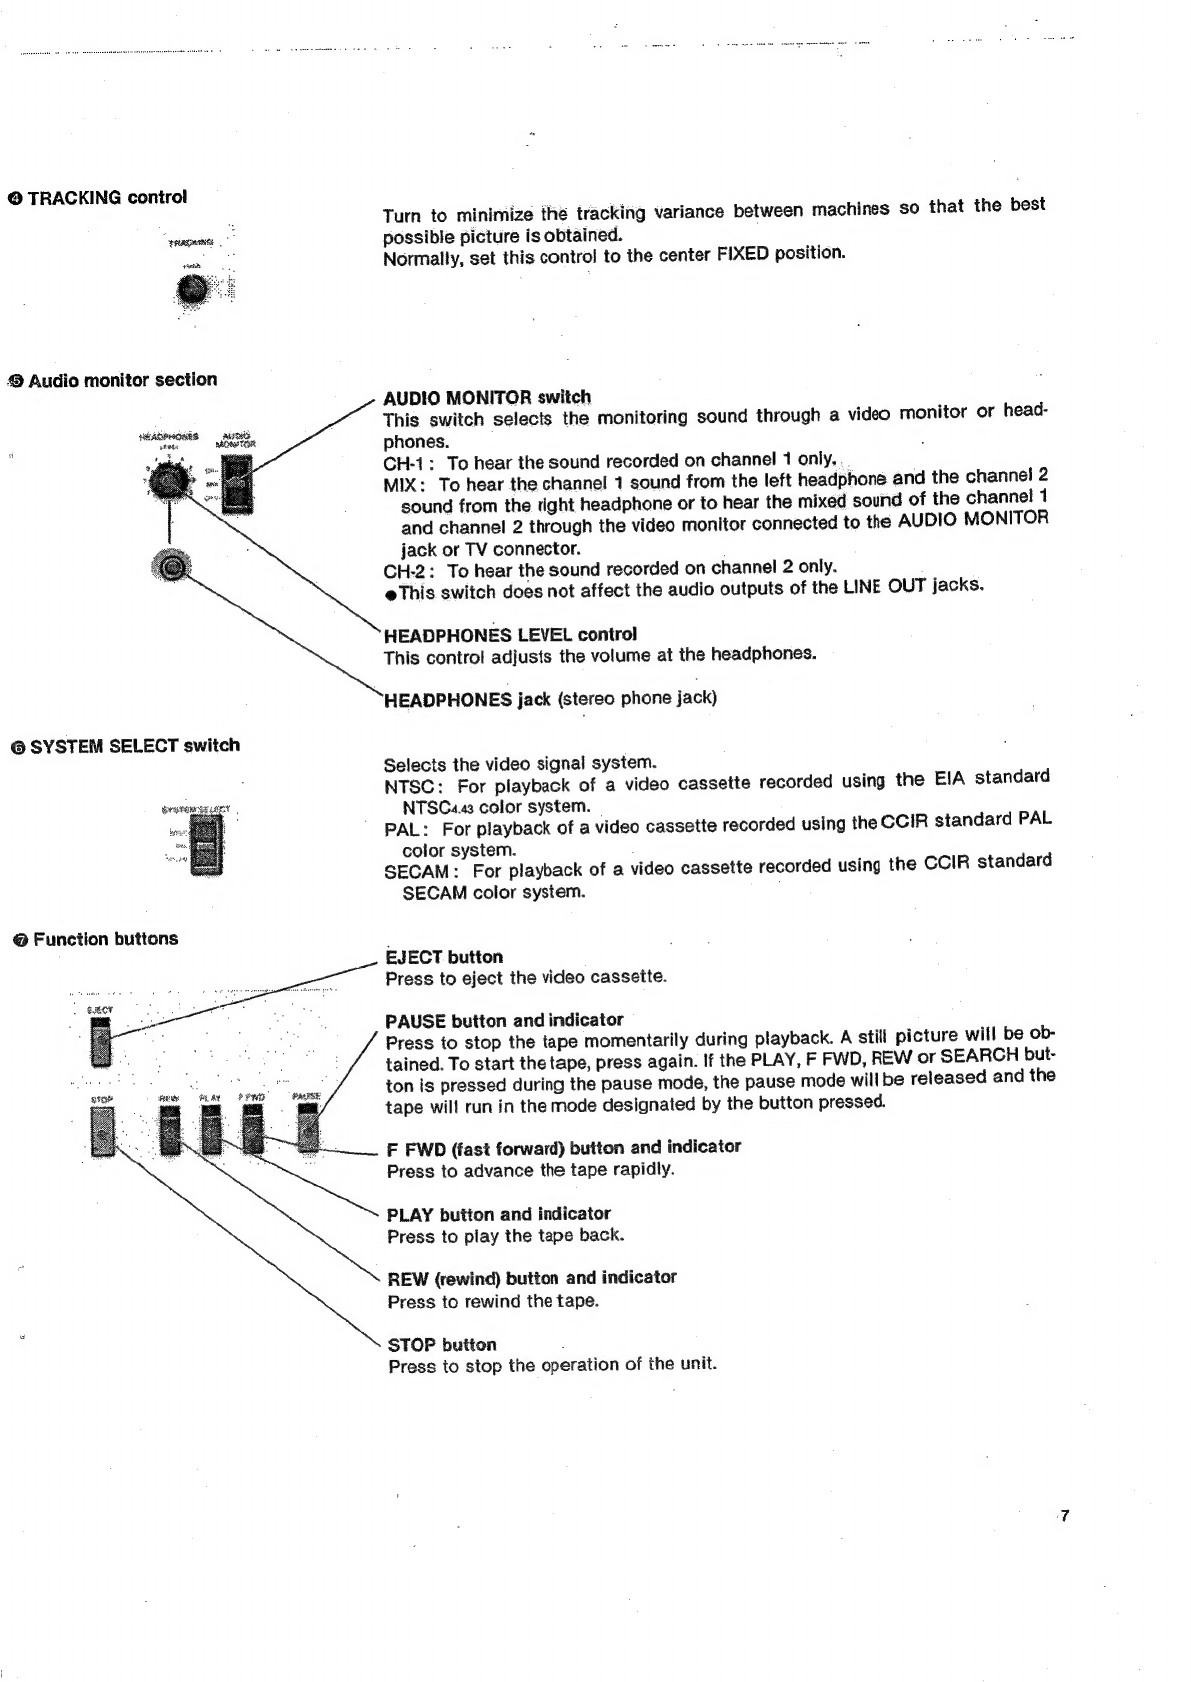
FOALUTOS
inscsceiccec
ee
vesusteaestcbecesncees
Sindee
bescotste
save
seuse
3
To
stop
the
tape
momentarily
during
playback.........
13
PreGaUtiOns
.......cccescecevcenevonsnnecteesereneatencecerecessseese
4
Search
operation
........ciccceccee
cee
ansneeceeneeenseeeeeeees
13
To
put
the
operation
panel
on
a
slant.........::ccneeeeees
4
To
play
a
tape
back
with
an
external
eyne
eyelet
w
13
About
video
CaSSETLES........2.cecceeeccneecceesanenseeecnseaneees
5
Programmed
operation
o.cccsianceceeceseesenwe
siete
eee
ees
14
To
insert
a
video
CASSEEte
.......
cece
eeeeseseeeeeeneeseeees
5
TIMEr
OPErAtioNn
.........eeeeceeseceeeee
eee
eeeceetreneensseee
en
eee
14
To
remove
&
VIGGO
CASSELTE
......
cece
ee
eene
cnet
ee
enaneneee
5
COMNECHIONS
.........0ce
cc
cenncccescnecseeonessneseseneuanasere
14
_
The
recording
format
..........:ceeeecersesecenereceenseeres
5
Timer
playback
............cccseceee
nae
ee
eran
ences
enareeeayenes
14
Handling
and
Storage
..........cseccsersesenesseeeeeressers
5
To
see
a
picture
On
ATV
receiver
.....cs.eseecenereeee
ene
en
eens
15
To
determine
the
amount
of
tape
on
the
reel............
5
CONNECTIONS
......cececcnssccrcnceesccccesescssreeenestenaen
ses
15
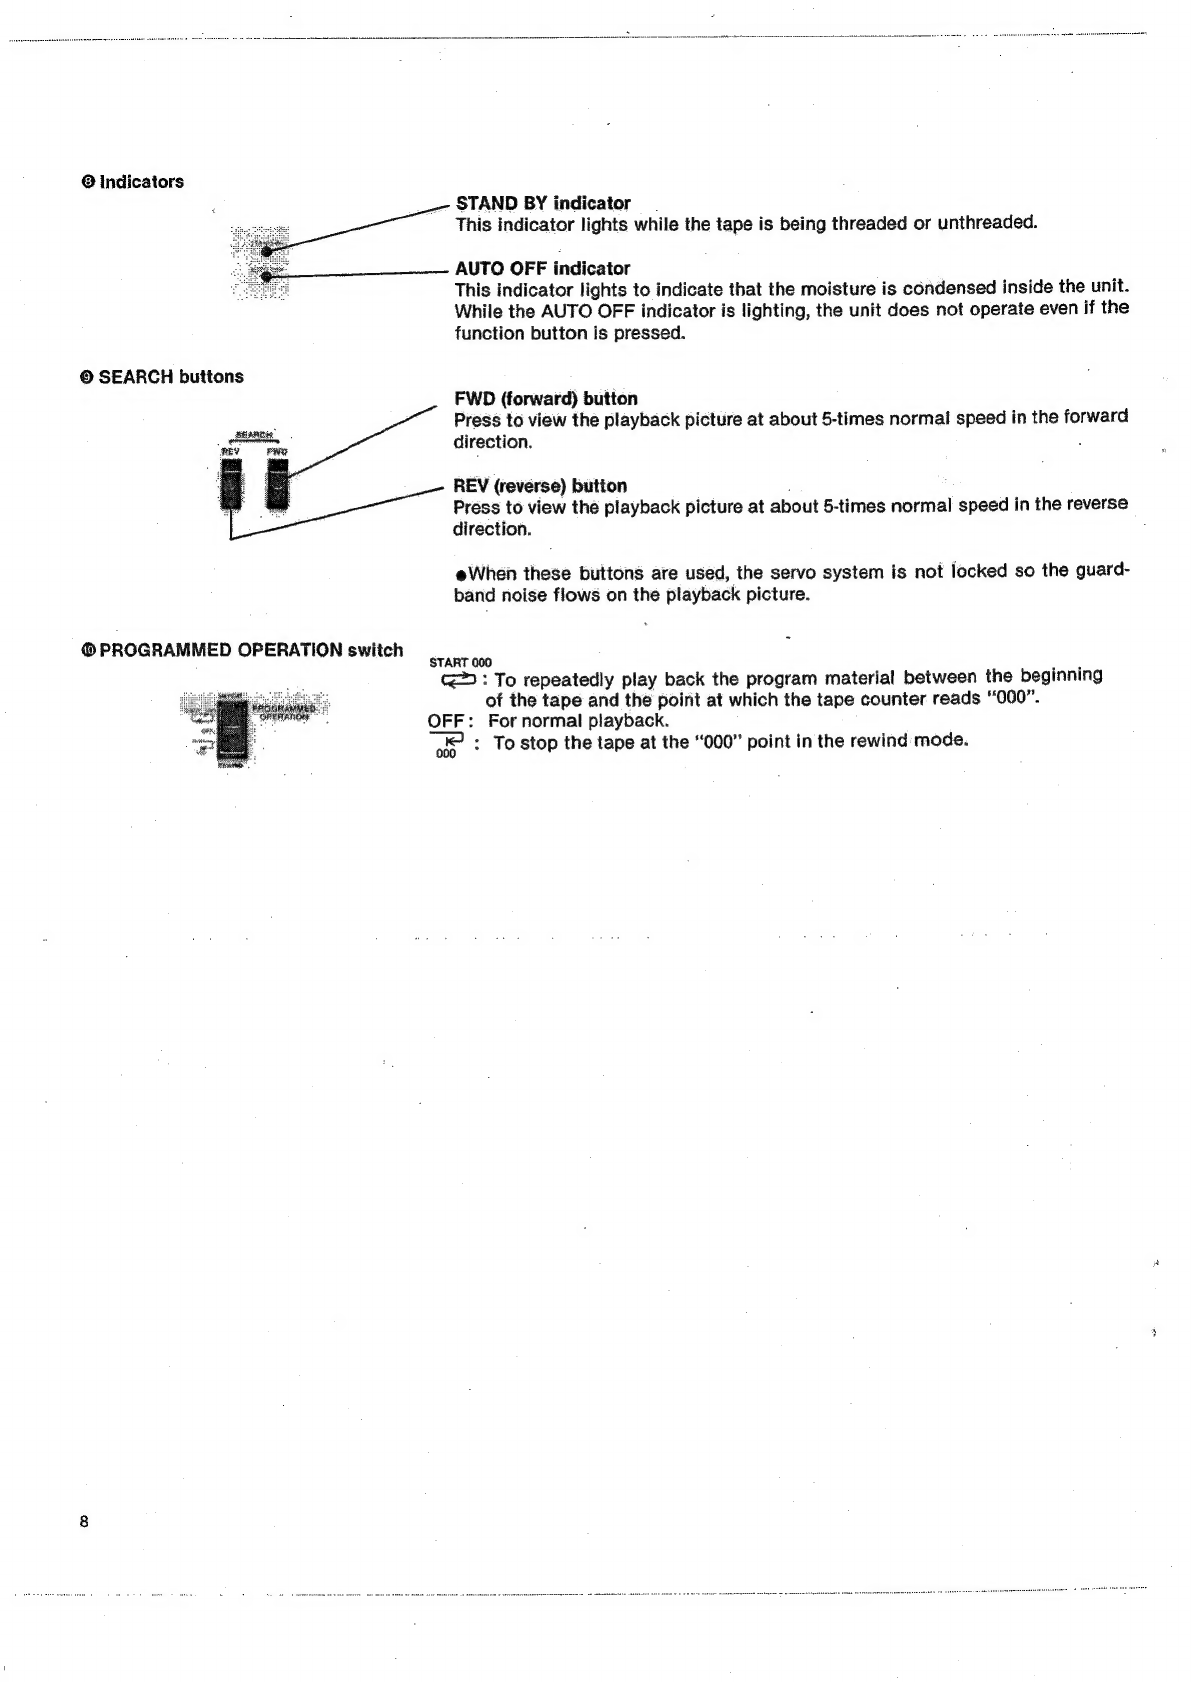
Location
and
function
Of
CONTMOIS
.......-...cceceneeeenneeeneee
6
Installation
of
an
RF
modulator
.....-...ccesensseeneeeeees
15
Front
panel
.........6
Soalanbuesavashscossweseneentene
gestesds
6
OPOPAUON:
2o5
couse
seco
egetawisk
vecnenncadi
ss
cheese
cause
vectses
15
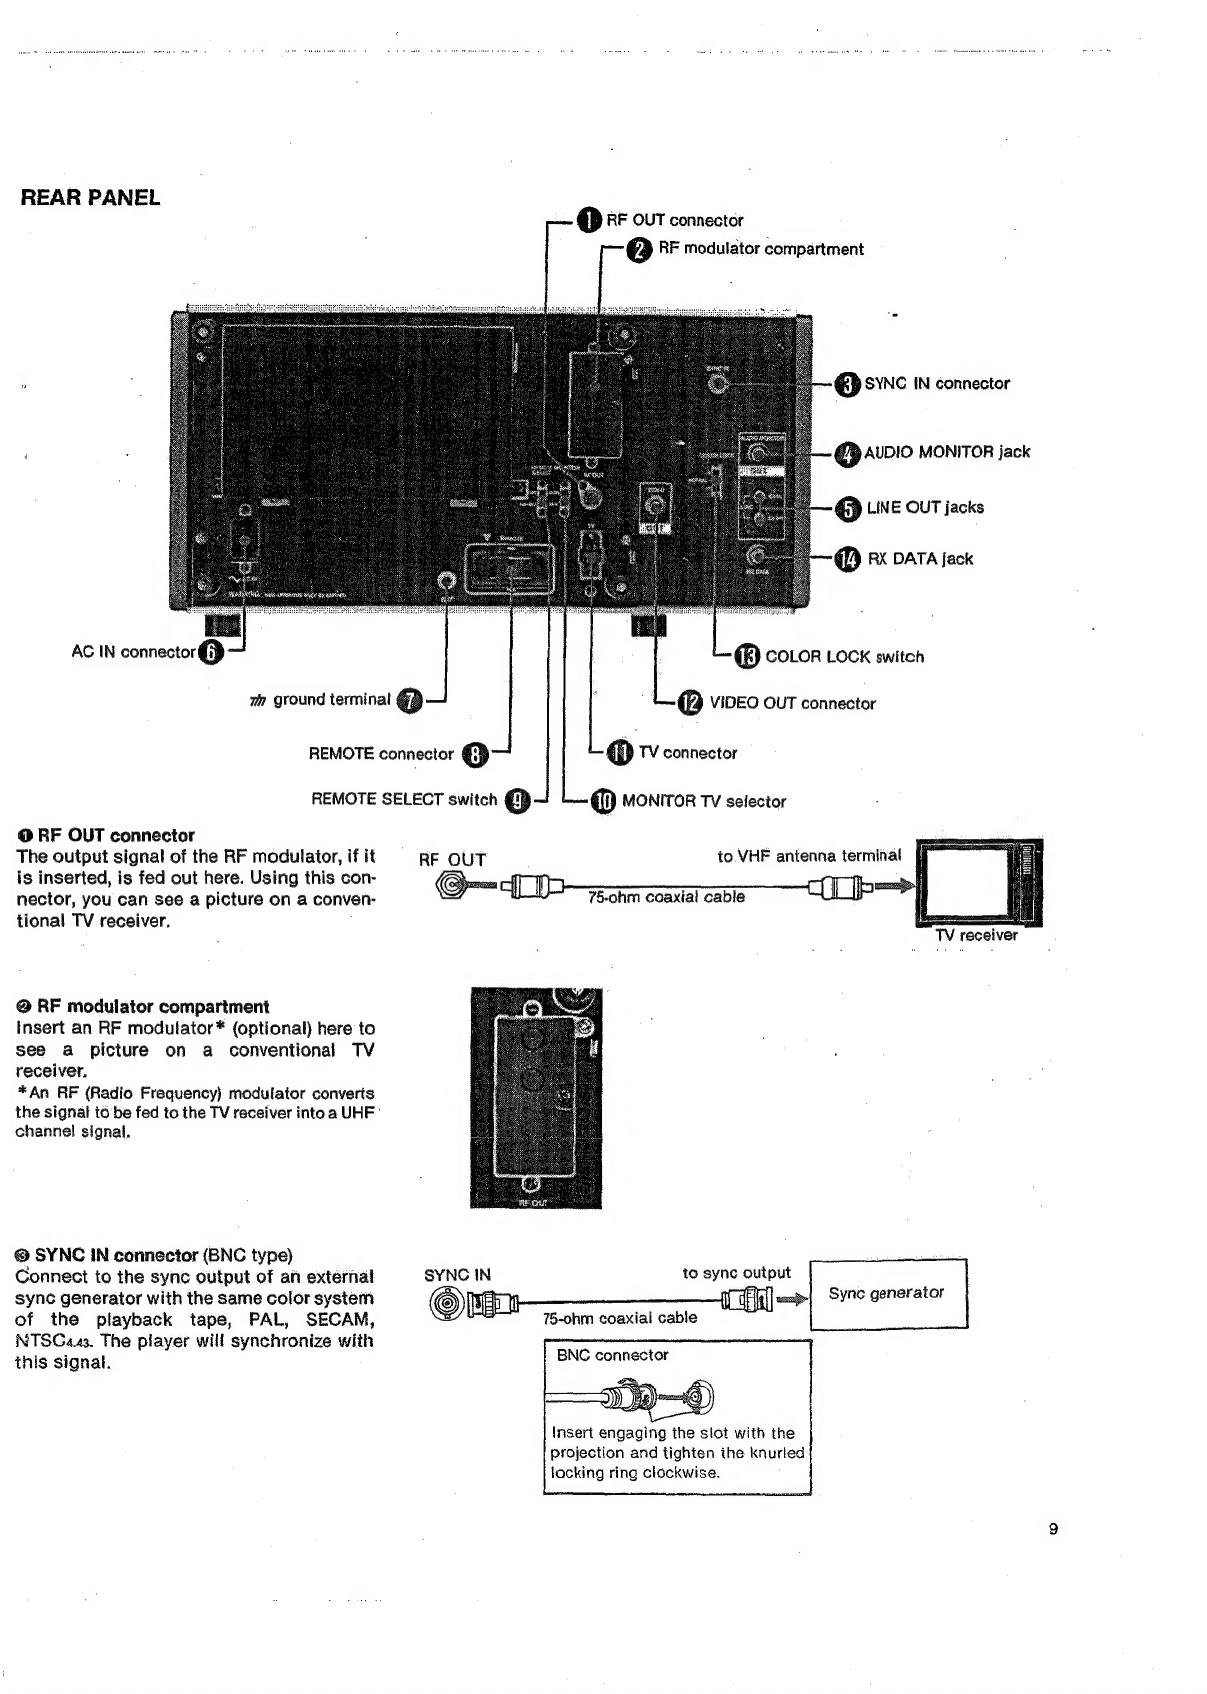
REAP
PANE’
.......cccnecececesseeeenntensceerptneceaseeeeeees
ae
9
Adjustment
of
the
playback
picture
..........secesesseee
eee
ane
16
Connections.......
piob
dae
dubevddevbeieevecedslecscasnacuveeswacenes
12
Video
head
CleANIAG
1...
esse
ee
ese
ewe
e
tenner
natanseeenereneags
16
Connections
with
a
video
monitor
or
a
TV
........5
2...
12
Auto
S@ArCh
CONTIOL.......
secre
ace
ecen
eens
etree
ee
eerenneeeeeen
ter
17
To
hear
the
sound
using
headphones............seeeereee
12
Rack
MOUNTING.........ccecceeee
eee
eerst
eee
ceeeaestnersasteerensens
VE
Connections
with
a
stereo
SySteM
.......cccseesereraneeee
12
Repacking
for
shipment
..............ccceeseneeeeeeneeee
Ravage
x0
17
PIAYDACK
2...
cceesersescsercscnreansseccsreceveceusnenssvesonepeenes
13
Specifications
.........cccccsssssecasereceeccsoerseeseeseevetensens
18
Preparations
.........cccccceneeaneceesneneceeseceeeereeeees
seed
Recommended
video
equipment
and
accessories...
18
OPerAation
.......ccerstnececessscecereccesceevennennes
mevenbeced
13
Trouble
ChECKS
oo...
eee
eceeccec
eee
cn
cere
neaneeeneceneneeeenes
ees
19
WARNING
FOR.
THE
CUSTOMERS
IN
THE
UNITED
WARNING
_
KINGDOM
_
10
prevent
fire
or
seek
Haoatd
do
not
ex-
THIS
APPARATUS
MUST
BE
EARTHED
to
your
3-pin
pose
the
unit
to
rain
or
moisture.
lua
j
;
ee
‘on.
plug
in
accordance
with
following
instruction
eTo
avoid
electrical
shock,
do
not
open
the
IMPORTANT
cabinet.
Refer
servicing
to
qualified
person-
The
wires
in
this
mains
lead
are
coloured
in
accord-
nel
only.
ance
with
the
following
code:
Green-and-yellow:
Earth
(safety
earth)
Blue:
Neutral
Brown:
Live
As
the
colours
of
the
wires
in
the
mains
lead
of
this
ap-
paratus
may
not
correspond
with
the
coloured
mark-
ing
identifying
the
terminals
in
your
plug,
proceed
as
follows
:
The
wire
which
is
coloured
green-and-yellow
must
de
connected
to
the
terminal
in
the
plug
which
is
marked
:
with
the
letter
E
or
by
the
safety
earth
symbol
4
or
9
coloured
green
or
green-and-yeliow.
;
OWN
ER
S
R
ECO
R
D
The
wire
which
is
coloured
blue
must
be
connecied
to
the
terminal
which
is
marked
with
the
letter
N
or
col-
The
model
and
serial
numbers
are
located
at
the
rear.
oured
black.
Record
the
serial
number
in
the
space
provided
below.
Refer
The
wire
which
is
coloured
brown
must
be
connected
to
them
whenever
you
call
upon
your
Sony
dealer
regarding
to
the
terminal
which
is
marked
with
the
letter
L
or
col-
this
product.
oured
red.
a
Model
No.
VP-5030
Serial
No.