manuals.online logo
Brands
  1. Home
  2. •
  3. Brands
  4. •
  5. Sony
  6. •
  7. Microphone
  8. •
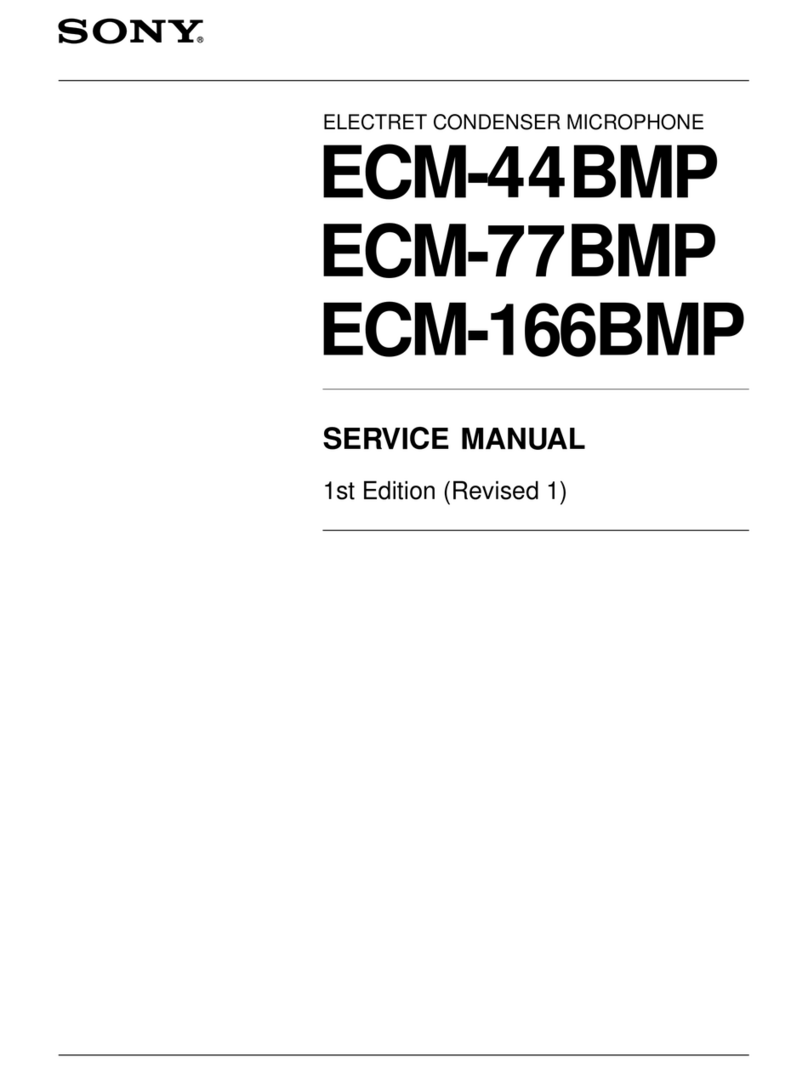
  9. Sony XA-MC10 User manual

Sony XA-MC10 User manual

SONY XA-MC10 (US,DE,FR,IT,NL,ES) 4-132-703-15 (1)
4-132-703-15(1)
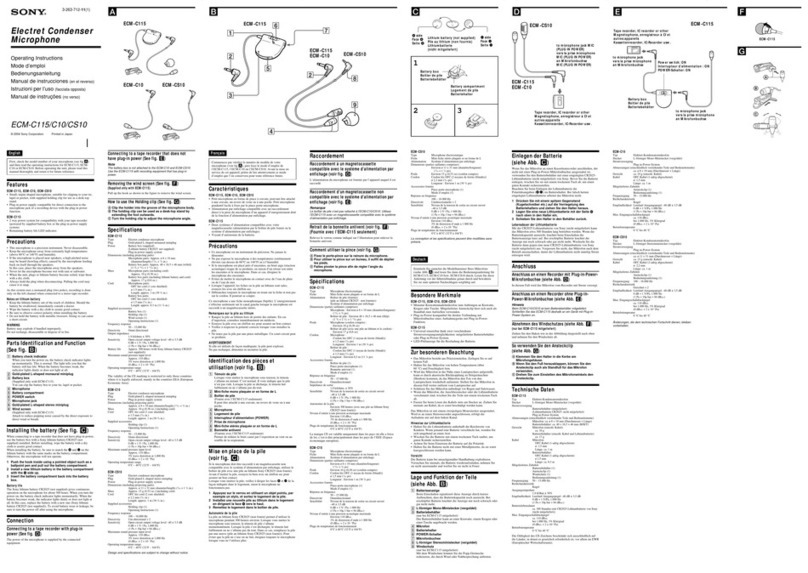
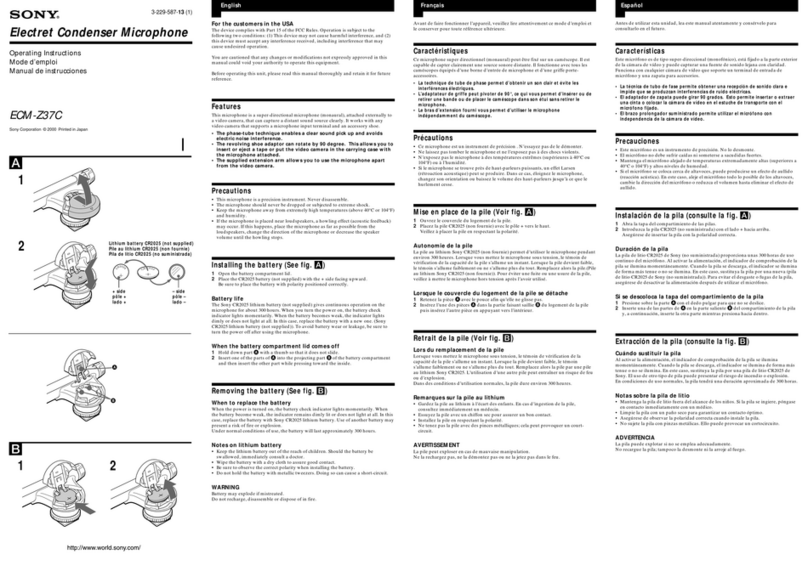
Microphone Instructions
Anleitung
Mode d’emploi
Istruzioni
Instructies
Instrucciones
English
Notice for customers: the following information is only
applicable to equipment sold in countries applying EU
directives and/or UK applying relevant statutory requirements
This product has been manufactured by or on behalf of Sony
Corporation.
EU and UK Importer: Sony Europe B.V.
Inquiries to the EU Importer or related to product compliance
in Europe should be sent to the manufacturer’s authorized
representative, Sony Belgium, bijkantoor van Sony Europe B.V., Da
Vincilaan 7-D1, 1930 Zaventem, Belgium.
Inquiries to the UK Importer or related to product compliance
in the UK should be sent to the manufacturer’s authorized
representative, Sony Europe B.V., The Heights, Brooklands,
Weybridge, Surrey KT13 0XW, United Kingdom.
Disposal of waste batteries and electrical and electronic
equipment (applicable in the European Union and other
countries with separate collection systems)
This symbol on the product, the battery or on the
packaging indicates that the product and the battery
shall not be treated as household waste. On certain batteries this
symbol might be used in combination with a chemical symbol. The
chemical symbol for lead (Pb) is added if the battery contains more
than 0.004% lead. By ensuring that these products and batteries are
disposed of correctly, you will help to prevent potentially negative
consequences for the environment and human health which could
be caused by inappropriate waste handling. The recycling of the
materials will help to conserve natural resources. In case of products
that for safety, performance or data integrity reasons require a
permanent connection with an incorporated battery, this battery
should be replaced by qualified service sta only.
To ensure that the battery and the electrical and electronic
equipment will be treated properly, hand over these products at
end-of-life to the appropriate collection point for the recycling of
electrical and electronic equipment.
For all other batteries, please view the section on how to remove
the battery from the product safely. Hand the battery over to the
appropriate collection point for the recycling of waste batteries. For
more detailed information about recycling of this product or battery,
please contact your local Civic Oce, your household waste disposal
service or the shop where you purchased the product or battery.
Cautions
•Thismicrophoneisaprecisioninstrument.Neverdisassemble.
•Keepthemicrophoneawayfromextremelyhightemperatures
and humidity.
•Itisextremelydangerousifthecordbecomeswoundaround
the steering column or gearstick. Be sure to keep it and other
parts from obstructing your driving.
•Ifair-bagsoranyothershock-absorbingequipmentisinyour
car, contact the store where you purchased this unit, or the car
dealer, before installation.
Parts list
•Thenumbersinthelistarekeyedtothoseintheinstructions.
•Theplugofthemicrophoneis connected to the connector of
the main unit for the microphone.
Installation
There are 2 ways of installation.
-A Installing on the sun visor
1 Install the microphone on the clip (-A-1).
2 Install the clip on the sun visor (-A-2).
-B Installing on the dashboard
1 Install the microphone on the clip with the cord
pressed into the groove of the clip (-B-1).
2 Attach the clip to the dashboard with the double-sided
tape (-B-2).
Note
Before attaching the double-sided tape , clean up the surface of the dashboard
with a dry cloth.
Adjusting the microphone angle
Adjust the microphone angle to the proper position.
Note
Themicrophoneswivelsonasingleaxis,asshowninthediagrambelow.Donot
turn it the wrong way forcibly.
Specifications
Type: Electret condenser microphone (for specified unit only)
Directional characteristics: Unidirectional
Mass: 25 g (0.88 oz) (microphone only)
Dimensions: 10.5 × 24 mm ( 7/16 × 31/32 in) (microphone only)
Deutsch
Hinweis für Kunden: Die folgenden Informationen gelten nur
für Geräte, die in Ländern verkauft werden, in denen EU-
Richtlinien gelten
Dieses Produkt wurde von oder für die Sony Corporation
hergestellt.
EU Importeur: Sony Europe B.V.
Anfragen an den Importeur oder zur Produktkonformität auf
Grundlage der Gesetzgebung in Europa senden Sie bitte an den
Bevollmächtigten Sony Belgium, bijkantoor van Sony Europe B.V.,
Da Vincilaan 7-D1, 1930 Zaventem, Belgien.
Entsorgung von gebrauchten elektrischen und
elektronischen Geräten (anzuwenden in den
Ländern der Europäischen Union und anderen
europäischen Ländern mit einem separaten
Sammelsystem für diese Geräte)
Das Symbol auf dem Produkt oder seiner
Verpackung weist darauf hin, dass dieses Produkt
nicht als normaler Haushaltsabfall zu behandeln ist, sondern
an einer Annahmestelle für das Recycling von elektrischen und
elektronischen Geräten abgegeben werden muss. Durch Ihren
Beitrag zum korrekten Entsorgen dieses Produkts schützen Sie
die Umwelt und die Gesundheit Ihrer Mitmenschen. Umwelt
und Gesundheit werden durch falsches Entsorgen gefährdet.
Materialrecycling hilft, den Verbrauch von Rohstoen zu
verringern. Weitere Informationen zum Recycling dieses Produkts
erhalten Sie bei Ihrer Gemeindeverwaltung, den kommunalen
Entsorgungsbetrieben oder dem Geschäft, in dem Sie das
Produkt gekauft haben.
Vorsichtsmaßnahmen
•DiesesMikrofonisteinPräzisionsgerät.ZerlegenSiedieses
Produkt unter keinen Umständen.
•SchützenSiedasMikrofonvorextremhohenTemperaturenund
Feuchtigkeit.
•Esistsehrgefährlich,wennsichdasKabelumdieLenksäule
oder den Schalthebel wickelt. Achten Sie unbedingt darauf,
dass das Kabel und andere Teile beim Fahren nicht hinderlich
sind.
•WennIhrAutomitAirbagsoderanderen
Aufprallschutzsystemen ausgestattet ist, wenden Sie sich
vor der Installation an den Händler, bei dem Sie dieses Gerät
erworben haben.
Teileliste
•DieNummerninderListeentsprechendeneninderAnleitung.
•DerMikrofonsteckerwird mit dem Anschluss für das
Mikrofon am Hauptgerät verbunden.
Befestigung
Es gibt 2 Befestigungsmöglichkeiten.
-A Befestigung an der Sonnenblende
1 Befestigen Sie das Mikrofon am Clip (-A-1).
2 Installieren Sie den Clip an der Sonnenblende (-A-2).
-B Befestigung am Armaturenbrett
1 Befestigen Sie das Mikrofon am Clip und drücken Sie
das Kabel in die Kerbe des Clips (-B-1).
2 Bringen Sie den Clip mit dem doppelseitigen Klebeband
am Armaturenbrett an (-B-2).
Hinweis
Reinigen Sie die Oberfläche des Armaturenbretts mit einem trockenen Tuch,
bevor Sie das doppelseitige Klebeband anbringen.
Einstellen des Mikrofonwinkels
Stellen Sie den Mikrofonwinkel nach Bedarf ein.
Hinweis
Das Mikrofon lässt sich wie in der Abbildung unten gezeigt nur um eine Achse
schwenken. Drehen Sie es nicht gewaltsam in die falsche Richtung.
Technische Daten
Typ: Elektret-Kondensatormikrofon (nur für angegebenes Gerät)
Richtcharakteristik: Unidirektional
Gewicht: 25 g (nur Mikrofon)
Abmessungen: 10,5 × 24 mm (nur Mikrofon)
Français
Avis à l’attention des clients : les informations suivantes
s’appliquent uniquement aux appareils vendus dans des pays
qui appliquent les directives de l’Union Européenne
Ce produit a été fabriqué par ou pour le compte de Sony
Corporation.
Importateur dans l’UE : Sony Europe B.V.
Lesquestionsbaséessurlalégislationeuropéennepour
l’importateur ou relatives à la conformité des produits doivent
être adressées au mandataire : Sony Belgium, bijkantoor van Sony
Europe B.V., Da Vincilaan 7-D1, 1930 Zaventem, Belgique.
Traitement des appareils électriques et
électroniques en fin de vie (Applicable dans les
pays de l’Union Européenne et aux autres pays
européens disposant de systèmes de collecte
sélective)
Ce symbole, apposé sur le produit ou sur son
emballage, indique que ce produit ne doit pas
être traité avec les déchets ménagers. Il doit être remis à un
point de collecte approprié pour le recyclage des équipements
électriques et électroniques. En vous assurant que ce produit sont
mis au rebut de façon appropriée, vous participez activement
à la prévention des conséquences négatives que leur mauvais
traitement pourrait provoquer sur l’environnement et sur la santé
humaine.Lerecyclagedesmatériauxcontribueparailleursàla
préservation des ressources naturelles. Pour toute information
complémentaire au sujet du recyclage de ce produit, vous pouvez
contacter votre municipalité, votre déchetterie locale ou le point
de vente où vous avez acheté le produit.
Attention
•Cemicrophoneestuninstrumentdeprécision.Neledémontez
jamais.
•N’exposezpaslemicrophoneàdestempératuresextrêmement
élevées et à l’humidité.
•Veillezàcequelecordonnesoitpasenrouléautourduvolant
oudulevierdevitesses.Cecipeuts’avérerextrêmement
dangereux.Veillezàcequelecordonetlesautrespiècesne
gênent pas votre conduite.
•Siunsystèmed’airbagsoutoutautreéquipementabsorbant
les chocs est présent dans votre véhicule, contactez le magasin
où vous avez acheté cet appareil ou votre concessionnaire
avant l’installation.
Liste des pièces
•Lesnumérosdelalistecorrespondentàceuxdesinstructions.
•Lachedumicrophoneest raccordée au connecteur de
l’appareil principal destiné au microphone.
Installation
Il existe 2 installations possibles.
-A Fixation sur le pare-soleil
1 Fixez le microphone sur le clip (-A-1).
2 Fixez le clip sur le pare-soleil (-A-2).
-B Fixation sur le tableau de bord
1 Fixez le microphone sur le clip en pressant le cordon
dans la rainure du clip (-B-1).
2 Fixez le clip sur le tableau de bord avec l’adhésif double
face (-B-2).
Remarque
Avantdexerl’adhésifdoubleface, nettoyez la surface du tableau de bord
avec un chion sec.
Réglage de l’angle du microphone
Réglez l’angle du microphone afin de le positionner
correctement.
Remarque
Lemicrophonebasculesurunseulaxe,commeillustrédansleschémaci-
dessous.Neletournezpasdanslemauvaissensenforçant.
Spécifications
Type : microphone condensateur à électret (pour appareil spécifié
uniquement)
Caractéristiques directionnelles : unidirectionnel
Poids : 25 g (0.88 oz) (microphone uniquement)
Dimensions : 10,5 × 24 mm ( 7/16 × 31/32 po.) (microphone
uniquement)
XA-MC10
©2009 Sony Corporation
Printed in Thailand
 
 
× 5
1
A2
1
B2


 






SONY XA-MC10 (US,DE,FR,IT,NL,ES) 4-132-703-15 (1)
Italiano
Avviso per i clienti: le seguenti informazioni riguardano
esclusivamente gli apparecchi venduti in paesi in cui sono
applicate le direttive UE
QuestoprodottoèstatofabbricatodaopercontodiSony
Corporation.
Importatore UE: Sony Europe B.V.
Richieste all’importatore UE o relative alla conformità di prodotto
in Europa devono essere indirizzate al rappresentante autorizzato
del costruttore, Sony Belgium, bijkantoor van Sony Europe B.V.,
Da Vincilaan 7-D1, 1930 Zaventem, in Belgio.
Trattamento del dispositivo elettrico o elettronico a
fine vita (applicabile in tutti i paesi dell’Unione
Europea e in altri paesi europei con sistema di
raccolta dierenziata)
Questo simbolo sul prodotto o sulla confezione
indica che il prodotto non deve essere considerato
come un normale rifiuto domestico, ma deve invece
essere consegnato ad un punto di raccolta appropriato per il
riciclo di apparecchi elettrici ed elettronici. Assicurandovi che
questo prodotto sia smaltito correttamente, voi contribuirete
a prevenire potenziali conseguenze negative per l’ambiente
e per la salute che potrebbero altrimenti essere causate dal
suo smaltimento inadeguato. Il riciclaggio dei materiali aiuta a
conservare le risorse naturali. Per informazioni più dettagliate
circa il riciclaggio di questo prodotto, potete contattare l’ucio
comunale, il servizio locale di smaltimento rifiuti oppure il
negozio dove l’avete acquistato.
In caso di smaltimento abusivo di apparecchiature elettriche e/o
elettroniche potrebbero essere applicate le sanzioni previste dalla
normativa applicabile (valido solo per l’Italia).
Attenzione
•Ilpresentemicrofonoèunostrumentodiprecisione.Non
smontare il prodotto.
•Nonsottoporreilmicrofonoatemperatureedumidità
eccessivamente elevate.
•Seilcavorimaneavvoltoalpiantonediguidaoallalevadel
cambio, possono verificarsi situazioni di pericolo. Accertarsi di
posizionare il cavo e altre parti in modo che non ostruiscano la
guida.
•Senell’autosonopresentiair-bagoaltridispositividi
assorbimento degli urti, prima dell’installazione contattare
ilnegozioincuièstatoacquistatol’apparecchioo
l’autoconcessionario.
Elenco delle parti
•Inumeriindicatinell’elencocorrispondonoaquelliriportati
nelle istruzioni.
•Laspinadelmicrofonoècollegataalconnettoredell’unità
principale del microfono.
Installazione
Sono disponibili 2 metodi di installazione.
-A Installazione sull’aletta parasole
1 Installare il microfono sul fermaglio (-A-1).
2 Installare il fermaglio sull’aletta parasole (-A-2).
-B Installazione sul cruscotto
1 Installare il microfono sul fermaglio con il cavo
inserito nella scanalatura del fermaglio stesso (-B-1).
2 Applicare il fermaglio al cruscotto utilizzando il nastro
biadesivo (-B-2).
Nota
Prima di applicare il nastro biadesivo , accertarsi di pulire la superficie del
cruscotto con un panno asciutto.
Regolazione dell’angolazione del microfono
Regolare l’angolazione del microfono sulla posizione corretta.
Nota
Il microfono si orienta su un singolo asse, come illustrato nella figura riportata di
seguito.Nonruotareilmicrofonoinmodoforzatonelsensoerrato.
Caratteristiche tecniche
Tipo: microfono condensatore a elettrete (per l’uso esclusivo con
l’apparecchio specificato)
Caratteristiche dell’orientamento: unidirezionale
Peso: 25 g (solo il microfono)
Dimensioni: 10,5 × 24 mm (solo il microfono)
Nederlands
Opmerking voor klanten: de volgende informatie geldt enkel
voor apparatuur verkocht in landen waar de EU-richtlijnen van
kracht zijn
Dit product werd vervaardigd door of in opdracht van Sony
Corporation.
EU-importeur: Sony Europe B.V.
Vragen aan de EU-importeur of met betrekking tot Europese
productconformiteit kunnen worden gericht aan de gemachtigde
vertegenwoordiger, Sony Belgium, bijkantoor van Sony Europe
B.V., Da Vincilaan 7-D1, 1930 Zaventem, België.
Verwijdering van oude elektrische en
elektronische apparaten (van toepassing in de
Europese Unie en andere Europese landen met
gescheiden inzamelingssystemen)
Dit symbool op het product of op de verpakking
wijst erop dat dit product niet als huishoudelijk
afval mag worden behandeld. Het moet echter
naar een inzamelingspunt worden gebracht waar elektrische
en elektronische apparatuur wordt gerecycled. Als u ervoor
zorgt dat dit product op de correcte manier wordt verwerkt,
helpt u mogelijke negatieve gevolgen voor mens en milieu die
zouden kunnen veroorzaakt worden in geval van verkeerde
afvalbehandeling te voorkomen. Het recycleren van materialen
draagt bij tot het behoud van natuurlijke bronnen. Voor meer
details in verband met het recyclen van dit product, kan u contact
opnemen met de gemeentelijke instanties, de organisatie belast
met de verwijdering van huishoudelijk afval of de winkel waar u
het product hebt gekocht.
Waarschuwingen
•Dezemicrofooniseenprecisie-instrument.Haalhetproduct
nooit uit elkaar.
•Steldemicrofoonnietblootaanextreemhogetemperaturenen
vochtigheid.
•Hetiszeergevaarlijkalshetsnoerverstriktraaktrondomde
stuurkolom of versnellingspook. Zorg ervoor dat het snoer en
de andere onderdelen u niet hinderen tijdens het autorijden.
•Alsdeautoisuitgerustmetairbagsofandere
schokabsorberende apparatuur, moet u contact opnemen
met de winkel waar u dit product hebt gekocht, of met de
autodealer, voordat u het product installeert.
Onderdelenlijst
•Decijfersindelijstkomenovereenmetdecijfersinde
instructies.
•Destekkervandemicrofoonwordt aangesloten op de
microfoonaansluiting van de hoofdeenheid.
Installatie
Er zijn 2 manieren om het product te installeren.
-A Installeren op de zonneklep
1 Bevestig de microfoon op de klem (-A-1).
2 Bevestig de klem op de zonneklep (-A-2).
-B Installeren op het dashboard
1 Bevestig de microfoon op de klem en druk het snoer
in de groef van de klem (-B-1).
2 Bevestig de klem met het dubbelzijdige plakband op
het dashboard (-B-2).
Opmerking
Voordat u het dubbelzijdige plakband bevestigt, moet u het oppervlak van het
dashboard reinigen met een droge doek.
De hoek van de microfoon aanpassen
Zet de microfoon in de gewenste hoek.
Opmerking
De microfoon draait op één as, zoals in de onderstaande afbeelding wordt
weergegeven. Draai de microfoon niet met kracht in de verkeerde richting.
Technische gegevens
Type: Electret-condensator microfoon (alleen voor de
aangegeven eenheid)
Richtingskenmerken: Eén richting
Gewicht: 25 g (alleen de microfoon)
Afmetingen: 10,5 × 24 mm (alleen de microfoon)
Español
Aviso para los clientes: la información siguiente resulta de
aplicación solo a los equipos comercializados en países
afectados por las directivas de la UE
Este producto ha sido fabricado por, o en nombre de Sony
Corporation.
Importador UE: Sony Europe B.V.
LasconsultasrelacionadasconelImportadoralaUEocon
la conformidad del producto en Europa deben dirigirse al
representante autorizado por el fabricante, Sony Belgium,
bijkantoor van Sony Europe B.V., Da Vincilaan 7-D1, 1930
Zaventem, Bélgica.
Tratamiento de los equipos eléctricos y
electrónicos al final de su vida útil (aplicable en la
Unión Europea y en países europeos con sistemas
de tratamiento selectivo de residuos)
Este símbolo en el equipo o en su embalaje indica
que el presente producto no puede ser tratado
como residuos doméstico normal. Debe entregarse
en el correspondiente punto de recogida de equipos eléctricos
y electrónicos. Al asegurarse de que este producto se desecha
correctamente, usted Ayuda a prevenir las consecuencias
potencialmente negativas para el medio ambiente y la salud
humana que podrían derivarse de la incorrecta manipulación
en el momento de deshacerse de este producto. El reciclaje
de materiales ayuda a conservar los recursos naturales. Para
recibir información detallada sobre el reciclaje de este producto,
póngase en contacto con el ayuntamiento, el punto de recogida
más cercano o el establecimiento donde ha adquirido el producto.
Precauciones
•Estemicrófonoesuninstrumentodeprecisión.Nolodesmonte
bajo ningún concepto.
•Mantengaelmicrófonoalejadodelugaresconhumedady
temperaturas muy altas.
•Queelcableseenrollealrededordelvolanteodelapalancade
cambiosesextremadamentepeligroso.Asegúresedeimpedir
que el cable y otros componentes obstruyan la conducción.
•Sielvehículodisponedeairbagsuotrosdispositivosde
amortiguación de impactos, póngase en contacto con el
establecimiento donde ha adquirido esta unidad o con
el concesionario de automóviles antes de llevar a cabo la
instalación.
Lista de componentes
•Losnúmerosdelalistacorrespondenalosqueencontraráen
las instrucciones.
•Laclavijadelmicrófonose conecta a la toma para micrófono
de la unidad principal.
Instalación
Existen dos métodos para realizar la instalación.
-A Instalación en la visera
1 Instale el micrófono en el clip (-A-1).
2 Instale el clip en la visera (-A-2).
-B Instalación en el salpicadero
1 Instale el micrófono en el clip con el cable fijado en la
ranura del clip (-B-1).
2 Enganche el clip en el salpicadero con la cinta adhesiva
de dos caras (-B-2).
Nota
Antes de colocar la cinta adhesiva de doble cara , limpie la superficie del
salpicadero con un paño seco.
Ajuste del ángulo del micrófono
Ajuste el ángulo del micrófono en la posición adecuada.
Nota
Elmicrófonogirasobreunúnicoeje,comomuestraelsiguientediagrama.Nolo
gire incorrectamente a la fuerza.
Especificaciones
Tipo: micrófono de condensador de electreto (solo para la unidad
especificada)
Características de direccionalidad: unidireccional
Peso: 25 g (solo el micrófono)
Dimensiones: 10,5 × 24 mm (solo el micrófono)
 
 
× 5
1
A2
1
B2


 







Other Sony Microphone manuals

Sony ECM-Z60 User manual

Sony

Sony ECM-Z60 User manual

Sony ECM-CR120 User manual

Sony

Sony ECM-CR120 User manual

Sony ECMMS2 User manual

Sony

Sony ECMMS2 User manual

Sony UWP-C1 User manual

Sony

Sony UWP-C1 User manual

Sony ECM T6 User manual

Sony

Sony ECM T6 User manual

Sony ECM 719 User manual

Sony

Sony ECM 719 User manual

Sony WRT-807A User manual

Sony

Sony WRT-807A User manual

Sony ECM-957PRO User manual

Sony

Sony ECM-957PRO User manual

Sony ECMMS907 - Stereo Type Mic User manual

Sony

Sony ECMMS907 - Stereo Type Mic User manual

Sony ECM-DS70P User manual

Sony

Sony ECM-DS70P User manual

Sony ECM-100U User manual

Sony

Sony ECM-100U User manual

Sony handycam ecm-hst1 User manual

Sony

Sony handycam ecm-hst1 User manual

Sony UWP-D11 User manual

Sony

Sony UWP-D11 User manual

Sony ECM Z60 User manual

Sony

Sony ECM Z60 User manual

Sony F-112 User manual

Sony

Sony F-112 User manual

Sony ECM-55B User manual

Sony

Sony ECM-55B User manual

Sony ECM-CR120 User manual

Sony

Sony ECM-CR120 User manual

Sony ECM-T115 User manual

Sony

Sony ECM-T115 User manual

Sony WRT-807A User manual

Sony

Sony WRT-807A User manual

Sony ECM-T110 User manual

Sony

Sony ECM-T110 User manual

Sony MAS-A100 User manual

Sony

Sony MAS-A100 User manual

Sony Wireless SingStar User manual

Sony

Sony Wireless SingStar User manual

Sony ECMVG1 User manual

Sony

Sony ECMVG1 User manual

Sony ECM-CS3 User manual

Sony

Sony ECM-CS3 User manual

Popular Microphone manuals by other brands

Shure 839 user guide

Shure

Shure 839 user guide

CAD E-200 Product specifications and user's guide

CAD

CAD E-200 Product specifications and user's guide

Shure WL183 user guide

Shure

Shure WL183 user guide

Sennheiser K6 quick guide

Sennheiser

Sennheiser K6 quick guide

Audio Technica ONEPOINT AT825 Specifications

Audio Technica

Audio Technica ONEPOINT AT825 Specifications

SE Electronics RNR1 user manual

SE Electronics

SE Electronics RNR1 user manual

Shure PG27-USB user manual

Shure

Shure PG27-USB user manual

Behringer GO VIDEO KIT quick start guide

Behringer

Behringer GO VIDEO KIT quick start guide

Marek Design RS1 owner's manual

Marek Design

Marek Design RS1 owner's manual

Superlux E12A quick start guide

Superlux

Superlux E12A quick start guide

AXESS ELECTRONICS mpwl-1503-bk owner's manual

AXESS ELECTRONICS

AXESS ELECTRONICS mpwl-1503-bk owner's manual

Motorola MDHMN9052 manual

Motorola

Motorola MDHMN9052 manual

MXL LSM-7GN quick start guide

MXL

MXL LSM-7GN quick start guide

Saramonic Vmic Pro manual

Saramonic

Saramonic Vmic Pro manual

Dodotronic ULTRAMIC384K BLE user guide

Dodotronic

Dodotronic ULTRAMIC384K BLE user guide

RODE Microphones Procaster instruction manual

RODE Microphones

RODE Microphones Procaster instruction manual

Audio Technica AT4071a Specifications

Audio Technica

Audio Technica AT4071a Specifications

Pure Acoustics MKV-200 User & safety precaution guide

Pure Acoustics

Pure Acoustics MKV-200 User & safety precaution guide

manuals.online logo
manuals.online logoBrands
  • About & Mission
  • Contact us
  • Privacy Policy
  • Terms and Conditions

Copyright 2025 Manuals.Online. All Rights Reserved.