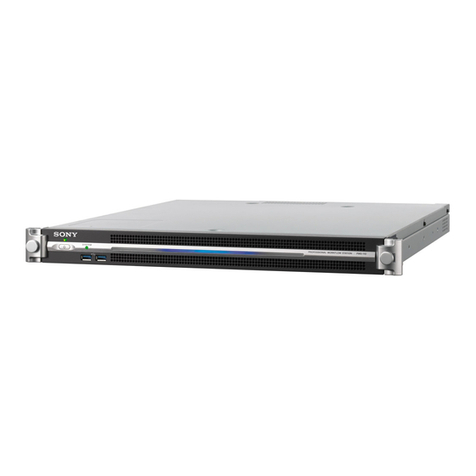
Sony PWS-110RX1A User manual

NETWORK RX STATION
PWS-110RX1A
電気製品は、安全のための注意事項を守らないと、火災や人
身事故になることがあります。
このオペレーションマニュアルには、事故を防ぐための重要な注意事項と製品
の取り扱いかたを示してあります。このオペレーションマニュアルをよくお読
みのうえ、製品を安全にお使いください。お読みになったあとは、いつでも見
られるところに必ず保管してください。
OPERATION MANUAL
[Japanese/English/French/German/Italian/Spanish/Chinese/Korean]
1st Edition

目次
2
目次
概要 .................................................................................................................................. 3
システム構成例 ............................................................................................................................................ 4
各部の名称と働き ........................................................................................................... 5
前面 ....................................................................................................................................................................... 5
前面(パネルを外した場合)............................................................................................................... 5
背面 ....................................................................................................................................................................... 6
準備 .................................................................................................................................. 7
初期設定............................................................................................................................................................. 7
アプリケーションおよびカムコーダーの設定...................................................................... 8
ライブラリ等のライセンスについて............................................................................................ 8
メンテナンスアプリケーションの操作 ........................................................................ 8
使用上のご注意 ............................................................................................................... 9
仕様 .................................................................................................................................. 9
安全のためのご注意が PWS-100/110 オペレーションガイド(付属)に記載され
ていますので、ご使用の前にお読みください。
日本語

概要 3
概要
本機は、ネットワーク経由でライブストリーミングを行う
システムです。ネットワーク機能を持つカムコーダーから
送信されたストリーミング映像を本機で受信し、SDI 信号
として出力することでライブストリーミングを実現します。
本機は、ストリーミング映像を受信する RX アプリケー
ションと、カムコーダーと本機との間のコネクションを管
理する ConnectionControlManager で構成されます。
ConnectionControlManager はクライアント PC の Web ブ
ラウザーに表示できる WebGUI を備え、複数のコネクショ
ンを一括管理できます。
JP

概要
4
システム構成例
PWS-110RX1A を使ってライブストリーミングを行うシス
テムの構成例を示します。
下記の例は、本機を 1 台だけ使用する小規模なシステムで
す。本機 1 台でストリーミングの受信とコネクション管理
を行います。
ストリーミングの受信を行う PWS-110RX1A を増やすこと
もできます。
ストリーミングを送信するには、ワイヤレスアダプター
CBK-WA100/101 を接続したカムコーダー、またはワイヤ
レス機能を搭載したカムコーダーが必要になります。対応
するカムコーダーについては、ソニーのサービス担当者ま
たは営業担当者にご連絡ください。
PWS-110RX1A
(受信 / コネクション管理) SDI
クライアント PC
フィールド インターネット 放送局
ルーター
SDI 機器

各部の名称と働き 5
各部の名称と働き
前面
aオン/スタンバイボタンおよびインジケーター
本機のオン /スタンバイを切り換えます。電源コードを接
続するとスタンバイ状態になり、インジケーターが赤色に
点灯します。スタンバイ状態のときにオン /スタンバイボ
タンを押すと、本機が起動してオン状態になり、インジ
ケーターが緑色に点灯します。オン状態のときにオン / ス
タンバイボタンを 2 秒以上長押しすると、スタンバイ状態
への移行を開始し、スタンバイ状態になるとインジケー
ターが赤色に点灯します。オン状態からスタンバイ状態に
した後、再度オンにする場合は、インジケーターが赤色に
点灯した後 3 秒以上たってからボタンを押してください。
電源コードが接続されていないときは、インジケーターが
消灯します。
bSYSTEM インジケーター
本機の状態を示します。
緑色点灯:正常動作中
緑色点滅(1秒周期):システム起動中またはスタンバイ移
行中
オレンジ色点滅(1秒周期):ワーニング発生
赤色高速点滅(1/4秒周期):エラー発生
cフロントパネル LED
WebGUI での設定によって、点灯 / 消灯します。設定は、
メンテナンス画面の [Settings] ページ−[001:LINELED]
で行います。
dUSB 端子(前面)
本機の初期設定をする際に、キーボードとマウスを接続で
きます。
本書で説明されていない USB 機器については対応していま
せん。
•前面の USB 端子は、両ポートとも給電に対応しています
(900 mA)。
•ケーブルは、SuperSpeedUSB ケーブルをご使用ください。
前面(パネルを外した場合)
SYSTEM インジケーターや WebGUI でエラーが通知され
た場合に、パネルを外してハードウェア各部のステータス
を確認することができます。
パネルを外すには、前面パネル左右のネジをゆるめ、手前
に引きます。
aFAN インジケーター
ファンのいずれかに障害が発生した場合に、対応するイン
ジケーターが赤く点灯します。
12 3
4
ご注意
123

各部の名称と働き
6
bPOWER インジケーター
AC 電源ユニットのどちらかに故障が検出された場合に、
対応するインジケーターが赤く点灯します。
cTEMP インジケーター
本機内部温度の異常上昇を検出した場合に赤く点灯します。
背面
aSYSTEMTC 端子
本システムでは使用しません。
bRemote 端子(1/2、3/4、5)
本システムでは使用しません。
cAC 電源ユニット
電源コードを挿入して、電源コンセントに接続します。
工場出荷時は、AC電源ユニットが 1つ装着されています。
別売の電源ユニットを追加装着することによって、電源を
二重化することができます。信頼性が要求されるシステム
で本機を使用するとき、一方の電源ユニットが故障しても
運用の継続が可能です。
◆ 電源ユニットの追加または交換については、ソニーのサービス
担当者または営業担当者にご連絡ください。
dSDI(1 〜 4)端子
左から SDI1 端子〜 SDI4 端子の順になります。
SDI 信号を出力します。
eREFIN 端子
同期基準信号を入力します。
fUSB 端子(背面)
キーボードとマウスを接続できます。
本書で説明されていない USB 機器については対応していま
せん。
•背面の 4 つの USB 端子のうち、右下のポートのみ給電に対応して
います(900mA)。他の 3 ポートは給電非対応ですので、USB
端子からの電力供給が不要な USB 機器を接続してください。
•ケーブルは、SuperSpeedUSB ケーブルをご使用ください。
gLAN 端子
ギガビットイーサネットに接続します。
hHDMI 端子
HDMI ケーブルでディスプレイに接続します。
HDMIケーブルは、下記の規格に適合したケーブルをご使
用ください。
•HighSpeedHDMICable(PremiumHighSpeedHDMI
Cable)
iDisplayPort 端子
本システムでは使用しません。
jアース端子
アースを接続します。
LAN1 LAN2
112 3
6768945 0
ご注意

準備 7
準備
初期設定
本機を使用する前に、本機内の Windows の設定を行いま
す。設定方法については、標準的な Windows10 の操作方
法に準じます。
本機を再起動する場合は、Windows の再起動ではなく、いったん
シャットダウンさせてから、前面のオン / スタンバイボタンを再
度オンにしてください。
1
前面の USB 端子にキーボードとマウスを接続し、背面
の HDMI 端子にディスプレイを接続する。
2
本体のオン / スタンバイボタンをオンにする。
3
Windows のサインイン画面が表示されたら、ユーザー
名には「rx1」パスワードには「rx1」と入力し、サイ
ンインする。
Windows の表示言語を設定する
1
Windows ボタンを押しながら X キーを押し、表示され
るメニューから[ControlPanel]を選択する。
2
[Clock,Language,andRegion]の[Language]を選択
する。
3
言語を追加する場合は、[Addlanguage]を選択する。
4
追加する言語を選択し、[Add]をクリックする。
5
使用する言語を選択して[Moveup]をクリックし、
その言語がいちばん上に表示されるようにする。
6
いったんサインアウトしてからサインインする。
ネットワークを設定する
1
本機背面の LAN1 端子に LAN ケーブルを接続します。
お客様のネットワーク構成に合わせた接続およびネッ
トワーク設定が必要です。
2
コントロールパネルの[NetworkandInternet]−
[Viewnetworkstatusandtasks]をクリックする。
3
[Connections]で LAN ケーブルを接続しているデバイ
スをクリックする。
4
[Properties]ボタンをクリックする。
5
[InternetProtocolVersion4(TCP/IPv4)]を選択して、
[Properties]ボタンをクリックする。
6
IP アドレスなどの設定を変更する。
7
DNS などの設定を行う場合は、[Advanced]ボタンを
クリックする。
8
設定が完了したら、[OK]ボタンをクリックする。
日時を設定する
1
コントロールパネルの[Clock,Language,andRegion]
で[DateandTime]−[Setthetimeanddate]を選
択する。
2
[DateandTime]タブの[Changetimezone]をク
リックして、タイムゾーンを選択する。
3
[DateandTime]タブの[Changedateandtime]を
クリックして、日付と時刻を設定する。
4
[InternetTime]タブの[Changesettings]ボタンを
クリックする。
5
NTP サーバーを設定し、[UpdateNow]ボタンをク
リックする。
6
定期的に NTP サーバーで時刻を補正する場合は、
[SynchronizewithanInternettimeserver]をチェッ
クする。
ユーザーのパスワードを設定する
本機内蔵の Windows には、工場出荷時にユーザー「rx1」
が設定されています。セキュリティのため、このユーザー
のパスワードを設定してください。
1
コントロールパネルの[UserAccountsandFamily
Safety]をクリックする。
2
[UserAccount]の[Changeaccounttype]をクリッ
クする。
3
ユーザー「rx1」を選択する。
4
[Changethepassword]をクリックする。
ご注意

メンテナンスアプリケーションの操作
8
5
新しいパスワードとヒントを入力し、[Change
Password]ボタンをクリックする。
サインアウトする
設定が完了したら、Windows からサインアウトします。
1
[Start]をクリックする。
2
スタートメニュー上部に表示されているアカウント名
をクリックし、[Sign out]をクリックする。
アプリケーションおよびカムコーダー
の設定
Windows の設定後、本機のアプリケーションおよびカム
コーダーの設定を、下記の順に行います。設定について詳
しくは、本システムのヘルプをご覧ください。
aConnectionControlManager の設定
クライアント PC から ConnectionControlManager の管理
画面を表示して、設定を行います。
bRX アプリケーションの設定
InitializationTool を起動して、RX アプリケーションの設
定を行います。
c送信側カムコーダーの設定
送信側のカムコーダー、またはカムコーダーに接続したワ
イヤレスアダプターの設定を行います。
設定について詳しくは、下記の URL にアクセスして本シス
テムのヘルプをご覧ください。
http://helpguide.sony.net/pro/rx/v1/ja/
index.html
ライブラリ等のライセンスについて
PWS-110RX1A が使用する各種ライブラリ等のライセンス
については、ConnectionControlManager の管理画面の
[ヘルプ]から確認できます。
メンテナンスアプリケー
ションの操作
システム管理者向けメンテナンスアプリケーション
(MaintenanceWebApplication)の操作については、本機
にサインインしてデスクトップ上にあるショートカットを
開いてマニュアルを参照してください。

使用上のご注意/仕様 9
使用上のご注意
電源に関する注意事項
本機が動作中に突然電源が切れた場合、データが壊れる可
能性があります。データ保護のため、UPS(無停電電源装
置)のご使用をお勧めします。
また、電源コードを抜く場合やブレーカーを落とす場合は、
必ず事前に本機のオン / スタンバイボタンを押して本機の
動作を停止させてください。
有寿命部品についての注意事項
ファン、バッテリーは有寿命部品として定期的な交換が必
要です。
常温でのご使用の場合、2 〜 5 年を目安に交換してくださ
い。ただし、交換時期は目安であり、部品の寿命を保証す
るものではありません。交換の際はお買い上げ店にご相談
ください。
ネットワークについての注意事項
使用環境によってはネットワーク上の意図せぬ第三者から
アクセスされる可能性があります。
セキュリティの面からすべてのパスワードを設定すること
を強く推奨します。
7 ページの手順に従って、すべてのパスワードを設定して
ください。
USBデバイスに関する注意事項
本機は、UASP(USBAttachedSCSIProtocol)に対応して
いません。
仕様
一般
電源 AC100V 〜240V
50/60Hz
消費電力 235W
待機電力 3W 以下
使用温度 5 ℃〜35 ℃
保存温度 −20 ℃〜+60 ℃
使用湿度 20%〜90%(相対湿度)
保存湿度 5%〜80%
質量 9.8kg
外形寸法 440×43.6× 507mm(幅/高さ/奥行き)
CPU
プロセッサー IntelCorei76700TE(2.4GHz)
メモリ 8GBytes
SO-DIMM(DDR4)(2)
ドライブ(M.2)
120GBytes
拡張バス PCIeGen28Lane(30W)(2)
入出力
LAN RJ-45(2)
1000BASE-T、100BASE-TX
USB(前面 / 背面)
SuperSpeedUSB(USB3.0)TypeA
(6、うち前面 2、背面 4)
前面:給電対応(各 900 mA)
単位:mm
482
440
43.6
507

仕様
10
背面:右下のポートのみ給電対応
(900 mA)、他 3 ポートは給電非対応
HDMI TypeA(1)
HDMIVer.1.4a、
最大解像度 1920 × 1200、60Hz
REFIN BNC(1)
SMPTEST318準拠 HD3値シンク
(0.6Vp-p/75Ω/同期負)または SDブ
ラックバースト /コンポジットシンク
(0.286Vp-p/75Ω/同期負)
SDI1 〜 4 BNC(4)
HD:SMPTEST292-1準拠
SD:SMPTEST259準拠
付属品
オペレーションマニュアル(本書)(1)
オペレーションガイド(1)
ラックマウント用ネジ(4)
別売アクセサリ
オプショナルパワーサプライPWSK-101
仕様および外観は、改良のため予告なく変更することがあ
りますが、ご了承ください。
•Windows は、米国 MicrosoftCorporation の米国およびそ
の他の国における登録商標または商標です。
•イーサネットは、富士ゼロックス株式会社の登録商標で
す。
•HDMI、High-DefinitionMultimediaInterface、および
HDMI ロゴは、米国およびその他の国における HDMI
LicensingAdministrator,Inc. の商標または、登録商標で
す。
その他、本書に記載されているシステム名、製品名、会社
名は一般に各開発メーカーの登録商標または商標です。な
お、本文中では、®、™マークは明記していません。
本製品は、トロンフォーラム(www.tron.org)の
T-License 2.1 に基づき T-Kernel 2.0 ソースコードを利用し
ています。
通信を行う機器でセキュリティ対策を行わなかった結果、
または、通信仕様上の、やむを得ない事情により、デー
タ漏洩等、セキュリティ上の問題が発生した場合、弊社
ではそれによって生じたあらゆる損害に対する責任を負
いかねます。
•必ず事前に記録テストを行い、正常に記録されている
ことを確認してください。本機や記録メディア、外部
ストレージなどを使用中、万一これらの不具合により
記録されなかった場合の記録内容の補償については、
ご容赦ください。
•お使いになる前に、必ず動作確認を行ってください。
故障その他に伴う営業上の機会損失等は保証期間中お
よび保証期間経過後にかかわらず、補償はいたしかね
ますのでご了承ください。
•本製品を使用したことによるお客様、または第三者か
らのいかなる請求についても、当社は一切の責任を負
いかねます。
•本機内、記録メディア、外部のストレージ等に記録さ
れたデータの損失、修復、複製の責任は負いかねます。
•諸事情による本製品に関連するサービスの停止、中断
について、一切の責任を負いかねます。

11
Table of Contents
Table of Contents
Overview ............................................................................. 12
System Configuration Examples............................................ 13
Name and Function of Parts............................................... 14
Front View.............................................................................. 14
Front View (Panel Removed)................................................. 14
Rear View............................................................................... 15
Setting Up ........................................................................... 16
Initial Settings........................................................................ 16
Application and Camcorder Settings..................................... 17
Library Licenses .................................................................... 17
Maintenance Web Application Operation ........................ 17
Usage Precautions............................................................. 18
Specifications..................................................................... 18
For safety, please read the precautions described in the PWS-100/110
Operation Guide (supplied).
English
GBGB

12 Overview
Overview
This unit is a system for live streaming on the Internet. It
receives streaming video transmitted from a camcorder
which has a network function, and outputs SDI signals for
live streaming.
The unit is comprised by an RX application that receives
streaming video, and a Connection Control Manager that
manages the connections between the camcorder and the
unit. The Connection Control Manager has a web GUI that
can be displayed using a web browser on a client PC, and
can be used to manage multiple connections
simultaneously.

13
Overview
System Configuration Examples
This section shows live streaming system configuration
examples using the PWS-110RX1A.
The following example shows a small-scale system using
only one unit. The unit acts as both streaming receiver and
connection manager.
Additional PWS-110RX1A units acting as streaming
receivers can be used.
For streaming transmission, a camcorder connected to a
CBK-WA100/101 Wireless Adaptor or a camcorder with
wireless function is required. For details about supported
camcorders, consult your Sony sales or service
representative.
PWS-110RX1A
(receiver/connection
manager) SDI
Client PC
Field Internet Broadcast station
Router
SDI device

14 Name and Function of Parts
Name and Function of Parts
Front View
aOn/Standby button and indicator
Switches the unit on/off (standby state). Connecting the
power cord places the unit in standby state, and the
indicator turns on red. Pressing the On/Standby button
while in standby state turns on the unit and the indicator
turns on green. Pressing and holding the On/Standby
button for two seconds switches the unit to standby state,
and the indicator changes to red. To turn the unit on again
after switching from On state to standby state, when the
indicator is red, press and hold the On/Standby button for
three seconds or longer. The indicator goes out when the
power cord is disconnected.
bSYSTEM indicator
Indicates the status of the unit.
Lit green: Operating normally
Flashing green (once per second): System is booting or
transitioning to standby state
Flashing orange (once per second): A warning has been
generated.
High-speed flashing red (four times per second): An
error has occurred.
cFront panel LED
Turns on according to settings in the web GUI. The LED
is configured using [001: LINE LED] in the [Settings]
page on the Maintenance screen.
dUSB connectors (front panel)
Connects to a keyboard and mouse for initializing the unit.
USB devices not described in this document are not
supported.
• Both USB ports on the front panel support power delivery (900 mA).
• Use SuperSpeed USB cables.
Front View (Panel Removed)
When the SYSTEM indicator or web GUI indicates an
error, you can remove the front panel to check the status of
the hardware components.
To remove the front panel, loosen the screws on the left
and right sides and pull the panel towards you.
aFAN indicators
If any of the fans fail, the corresponding fan indicator turns
on red.
bPOWER indicators
If either of the AC power supply units fail, the
corresponding indicator turns on red.
12 3
4
Notes
123

15
Name and Function of Parts
cTEMP indicator
If an abnormally high temperature is detected within the
unit, the indicator turns on red.
Rear View
aSYSTEM TC connector
Not used by this system.
bRemote connectors (1/2, 3/4, 5)
Not used by this system.
cAC power supply units
Insert the power cords and connect to power outlets.
Only one AC power supply unit is installed at the factory.
A second power supply unit can be installed to provide
power supply redundancy. When used in systems that
require reliability, power supply redundancy allows the
unit to continue operating even if a power supply unit fails.
For details about installing or replacing a power supply
unit, consult your Sony sales or service representative.
dSDI (1 to 4) connectors
SDI1 to SDI4 connectors are numbered from left to right.
Outputs SDI signals.
eREF IN connectors
Input sync reference signals.
fUSB connectors (rear panel)
Connect to a keyboard and mouse.
USB devices not described in this document are not
supported.
• Of the four USB connectors on the rear panel, only the bottom right port
supports power delivery (900 mA). The other three ports do not support
power delivery, and should be used to connect USB devices that do not
require power supplied from the USB connector.
• Use SuperSpeed USB cables.
gLAN connectors
Connect to a Gigabit Ethernet network.
hHDMI connector
Connect to a monitor using an HDMI cable.
Use an HDMI cable that conforms to the following
standard.
• High Speed HDMI Cable (Premium High Speed HDMI
Cable)
iDisplayPort connector
Not used by this system.
jGround terminal
Connect to ground.
LAN1 LAN2
12 3
6768945 0
Notes

16 Setting Up
Setting Up
Initial Settings
Before using the unit, configure the Windows settings
within the unit. The description below describes the
settings in Windows 10.
To reboot the unit, first shut down the unit and then turn the On/Standby
button on the front panel on again, without rebooting Windows.
1
Connect a keyboard and mouse to the USB connectors
on the front panel, and connect a monitor to the HDMI
connector on the rear panel.
2
Set the On/Standby button to the On position.
3
When the Windows sign-in screen appears, enter
“rx1” as the user name, enter “rx1” as the password,
and sign in.
Setting the Windows interface language
1
Hold down the Windows key and press the X key, then
select [Control Panel] from the displayed menu.
2
Select [Clock, Language, and Region] > [Language].
3
Select [Add language] to add a language.
4
Select the language to add, then click [Add].
5
Select the language to use and click [Move up] until
the language is displayed at the top.
6
Sign out and then sign in again.
Configuring the network
1
Connect a LAN cable to the LAN1 connector on the
rear panel of the unit. Connection and network settings
for the user environment are required.
2
Click [View network status and tasks] under [Network
and Internet] in the control panel.
3
Click the device connected by the LAN cable in
[Connections].
4
Click the [Properties] button.
5
Select [Internet Protocol Version 4 (TCP/IPv4)], then
click the [Properties] button.
6
Change the IP address and other settings.
7
Click the [Advanced] button to configure DNS, and
other settings.
8
When finished, click the [OK] button.
Setting the date and time
1
Select [Set the time and date] under [Date and Time]
in the [Clock, Language, and Region] control panel.
2
Click [Change time zone] on the [Date and Time] tab,
and select the time zone.
3
Click [Change date and time] on the [Date and Time]
tab, and set the date and time.
4
Click the [Change settings] button on the [Internet
Time] tab.
5
Specify an NTP server, then click the [Update Now]
button.
6
Place a check mark in [Synchronize with an Internet
time server] to periodically correct the clock using the
NTP server.
Setting user passwords
The “rx1” default user is configured for Windows within
the unit. Set the password for the user to provide security.
1
Click [User Accounts and Family Safety] in the
control panel.
2
Click [User Account] > [Change account type].
3
Select the “rx1” user.
4
Click [Change the password].
5
Enter a new password and a password hint, then click
the [Change Password] button.
Note

17
Maintenance Web Application Operation
Signing out
When finished, sign out from Windows.
1
Click [Start].
2
Click the account name displayed at the top of the Start
menu, then click [Sign out].
Application and Camcorder Settings
After configuring Windows, configure the application and
camcorder settings using the following procedures. For
details about configuration, refer to the Help of the system.
aConnection Control Manager settings
Display and configure the Connection Control Manager
admin screen from a client PC.
bRX application settings
Launch the Initialization Tool to configure the RX
(receiver) application.
cCamcorder transmitter settings
Configure the camcorder transmitter or the wireless
adaptor connected to the camcorder.
For details about configuration, access the following URL
and refer to the Help of the system.
http://helpguide.sony.net/pro/rx/v1/en/
index.html
Library Licenses
You can display license information about each type of
library used by the PWS-110RX1A from [Help] on the
Connection Control Manager admin screen.
Maintenance Web
Application Operation
For details about the operation of the Maintenance Web
Application for system administrators, sign in to the unit
and double-click the desktop shortcut to browse the
manual.

18 Usage Precautions / Specifications
Usage Precautions
Power supply precautions
If the unit is suddenly turned off during operation, data loss
may occur. To maintain data integrity, the use of an
uninterruptible power supply (UPS) is recommended.
To disconnect the power cord or turn off the breaker,
always press the On/Standby button on the unit to stop the
unit before proceeding.
Components with limited lifespan
The fan and battery are consumable parts that will need
periodic replacement.
When operating at room temperature, a normal
replacement cycle will be about 2 to 5 years.
However, this replacement cycle represents only a general
guideline and does not imply that the life expectancy of
these parts is guaranteed. For details on parts replacement,
contact your dealer.
Network precautions
Depending on the operating environment, unauthorized
third parties on the network may be able to access the
system.
We strongly recommend configuring all of the passwords
for security purposes.
Configure all the passwords following the procedure on
page 16.
USB device precautions
The unit does not support UASP (USB Attached SCSI
Protocol).
Specifications
General
Power requirement
100 V to 240 V AC
50/60 Hz
Power consumption
235 W
Standby power consumption
3Worlower
Operating temperature
5°C to 35 °C (41 °F to 95 °F)
Storage temperature
–20 °C to +60 °C (–4 °F to +140 °F)
Operating humidity
20% to 90% (relative humidity)
Storage humidity 5% to 80%
Mass 9.8 kg (21 lb. 9.7 oz.)
Dimensions 440 × 43.6 × 507 mm (17 3/8× 1 3/4×
20 in.) (width / height / depth)
CPU
Processor Intel Core i7 6700TE (2.4 GHz)
Memory 8 GBytes
SO-DIMM (DDR4) (2)
Drive (M.2) 120 GBytes
Expansion bus PCIe Gen2 8Lane (30 W) (2)
Inputs/outputs
LAN RJ-45 (2)
1000BASE-T, 100BASE-TX
USB (front panel/rear panel)
Super Speed USB (USB 3.0) Type A
(6, 2 on front and 4 on rear)
Front: Power delivery support (900 mA/port)
Rear: Power delivery support on bottom
right port (900 mA), not supported on
other three ports
HDMI Type A (1)
HDMI Ver. 1.4a,
1920 × 1200 maximum resolution, 60 Hz
Unit: mm (in.)
440 (17 3/8)
482 (19)
43.6 (1 3/4)
507 (20)

19
Specifications
REF IN BNC (1)
SMPTE ST 318 compliant, HD tri-level
sync (0.6 Vp-p/75 ohms/sync negative)
or SD black burst/composite sync
(0.286 Vp-p/75 ohms/sync negative)
SDI 1 to 4 BNC (4)
HD: SMPTE ST 292-1 compliant
SD: SMPTE ST 259 compliant
Supplied accessories
Operation manual (this document) (1)
Operation Guide (1)
Screws for Rack Mount (4)
Optional accessories
PWSK-101 Optional Power Supply
Design and specifications are subject to change without notice.
• Windows is a registered trademark of Microsoft
Corporation in the United States and/or other countries.
• Ethernet is a registered trademark of Fuji Xerox Co., Ltd.
• The terms HDMI and HDMI High-Definition Multimedia
Interface, and the HDMI Logo are trademarks or
registered trademarks of HDMI Licensing Administrator,
Inc. in the United States and other countries.
All other product names and brand names are registered
trademarks or trademarks of their respective owners. Trademarked
items are not indicated by ® or ™ symbols in this document.
This Product uses the Source Code of T-Kernel 2.0 under
T-License 2.1 granted by TRON Forum (www.tron.org).
SONY WILL NOT BE LIABLE FOR DAMAGES OF ANY
KIND RESULTING FROM A FAILURE TO IMPLEMENT
PROPER SECURITY MEASURES ON TRANSMISSION
DEVICES, UNAVOIDABLE DATA LEAKS RESULTING
FROM TRANSMISSION SPECIFICATIONS, OR
SECURITY PROBLEMS OF ANY KIND.
Notes
• Always make a test recording, and verify that it was
recorded successfully.
SONY WILL NOT BE LIABLE FOR DAMAGES OF
ANY KIND INCLUDING, BUT NOT LIMITED TO,
COMPENSATION OR REIMBURSEMENT ON
ACCOUNT OF FAILURE OF THIS UNIT OR ITS
RECORDING MEDIA, EXTERNAL STORAGE
SYSTEMS OR ANY OTHER MEDIA OR STORAGE
SYSTEMS TO RECORD CONTENT OF ANY TYPE.
• Always verify that the unit is operating properly before
use. SONY WILL NOT BE LIABLE FOR
DAMAGES OF ANY KIND INCLUDING, BUT
NOT LIMITED TO, COMPENSATION OR
REIMBURSEMENT ON ACCOUNT OF THE LOSS
OF PRESENT OR PROSPECTIVE PROFITS DUE
TO FAILURE OF THIS UNIT, EITHER DURING
THE WARRANTY PERIOD OR AFTER
EXPIRATION OF THE WARRANTY, OR FOR
ANY OTHER REASON WHATSOEVER.
• SONY WILL NOT BE LIABLE FOR CLAIMS OF
ANY KIND MADE BY USERS OF THIS UNIT OR
MADE BY THIRD PARTIES.
• SONY WILL NOT BE LIABLE FOR THE LOSS,
REPAIR, OR REPRODUCTION OF ANY DATA
RECORDED ON THE INTERNAL STORAGE
SYSTEM, RECORDING MEDIA, EXTERNAL
STORAGE SYSTEMS OR ANY OTHER MEDIA
OR STORAGE SYSTEMS.
• SONY WILL NOT BE LIABLE FOR THE
TERMINATION OR DISCONTINUATION OF ANY
SERVICES RELATED TO THIS UNIT THAT MAY
RESULT DUE TO CIRCUMSTANCES OF ANY KIND.
For the customers in Taiwan

20 Table des matières
Table des matières
Présentation........................................................................ 21
Exemples de configuration système....................................... 22
Nomenclature.......................................................................23
Vue de face............................................................................. 23
Vue de face (Panneau retiré).................................................. 23
Vue arrière.............................................................................. 24
Mise en service ................................................................... 25
Réglages initiaux................................................................... 25
Réglages de l’application et du caméscope........................... 26
Licenses de bibliothèque....................................................... 26
Fonctionnement de l’application Maintenance Web....... 26
Précautions d’utilisation.................................................... 27
Spécifications ..................................................................... 27
Afin de garantir votre sécurité, veuillez lire les précautions décrites dans le
guide d’utilisation du PWS-100/110 (fourni).
Français
Other manuals for PWS-110RX1A
2
Table of contents
Languages:
Other Sony Network Hardware manuals

Sony
Sony Ipela SNT-V704 User manual

Sony
Sony NAC-SV10i User manual

Sony
Sony PCWA-C800S Read This First User manual

Sony
Sony VAIO PCWA-DE30 User manual

Sony
Sony CNU-500 User manual

Sony
Sony PWS-100RX1 Reference guide

Sony
Sony PCWA-C100 User manual

Sony
Sony HAW-SIBU Use and care manual

Sony
Sony 158SVR2000 User manual

Sony
Sony ODS-D55U User manual

Sony
Sony PWS-110RX1A User manual

Sony
Sony IXS-6700-C User manual

Sony
Sony Ipela SNT-EP104 User manual

Sony
Sony Ipela SNT-V704 User manual

Sony
Sony XEC-505 User manual

Sony
Sony NAC-SV10i User manual
Sony
Sony CNU-500 Manual

Sony
Sony NSR-500 User manual

Sony
Sony Ipela SNT-EX101 User manual

Sony
Sony VAIO PCWA-DE30 User manual