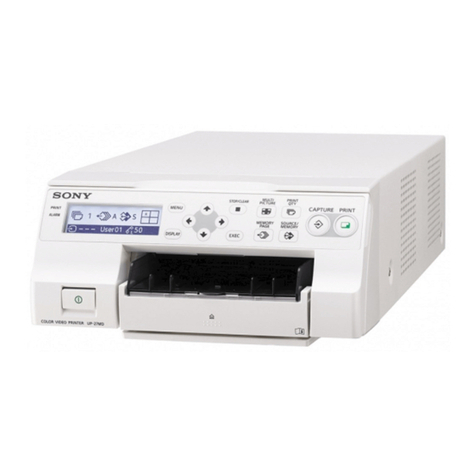
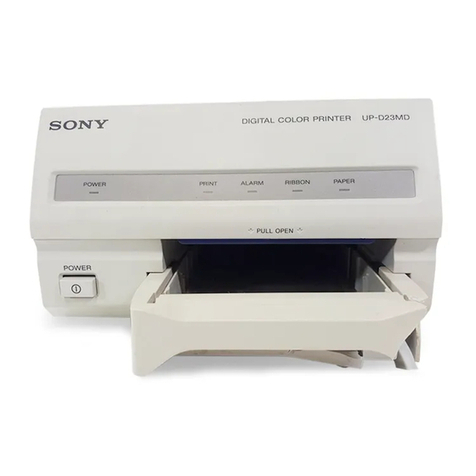
Sony UPD25MD User manual

Digital Color
Printer
Instructions for Use
Before operating the unit, please read this manual thoroughly
and retain it for future reference.
UP-D25MD
4-152-259-15(1)
© 2009 Sony Corporation

2
Owner’s Record
The model and serial numbers are located at the rear.
Record these numbers in the space provided below.
Refer to these numbers whenever you call upon your Sony
dealer regarding this product.
Model No. ____________________
Serial No. ____________________
To reduce the risk of fire or electric shock, do not
expose this apparatus to rain or moisture.
To avoid electrical shock, do not open the
cabinet. Refer servicing to qualified personnel
only.
No modification of this equipment is allowed.
THIS APPARATUS MUST BE EARTHED.
To disconnect the main power, unplug the power
plug.
When installing the unit, incorporate a readily
accessible disconnect device in the fixed wiring,
or connect the power plug to an easily accessible
socket-outlet near the unit.
Do not position the ME equipment where it is
difficult to unplug the power plug.
If a fault should occur during operation of the
unit, operate the disconnect device to
switch the power supply off, or unplug the power
plug.
For the customers in the U.S.A.
This equipment has been tested and found to comply with
the limits for a Class A digital device, pursuant to part 15
of the FCC Rules. These limits are designed to provide
reasonable protection against harmful interference when
the equipment is operated in a commercial environment.
This equipment generates, uses, and can radiate radio
frequency energy and, if not installed and used in
accordance with the instruction manual, may cause
harmful interference to radio communications. Operation
of this equipment in a residential area is likely to cause
harmful interference in which case the user will be
required to correct the interference at his own expense.
You are cautioned that any changes or modifications not
expressly approved in this manual could void your
authority to operate this equipment.
All interface cables used to connect peripherals must be
shielded in order to comply with the limits for a digital
device pursuant to Subpart B of part 15 of FCC Rules.
For the customers in Canada
This unit has been certified according to Standard CAN/
CSA-C22.2 No.60601-1.
For the customers in the U.S.A and Canada
When you use this product connected to 240 V single
phase, be sure to connect this product to a center tapped
circuit.
Important safeguards/notices for use in the
medical environments
1. All the equipments connected to this unit shall be
certified according to Standard IEC60601-1,
IEC60950-1, IEC60065 or other IEC/ISO Standards
applicable to the equipments.
2. Furthermore all configurations shall comply with the
system standard IEC60601-1-1. Everybody who
connects additional equipment to the signal input part
or signal output part configures a medical system, and
is therefore, responsible that the system complies with
the requirements of the system standard IEC60601-1-1.
If in doubt, consult the qualified service personnel.
3. The leakage current could increase when connected to
other equipment.
4. For this particular equipment, all accessory equipment
connected as noted above, must be connected to mains
via an additional isolation transformer conforming with
the construction requirements of IEC60601-1 and
providing at least Basic Insulation.
5. This equipment generates, uses, and can radiate radio
frequency energy. If it is not installed and used in
accordance with the instruction manual, it may cause
interference to other equipment. If this unit causes
interference (which can be determined by unplugging
the power cord from the unit), try these measures:
WARNING
Symbols on the products
This symbol indicates the equipotential
terminal which brings the various parts of a
system to the same potential.
This symbol indicates the manufacturer, and
appears next to the manufacturer’s name and
address.
Refer to the operating instructions
Follow the directions in the operating
instructions for parts of the unit on which this
mark appears.
3
Relocate the unit with respect to the susceptible
equipment. Plug this unit and the susceptible
equipment into different branch circuit.
Consult your dealer. (According to standard IEC60601-1-
2 and CISPR11, Class B, Group 1)
Important EMC notices for use in the medical environments
• The UP-D25MD needs special precautions regarding
EMC and needs to be installed and put into service
according to the EMC information provided in this
instructions for use.
• The portable and mobile RF communications equipment
such as cellular phones can affect the UP-D25MD.
Warning
The use of accessories and cables other than those
specified, with the exception of replacement parts sold by
Sony Corporation, may result in increased emissions or
decreased immunity of the UP-D25MD.
Warning
If the UP-D25MD should be used adjacent to or stacked
with other equipment, it should be observed to verify
normal operation in the configuration in which it will be
used.
Guidance and manufacturer’s declaration-electromagnetic emissions
The UP-D25MD is intended for use in the electromagnetic environment specified below.
The customer or the user of the UP-D25MD should assure that it is used in such an environment.
Emission test Compliance Electromagnetic environment-guidance
RF emissions
CISPR 11 Group 1
The UP-D25MD uses RF energy only for its internal
function. Therefore, its RF emissions are very low and are
not likely to cause any interference in nearby electronic
equipment.
RF emissions
CISPR 11
Class B
The UP-D25MD is suitable for use in all establishments,
including domestic establishments and those directly
connected to the public low-voltage power supply network
that supplies buildings used for domestic purposes.
Harmonic emissions
IEC 61000-3-2
Class A
Voltage fluctuations/
flicker emissions
IEC 61000-3-3
Complies

4
Guidance and manufacturer’s declaration - electromagnetic immunity
The UP-D25MD is intended for use in the electromagnetic environment specified below. The customer or the user of the
UP-D25MD should assure that it is used in such as environment.
Immunity test IEC 60601 test
level Compliance level Electromagnetic environment-guidance
Electrostatic
discharge (ESD)
IEC 61000-4-2
±6 kV contact
±8 kV air
±6 kV contact
±8 kV air
Floors should be wood, concrete or ceramic tile. If floors are
covered with synthetic material, the relative humidity should
be at least 30%.
Electrical fast
transient/burst
IEC 61000-4-4
±2 kV for power
supply lines
±1 kV for input/
output lines
±2 kV for power
supply lines
±1 kV for input/
output lines
Mains power quality should be that of a typical commercial or
hospital environment.
Surge
IEC 61000-4-5
±1 kV differential
mode
±2 kV common
mode
±1 kV differential
mode
±2 kV common
mode
Mains power quality should be that of a typical commercial or
hospital environment.
Voltage dips, short
interruptions and
voltage variations
on power supply
input lines
IEC 61000-4-11
< 5% UT
(> 95% dip in UT)
for 0.5 cycle
40% UT
(60% dip in UT)
for 5 cycles
70% UT
(30% dip in UT)
for 25 cycles
< 5% UT
(> 95% dip in UT)
for 5 sec
< 5% UT
(> 95% dip in UT)
for 0.5 cycle
40% UT
(60% dip in UT)
for 5 cycles
70% UT
(30% dip in UT)
for 25 cycles
< 5% UT
(> 95% dip in UT)
for 5 sec
Mains power quality should be that of a typical commercial or
hospital environment. If the user of the UP-D25MD requires
continued operation during power mains interruptions, it is
recommended that the UP-D25MD be powered from an
uninterruptible power supply or a battery.
Power frequency
(50/60 Hz)
magnetic field
IEC 61000-4-8
3 A/m 3 A/m Power frequency magnetic fields should be at least
characteristic of a typical location in a typical commercial or
hospital environment.
NOTE: UTis the a.c. mains voltage prior to application of the test level.

5
Guidance and manufacturer’s declaration - electromagnetic immunity
The UP-D25MD is intended for use in the electromagnetic environment specified below. The customer or the user of the
UP-D25MD should assure that it is used in such as environment.
Immunity test IEC 60601 test
level Compliance level Electromagnetic environment-guidance
Conducted RF
IEC 61000-4-6
Radiated RF
IEC 61000-4-3
3 Vrms
150 kHz to 80 MHz
3 V/m
80 MHz to 2.5 GHz
3 Vrms
3 V/m
Portable and mobile RF communications equipment should
be used no closer to any part of the UP-D25MD, including
cables, than the recommended separation distance
calculated from the equation appliance to the frequency of
the transmitter.
Recommended separation distance
d= 1.2 √P
d= 1.2 √P80 MHz to 800 MHz
d= 2.3 √P800 MHz to 2.5 GHz
Where Pis the maximum output power rating of the
transmitter in watts (W) according to the transmitter
manufacturer and dis the recommended separation distance
in meters (m).
Field strengths from fixed RF transmitters, as determined by
an electromagnetic site survey, a should be less than the
compliance level in each frequency range. b
Interference may occur in the vicinity of equipment marked
with following symbol:
NOTE 1: At 80 MHz and 800 MHz, the higher frequency range applies.
NOTE 2: These guidelines may not apply in all situations. Electromagnetic propagation is affected by absorption and
reflection from structures, objects and people.
a Field strengths from fixed transmitters, such as base stations for radio (cellular/cordless) telephones and land mobile
radios, amateur radio, AM and FM radio broadcast and TV broadcast cannot be predicted theoretically with accuracy. To
assess the electromagnetic environment due to fixed RF transmitters, an electromagnetic site survey should be
considered. If the measured field strength in the location in which the UP-D25MD is used exceeds the applicable RF
compliance level above, the UP-D25MD should be observed to verify normal operation. If abnormal performance is
observed, additional measures may be necessary, such as reorienting or relocating the UP-D25MD.
b Over the frequency range 150 kHz to 80 MHz, field strengths should be less than 3 V/m.

6
Caution
When you dispose of the unit or accessories, you must
obey the law in the relative area or country and the
regulation in the relative hospital.
Warning on power connection
Use a proper power cord for your local power supply.
1. Use the approved Power Cord (3-core mains lead) /
Appliance Connector / Plug with earthing-contacts that
conforms to the safety regulations of each country if
applicable.
2. Use the Power Cord (3-core mains lead) / Appliance
Connector / Plug conforming to the proper ratings
(Voltage, Ampere).
If you have questions on the use of the above Power Cord
/ Appliance Connector / Plug, please consult a qualified
service personnel.
Warning on power connection for medical
use
Please use the following power supply cord.
With connectors (plug or female) and cord types other than
those indicated in this table, use the power supply cord that
is approved for use in your area.
*Note: Grounding reliability can only be achieved when the equipment is
connected to an equivalent receptacle marked ‘Hospital Only’ or ‘Hospi-
tal Grade’.
For the customers in Europe
This product has been manufactured by or on behalf of
Sony Corporation, 1-7-1 Konan Minato-ku Tokyo, 108-
0075 Japan. Inquiries related to product compliance based
on European Union legislation shall be addressed to the
authorized representative, Sony Deutschland GmbH,
Hedelfinger Strasse 61, 70327 Stuttgart, Germany. For any
service or guarantee matters, please refer to the addresses
provided in the separate service or guarantee documents.
Recommended separation distances between portable and mobile RF communications equipment and the
UP-D25MD
The UP-D25MD is intended for use in an electromagnetic environment in which radiated RF disturbances are controlled.
The customer or the user of the UP-D25MD can help prevent electromagnetic interference by maintaining a minimum
distance between portable and mobile RF communications equipment (Transmitters) and the UP-D25MD as recommended
below, according to the maximum output power of the communications equipment.
Rated maximum output power of transmitter
W
Separation distance according to frequency of transmitter
m
150 kHz to 80 MHz
d= 1.2 √P
80 MHz to 800 MHz
d= 1.2 √P
800 MHz to 2.5 GHz
d= 2.3 √P
0.01 0.12 0.12 0.23
0.1 0.38 0.38 0.73
1 1.2 1.2 2.3
10 3.8 3.8 7.3
100 12 12 23
For transmitters rated a maximum output power not listed above, the recommended separation distance din meters (m) can
be estimated using the equation applicable to the frequency of the transmitter, where Pis the maximum output power rating
of the transmitter in watts (W) according to the transmitter manufacturer.
NOTE 1: At 80 MHz and 800 MHz, the separation distance for the higher frequency range applies.
NOTE 2: These guidelines may not apply in all situations. Electromagnetic propagation is affected by absorption and
reflection from structures, objects and people.
United States and Canada
Plug Type HOSPITAL GRADE*
Cord Type Min.Type SJT
Min.18 AWG
Minimum Rating for Plug
and Appliance Couplers
10A/125V
Safety Approval UL Listed and CSA

7
Table of Contents
Introduction
Features ...................................................................8
System Configuration .........................................8
Location and Function of Parts and Controls .....8
Front ....................................................................8
Rear .....................................................................9
Preparation
Supplied Accessories ............................................10
Connections ..........................................................10
USB Port Connection .......................................10
Installing the Printer Driver ..............................11
Operation
Before Printing .....................................................12
Loading the Ink Ribbon ....................................12
Loading the Paper .............................................14
Adjustments and Settings on the Menu .............16
Menu Structure .................................................16
Menu List ..........................................................17
Using the Menu .................................................18
Saving Color Adjustment Settings ....................18
Printing a List of Printer Settings .....................19
Printing .................................................................19
Miscellaneous
Precautions ...........................................................21
Safety ................................................................21
Cleaning ............................................................21
Cleaning the thermal head ................................22
Automatic paper feed roller cleaning ...............22
Manual paper feed roller cleaning ....................22
Ink Ribbon and Paper .........................................23
About the Color Printing Pack (UPC-21S/
UPC-21L) and the Laminate Color Printing
Pack (UPC-24SA/UPC-24LA) .......................23
Specifications ........................................................24
Troubleshooting ....................................................25
Explanation of Indicators ....................................26
Clearing a Paper Jam ........................................28
Microsoft and Windows are registered trademarks of
Microsoft Corporation.
Other company names and product names mentioned in
this guide are also trademarks and registered trademarks.

8Features / Location and Function of Parts and Controls
Introduction
Introduction
Features
The UP-D25MD Digital Color Printer is a dye sublimation
thermal transfer printer providing high speed printing of
computer image data on A6 paper in full color (256
gradations process and 16.7 million colors) and at high
resolution (423 dpi precision head).
System Configuration
Location and Function of
Parts and Controls
Front
APRINT indicator
Lights while printing is in progress.
BLCD display
Displays printer status, error messages, and menus.
CALARM indicator
Lights when an error such as a paper jam occurs.
DMENU button
Press this button to display the menu or to return to the
main screen from the menu.
EDirectional buttons (<, ,, M, m)
Use these buttons to select menu items and change
settings.
FxSTOP button
Press this button to stop a continuous printing
operation. Printing stops once the current item is
finished printing.
GEXEC button
Use this button to confirm a menu setting.
H!POWER switch
Use this switch to turn the printer on or off.
IPaper feed tray (page 14)
Load paper in this tray. Printouts stack in the tray
above.
JZ(eject) mark
Press here to eject the paper feed tray.
UP-D25MD Digital Color Printer
Computer controls the
printer operations.
USB cable

9
Location and Function of Parts and Controls
Introduction
KTray light
Illuminates the output tray. (You can configure the
setting for this.) (page 18)
Inside the Ribbon Door Panel
A!POWER switch
Use this switch to turn the printer on or off. This
switch functions even while the ribbon door panel is
open.
BRibbon tray (page 12)
Load the ink ribbon in this tray.
CDial (page 28)
Use this dial to clear paper manually when an internal
paper jam occurs.
DMedia switch lever
Switch the position of this lever according to the type
of ink ribbon being used.
Rear
AUSB cable stopper (page 10)
Secures the USB cable to prevent it from being
disconnected.
BUSB connector
Connects to a computer equipped with a Hi-Speed
USB (USB 2.0 compliant) interface.
Note
Use the supplied USB cable when connecting.
C-AC IN connector (page 10)
Connects to the power cord.
DEquipotential ground terminal connector
Connects to a ground (equipotential) plug to bring the
various parts of the system to the same potential.

10 Supplied Accessories / Connections
Preparation
Preparation
Supplied Accessories
This printer is packed with the following accessories.
Check that nothing is missing from your package.
Notes
• Retain the original carton and packing materials in case
you have to transport this unit in the future.
• When transporting the printer, remove the ink ribbon and
paper feed tray, and lock the internal thermal head. For
details, see “Transportation” on page 21.
Connections
After connecting the supplied USB cable to the printer and
the computer, connect the power cord. For details about the
printer connection, refer to the manuals for the computer or
other peripheral devices.
USB Port Connection
Securing the USB cable
After you connect the USB cable to the printer, it is
recommended that you use the cable stopper to secure the
USB cable to prevent it from being accidentally
disconnected.
Notes
• Follow the connection procedures described in the
computer manual.
• Make sure that the USB cable is connected securely at
both ends.
• The supplied printer driver does not support network
printing.
USB cable 1-824-211-41 (SONY) (1)
Before Using This Printer (1)
Thermal head cleaning cartridge (1)
Paper feed tray (1)
Stopper (1)
CD-ROM (printer driver/Instructions for use) (1)
Software License Agreement (1)
Service Contact List (1)
to (USB)
connector
USB cable
(supplied)
UP-D25MD
Power cord
to -AC IN
connector
to wall outlet
Computer

11
Connections
Preparation
• Printer operation is not guaranteed for USB hub
connections.
Installing the Printer Driver
For computers running on Windows 2000/
Windows XP/Windows Vista
After connecting the printer to your computer, turn on the
printer. For details on installation, refer to the installation
guide and Readme file included on the supplied CD-ROM.
For computers running on Windows 7
Before connecting the printer, install the supplied printer
driver on your computer. For details on installation, refer to
the installation guide and Readme file included on the
supplied CD-ROM.
Note
Do not allow the connected computer to enter the Standby
(Suspend) or Sleep modes while the printer is turned on,
because this may cause the printer to stop operating
properly.

12 Before Printing
Operation
Operation
Before Printing
Once the printer is connected to the computer (page 10),
you must load the paper and the ink ribbon as described
below before you can actually begin printing.
Loading the Ink Ribbon
Note
When using the printer for the first time, the thermal head
may be set to its transport position. Be sure to turn on the
printer and release the head from its transport position
before removing the ribbon tray.
Do not open the ribbon door panel if “WAIT” appears on
the LCD display.
1
Open the ribbon door panel.
2
Switch the position of the media switch lever
according to the type of ink ribbon being used.
When using the printer for the first time or when
changing the type of ink ribbon to use, perform the
following to switch the position of the media switch
lever.
1Remove the cover.
2Switch the position of the media switch lever.
3Replace the cover.
Note
Print quality may be adversely affected if the media
switch lever is not properly positioned. Make sure that
it is set either all the way in or all the way out,
depending on the ribbon type.
3
Pull the ribbon tray straight out of the printer.
UPC-21S/UPC-21L: In UPC-24SA/UPC-24LA: Out

13
Before Printing
Operation
4
Load the ink ribbon.
1Align the two pegs on each side of the ink ribbon
with the slots on the ribbon tray.
Notes
• Make sure to load the ink ribbon with the front and
back oriented correctly.
• Do not manually wind the ink ribbon before loading
it. Doing so may adversely affect the print quality.
2Slide the ink ribbon straight into the ribbon tray
until completely inserted.
Note
Do not touch the white tabs on the sides of the ribbon
tray. Doing so may result in improper loading of the
ink ribbon.
5
Slide the ribbon tray straight into the printer until
completely inserted.
6
Close the ribbon door panel.
Removing the Ribbon Tray
To remove the ribbon tray when replacing the ink ribbon,
for example, pull the tray straight out.
If the ink ribbon tears during use
Cellophane tape, etc., can be used to repair a torn ink
ribbon so that the remainder of the ribbon can be used.
Wind the ink ribbon until the cellophane tape is no longer
visible by turning the gray gear at the winding end in the
direction of the arrow. (Make sure the ink ribbon does not
sag.)
Right Wrong
Tab
Cellophane tape

14 Before Printing
Operation
Loading the Paper
Follow the steps below to load paper into the paper feed
tray and to insert the tray into the printer.
When using the printer for the first time, begin with step 2.
Notes
• Be careful not to touch the print side of the paper.
• Use only the recommended paper for this printer. Other
types of paper may cause printer malfunctions, such as
paper jams. For details about compatible ink ribbons and
paper, see “Ink Ribbon and Paper” on page 23.
• When the message “CHANGE RBN” appears on the
LCD display, the ink ribbon is used up. Replace the
ribbon and load the printer with new paper.
• Be careful when inserting and removing the paper feed
tray, because it may cause the printer to shift position and
fall.
1
Press the Zmark on the paper feed tray to eject the
tray.
2
Open the lid of the paper feed tray, and load the paper
and protective sheet together with the print side facing
up.
When using printing packs UPC-21L or UPC-
24LA
1Open the paper feed tray.
2If the paper feed tray partition is raised, lower it.
3Neatly stack and load the paper in the paper feed
tray, aligning the “v” mark on the protective sheet
with the “f” mark inside the tray.
When using printing packs UPC-21S or UPC-
24SA
1Open the feed tray.
2If the paper feed tray partition is lowered, raise it.
3Neatly stack and load the paper in the paper feed
tray, aligning the “v” mark on the protective sheet
with the “f” mark inside the tray.
Notes
• When the paper runs out, do not just add more
paper. Replace both the paper and the ink ribbon.
Replenishing the paper midway may cause a paper
jam.

15
Before Printing
Operation
• When handling the paper, do not touch the print
side. Fingerprints and dust may adhere to the print
side and soil it. To prevent the print side from
becoming soiled, handle the paper with the
protective sheet (with printed warnings) attached.
• Load the paper properly so that it fits completely in
the paper feed tray. If the paper is bent, it will
protrude from the paper feed tray and may not feed
properly. Make sure to handle each ream of paper by
the protective sheet and to remove any bends in the
paper before using it.
• Do not put a mixture of different types of paper in
the paper feed tray.
3
Remove the protective sheet and close the lid.
Note
Make sure to keep the protective sheet after removing
it. The reverse side of the protective sheet (without
printing), can be used as a cleaning sheet to clean the
thermal head. For details about cleaning, see
“Cleaning the thermal head” on page 22.
4
Insert the paper feed tray into the printer until it clicks
into place.
Notes
• If the paper feed tray cannot be completely inserted
in the printer, check the tray insertion area and
remove any paper found there.
• Do not allow more than 10 printouts to accumulate.
Leaving too many printouts in the output tray could
cause a paper jam.
Attaching the Stopper
When multiple printouts are ejected, the printouts that
accumulate on the paper feed tray may fall out. To prevent
this, attach the stopper to the paper feed tray.
1
Press the Zmark area of the paper feed tray, and
remove the tray.
2
Fit the stopper into the two slits on the lid of the paper
feed tray, and insert it all the way in.
Note
Do not pull on the metallic portion of the stopper.

16 Adjustments and Settings on the Menu
Operation
Adjustments and
Settings on the Menu
The menu allows you to adjust the color of prints and
configure printer settings to suit your printing needs.
Configured settings are stored even when the printer is
turned off, and up to two user-defined color adjustment
configurations can be saved.
Menu Structure
When the LCD display is in the ready state, pressing the
MENU button displays the menu.
With the menu displayed, each setting can be selected and
configured with the directional buttons (<, ,, M, m).
Press the MENU button while the menu is displayed to
return the LCD display to the ready state.
The menu is structured as follows.
Selected
configuration
number
Media size and
remaining pages
LA: 24LA
SA: 24SA
L: 21L
S: 21S
Setup menuColor adjustment menuReady state
Button operations for menus
• Press <or ,to switch between menus, and press Mor mto switch between setting items in menus. If you press M(or m) at the first (or
last) item in a menu, you will jump to the last (or first) item of that menu.
• If [>] appears at the right of a menu item, pressing ,displays the sub-item for that menu. If [BACK>] is displayed, however, pressing ,
returns you to the previous item level for that menu.
• When setting values are displayed, pressing <or ,changes the values.

17
Adjustments and Settings on the Menu
Operation
Menu List
Descriptions of the settings available for each menu item
are listed below.
Default settings appear in bold.
COLOR Menu
Item Description Settings
LOAD COL Loads a saved
color
configuration.
0Value set by the printer
driver (Display only. The
printer driver setting is
applied for printing.).
1 User setting 1 saved with
[SAVE] (The color
adjustment set by the printer
driver is disabled, and the
color configuration saved on
the printer is used.)
2 User setting 2 saved with
[SAVE].
DEFAULT Resets the
settings for color
configurations 1
and 2 to the
default values.
Press the EXEC button to
confirm.
C-R
(Cyan - Red)
Higher values add
red to prints.
Lower values
reduce red and
add cyan (light
blue).
Adjustable in 65 steps,
ranging from –32 to 32. 0 is
the standard value.
Adjustment range: –32 ~ 0~
32
M-G
(Magenta -
Green)
Higher values add
green to prints.
Lower values
reduce green and
add magenta
(pink).
Adjustable in 65 steps,
ranging from –32 to 32. 0 is
the standard value.
Adjustment range: –32 ~ 0~
32
Y- B
(Yellow -
Blue)
Higher values add
blue to prints.
Lower values
reduce blue and
add yellow.
Adjustable in 65 steps,
ranging from –32 to 32. 0 is
the standard value.
Adjustment range: –32 ~ 0~
32
SHARP
(Sharpness)
Adjusts the image
contours. The
larger the value,
the sharper the
image contour.
Can be adjusted in 15
gradations. 7 is the standard
value.
Adjustment range: 0 ~ 7~ 14
DARK Adjusts the level
of dark areas.
Can be adjusted in ±32
gradations. 0 is the standard
value.
Adjustment range: –32 ~ 0~
32
GAMMA Adjusts the level
of intermediate
colors.
Can be adjusted in ±32
gradations. 0 is the standard
value.
Adjustment range: –32 ~ 0~
32
LIGHT Adjusts the level
of light areas.
Can be adjusted in ±32
gradations. 0 is the standard
value.
Adjustment range: –32 ~ 0~
32
CURVE Switches the tone
curve.
1Standard
2 High contrast
3Lowcontrast
ADVANCE Configures
detailed color
settings.
INTENSITY Adjusts the
intensity of each
color.
Can be adjusted in ±32
gradations. 0 is the standard
value.
Adjustment range: –32 ~ 0~
32
R-Y: Colors from red to
yellow
Y-G: Colors from yellow to
green
G-C: Colors from green to
cyan (light blue)
C-B: Colors from cyan (light
blue) to blue
B-M: Colors from blue to
magenta (pink)
M-R: Colors from magenta
(pink) to red
SATURATIO
(Saturation)
Adjusts the
saturation of each
color.
Can be adjusted in ±32
gradations. 0 is the standard
value.
Adjustment range: –32 ~ 0~
32
VA L U E A d j u s t s t h e
brightness of each
color.
Can be adjusted in ±32
gradations. 0 is the standard
value.
Adjustment range: –32 ~ 0~
32
HUE Adjusts the hue of
each color.
Can be adjusted in ±32
gradations. 0 is the standard
value.
Adjustment range: –32 ~ 0~
32
SAVE COL Saves the color
configuration in
the color
adjustment menu.
Two different
color
configurations
can be saved.
1Saves the configuration as
user setting 1.
2 Saves the configuration as
user setting 2.
A color configuration cannot
be saved for setting 0, because
it is the printer driver setting.
Item Description Settings

18 Adjustments and Settings on the Menu
Operation
SETUP Menu
Using the Menu
1
Press the !POWER switch to turn on the printer.
The backlight on the LCD display lights green, and
the PRINT and ALARM indicators and tray light light
simultaneously before turning off.
2
Confirm that the LCD display is in the ready state
(“C0 LA-30,” etc.), and then press the MENU button.
3
Press <or ,to select a menu ([COLOR] or
[SETUP]).
4
Press Mor mto select an item.
5
Press <or ,to select a setting.
6
Finish configuring settings, and then press the MENU
button.
The LCD display returns to the ready state.
Saving Color Adjustment Settings
Settings that are configured on the color adjustment menu
can be saved and then loaded again later when needed. Up
to two different color configurations can be saved.
To save a color configuration
1
Press the MENU button.
2
Press <or ,to select [COLOR].
3
Press Mor mto select items (C-R, M-G, Y-B, SHARP,
DARK, GAMMA, LIGHT, CURVE, or ADVANCE)
in the color adjustment menu and change the desired
settings.
4
Once the settings are configured, press Mor mto
select [SAVE COL].
5
Press <or ,to select a number (1 or 2) under
which to save the color configuration.
Pressing <or ,changes the position of [*] on the
LCD display. Move [*] to the left of the desired
number. Up to two color configurations can be saved
by selecting a different number for each
configuration.
For details about the current color configuration,
check the settings in the [COLOR] menu or print a list
of printer settings. (page 19)
6
Press the EXEC button to save the color
configuration.
7
Press the MENU button to return to the ready screen.
To load a color configuration
1
Press the MENU button.
Item Description Settings
LAMP Sets the operation
of the output tray
indicator.
MODE 1 Ready (OFF) t
Receiving image
(flashing) t
Printing (OFF) t
Ejecting (ON) t
Ejecting finished
(OFF)
MODE 2 Always ON
MODE 3 Always OFF
BEEP Turns the button
operation beep
and the printing
error alarm on or
off.
ON Printer sounds are
turned on.
OFF Printer sounds are
turned off.
CLEAN
DISP
Sets the cleaning
message display
function.
ON Displays a message on
the LCD display when
head cleaning is
recommended.
OFF Does not display a
message even when
head cleaning is
recommended.
PARAM PRT Prints a list of the
current printer
settings.
Press the EXEC button to
execute printing (page 19).
FLY PRT Sets the timing at
which to begin
printing
operations.
ON Paper begins feeding at
the same time image
data is received from the
computer.
OFF Paper begins feeding
after all image data is
received from the
computer.
CLEAN ROL Executes manual
paper feed roller
cleaning.
Press the EXEC button to
execute manual cleaning
(page 22).
3, 4, 5
2, 6
1

19
Printing
Operation
2
Press <or ,to select [COLOR].
3
Press Mor mto select [LOAD COL].
4
Press <or ,to select a configuration number.
5
Press the MENU button to return to the ready screen.
Printing a List of Printer Settings
Follow the steps below to print a list of the current printer
settings.
1
Press the MENU button.
2
Press <or ,to select [SETUP].
3
Press Mor mto select [PARAM PRINT].
4
Press ,, and then press the EXEC button.
A list of the current printer settings is printed.
Printing
Before printing
• Is the printer connected to a computer? (page 10)
• Have the ink ribbon and paper been properly loaded?
(page 12)
• Has the printer driver been installed? (page 11)
1
Press the !POWER switch to turn on the printer.
The backlight on the LCD display lights green, and
the PRINT and ALARM indicators and tray light light
simultaneously before turning off.
2
Turn the computer on.
3
Using the computer, initiate a printing operation.
The PRINT indicator flashes while the image data is
being received from the computer, and then remains
steadily lit while printing is in progress.
Notes
• Although the paper being printed may come into view
while printing is in progress, do not attempt to remove it
until printing is complete.
• Do not turn off the printer while printing is in progress.
Doing so may cause a paper jam.
• Do not open the ribbon door panel while printing is in
progress. If the panel is opened, printing stops, and when
the panel is closed again, the printer ejects the page that
was printing and returns to the ready state.
• Do not open the ribbon door panel if “WAIT” appears on
the LCD display. Internal printer processing is in
progress.
• Although the printer can be set for continuous printing,
if the printouts stack up and begin to bend, printing stops
and the ALARM indicator lights. When this happens,
remove the printouts from the output tray. The printing
operation automatically resumes and the remaining
images are printed.
Number Description
0 The printer driver color settings are
applied when printing.
1 or 2 The user-defined color adjustment settings
saved under each configuration number
are converted to internal printer settings
for printing.
1
ALARM indicator
STOP button
PRINT indicator

20 Printing
Operation
• Do not allow more than 10 printouts to accumulate.
Leaving too many printouts in the output tray could
cause a paper jam.
When printing is disabled
Printing is disabled when the ribbon door panel is open or
the ALARM indicator is lit.
For details, see “Explanation of Indicators” on page 26.
If the paper or ink ribbon runs out while printing
The printer terminates the printing operation. Once the
new paper and ink ribbon are loaded, the printing operation
automatically resumes and the remaining images are
printed.
Canceling continuous printing
Press the STOP button. The current item finishes printing,
and the printer enters the ready state once the printout is
ejected.
Storing printouts
• Avoid storing printouts in a location subject to high
temperatures, high humidity, or direct sunlight. Such
conditions could result in fading.
• Do not stick tape on a printout. Also, do not let printouts
come into contact with materials which contain
plasticizers, such as erasers or desk mats.
• Do not allow volatile organic solvents, such as alcohol,
to come into contact with printouts.
Other manuals for UPD25MD
1
Table of contents
Other Sony Printer manuals

Sony
Sony SNAPLAB UP-CR20L Instruction manual

Sony
Sony UP55MD User manual

Sony
Sony UPX-C300 User manual

Sony
Sony FilmStation UP-DF750 User manual

Sony
Sony UP-D897 User manual

Sony
Sony UP-51MDP User manual

Sony
Sony UP-20 User manual

Sony
Sony DPP-EX5 User manual

Sony
Sony PictureStation DPP-FP30 Installation instructions manual

Sony
Sony UP-DR80MD User manual
Popular Printer manuals by other brands

Canon
Canon PIXMA MX340 Series Simplified service manual

Boca Systems
Boca Systems Micro Plus user manual

Rimage
Rimage Desktop 360i Replacement guide

Monarch
Monarch Paxar 9450 RASCAL Operator's handbook

Star Micronics
Star Micronics futurePRNT TSP100 Hardware manual

Panasonic
Panasonic KX-P3626 operating instructions