Tab
e
of
Contents
Getting
Started
Unpacking
Choosing
a
good
location
....
Inserting
the
batteries
into
the
remote
commander
Connections
Connecting
to
your
system
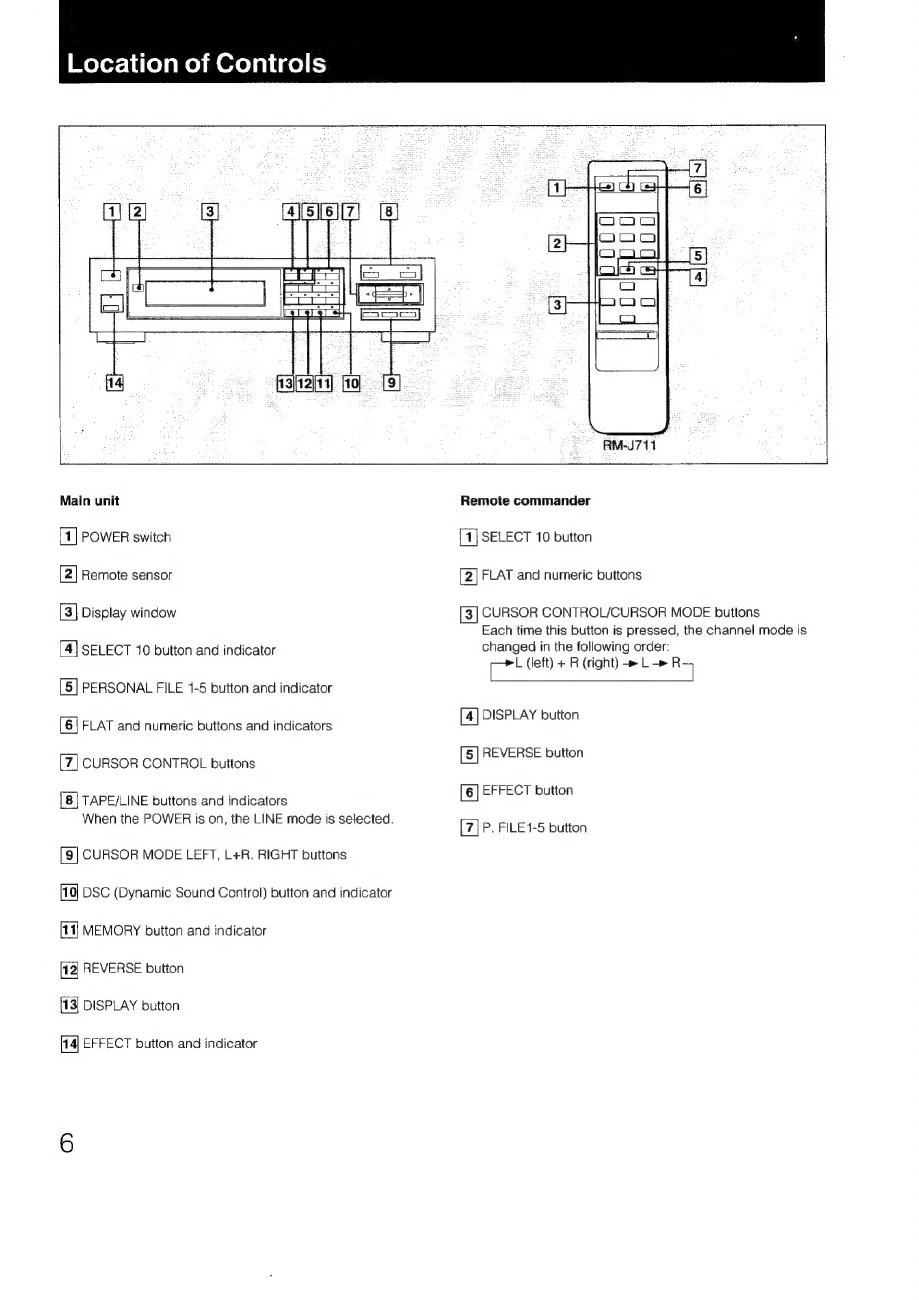
Location
of
controls
ArRRWWw
Using
Your
Equalizer
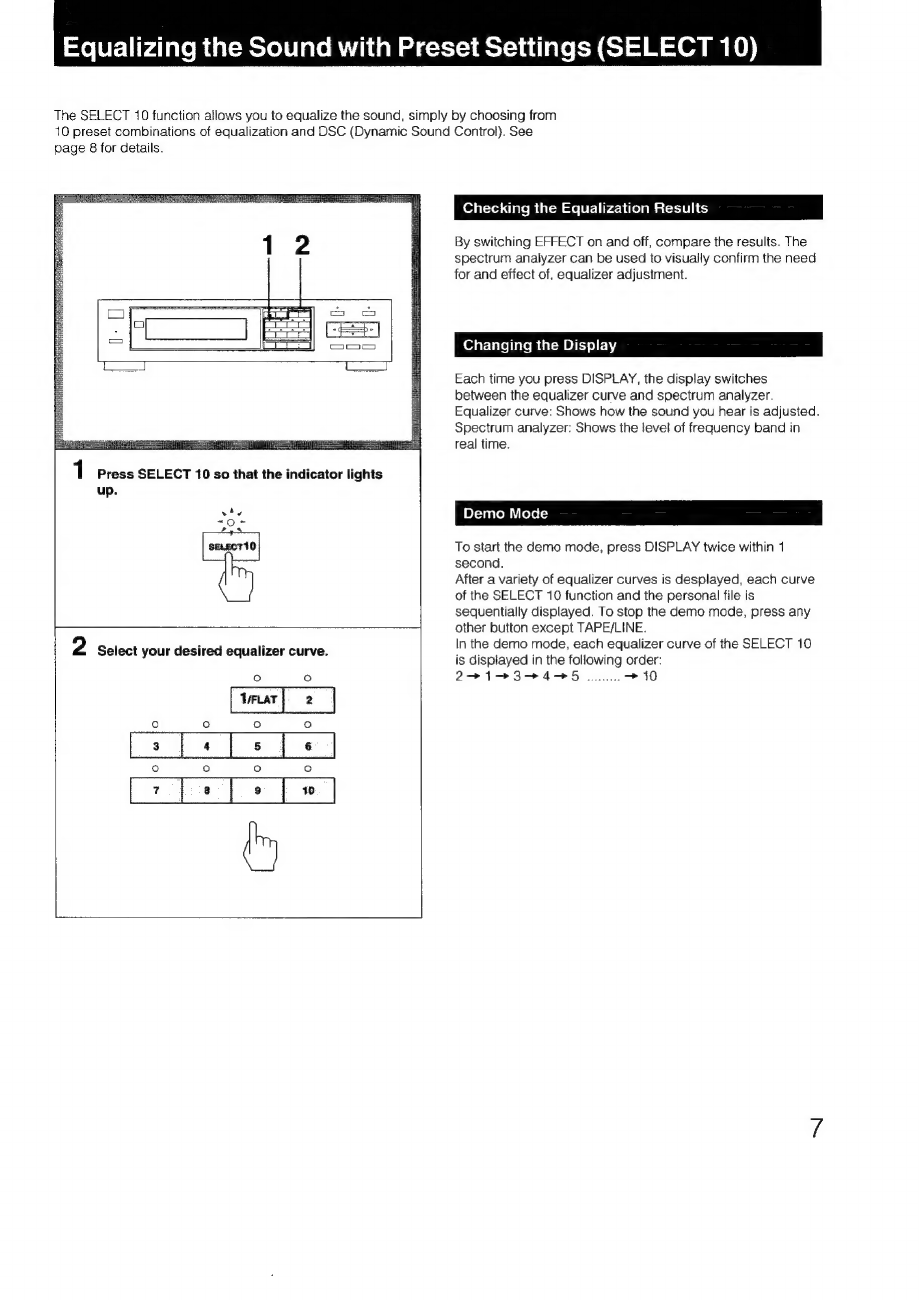
Equalizing
the
sound
with
preset
settings
Sages
10)
.....
Checking
the
equalization
results
Changing
the
display
..
Demo
mode
..
SELECT
10
settings
as
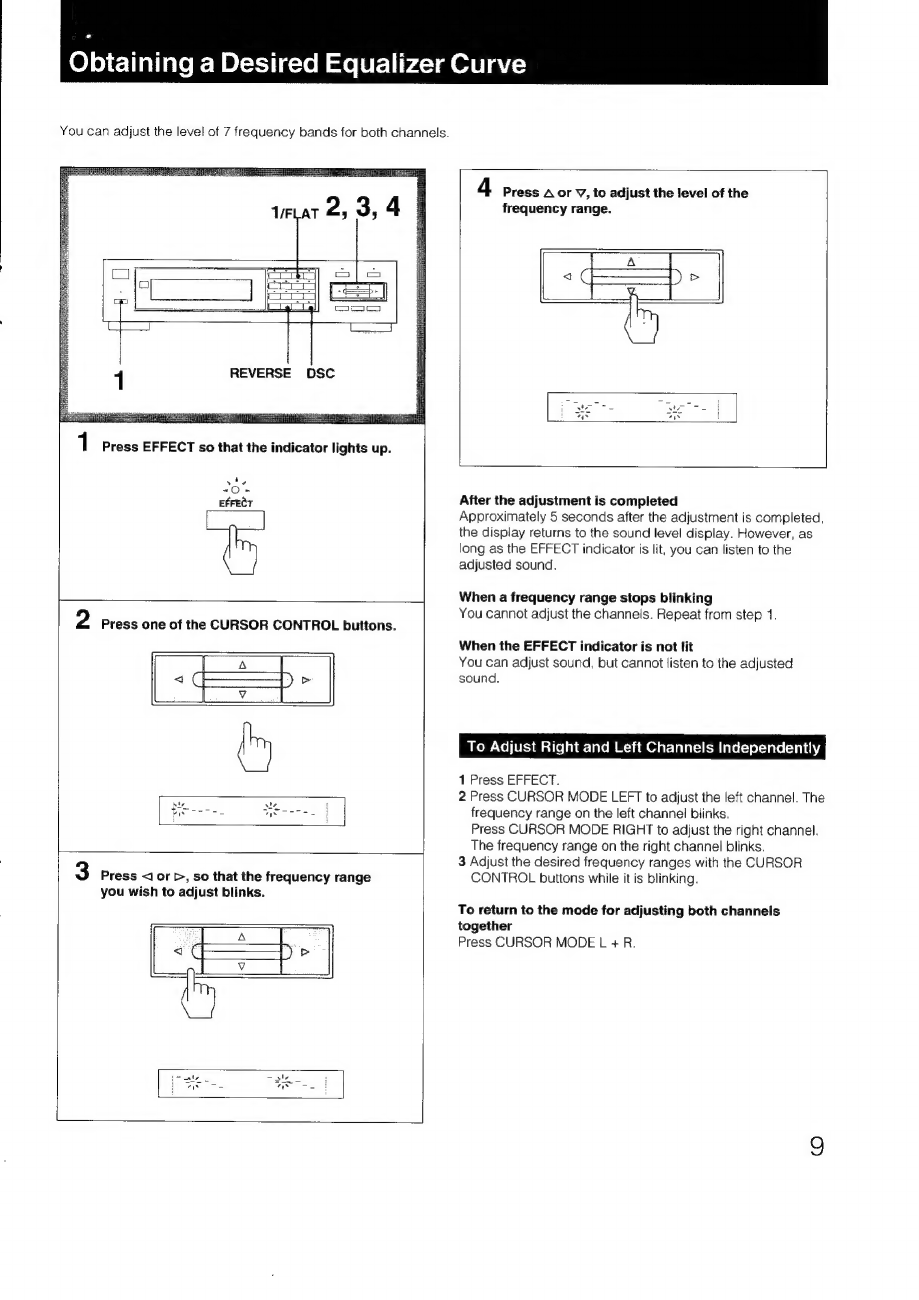
Obtaining
a
desired
equalizer
curve
......
To
adjust
right
and
left
channels
independently
Characteristics
of
each
frequency
.......
To
flatten
an
equalizer
curve
TO
reverse
AN
CQUAIIZEL
CUIVE
ooo
icccceecteeseeettettteeeees
10
To
have
an
equalizer
curve
re-adjusted
automatically
(DSC:
Dynamic
Sound
Control)
........0cccccsccceeseseseeseees
10
Storing
your
individual
settings
(PERSONAL
FILE)
To
recall
a
stored
setting
on Nn
er
To
clear
the
stored
SettingS
..........cccccccessceccssseeessesteeens
10
General
Specifications
Troubleshooting
lateled-iitle
We:
M
Crelelem
Meter]
{cel
1)
To
prevent
internal
heat
build-up
in
the
unit,
Place
the
unit
in
a
location
with
adequate
air
circulation.
Do
not
install
the
unit:
in
a
place
subject
to
direct
sunlight,
excessive
dust,
mechanical
vibration
or
shock.
This
way.
Not
this
way.
vi
ee
iS
Do
not
throw
away
the
carton
and
packing
material!
It
will
be
an
ideal
container
when
transporting
the
unit
for
repair
work,
etc.
Inserting
the
Batteries
into
the
Remote
Commander
2
Insert
two
size-AA
(R6)
batteries
with
correct
polarity.
1
Open
the
cover.
RES
Battery
life
About
half
a
year
of
normal
operation
can
be
expected
when
using
the
Sony
SUM-3
(NS)
batteries.
When
the
batteries
are
exhausted,
the
commander
can
no
longer
operate
the
unit.
Replace
both
batteries
with
new
ones.
To
avoid
battery
leakage
When
the
commander
is
not
to
be
used
for
a
long
period
of
time,
remove
the
batteries
to
avoid
damage
caused
by
battery
leakage
and
corrosion.