MTX-5 MIDI Controller Owner’s Manual 3
1. INTRODUCTION
Thank you for purchasing the Musicom Lab MTX-5 MIDI Controller.
The MTX-5 MIDI Controller is the ultimate floor-based MIDI foot controller that is compact and easy to use.
The MTX-5 MIDI Controller has a powerful MIDI function, so it can also be used with rack-based rig.
1.1 Main Features
ˍG Create up to 870 presets (290 banks x 3 presets) and 1 global preset.
ˍG Create up to 870 songs.
ˍG Organize the 870 Songs into 64 sets of 56 songs.
ˍG Switches can be assigned to the user's preference.
Two expression pedals or four
ˍG foot switches can be connected to the XPDL jack.
Three MIDI OUT connectors. (one standard MIDI connector and two 1/8 inch phone connectors)
ˍG
ˍG Transmits 16 MIDI (PC, CC, Note, etc) messages, when a preset is changed.
Transmits 12 MIDI (PC, CC, Note, etc) messages when the switch assigned to page is pressed.
T
ˍG ransmits MIDI Time Clock. BPM can be stored in each bank preset and song preset.
80 MIDI System Exclusive slots.
ˍG
USB
ˍG Connection to a PC or MAC.
ˍG Easily copy presets, songs, sets and switches.
Graphic
ˍG LCD display that can display preset/song titles and other status.
1.2 Specifications
LCD display ................................................
ˍG
LED ................................................................
ˍG
Current Draw ...............................................
ˍG
Dimensions ..................................................
ˍG
Weight ..........................................................
ˍG
128 x 64 Dot Matrix (White on Black)
3 color ( Red / Blue / Purple )
100 mA (DC9V, Phantom or USB)
160 mm(W) x 93 mm(D) x 63 mm(H)
6.3 inches(W) x 3.7 inches(D) x 2.5 inches(H)
550 g / 1.2 lb
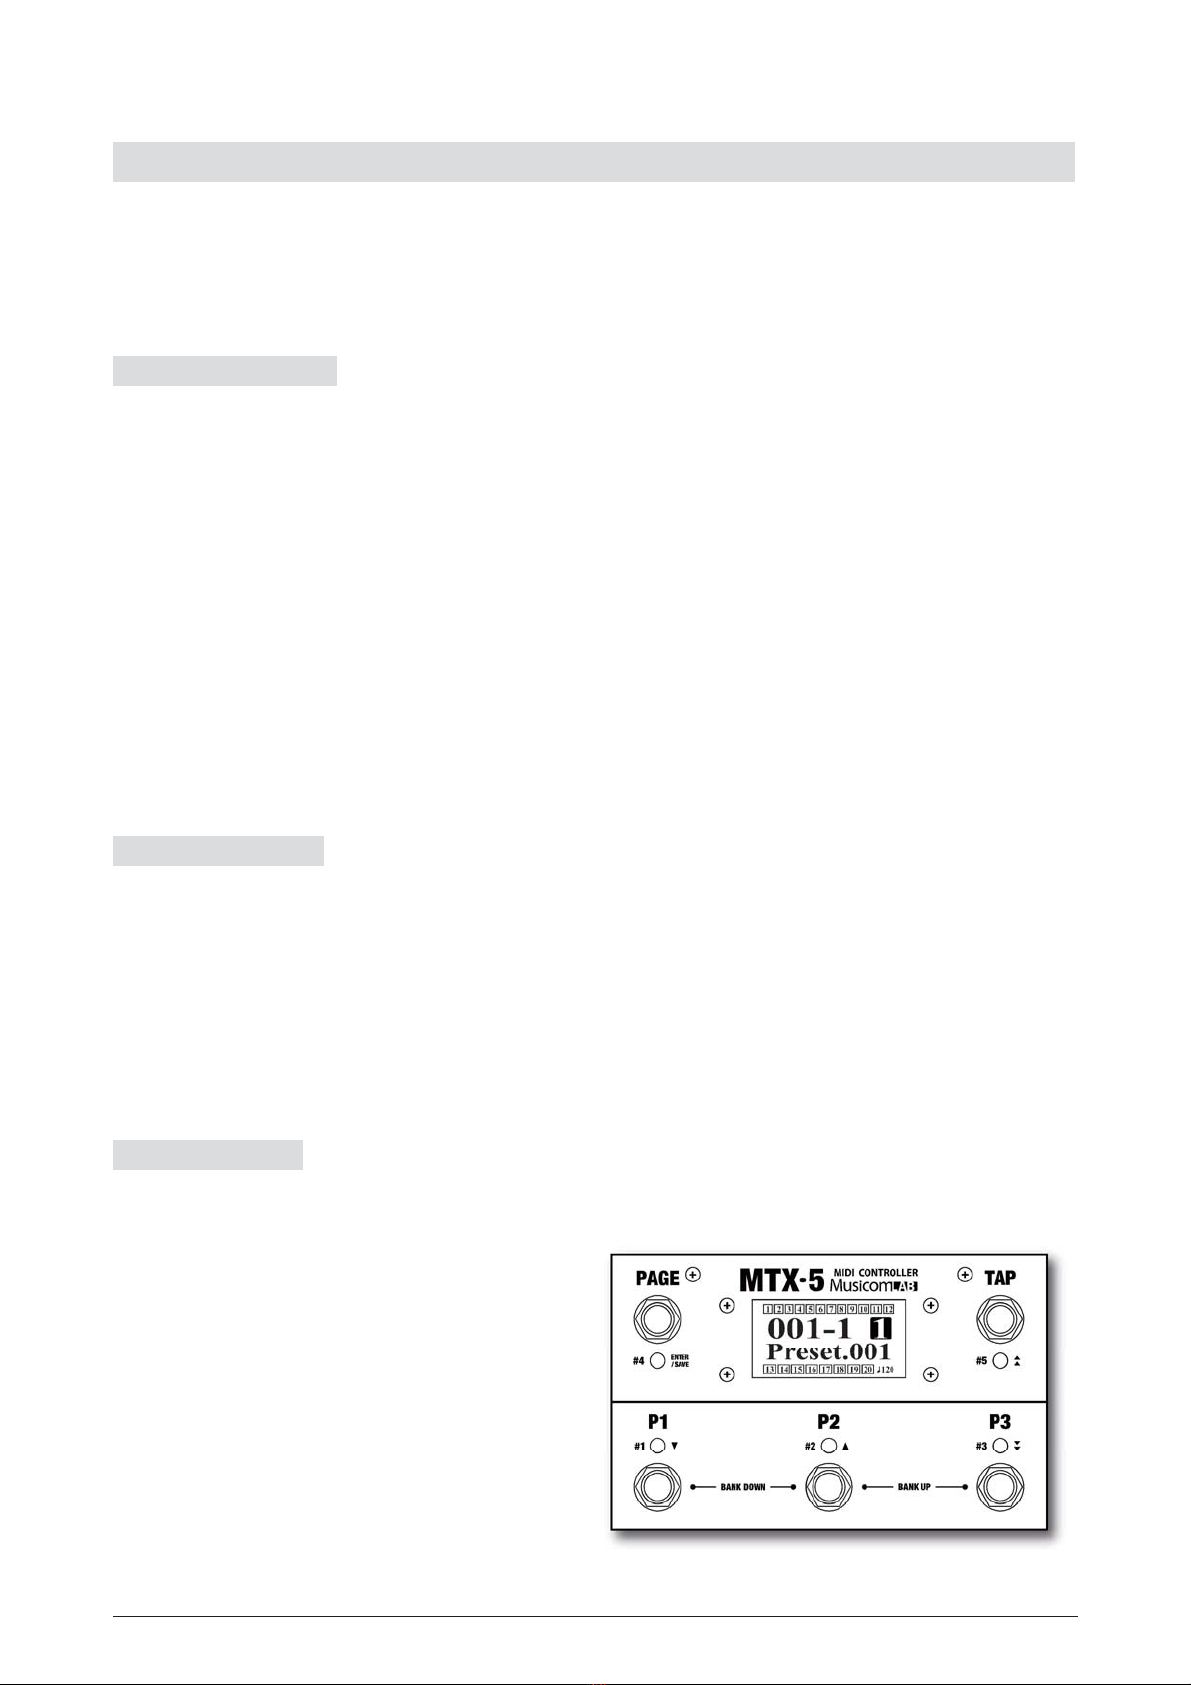
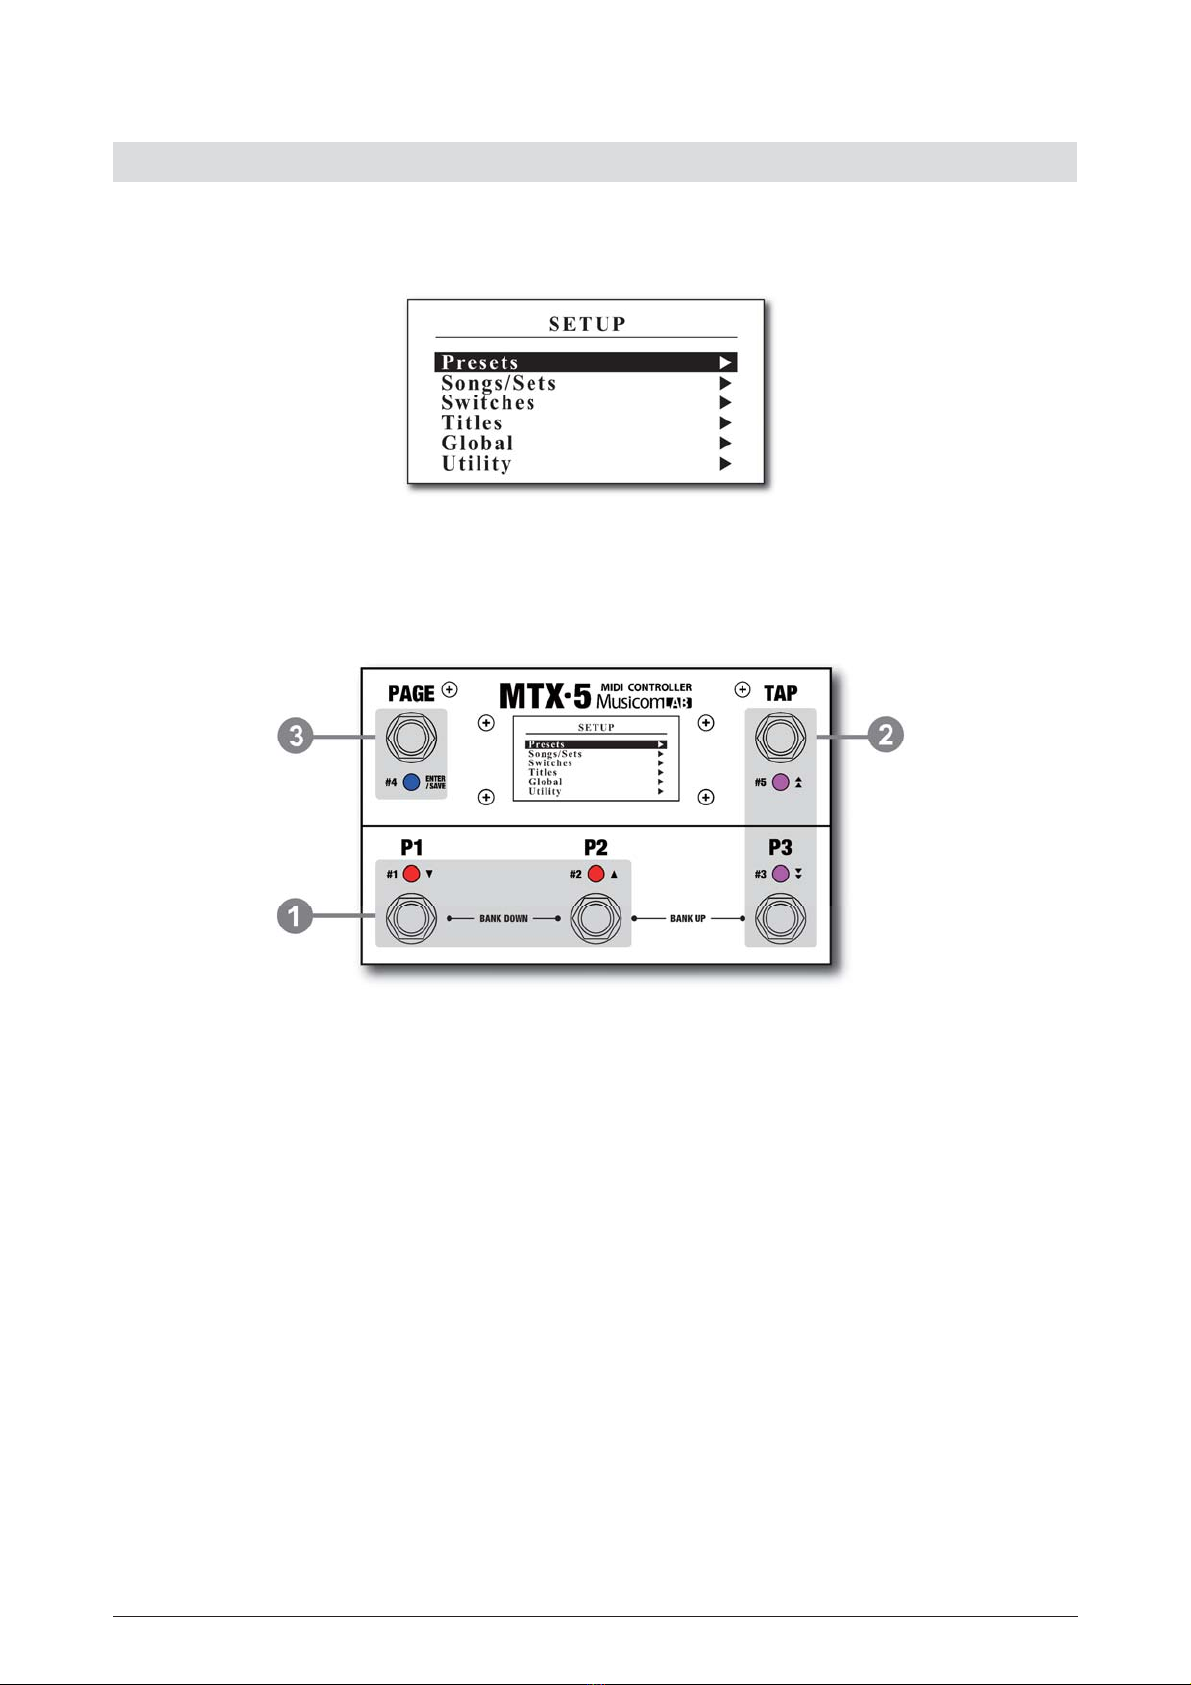
1.3 Front Panel
P1 through P3
On the page 1, these switches are used to recall one of
the three presets. When on other pages, pressing these
switches turns on/off individual IA switches.
TAP
The TAP switch can be synchronized with MIDI Time
Clock. Tapping the TAP switch will change the MIDI Time
Clock. At this time, the Global BPM will be changed to
the tempo of your taps. The Global BPM changed by
tapping the TAP switch is applied to the current bank or
song. In other words, the Preset BPM stored in the
current bank or song is ignored. When the MTX-5 powers
up, the Global BPM is 120.