3
Table of Contents
Listening to the radio
–– Preset Tuning ........................... 24
Tape
Loading a tape ..................................... 25
Playing a tape ...................................... 25
Recording to a tape
–– CD Synchro Recording/
High Speed Dubbing/Recording
Manually/Program Edit ................. 26
Timer-recording radio programs ......... 28
Sound Adjustment
Adjusting the sound ............................. 29
Selecting the audio emphasis effect .... 29
Selecting the surround effect ............... 29
Making a personal audio emphasis file
–– Personal File............................. 30
Enjoying Dolby Pro Logic Surround
sound ............................................. 30
Other features
Changing the spectrum analyzer
display ........................................... 31
Singing along: Karaoke ....................... 31
Enhancing video game sound
— Game Sync ............................... 32
Falling asleep to music
— Sleep Timer .............................. 32
Waking up to music
— Daily Timer .............................. 33
Hooking up optional
components
Connecting an MD deck/VCR/
camcorder/video game .................. 34
Connecting a turntable/subwoofer.......34
Connecting a DVD player ................... 35
Additional Information
Precautions .......................................... 36
Troubleshooting................................... 37
Specifications ...................................... 39
Glossary ............................................... 42
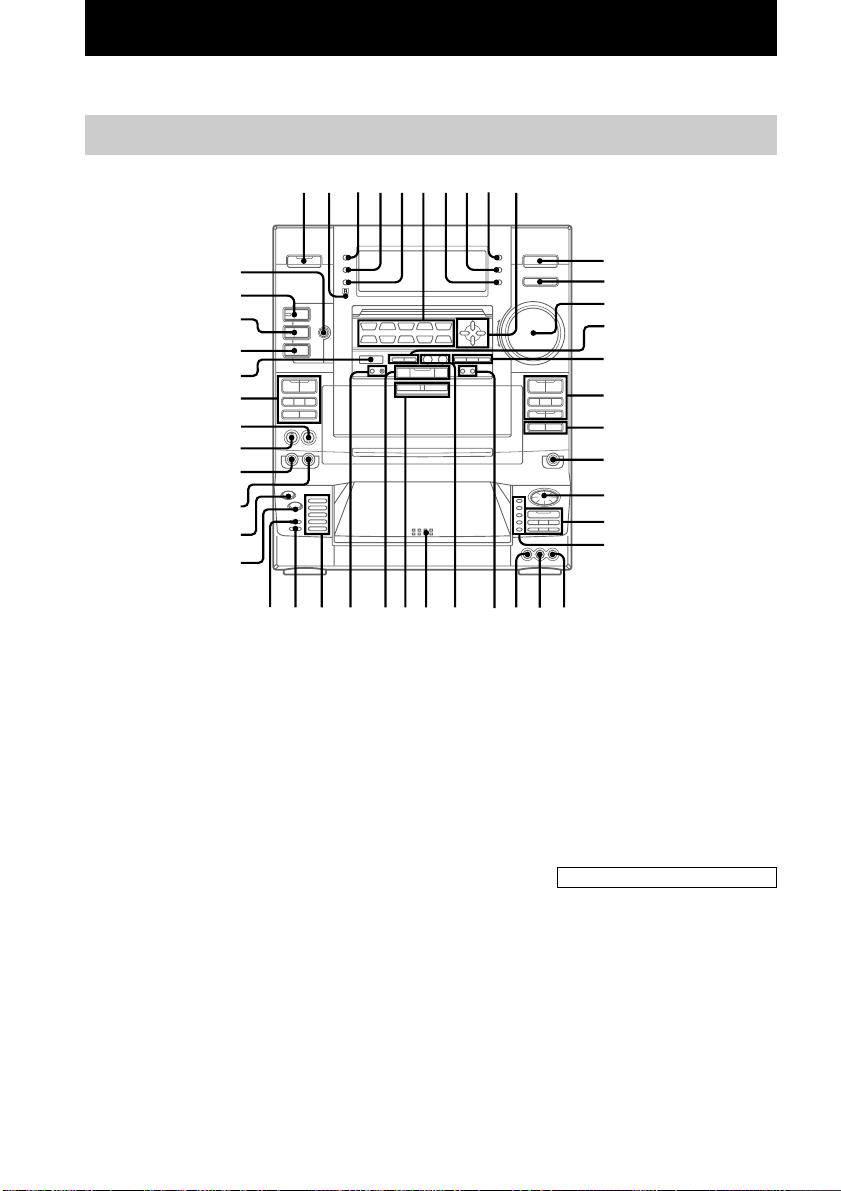
Parts Identification
Main unit ............................................... 4
Remote control ...................................... 5
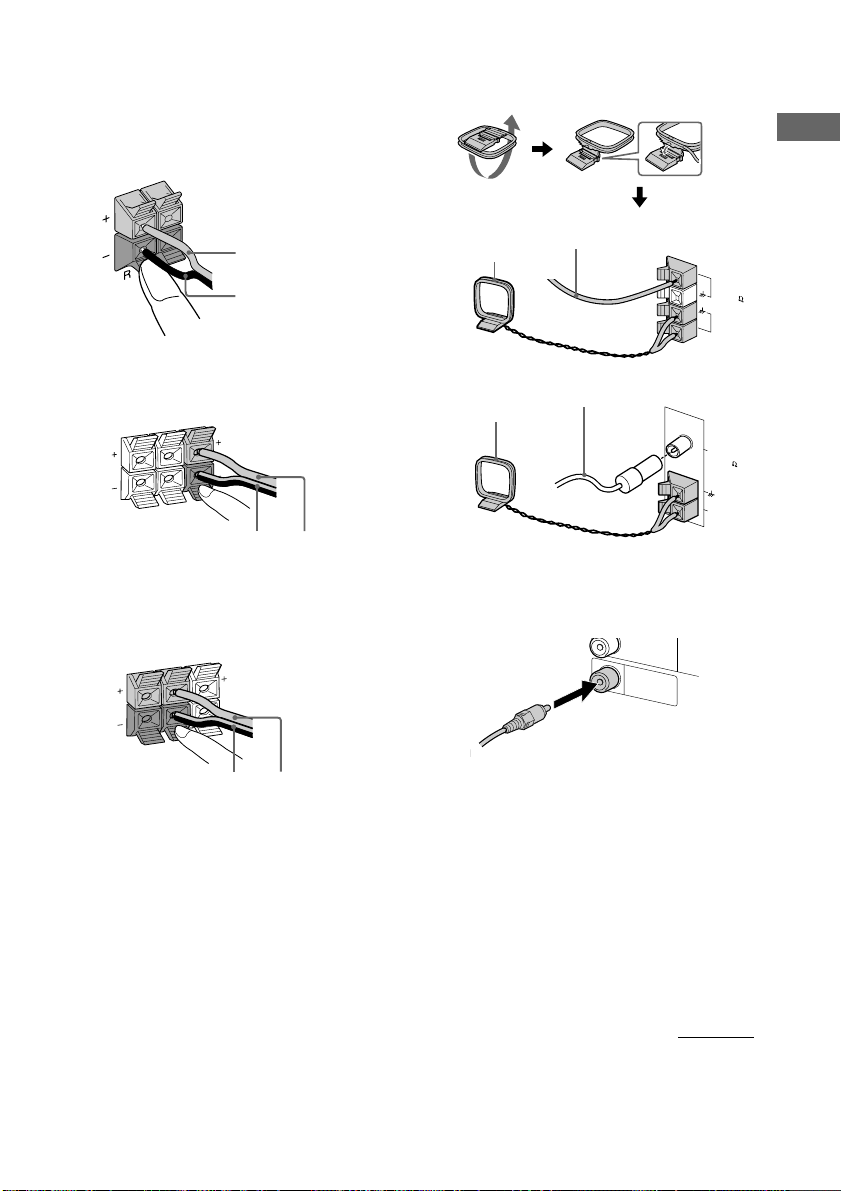
Getting Started
Hooking up the system .......................... 6
Inserting two size AA (R6) batteries into
the remote ........................................ 9
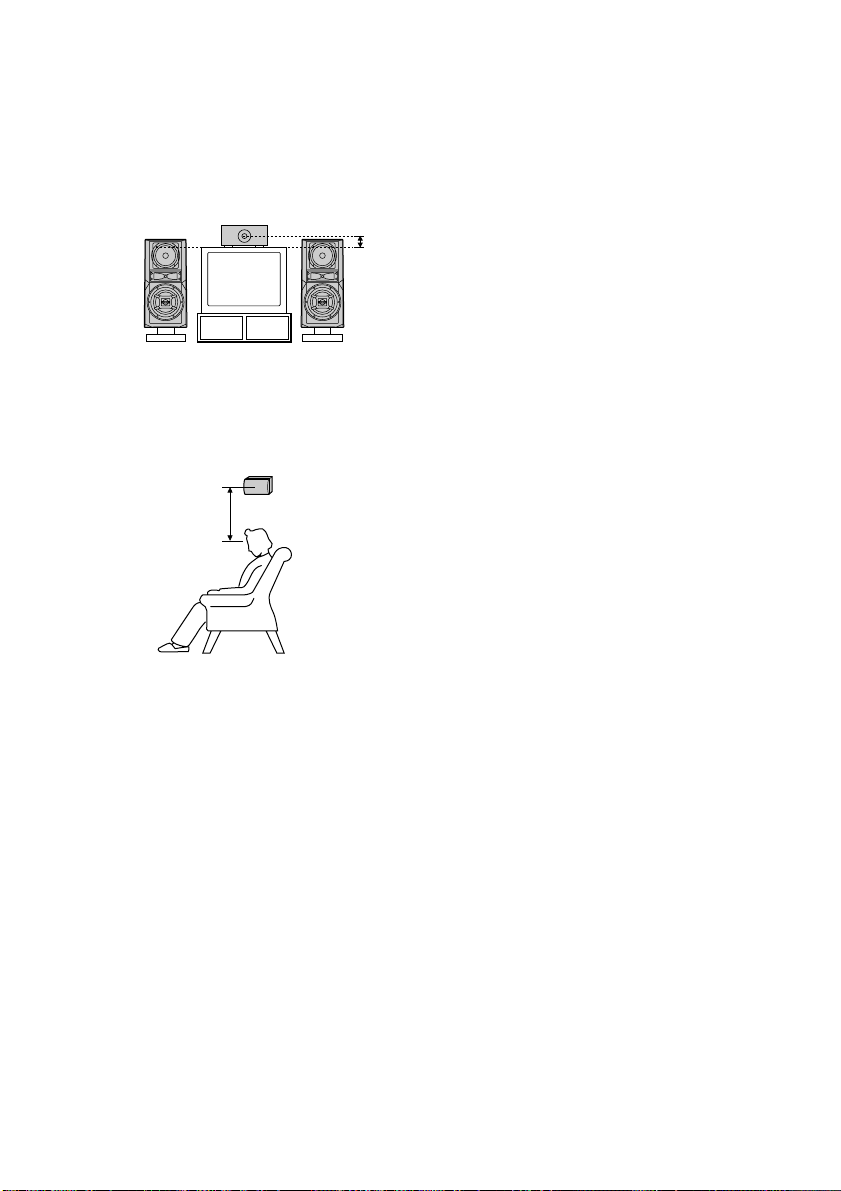
Setting up the speakers for Dolby Pro
Logic ............................................... 9
Setting the time.................................... 11
Saving the power in standby mode...... 11
VIDEO CD/CD
Loading a disc ..................................... 12
Playing a VIDEO CD
–– Normal Play/Shuffle Play/
Repeat Play.................................... 12
Playing a VIDEO CD with the PBC
functions (Ver.2.0)
–– PBC Play .................................. 14
Playing a CD
–– Normal Play/Shuffle Play/
Repeat Play.................................... 15
Playing VIDEO CD/CDs without
interruption
–– Non-Stop Play .......................... 16
Programming the VIDEO CD/CD tracks
–– Program Play ............................ 16
DJ Effects ............................................ 17
Using the VIDEO CD/CD display ......17
Using the on-screen display ................ 18
Locating a specific part of a disc
–– Scene Search ............................ 19
–– Time Search ............................. 20
–– Disc Digest ...............................20
–– Track Digest .............................21
Resuming playback from the point you
stopped a VIDEO CD
–– Resume Play............................. 21
Setting the sharpness
–– Active Picture........................... 22
Tuner
Presetting radio stations....................... 23