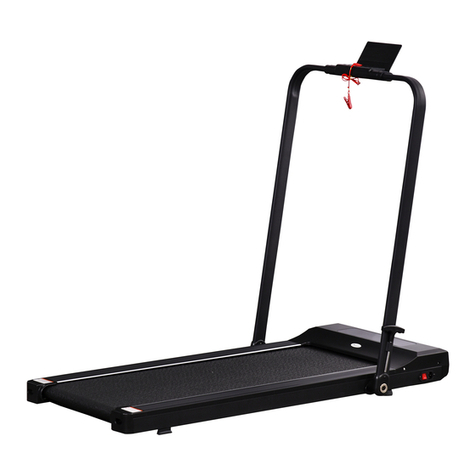
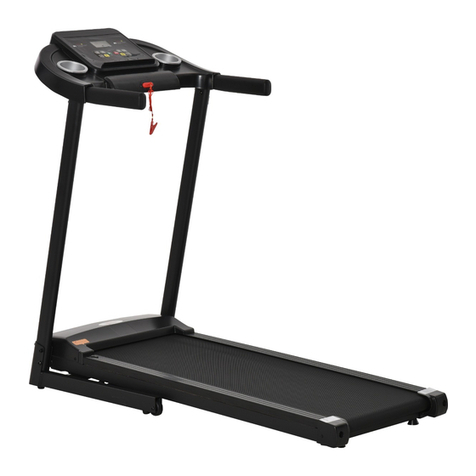
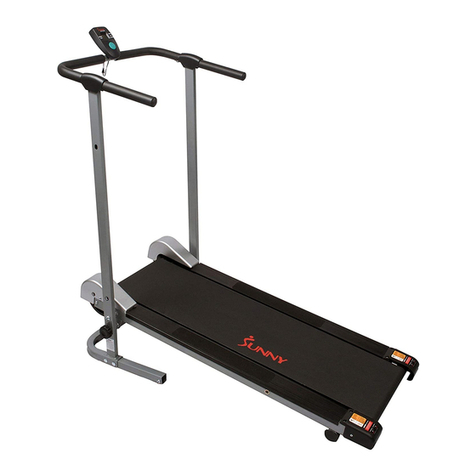
Soozier A90-211V80 User manual

ASSEMBLY INSTRUCTION
A90-211V80
INadd034V02_US
IMPORTANT, RETAIN FOR FUTURE REFERENCE: READ CAREFULLY

2
1、Catalogue
Number Content
1Catalogue
2Safety instructions
3Packing specifications
4Assembly instructions
5Electric control instructions
6Maintenance instructions
7Failures and trouble shooting
8
9
Exercise guidelines
Warm exercise
Thanks choose home use electric treadmill. Our products will improve your
health, the more familiar with your treadmill, the more easy and comfortable for
using. So please read this manual carefully before use the new treadmill.
To guarantee the maximum quality of products, all parts of this treadmill use
high quality material, and passed strict inspection and testing. Refer to this
manual, will guide you assemble, use and maintain of this treadmill correctly.
Thanks for using!

3
2、Safety Instructions
A. We considered many safety problems when design and manufacture this treadmill, to
ensure your safety, please read all contents of this manual carefully before use.We do not
bear the consequences of any abnormal operation.
RISK
B. Do not use the heart rate device together with other wireless heart rate devices, or it
can cause electrical interference.
WARNING
Please follow the instructions below to avoid any hurt to you or others.
1. To avoid any accidents or danger, please make sure this treadmill is fully grounded before using.
2. While running, please clamp the safety lock(red) to an appropriate position of your clothes, If any
unsuspected situation happened, it’ll dropped off immediately to stop the machine
3. a. Please refer to your health care doctor’s opinion before exercising.
b. Please wear comfortable sportswear when exercising, don’t wear shoes with soft sole,or shoe
shavings will be involved into motor and control system, and cause operating malfunction
c. Keep the room clean and tidy, avoid dirts being absorbed into the treadmill, which will cause
operating malfunction.
d、User weight should not exceed 100kg.
4. This product is for one person use only when it is running. To avoid any accidents, please do not let
children or pets play around to avoid accidents.
5. Minimum spacing requirements for placing the treadmill in the home, no less than 100cm respectively
for front and both sides, no less than 200cm for rear.
6. Please do not use this treadmill if power line broken.
7. If the treadmill is damaged or broken, please do not use and contact for warranty.
8. Please do not touch any moving parts when the treadmill is running, never press or stuff any objects
into the treadmill.
9. This machine is suitable for indoor use, please do not use outdoors or in the gym.
10. Place the treadmill on clean and smooth floor, keep it in good ventilation condition, ensure the unit
ventilated. Make sure there are no sharp objects nearby. Do not use it near water or fire sources.
11. Please use the handrail when getting on or getting off from the machine. Do not get off from the
treadmill when the walking machine is not stopped completely.If any accident happens,, you must pull off
the safety lock,then the treadmill will stop immediately.
12. Do not use this machine when you are using oxygen equipment or using spray near it.
13. To make sure the treadmill running properly, please do not install any accessories which are not
supplied by the original factory.
14. Must keep all parts of the treadmill installed firmly.
15. Please turn off and unplug the power after using the treadmill.When not using the treadmill,
please keep the security lock safely to prevent any third parties use it.

4
3、Packing Specification
Number Component
1FRAME
2MANUAL
3SCREEN
4COLUMN SIDE COVE
5SCREW PACK Fourth page icon
Screw Pack
说明书

5
4、Assembly Instructions
1:Lift the main frame out of the carton and open the cable tie that bundles the frame.
2:Expand the frame:please pull out the pull pin on the column of N, and hold the frame on the ground
with the other hand,secure it to the sheet metal part of the base with D#M8*45 screws..
3:Assembly of the electronic meter stand:first fold the electronic meter stand in the direction of the
arrow, and then fix the electronic meter stand on the column with F#M8*15 screws (2 pieces) and G#M8
pads (2 pieces).
N
D
D
F
G

6
4: A.First connect the signal lines of the electronic meter, and then put the panel on the electronic meter
as indicated by the direction of the arrow, and then fix it with E#M5*40 screws (2 pieces).
B.The red part indicated by the arrow is the anti-warping device.In use, please adjust the device
according to your own weight to prevent the base from being upturned.
5:Fold the product:When you need to carry or use this product for a long time,fold
it up as shown below:
Hold the back end of the running platform and slowly raise the running platform in the direction indicated
by the cutting head until the running platform is substantially parallel with the column. Pull the knob
outward with the other hand to ensure that the knob iron shaft is inserted into the side of the inside
running platform folded hole.
L
E
W
Y

7
5、Electric Control Instructions
Boot start: Normal start after 3 seconds countdown.
The number of programs is P1~P12 automatic programs.
Safety lock function
Unplugging the safety lock immediately shows that the "SAFE" treadmill is quickly stopped, when the
safety lock is placed, the electronic watch is fully displayed for 2 seconds, and the data is all cleared.
Key Function
Start button, stop button:
“START” is the start button. When the treadmill is stopped, press the start button, the speed displays
“1.0”, and the treadmill starts.
“STOP” is the stop button. When the treadmill is running, press the stop button, all data is cleared, the
treadmill stops .
Program key:
"PROGAM" is the program key. In the standby state, press this button to cycle through the manual
mode to the automatic program P1 – P12; the manual mode is the system default operation mode, the
default speed of the manual mode is 1.0km/h, and the maximum running speed is 12.0km/h.
Mode key:
“MODE” is the mode button. In the standby mode, press this button to cycle through three different
countdown modes of operation from time, distance and calories. when selecting various modes, the
speed increase/decrease key can be used to set the relevant countdown value. When you are done,
press the “START” button to start the treadmill.
Speed button:
“SPEED+” and “SPEED -” are speed addition and subtraction keys: they can be used to adjust
the speed after the treadmill is started, stepping 0.1Km/time, “SPEED+” and “SPEED -” can be
used to parameterize the treadmill. To adjust the set value.
Indication Function
Speed display:
Displays the speed value of the current run.
Time display:
Shows the running time in manual mode or the running time countdown in mode and program.
Distance display:
Displays the distance total in manual and program mode or the inverse of the mode running distance.

8
Calorie display:
Shows the calorie accumulation during exercise in manual and program mode or the calorie count in
mode run.
The range of data displayed by each window:
TIME: 0:00 – 99:59 (MIN)
DISTANCE: 0.00 – 99 (KM)
CALORIES: 0.0 – 990 (KC)
SPEED: 1-12KM/H
Automatic program
The default running time is 10 minutes. After the program is selected, the running time is set. The
program segment of each program is divided into 10 segments, and the running time of each program
block is evenly distributed. The motor stops the meter clear after the running time is completed. The
following is a motion chart of 12 programs.
Time
Phase
Time set / 10 = Running time each stage
12345678910
P1 SPEED 3365544443
P2 SPEED 3344555664
P3 SPEED 2468786232
P4 SPEED 3356765433
P5 SPEED 3666877554
P6 SPEED 2654875332
P7 SPEED 2997765322
P8 SPEED 2444568862
P9 SPEED 2455656332
P10 SPEED 2575865243
P11 SPEED 25678910 532
P12 SPEED 2356869653

9
Parameter setting in 3 modes
The countdown time setting is initially 30:00 minutes, the setting range is 5:00---90:00 minutes, and the
step is 1:00.
The calorie setting of the calorie count is: 100 kcal, the setting range is 20---990 kcal, step 10.
The initial distance of the countdown distance is 5.0 km, the setting range is 0.5---99.0 km, and the step
is 0.1
The cycle switching sequence is: manual, time, distance, calories.
Other
When a countdown parameter is run, the display shows END, and a 0.5 second alarm every 2 seconds
until the treadmill stops, stops the alarm, and then returns to the manual mode state. Countdown time,
countdown calorie, and countdown distance can only be set to one of them. Run the last setting, the set
parameters are counted down, and the other displays positive count.
6、Maintenance Instructions
Proper maintenance keeps your treadmill in top condition; incorrect maintenance can hurt or shorten the
life of your treadmill.
WARNING: Always unplug the treadmill's power cord before cleaning or maintaining the product!
1. Regularly remove dust to keep the parts clean,
2. After using the treadmill, wipe the instrument and other parts of the sweat and debris with a clean towel
or cloth. Be careful not to splash water on the electrical components and under the running belt.
3. Place your treadmill in a clean, dry environment, make sure the power is off, and unplug it.
4. In order to facilitate the movement, the treadmill is equipped with wheels installed. Please confirm that
the power is disconnected and the body is folded before moving.
5. Always check and lock all parts of the treadmill; parts of the damaged ring must be replaced
immediately.
6. In order to better maintain and extend the life of the treadmill, it is recommended that you rest the
treadmill for 10 minutes after 30 minutes of continuous use.
7. The running belt has been adjusted at the factory, but after use, the running belt will be stretched, will
deviate from the center position and cause the running belt friction strip and the rear cover to be
damaged. It is normal for the running belt to be stretched during use. After using it for a period of time, if
you are running with a treadmill and it is slippery or not smooth, you can adjust the tightness of the
running belt to improve.

10
A. Running belt tightening adjustment If the running belt is too loose, please insert the supplied hex
wrench into the adjusting hole of the left footstep of the treadmill, turn it 1/4 turn clockwise, and then
adjust the right foot to rotate clockwise. 1/4 laps, note that the left and right must be adjusted
synchronously, so that the running belt can be tightened and the running belt will not deviate from the
center point. If the running belt is too tight, the left and right synchronization will be adjusted
counterclockwise.
Note: The running belt cannot be adjusted too tightly. This will break the running belt, increase the
pressure of the front/rear drum, cause damage to the roller bearing, etc., produce abnormal noise or
other problems, and only need to adjust to the running belt without slipping.
B. Running belt alignment adjustment
When you use the treadmill, the pressure on the two belts is not the same when running, and the
pressure on the running belt is unbalanced, causing the running belt to deviate from the center. This
deviation is normal and it automatically returns to the center when no one is running on the running belt.
If you don't get back to the center, you need to run back to the center.
Run the treadmill at no load, adjust the speed to the sixth gear, and observe the distance from the
running belt to the left and right side bars:
●If it is to the left, use a hex wrench to turn the left screw 1/4 turn clockwise;
●If it is biased to the right, use a hex wrench to turn the right screw 1/4 turn clockwise;
●If the running belt is still not in the middle, repeat the above action until it is adjusted to the middle.
After adjusting the running belt to the middle, adjust the speed to the sixth gear, and observe the
deviation of the running belt and the smooth running condition. If there is any deviation, repeat the
adjustment step.
Caveat! Do not overtighten the rollers! This will result in permanent damage to the bearing!
8. lubricating oil
The treadmill is lubricated at the factory, but the treadmill's lubricity is often checked to help keep the
treadmill in optimal use. The treadmill must be lubricated after one year of use or 100 hours of operation.
After 30 hours or 30 days of use, when the treadmill is at rest, pull up the running belt from the side
and reach the surface of the running platform as far as possible. If you feel the lubricant, you do not need
to add lubricating oil; if you touch the surface There is a strong feeling of dryness, please follow the
instructions below to refuel. (Please use non-oil-based lubricants)
How to add lubricant?
please operate as shown below, open the sidebar left.For the fueling decorative cover on the front
side, use a pair of scissors or a utility knife to cut the oil bottle according to the size of the figure, and then
add the oil according to the bottom icon. When filling, please pay attention to insert the thin rod at the
front end of the oil bottle into the fuel filler pipe on the platform. Go in.

11
7、Failures And Trouble Shooting
1.Electronic watch displays error message code and excludes
Default code Default code Default Resolution
Er1 The display board is not
connected
Received signal
1.1.Check if the communication line is loose,
detached or damaged;
1.2.Check or replace the electronic board;
1.3.Check or replace the controller.
Er3 Over pressure 2.1.Please check if the voltage on the power
supply line is at a normal value. :AC
200-240V;
2.2.Check or replace the controller.
2.3.Check or replace the motor.
Er4 Over current 3.1.Check whether overload;
3.2.Check if the mechanical running parts are
stuck;
3.3.Check whether the lack of a release agent,
and if the release agent is missing, the friction
between the running belt and the running
board will increase.;
3.4.Check whether the running board serious
wear and tear;
3.5.Check whether the running belt is worn
out;
3.6.Check whether the motor cable short
circuit;
3.7.Check or replace the controller;
3.8 Check or replace the motor.

12
Er5 overload 4.1.Check whether overload;
4.2.Check whether the mechanical running
parts are stuck;
4.3.Check whether the lack of a release agent,
and if the release agent is missing, the friction
between the running belt and the running
board will increase.;
4.4.Check whether the running board serious
wear and tear;
4.5.Check whether the running belt is worn
out;
4.6.Check whether the motor cable short
circuit;
4.7.Check or replace the controller;
4.8 Check or replace the motor.
Er6 Motor not connected 5.1.Check whether the motor line loose or fall
off;
5.2 .Check or replace the motor;
5.3.Check or replace the controller。
Er7 Indicates that the motherboard
has not received the signal
6.1. Check if the communication cable is
loose, detached or damaged;
6.2.Check or replace the electronic board;
6.3.Check or replace the controller.
Er13 IGBT short circuit 7.1Check or replace the controller
Er14 short circuit of the load 8.1 Check the controller output for foreign
matter causing a short circuit;
8.2 Check or replace the motor.

13
2.Common problems and troubleshooting methods
1. Some or all of the buttons are not working well
1.1 Uncover the upper case of the electronic watch and test whether the buttons are working;
1.2 Check or replace the electronic board;
1.3 Check the button can be worked after the power is turned back on .
1. The electronic watch has no display
Troubleshooting methods:
2.1 Check if the input voltage is within the allowable range:AC 100-120V / AC 200-240V;
2.2 Check if the switch on the electric running machine is turned on.;
2.3 Check if the fuse inside the power outlet is blown. If it is blown, replace it with a spare fuse;
2.4 Check the controller, if LED is lit;
2.5 Check each cable;
2.6 Check or replace the electronic board;
2.7 Check or replace control board.
2. Other problems and troubleshooting
a. The treadmill cannot start
Check if the power plug is plugged in, the power switch is turned on, and the safety switch is
removed.
b. Treadmill slips
Adjust the running belt tightly by referring to the instructions.
c. Running belt deviation
Refer to the instructions to adjust the running belt to center.
d . Running abnormal sound
Check if the machine screws are loose and the running belt needs to be lubricated.

14
8、Exercise Guidelines
●Consult your doctor before starting a exercise or training program. Please follow the doctor's advice
and instructions for training.
●Set your goals with your doctor before you can ensure that the plan is realistic and start the training
program with ease.
●You can add some aerobic exercise to your exercise plan, such as walking, jogging, swimming,
dancing or cycling. Always check the pulse. If you do not have an electronic heartbeat monitor, ask your
doctor how to measure the pulse by hand or neck. In addition, you must set the target heart rate based
on age and physical well-being.
●Drink plenty of water during exercise. You must replenish moisture lost from excessive exercise to
prevent dehydration. Avoid drinking plenty of ice water or beverages, drinking water or beverages at
room temperature.
9、Warm Exercise
Warm up and soothe exercise:
A successful exercise program must include warm-up, aerobic and soothing exercise. The number of
exercises will be at least two or three times a week, and one day after the exercise, you can increase the
number of exercises to four to five days after a few months. Warm-up is an important part of your fitness.
Warm up before each exercise. Warm warm-up can prepare your body for more intense exercise,
because warm-up can help muscles warm and stretch. Improves blood circulation, increases pulse, and
delivers more oxygen into the muscles. After the aerobic exercise, repeated warm-up exercises can also
reduce muscle soreness. We recommend the following warm-up and soothing exercises.

15
1.Touch the toes:
Slowly bend forward, relax your back and
shoulders when you bend down, try to stretch to
the maximum, then stop counting to 15.Repeat 3
times.
2.Bigfoot muscle stretching:
Sit on the floor and straighten your right leg. Bend
your left leg so that the left sole is close to the
inside of your right leg. Try to extend your body to
the right toe for 15 seconds. After relaxing, stretch
your left leg in the same way.Repeat 3 times for
each leg.
3.The calf and heel are stretched:
Hold the wall with both hands or stand with one
foot behind, keep the hind legs upright, and the
heels touch the ground and tilt toward the wall.
Hold for 10-15 seconds and then relax. Repeat 3
times for each leg.
4.Quadriceps stretching:
Grasp the balance with your left hand or the table,
then extend your right hand backwards, grab the
right heel and slowly pull it to your hips until you
feel tight in front of your thighs.Hold for 10-15
seconds and then relax. Repeat this action for
every leg.
5.The sartorius muscle (muscle inside
the thigh) stretches:
The soles of the feet are opposite, the knees are
seated outwards, and both hands grasp the feet
and pull toward the groin. Hold for 10-15 seconds
and then relax. Repeat 3 times

Table of contents
Other Soozier Treadmill manuals
Popular Treadmill manuals by other brands

STAR TRAC FITNESS
STAR TRAC FITNESS Pro Tread AC 7600 Service manual
ICON Health & Fitness
ICON Health & Fitness PFTL28820-INT.0 user manual
NordicTrack
NordicTrack T8.0 Treadmill manual
Philips
Philips ReCare 7.0 T user manual

strength master
strength master Lohas T-2 owner's manual
ICON Health & Fitness
ICON Health & Fitness NordicTrack Commercial 1750 user manual
