SoundWater Camano Manual

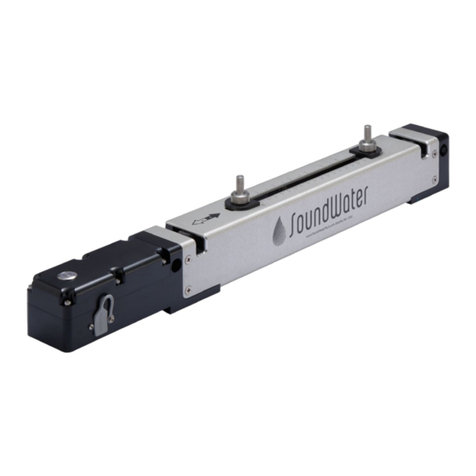
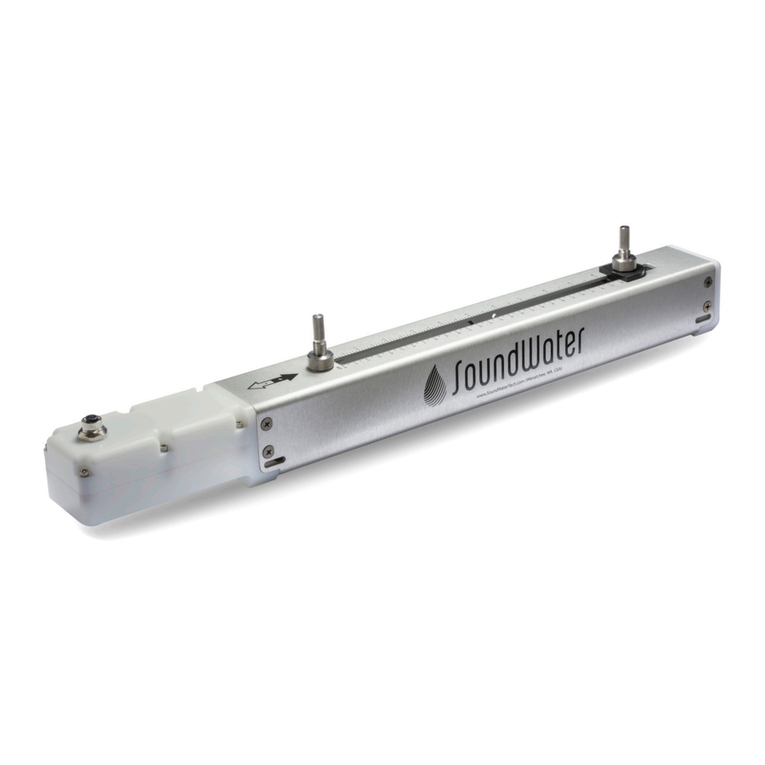
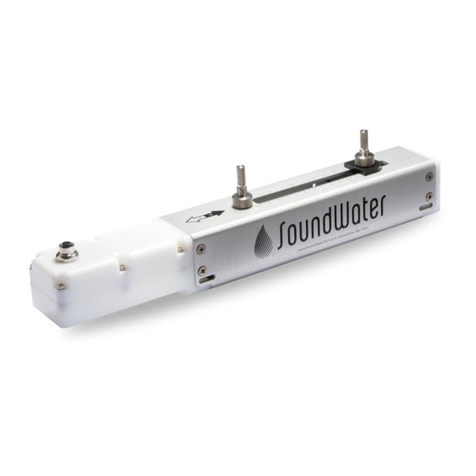
SoundWater CamanoTM
Fluid flow sensing, redefined
Transit Time Ultrasonic Flowmeter
Instruction Guide
For Camano

Camano Instructions
2SoundWater Technologies, LLC
Contents
General Information Page
General Information ........................................................................3
Meter Features ............................................................................3
Specifications..............................................................................4
Dimensions................................................................................5
Technology ................................................................................6
Getting Started
App Features ..............................................................................8
Connecting Power & Communications ........................................................9
Wiring Diagrams ..........................................................................10
App Installation ...........................................................................12
Parameter Set Up .........................................................................13
Flowmeter Installation
Straight Pipe Recommendations ............................................................14
Full Pipe Recommendations ................................................................15
Flowmeter Orientation .....................................................................15
Transducer Spacing .......................................................................16
Installing the Flowmeter ...................................................................17
Do’s and Don’ts ...........................................................................17
Operation
Collecting Your Data .......................................................................18
Data Logging . . . . . . . . . . . . . . . . . . . . . . . . . . . . . . . . . . . . . . . . . . . . . . . . . . . . . . . . . . . . . . . . . . . . . . . . . . . . . 19
Explanation of Recording Times............................................................ 20
Troubleshooting
Troubleshooting Guide .....................................................................21
This device complies with Part 15 of FCC Rules and Industry Canada license-exempt RSS standard(s). Operation is subject to the following two conditions: (1) this device may not cause
harmful interference, and (2) this device must accept any interference received, including interference that may cause undesired operation. Contains FCC ID: XDULE40-S2, Contains IC:
8456A-LE4S2. CAN ICES-1/NMB-1; CAN ICES-3 (B)/NMB-3(B)
MODEL: SWT CAMANO-01
Contents

1-509-899-7838 :: soundwatertech.com 3
General Information
General Information
When you want accurate, reliable and dedicated flow
measurement quickly—with minimum set up time and
maximum ease of use, in a wide range of applications—
here’s your device.
Meet SoundWater Camano.
Ultrasonic. Installs outside the pipe. And as easy to use as
a typical mobile app.
What is Camano?
New from SoundWater, Camano is a powerful, dedicated
ultrasonic flowmeter that’s accurate, easy to use, and
a snap to set up—and that’s just for starters. Camano
is engineered to accept ongoing enhancements as
applications and capabilities evolve.
Quick to install. Flexible brackets let you quickly and
easily wall-mount the Camano control unit. The Camano
Sensor mounts quickly and easily—outside the pipe—using
standard straps.
Connect with SCADA & PLC. Camano can deliver a range
of outputs, including 4–20 mA, 1–10 V, pulse, and to your
automated systems. You can also set digital alarms for
high/low flow, open circuit, and low signal events. Use
the built-in USB port for thumb drive-based data logging
downloads at any time.
Works with cellular data. Simply combine Camano with
the Ayyeka Wavelet TM to seamlessly transmits flow data
from your Camano using mobile networks—and you
access your data through any web browser.
Easy to use. The built-in, touchscreen is your access
to the Camano app, with its familiar Android-app user
experience. Swipe, tap, scroll, and (if needed) use an on-
screen keyboard to specify application parameters.
Pre-set menus, plain-language dialogs, and intuitive
navigation let you easily choose from pre-loaded pipe and
fluid data (or enter your own)—no more complex codes or
cumbersome instructions. In seconds, Camano displays
optimal transducer spacing and flow measurements.
Next, quickly install the Camano Sensor on the pipe,
secure power and data output wiring, and you’re ready
to monitor, log, and output to data collection systems.
Start viewing flow directly on the built-in touch screen
and instantly toggle between flow volume and rate with a
simple swipe.
Along with fast, easy installation and set up—and no
need to break pipe—Camano works with a wide range of
applications. With Camano’s ultrasonic technology, you
(and your automated systems) can get started tracking
flow quickly and easily.
Meter Features & Control Unit
Moveable acoustic transducer
Cable strain relief / conduit connection
Anodized aluminum channel
Hose clamp
slot with
quick release
Rugged acetal end
housing and foot
Integrated ruler
Fixed acoustic
transducer
Bi-directional
flow sensing
All Camano models include the features as shown below.
Easy
mount
bracket
Color touch
screen display
Power and Outputs
(4-20 mA, 1-10 Volt,
Pulse, Digital Alarm

Camano Instructions
4SoundWater Technologies, LLC
Camano Specifications*
General Information
Installation 15 pipe diameters upstream, 5 diameters downstream for optimal performance (typical)
Flow Detection Bi-directional; 0.1 /s to 20 /s (0.03 m/s to 6 m/s)
Pipe Size 1" to 24" (nominal)
Performance PIPE SIZE ACCURACY OPERATING RANGE REPEATABILITY
3” to 24” ±1.0% to 2.0% typical -20 to 20 /s (-6 to 6 m/s) 0.5%
1” to 2” ±2.0% to 3.0% typical -20 to 20 /s (-6 to 6 m/s) 0.5%
*Under standard conditions, assuming fully developed and symmetrical flow profile (typically taken on a straight run of 15
diameters upstream and 5 diameters downstream; flow rate above 3 /s or 1m/s; non-aerated liquids).
If the equipment is used in a manner not specified by the manufacturer, the protection provided by the equipment may
be impaired.
Turndown 200:1
Environmental IP65 splash proof; weather and corrosion resistant
Materials CONTROL BOX
Polycarbonate enclosure, glass touch screen, stainless steel circular connector, nickel plated
brass USB connector, nickel plated brass transducer connector, EPDM rubber
BACKPLATE
Stainless steel
TRANSDUCER ASSEMBLY
Anodized aluminum housing, acetal footings, aluminum transducer strain relief, PVC strain relief,
EPDM O-rings, EPDM strain relief gasket, stainless steel fasteners, epoxy silk screen, PVC coaxial cable,
nickel plated brass coaxial cable connectors
MOUNTING STRAPS
Stainless steel
Temperature Ambient & Fluid: -20˚ to 150˚ F (-29˚ to 65˚ C)
Data Logging Built-in; export via USB thumb drive; maximum data samples: 100,000
Display Android-based touchscreen user interface; backlit; 20+ year lifetime with power save mode
3+ year lifetime with full-power, continuous use
Metric and English units
Soware Android OS/Android-based app; easy soware updates via USB thumb drive
Power 12-24 V DC or AC, external power; 400mA typical@20 V, 1 A inrush
Recommended external AC-DC converter part #PLUS ML30.241
Security 6-digit passcode protects configuration/set up, volume reset, and data logging
Specifications continued on next page
* Specifications subject to change.

1-509-899-7838 :: soundwatertech.com 5
Specifications continued on next page
Outputs NOTE: The isolation for all outputs is as a group; that is, all of the outputs share a common reference.
CURRENT (4-20 MA)
Isolated 4-20 mA, directly proportional to flow—4 mA/zero flow (fixed),
20 mA/user programmable flow. Accuracy (linearity): 16-bit (15 ppm);
VOLTAGE (1-10 VDC)
Isolated 1–10 Vdc, directly proportional to flow—0 V/zero flow (fixed),
10 V/user programmable flow.
PULSE
Isolated, NFET (NPN type) open drain output with a frequency directly proportional to flow
Maximum frequency: 10 kHz; mark: space ratio = 50.0: 50.0 (accurate to < 1 ppm)
DIGITAL ALARM
Isolated, NFET (NPN type) open drain output, configured to change state at any user-selected
combination of: (1) high flow, (2) low flow, (3) poor acoustic signal (e.g., empty pipe, disconnected
transducers, etc.), (4) open 4-20 mA circuit
Manufacture United States
Camano Specifications* — continued
General Information
* Specifications subject to change.
Dimensions
For 8" to 24" pipe (requires two) For 1" to 4.5" pipe
For 2" to 12" pipe
6.09" (15.47 cm) 11.34" (28.80 cm)
2.37"
(6.02cm)
3.9"
(9.78 cm)
15.07" (38.28 cm)

Camano Instructions
6SoundWater Technologies, LLC
Technology
The transit time flowmeter operates by alternately transmitting and
receiving a burst of sound energy between the two transducers.
The burst is first transmitted in the direction of fluid flow
and then against fluid flow.
Since sound energy in a moving liquid is carried faster when it travels in the direction of fluid flow (downstream) than it
does when it travels against fluid flow (upstream), a dierence in the travel times will occur. The sound’s travel time is
accurately measured in both directions and then used to compute the flow rate.
Sound waves can bounce in many directions as they travel through various materials. The more the sound waves scatter,
the fewer actually reach the second transducer. The Camano uses sophisticated methods to maximize transducer
eciency, thus allowing the unit to run on very low power. Focusing of the sound wave is also important to ensure it
reaches the second transducer without degrading. This is accomplished by accurately spacing the transducers to allow
for optimum sound transit between transducers. The Camano app computes this spacing based on the pipe size, pipe
material, and type of liquid.
Transit time technology works best in clean or mildly dirty water or fluids with minimal turbulence or flow distortion.
General Information

1-509-899-7838 :: soundwatertech.com 7

Camano Instructions
8SoundWater Technologies, LLC
Getting Started
The Camano Control Unit and Camano App Features
Camano Features
Easy to Mount
Camano comes with an easy-mount wall bracket
that puts your control unit right where you need it,
yet out of the way—in just a few minutes.
Easy to Connect
Use the included cable to connect the control
unit to the Camano Sensor (transducers). Power
connections are just as easy—cable is included—
and linking to your automated systems is both fast
and flexible.
Easy to Set up
The full-color Camano App and extensive, built-in
parameter libraries help you easily specify pipe,
fluid and other values—then shows you how to
space transducers.
App Features
Android-based, interactive touchscreen
Easy configuration for 4-20 mA, 1-10 Vdc,
pulse, and digital alarms
Built-in data logging
Programmable alarms
Select from a wide range of fluids
and pipe types
Flexible control unit mounting and
connections
Backlit for maximum visibility in
darkness or sunlight
English or metric units
Complete monitoring and data
Output flow data—in a range of analog or digital
formats—plus alarms/alerts can be automatically
transferred to your automated systems. Download
data logs any time with a thumb drive.
Cellular Data & IoT Web Interface
For remote applications (or where hard-wired
communication is impractical), make Camano an
IoT device by adding the Ayyeka Wavelet. Wavelet
seamlessly transmits flow data from your Camano
using mobile networks—and you access your data
through any web browser.
Ongoing enhancement
Upgrade your Camano with ease—just download
the latest soware and load it to the control unit
with a thumb drive. You’ll always have the latest,
most capable version.
Easy mount bracket
To transducers Power and Out-
puts (4-20 mA,
1-10 Volt, Pulse,
Digital Alarm

1-509-899-7838 :: soundwatertech.com 9
Connecting to Power & Communications
Getting Started
Getting StartedControl Box
9.23"
(23.44 cm)
7.5"
(19.08 cm)
4.63" (11.76 cm)
Control Box, bottom view
ø .31" (.78 cm)
Mount the Control Unit
Camano comes with an easy-mount wall bracket. The
flexible brackets let you quickly and easily wall-mount the
Camano control unit.
Connect to a Power Source
Connect the supplied cable to your 12-24V DC or AC
power, by attaching the red wire to the positive supply
terminal, and the black wire to the 0V terminal.
For all wired connections, check the wire color code table,
and pinout diagrams below for proper set up. Also, refer
to wiring diagrams on the following pages for guidelines.
If not using the supplied cable for wiring power and
communications, be sure to use a compatible part to
Turk USA # RKSV 12T.
Once power and communications have been wired
properly. Plug the power and communications cable into
the flowmeter display at the mating circular connector.
Supplied Cable Pinout:
1 Analog & digital isolated ground 0V
2 NC
3 Pulse output, open drain
4 4-20mA output
5 NC
6 NC
7 0-10V output
8 Power 12-18V DC or AC
9 Alarm output, open drain
10 NC
11 Power ground 0V
12 NC
Flowmeter Display Pinout:
Wiring Color Definitions:

Camano Instructions
10 SoundWater Technologies, LLC
User Digital Input Device SoundWater Flowmeter
+ DC powerPowerDigital & Analog Gnd
White wire, Pin 1
Common
Digital input Alarm
Orange wire, Pin 9
User Digital Input Device SoundWater Flowmeter
Digital input
Power
Digital & Analog Gnd
White wire, Pin 1
+ DC power
Common Alarm
Orange wire, Pin 9
R
User Digital Counter SoundWater Flowmeter
+ DC powerPowerDigital & Analog Gnd
White wire, Pin 1
Common
Digital input Alarm
Green wire, Pin 3
Wiring
Alarm Output (sourcing input)
Alarm Output (sinking input)
Pulse Output (sourcing input)
Getting Started

1-509-899-7838 :: soundwatertech.com 11
User Digital Counter SoundWater Flowmeter
+ DC powerPowerDigital & Analog Gnd
White wire, Pin 1
Common
Digital input Alarm
Green wire, Pin 3
User Current Input Devic
eS
oundWater Flowmeter
Current input 4-20mA Output
Yellow wire, Pin 4
0 V Digital & Analog Gnd
White wire, Pin 1
User Voltage Input Device SoundWater Flowmeter
Voltage input 0-10V Analog Output
Blue wire, Pin 7
0 V Digital & Analog Gnd
White wire, Pin 1
Pulse Output (sinking input)
4-20mA Analog Output
0-10 V Analog Output
Getting Started

Camano Instructions
12 SoundWater Technologies, LLC
Selecting a PIN
Choose and enter your own PIN (6-digit access code)—
and remember it, as you’ll need it going forward to access
the app. Prepare for Set up
Use the Drawer Icon ( ) to access Camano’s menu—then
select ‘Set Up’ for parameter settings.
Parameter settings are protected behind a lock. To unlock,
simply tap on the Lock icon ( ) and enter your PIN.
SPEED OF SOUND
liters/min
000.000
Flow
Data Log In Progress
00:00:00
Time Remaining
SPEED OF SOUND
liters/min
000.000
Flow Readings
Data Log In Progress
00:00:00
Time Remaining
Flow
Set Up
Lock
Output
Alarm
Diagnostics
Settings
D
0
g
s
s
6
App Installation
Setting up the App
Your Camano ships complete with power cabling.
Getting Started

1-509-899-7838 :: soundwatertech.com 13
The Set up Screen
Use the handy parameter selection
screens to set your units of
measure and display preferences.
Conveniently select pipe, liner, and
liquid specifications from lists of
pre-loaded values. Don’t see the
right option? Add your custom
values.
Units
Toggle between Imperial and metric
units of measure.
Select Flow Rate, Volume, and
Velocity from Camano’s pre-loaded
values or add your own custom
values.
Pipe
Select Pipe Type,Size, and Wall
Classifications from our pre-loaded
values or add custom values by
selecting Custom under Pipe Type.
When entering a custom type, you
must supply the outer diameter, wall
thickness, speed of sound through
the pipe material, and the surface
roughness—enter zero if unknown
roughness.
Liner
Switch between liner and no liner.
When selecting Liner Enabled,
enter Liner Thickness and choose
Liner Material from our pre-loaded
list or add custom values. When
adding a custom material, you must
enter the speed of sound through
that material.
Liquid
Select Liquid Type and
Temperature from our pre-loaded
list of values or add a custom liquid
type. When adding a custom liquid,
you will need to enter the speed
of sound through that liquid, the
viscosity, and the density.
Transducer
Select the Transducer Type and
Orientation.
Parameter Set Up
Units
Input
English
Flow Rate
gallons/min
Volume
ga
ll
ons
Velocity
f
t
/
sec
Pipe
Input
Standard
Nominal Size
Wall Classification
Customize
Liner
Input
Thickness
Materials
Customize
0.0 i
n
Liquid
Input
Temperature
Liquid Type
Customize
Type
S
PACING
SAVECANCEL
Transducer
Set Up
Units Pipe
Liner Liquid
Transducer
Transducer Spacing:
––
Getting Started

Camano Instructions
14 SoundWater Technologies, LLC
Flowmeter Installation
Straight Pipe Recommendations (X = diameter)
5X15X
20X
40X
5X15X
30X
40X
Reduced Pipe
Two Elbows In Plane
Two Elbows, Out Of Plane
Expanded Pipe
5X
5X
5X
5X
Swirling Flow:
Propeller Meter
Flowmeter installation
Swirling Flow:
Partially Open
Butterfly Valve

1-509-899-7838 :: soundwatertech.com 15
Full Pipe Recommendations
Flowmeter Installation
This is a view looking directly into a pipe,
with the meter in multiple possible positions
on the side of the pipe. Horizontal (3 o’clock
or 9 o’clock position) is the preferred installation
orientation, since it avoids problems with
trapped air and sediment.
Flowmeter Orientation
Fair — Unacceptable if
pipe contains air
Best Position
Air bubbles
Sediment
Not Ideal:
Allows air pockets to form at meter
Recommended:
Keep pipe full at meter for accuracy
Not Ideal:
Air can be trapped
Recommended:
Allows air to bleed o
Not Ideal:
Post-valve cavitation can create air pocket
Recommended:
Keeps pipe full at meter for accuracy
Fair — Unacceptable if
pipe contains sediment

Camano Instructions
16 SoundWater Technologies, LLC
Set Up
Units Pipe
Liner Liquid
Transducer
Transducer Spacing:
2.0 in
Transducer Spacing
Once you entered your parameters in the previous section, the app automatically
computed the proper transducer spacing. This is shown at the bottom of the main
app screen.
The next step is to adjust the transducer spacing on the flowmeter, as follows:
1. Rotate the black knob to unlock the horizontal motion for each transducer.
2. Move the transducers to the specified transducer spacing by sliding them
along the integrated ruler. Note: It is not necessary to start at zero on the
ruler, so long as the actual spacing is correct.
3. Lock into place using the black knobs. This is important to prevent the
transducer spacing from moving when mounting the flowmeter!
Flowmeter installation
Black locking knob on transducer Integrated ruler

1-509-899-7838 :: soundwatertech.com 17
Rotate silver knobs counter-clockwise to raise
the transducers, clockwise to lower.
Cover bottom face of transducers with coupling gel.
Wrap cords around pipe and secure with cam cleats.
Flowmeter installation
Installing the Flowmeter
Once the transducer spacing has been set and locked in
place, you are ready to install the flowmeter on your pipe.
1. Wall mount the display.
2. Rotate the silver knobs counter clockwise until
they stop. This raises the transducers up above the
meter footings.
3. Apply coupling gel liberally to the transducer faces,
covering the entire bottom face of each transducer.
4. Place flowmeter on pipe, assuring that the footings
are flush with the pipe and the meter is aligned
with the axis of the pipe.
Do’s and Don’ts
Do store your Camano in a dry, inside area when not in
use.
Do keep your Camano in its protective case when
transporting to prevent damage.
Do gently clean the transducer pads regularly with
isopropyl alcohol to prevent hardening and build up
of used coupling gel.
Do periodically check that there is suceint coupling gel.
Don’t store, transport, or use your Camano where the
device may exceed 150˚F (65˚C).
Don’t bang or drop the Camano on hard objects or
surfaces.
Don’t nick the transducer pads.
To prevent damage, you must use the
recommended coupling gel.
5. Strap the meter to pipe with the mounting straps.
6. Rotate silver knobs clockwise to press transducers
onto the pipe. Hand tighten only until seated firmly.
Warning: Tightening too much can li the meter
away from the pipe, causing incorrect readings.

Camano Instructions
18 SoundWater Technologies, LLC
Operation
Operation
Collecting Your Data
Connect power to the flowmeter.
Periodically we update the app with new features and enhancments. All
updates will be posted to our website and available for download.
Your flow data will display on the Camano App.
Data Logging
All data logging functions are accessed by tapping the Data Logging button in
the measurement view.
The purpose of the Camano’s built-in data logger is to record flow for a
specified period of time. It may be used to conveniently record flow for as long
as 365 days or as little as one minute. Only one data log may be used at any
one time.
The Camano’s data logger stores only one data set at any
time, selecting “Rec” (which creates a new data log) will
write over the existing data log. A message appears when
selecting the “Rec” button indicating that the existing data
log will be over-written if a new data log is started and gives
the user the ability to continue with the new data log or to
cancel.
FLOW RATE
liters/day
000.000
FLOW VOLUME
liters
000.000
Data Log In Progress
00:00:00
Remaining
Flow
Data Log
Data Log
00:00:00
REC
Set Recording Time: 0
1 h7 d

1-509-899-7838 :: soundwatertech.com 19
Data Log
Data Log In Progress
00:32:01
Time Remaining
STOP
Set Recording Time: 18 h
1 h7 d
Making a Recording
• Tap the Data Logging button to access the data logger features.
• Enter your 4-digit PIN to unlock the data logging screen.
• Using the slider bar in the app’s data logger set up view, set the
recording time. (See Explanation of Recording Times on the next page.)
• Tap “Rec” to start the recording. Data will start recording on the meter.
You can disconnect the mobile app during recording. The meter will turn
o when done to save power, unless still connected to the app.
• To stop recording prior to completing the time period, tap the “Stop”
button.
Retrieving the Data-Log File from the App
You may want to copy the data log file from the app to use on your computer.
To do this:
1. Insert a Flash thumb drive into the USB port located on the
bottom of the Camano box.
2. Navigate to the Data Log set up and tap the ‘download’ icon.
3. Wait until all data has transferred to the USB drive before
disconnecting from the port.
Sharing Data
Shared data is formatted in a CSV file (comma delimited file). The file name is
unique and contains both the date and time that the data log was started as
well as the location name. Set up information such as the date and time the
data log was started, the number of samples, sampling period, and location
name are located at the top of the data file. The data is arranged in rows,
where each row contains a single flow measurement including sample number,
time stamp, flow rate, velocity, volume, and quality. The data file can be viewed
or printed as a text file or formatted using most spreadsheet and database
programs, such as Microso®Excel or Access.
Operation
Data Log
Data Log
00:00:00
REC
Set Recording Time: 18 h
1 h7 d

Camano Instructions
20 SoundWater Technologies, LLC
Explanation of Recording Times
The sampling rate (time between each recorded flow measurement) and total number of recorded measurements is
controlled by the Camano. The maximum possible number of measurements is 100,000 and each includes five values—
flow rate, total, velocity, time stamp, and quality. The maximum sampling rate is two seconds.
The Camano data logger will attempt to maximize the sampling rate, based on the your selected recording time. For
example, if you select to record flow for one minute, then the Camano maximizes the sampling rate at two seconds and
will record 31 flow measurements (covering a total of 60 seconds).
If you select to record flow for four days, then the Camano again attempts to maximize the number of flow measurements;
however since there is not enough memory to record flow every two seconds for four days, it configures the sampling
period to maximize the number of flow measurements. For the case of four days, the Camano sets the sampling period at
4 seconds giving you over 86,400 flow measurements.
Length Sample Period
1 minute 2 seconds
1 hour 2 seconds
10 hours 2 seconds
1 day 2 seconds
4 days 4 seconds (1 min., 32 sec.)
10 days 9 seconds
14 days
30 days
180 days
365 days
13 seconds
26 seconds
156 Seconds (2 min., 36 sec.)
316 Seconds (5 min., 16 sec)
Operation
Table of contents
Other SoundWater Measuring Instrument manuals

