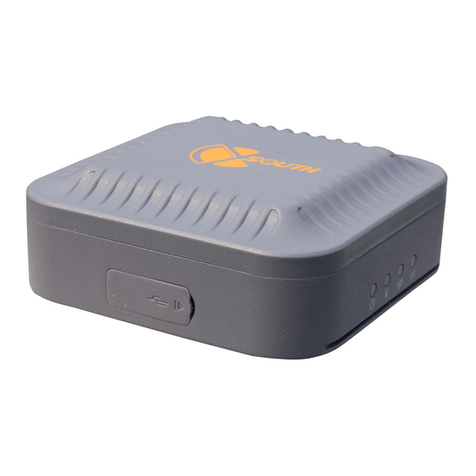
South NET S9 User manual

NET S9 user manual
NET S9
User Manual
South surveying & mapping instrument co., ltd.
18/06/2014

NET S9 user manual
1
Contents
Chapter1 NetS9 introduction.......................................................................................................1
1.1 Brief...............................................................................................................................1
1.2 Index of performance.....................................................................................................4
1.3 Appearance structure......................................................................................................7
1.3.1 Appearance......................................................................................................7
1.3.2 Front panel....................................................................................................8
1.3.3 Rear panel......................................................................................................9
Chapter2 NetS9 power and battery............................................................................................11
2.1 Ext power.....................................................................................................................11
2.2 Battery safety...............................................................................................................12
2.3 Battery charge & usage................................................................................................12
2.4 Conserve battery..........................................................................................................12
Chapter3 NetS9 configuration ...................................................................................................13
3.1 Keys and LCD configuration .......................................................................................13
3.1.1 Key function................................................................................................13
3.1.2 LCD interface..............................................................................................14
3.2 The Web Server configuration .....................................................................................16
3.2.1 Login Web Server through LAN.................................................................16
3.2.2 Login Web Server by the public network .............................................32
Chapter4 NETS9 single station configuration ...........................................................................33
4.1 NRS Station setup........................................................................................................33
4.1.1 Add new stations ........................................................................................33
4.1.2 Service setup..............................................................................................34
4.2 NRS Server setup.........................................................................................................36
4.3 NETS9 configuration...................................................................................................37

NET S9 user manual
2
4.3.1 NetS9 network connection ........................................................................37
4.3.2 Network settings ........................................................................................41
4.3.3 Reference station setting ......................................................................42
4.3.4 Data recording setting ............................................................................43
4.3.5 Data transmission ......................................................................................43
4.3.6 Broadcast SCMRX ..........................................................................................44
4.4 NRS normal status..........................................................................................................45
4.4.1 Station normal status ..............................................................................45
4.4.2 Server normal status ................................................................................46
4.5 Port mapping ...................................................................................................................46

NET S9 user manual
1
Chapter1 NetS9 introduction
1.1 Brief
NetS9 is a high-end Beidou CORS receiver based on many years of technology accumulation
of SOUTH Company. It is domestic independent satellite navigation system, with independent
core technology. Receiver uses small volume efficient core processor of Cortex-A5 with
strong performance and fast compute speed. As we know, international mainstream operating
systems are Windows and Linux, and NetS9 chooses Linux as the built-in operating system
which has powerful onboard software, it is a real embedded control system. Receiver of
NetS9 is built with new aluminum alloy design, and it can adapt to the complex work
environment with Level of IP67 industrial design and fully meet the CORS system unattended
for a long time and stable operation of demand.
New design NetS9 reference station receiver provides diverse interfaces and powerful Web
Server functions, etc.
NetS9 designs a fixed stent which is convenient to install and can be installed anywhere.
According to the industrial standard to choose receiver internal electronic components,
receiver can stable work in 40 ℃ to 75 ℃environment, all parameters are automatically saved
in the internal FLASH, parameters will not change when power supply drop, the instrument
can automatically connect to the server.
NetS9 can not only upload static data, observation data, satellite data and differential data, but

NET S9 user manual
2
also it adopts stable and reliable eMMC storage method and it has the automatic cycle storage
function. In addition, the users can use external mobile storage devices to backup the static
data by USB interface; data can also be downloaded remotely.
NetS9 has flexible configurations, such as local network configuration, WIFI connection,
Bluetooth connectivity, and buttons with LED screen configuration, serial port configuration
and the network remote configuration. It supports remote restart, remote format the SD card,
remote registration and firmware upgrade, which help users easily to maintain and reduce the
costs.
The receiver has auto restart function which can work continually after blackout without any
setting again; it has long-term and stable capacity of work, which can long-term continuously
track satellite signals and record raw data.
NetS9 reference station receiver technology characteristics are as follows:
1. 440 channels, fully compatible with all major satellite positioning system;
2. Receiver uses smallest Cortex-A5 as core processor, strong and fast;
3. Built-in stable and reliable Linux operating system;
4. NetS9 is built with new aluminum alloy design, and it can adapt to the complex work
environment with Level of IP67.
5. The front panel LED display design realizes that setting receiver without PC;
6. Providing WiFi function which allows to configure receiver via Wifi connection, greatly

NET S9 user manual
3
improves the user experience and convenience;
7. Support STH, RINEX2. X and RINEX3. X;
8. 10000 mAH built-in battery, it can be used as either a main power or uninterrupted UPS
power, provides more than 15 hours of battery life;
9. Double RJ45 Ethernet interface design, stronger applicability;
10. With 8 GB high-speed built-in memory, stable and reliable eMMC storage method, the
receiver has the automatic cycle storage function. In addition, the user can use external
mobile storage devices(The biggest store of 1TB) to store the static data by USB main
interface;
11. Standard external 10MHZ frequency input interface, one PPS output interface, one event
input interface and weather/tilt sensor interface.

NET S9 user manual
4
1.2 Index of performance
GNSS character
◎440 channels
COMPASS: B1、B2、B3
GPS:L1 C/A, L2E, L2C, L5
GLONASS:L1 C/A and P , L2 C/A ( only for GLONASS M), L2 P
SBAS:L1 C/A, L5
GIOVE-A:L1 BOC, E5A, E5B, E5AltBOC
GIOVE-B: L1 CBOC, E5A, E5B, E5AltBOC
GALILEO: GIOVE-A, GIOVE-B, E1, E5A, E5B
◎Unfiltered, unsmoothed pseudo range measurements data for low noise, low multipath error,
low time domain correlation and high dynamic response
◎Very l ow noi se of G N SS carri er phase measurem ent, the preci si on of 1 H Z bandw i dth < 1
mm
◎The SN R of the dB - Hz report
◎Proven Pacific crest low elevation Angle tracking technology
◎Support a vari ety of satel l i te navi gati on system
◎Supports real-time static and dynamic dual-frequency RTK, supports both single frequency
BD - 2 calculating model

NET S9 user manual
5
◎U ni que RTK technol ogy, guarantee the reliabil i ty of the posi ti oning accuracy, greatly
improve the quality of the data decoding
◎I ntel l i gent dynamic sensitivity positioning technology, adapt to the environment changes,
adapt to more and more bad positioning environment and longer distance
◎Ful l y com pati bl e hi gh compact message, easy to form a com pl ete set of data transmi ssi on
and software application development
◎Stable long-distance RTK calculating ability
Position accuracy
◎static:
Plane:±(2.5mm+1x10⁻⁶D), elevation:±(5.0mm+1x10⁻⁶D)
◎RTK :
Plane:±(10mm+1x10⁻⁶D), elevation:±(20mm+1x10⁻⁶D)
◎Initialization time: Less than 60 seconds
◎I ni ti al i ze the reliability: Generally greater than 99.9%
◎M emory: 8GB , can record up to 12 m onths of the ori gi nal observati on data, (satel l i te data
records for 5 seconds an epoch), Support large capacity 64G of industrial-grade data SD
memory card
◎Posi ti on output: 1H Z , 2 HZ, 5HZ, 10HZ and 20 HZ and 50 HZ(depending on the
installation options),output original measurement and location of up to 50 HZ
◎Store formats: STH, RINEX, BINEX

NET S9 user manual
6
◎Naming files: Variety
◎Data retrieval and transfer: HTTP download, FTP download, USB copy
◎N avi g ati on outputs: ASCII: NMEA - 0183 GSV, AVR, RMC, HDT, VGK, VHD, ROT,
GGK, GGA, GSA, ZDA, VTG, GST, PJT, PJK, BPQ, GLL, GRS, GBS and the binary
◎Reference outputs: CMR, CMR+, RTCM 2.1, RTCM2.2, RTCM2.3, RTCM3.0, RTCM3. X
◎Support circular storage
◎Support external U SB storage
Device interface
◎2 RJ45 network interface
◎2 RS232 interface, and support the aerometeograph, inclinometer and all kinds of sensors
◎1 mai n U SB i nterface, external U SB storag e i s used to record the ori gi nal observati on data
◎1 U SB i nterface, the data of recei ver i nternal storage can be dow nl oaded di rectly by the
interface
◎3 independent power input ports, ensure the power supply is reliable
◎1 external cl ock i nput i nterface
◎1external event input interface
◎1 GNSS antenna interface
◎1 W I FI antenna i nterface
Communication
◎Ethernet: RJ45 connector supports HTTP, HTTPS, TCP/IP, UDP, FTP, and NTRIP

NET S9 user manual
7
◎Bluetooth: Supports 2.4 GHZ connection
◎W IFI: AP and the Client mode
User interface
◎A vacuum LCD screen, 8 buttons on the keyboard, the Web user interface
Battery and power supply
◎9 ~ 28 V DC input
◎Built-in lithium battery can work continuously more than 15 hours after charged
◎Power level: 3.8 W
Environment
◎W orki ng temperature: -40℃ ~75℃
◎Storage temperature:-40 ℃~80 ℃
1.3 Appearance structure
1.3.1 Appearance
Receiver of NetS9 receiver appearance is as shown in figure 1-1.Receiver is rectangular in
shape; the front panel provides buttons and LCD display function; Rear panel provides
multiple interface functions: RS - 232 interface, RJ45 interface, antenna interface, power
supply interface, USB interface, etc.

NET S9 user manual
8
Fig. 1-1 NetS9
1.3.2 Front panel
NetS9 front panel is as shown in figure 1-2; it mainly provides buttons and LCD display
function.
Fig. 1-2 NetS9 front panel

NET S9 user manual
9
The front panel of each function module is as shown in table 1-1:
Tab. 1-1 NetS9 front panel functions
No Function Description
1,3 button View and modify the receiver configuration
2 LED
display
Check the working state of the receiver and
function configuration
1.3.3 Rear panel
NetS9 rear panel provides a more diverse interface function, is as shown in figure 1-3:
Fig. 1-3 NetS9 rear panel
NetS9 rear panel function of each interface is as shown in table 1-2:

NET S9 user manual
10
Tab. 1-2 NetS9 rear panel functions
No Function Description
1 WIFI antenna
interface Connect WIFI antenna
2 power
interface External power and receiver built-in battery
3 Input/output
interface
PPS output interface, external events input interface,
a serial port and power interface
4 RS-232
interface
Static data output, the output difference data output,
the navigation data, external interface
5 USB interface USB function, power supply interface
6 RJ45 interface 10 m / 100 m Ethernet interfaces, static and
difference data to the server
7 GNSS antenna
interface Connect GNSS antenna
8
External
frequency
standard
The external clock input

NET S9 user manual
11
Chapter2 NetS9 power and battery
NetS9 provides a stable external power while providing a built-in battery as UPS functions.
When plug into charger, the internal battery has automatic charging function; in the case of
external power failure, it can safely switch to the internal battery automatically and ensure
NetS9 stable operation for about 15 hours; similarly, when the external power supply is
restored, built-in battery-powered mode can automatically safely switch to external power
supply, then internal battery enter into the power storage state.
2.1 Ext power
The right to use an external power supply of NetS9 precedence over the built-in battery. Only
when the receiver is not connected to an external power supply or external power failure, the
internal battery will work.
For a receiver to work properly, the external power supply must provide 9V DC to 28V DC,
and the power must be greater than 5W. When external power is disconnected and the built-in
battery is exhausted, NetS9 will automatically shut down; when the power is restored, the
receiver automatically starts and its configuration parameters will be restored to pre-shutdown
state, and begin normal operation.
Warning: Do not place the external power adapter, its subsidiary plug, and cables to
outdoors or in damp places. Do not use an external power to supply power when
receiver works in a humid environment.
Warning: External power supply input voltage cannot exceed 28V DC, otherwise the
receiver will have a fatal injuries.

NET S9 user manual
12
2.2 Battery safety
NetS9 uses built-in rechargeable Li-ion battery. When using the battery, please note:
Warnings:
a) If the battery discolors and leaks or has other undesirable phenomena, please do
not use;
b) Do not short circuit the battery, disassemble damaged, approaching heat or throw
in a fire, avoid direct sunlight;
c) Do not put the battery in water.
2.3 Battery charge & usage
The internal battery will automatically recharge when external power is used. Battery before
first use, please fully charged. If the battery is placed for three months without using, first
fully charged, then use it. It will take about 24 hours for full charge.
Warnings:
a) Do not charge the damage or leaking battery;
b) Do not disassemble the battery and charge alone.
2.4 Conserve battery
The battery should be fully charged before conservation;
If long-term conservation, please ensure to charge once every three months.

NET S9 user manual
13
Chapter3 NetS9 configuration
SOUTH NetS9 provides a variety of ways to configure the parameters, Including buttons,
LCD, WIFI, Web Server, serial ports and Bluetooth. The button configuration and Web Server
are the most commonly used configuration methods. According to the actual situation of the
user to select the most efficient way to complete NetS9 parameter configuration.
3.1 Keys and LCD configuration
3.1.1 Key function
NetS9 front panel is as shown in figure 1-2, a total of eight buttons. Users can use these
buttons to switch on/off receiver, restart the receiver, view and modify the configuration
information, and so on.
Table 3-1 button introduction of NetS9
key name Function description
Power Power key
Esc Return to the main interface, cancel modification
Reset click this key 5sto restart the system
Enter Enter the page of parameter modification and
confirm changes

NET S9 user manual
14
Up Turn over the page and reduce parameter values
Down Turn over the page and increase parameter values
Left The cursor moves left
Right The cursor moves Right
3.1.2 LCD interface
After the completion of the system startup, LCD main interface will be displayed as shown in
figure 3-1. In the main interface mode, click this key . Users can access to the parameters
of the interface for base station to launch coordinate system and modifications of different
schemes. The parameters of base station are as shown in figure 3-2.Under the arbitrary
parameter interface; press the return key , returns to the main interface.
Fig. 3-1 LCD main interface
And the SV means visible satellite number; BAT means the built-in battery allowance; MB
means receiver memory capacity and the REC light keep flashing shows that NetS9 is
receiving and recording static data.

NET S9 user manual
15
Fig. 3-2 parameters configuration interface
Then Start Base means start the base station mode, Diff Type means differential data type.
There are three kinds of base station start mode:
HERE:Using automatic repeat coordinates to start the base station
OFF:Manually start the base station
NEW:Using automatic single point coordinate to start the base station
Under the arbitrary parameter interface mode, if you need to modify the parameters, you can
press the button and modify the instrument parameters. At this time the cursor keeps
flashing, and then you can press the buttons to change the location of the cursor, the
button to modify the size of the parameter values. When these parameters all are
changed, if you press the button , it will save the data, the cursor disappears, the new
configuration information goes into effect and the instrument return to the interface of
Parameter Settings. If press the button , it will not save the data, the cursor disappears,
configuration information will restore and save previous information and the instrument
return to the interface of Parameter Settings. At the same time, you can continue to press the
button to view the other parameters. If you want to configure of base station start mode
and sent differential data information directly, the screen lights up when you press any key,

NET S9 user manual
16
then you can press the button , it appears the interface . And you can
press the key two times uninterruptedly to switch the interface , When the
right triangle arrow moves toward to downside of Start Base, you can press the button
to switch different working modes; what is more, you can press the key to switch the
interface ,at the same time you can switch to send difference scheme of
configuration directly by pressing the button .
If without operating for a long time, the instrument will automatically closed LCD screen and
you can press any key to wake it up.
3.2 The Web Server configuration
When you enter the IP address of the NetS9 in IE browser, then you can access the Web
Server system and complete NetS9 parameter configuration.
3.2.1 Login Web Server through LAN
1. Use physical method to connect to the Internet
Users can use a network cable to connect the NetS9 to local PC. NetS9 also can be connected
to the local router or switch; we need make sure NetS9 with PC are in the same local area
network (LAN).
2. Login the Web Server and set NetS9 parameters

NET S9 user manual
17
Here NetS9 IP and local PC IP must be set to the same network segment. And you can enter
NetS9 IP address in the IE browser, we suppose that NetS9 IP is 192.168.4.24 and input it,
then we can enter the NetS9 Web Server system login page is as shown in figure 3-3.
Users can choose Chinese or English in the top right-hand corner of the login page through
the shortcut key; At the same time, the NetS9 provides the "help" shortcut keys, if the user
cannot login system or the system page is abnormal, they are available by clicking on the
login page in the top right corner of the "help" to get the solution.
Fig. 3-3 NetS9 system login page
In the login page, user input the correct name and password, click "login" to enter NetS9 Web
Server system home page as shown in figure 3-4. System default user name and password are
as follows: admin, admin. After login system, you can change the password on the "change
password" page.
Note: NetS9 Web Server system only supports Internet explorer browser, the other
browsers are not supported!
Table of contents
Other South Receiver manuals
