Introducción
El Southwire 40130N detecta voltaje AC desde 50V hasta 1000V.
Tiene una linterna LED incorporada para mayor comodidad. Bajo
uso apropiado, este producto proveerá muchos años de servicio
confiable.
Símbolos Internacionales de Seguridad
Posible peligro. Indica que el usuario debe consultar el manual
acerca de importante información de seguridad
Indica la posible presencia de voltajes peligrosos
El equipo está protegido por aislamiento doble o reforzado
• Si el detector se utiliza en una manera no especificada por el
fabricante, las características de seguridad pueden ser afectadas.
• Antes de usar el detector, compruébelo en una fuente activa de
confianza que esté dentro del voltaje AC especificado para
asegurar que esté funcionando correctamente.
• El tipo de aislamiento y su espesor, distancia de la fuente de
voltaje, cables aislados, y otros factores pueden afectar la
operación. Utilice otros métodos para verificar un voltaje activo
si no está seguro.
• No use el detector si aparece estar dañado o si no está
funcionando correctamente. Si tiene duda, cambie el detector.
• No utilice el detector en voltajes que sean más altos que el rango
de voltajes marcado en el detector.
• Tenga cuidado con voltajes por encima de los 30 voltios AC ya
que puede representar un peligro de electrocución.
• Cumpla con los requisitos de seguridad locales y nacionales -
en particular con respecto al potencial de arco eléctrico.
• Utilice equipo de protección personal aprobado al trabajar en
circuitos activos.
ADVERTENCIA
Mantenimiento
1. MANTENGA EL DETECTOR SECO. Si se moja, séquelo.
2. UTILICE Y ALMACENE EL DETECTOR BAJO TEMPERATURAS NORMALES.
Las temperaturas extremas pueden acortar la vida de las piezas
electrónicas y pueden distorsionar o derretir las piezas plásticas.
3. MANEJE EL DETECTOR SUAVEMENTE Y CUIDADOSAMENTE.
Dejarlo caer puede dañar las piezas electrónicas o su carcasa.
4. MANTENGA EL METRO LIMPIO. Límpielo ocasionalmente con un paño
húmedo. NO use químicos, ni detergentes o productos de limpieza.
5. USE BATERÍAS NUEVAS ÚNICAMENTE Y QUE SEAN DEL TAMAÑO Y TIPO RECO-
MENDADO. Retire las baterías viejas para que no se sulfaten y dañen el aparato.
Descripción Breve Aplicaciones Típicas
Categoría de
Clasificación
Circuitos de iluminación
trifásicos y monofásicos
en edificios comerciales
- Equipos en instalaciones fijas como motores
trifásicos, interruptores y paneles de distribución
- Circuitos de iluminación en edificios comerciales
- Líneas de alimentación en plantas industriales
- Cualquier dispositivo o circuito de derivación que
esté cerca de una fuente de Categoría III
- Paneles de distribución primaria
- Líneas aéreas o subterráneas a edificios separados
- Entrada de servicio procedente de la red pública
- Bombas exteriores
CAT III
CAT IV
Categoría de Clasificaciones de Seguridad
Punto de conexión al
suministro eléctrico y
conductores exteriores
2/15 Rev. 2 40130N Insert
Especificaciones Generales
Rango de detección del voltaje
Rango de frecuencia
Baterías
Temperatura de operación
Temperatura de almacenamiento
Humedad
Altitud
Grado de polución
Cumplimiento de Seguridad
50V AC a 1000V AC
50/60Hz
Dos baterías AAA 1.5V
32°F a 122°F (0°C a 50°C)
14°F a 140°F (–10°C a 60°C)
80% max.
7000pies (2000m)
2
CAT IV-1000V
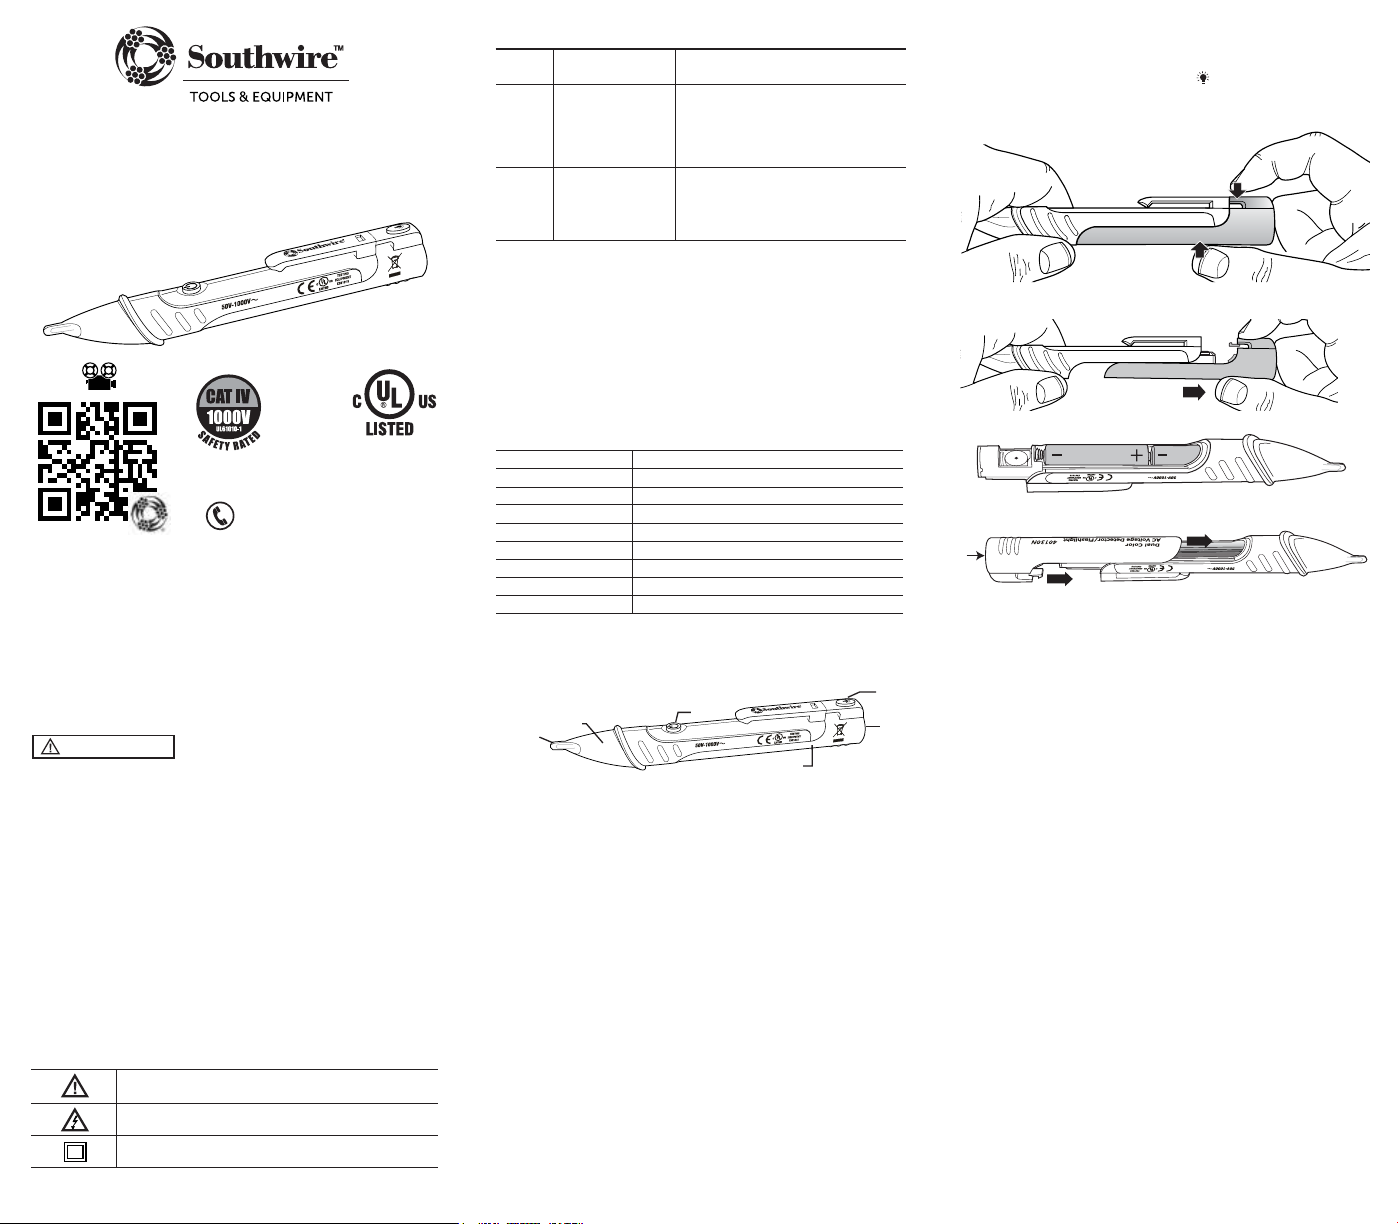
1. Linterna
2. Botón de encender la linterna
3. Compartimiento y cubierta de la batería
4. Botón de encendido
5. Luz verde LED indica “encendido”
y luz LED roja que alerta la detección
6. Punta del detector
Descripción del Detector
Operación
1. Prueba con alarma de sonido:
Presione el botón de Encendido y suéltelo
rápidamente. Se escuchará un pitido único seguido inmediatamente por una luz LED
verde constante.
El detector está activado y funcionará con el sonido de la alarma.
Para verificar que está funcionando, coloca la punta del detector cerca a una fuente
activa de Voltaje AC que esté dentro del rango de detección definido. La luz LED
roja destellará y se escuchará un pitido.
2. Prueba sin alarma de sonido:
Con el probador apagado, presione y mantenga
presionado el botón de encendido. Usted verá una luz LED verde constante.
El detector ahora está activado y funcionará sin el pitido. Para verificar que está
funcionando, coloca la punta del detector cerca a una fuente activa de Voltaje AC
que esté dentro del rango de detección definido. La luz LED roja destellará pero
no se escuchará el pitido.
3. Detectar la presencia de un voltaje AC: Coloca la punta del detector cerca de
un voltaje AC. Si el detector encuentra un voltaje dentro del rango de detección
definido, la luz LED en la punta del detector cambiará de color verde a rojo. La luz
LED roja seguirá destellando y se escuchará el pitido si está activado (consulte
Hacer Prueba con el Sonido de Alarma). La velocidad del destello de la luz LED y
el pitido aumentará según el detector se acerque más a la fuente del voltaje.
4. Apagar la unidad: Presiona y sujeta el botón de encendido. Escucharás un doble
pitido y verás que la luz LED verde se apagará. Suelta el botón de encendido. El
detector ahora está desactivado y no funcionará.
5. Indicación de batería baja: Situación 1 – Al encender el detector: La luz LED
en la punta del detector cambia de verde constante a destellar en verde y se
escuchan unos pitidos. Luego el detector se apaga. La unidad está desactivada y
no funciona. Se necesita cambiar las baterías. Para cambiar las baterías, consulte
las instrucciones bajo Cambio de Baterías.
Situación 2 – Al operar el detector: Si la luz LED se va atenuando y el pitido se va
haciendo más bajo, es posible que el detector requiera baterías nuevas. Para cambiar
las baterías consulte las instrucciones bajo Cambio de Baterías.
Situación 3 – Al encender el detector: La luz LED verde no se ilumina o está más
oscura que lo normal. Se deben cambiar las baterías. Para cambiar las baterías
consulte las instrucciones para Cambio de Baterías.
6. Apagado Automático: Después de 5 minutos sin uso, el detector se apaga
automáticamente para conservar la batería. Se escuchará un pitido doble y luego
la luz LED de encendido se apagará. El detector está desactivado y no funciona.
7. Linterna: Presione y mantenga presionado el botón con el símbolo “ ” para
encender la linterna. Suelte el botón para apagar la linterna.
4. Coloque cuidadosamente la cubierta de la batería de manera que quede alineada
con las ranuras en el detector. Asegúrese de cerrar la cubierta completamente.
5. Use el detector en una fuente de voltaje AC que ya conozca para asegurar que el
detector esté funcionando correctamente.
NOTA:
Cuando las pilas se carguen por primera vez, por favor retire la
cinta blanca rectangular de seguridad antes de instalar las pilas.
4.
5.
4.
1.
2.
3.
6.
REGISTRE SU PRODUCTO
Registre su producto en www.southwiretools.com o al escanear el código QR en
este manual. En Southwire, estamos dedicados a proveer la mejor experiencia al
cliente. Al seguir unos pasos rápidos para registrar su producto, usted puede recibir
un servicio más rápido, ayuda más efectiva, e información acerca de futuros
productos. Simplemente proporcione el número de modelo y serie de su producto,
y alguna información personal – es así de fácil y rápido.
GARANTÍA LIMITADA Y LIMITACIÓN DE RESPONSABILIDAD EN MEDIDORES Y
PROBADORES DE SOUTHWIRE
Southwire Company LLC, garantiza este producto contra defectos en materiales y
mano
de obra por dos años desde de la fecha de compra. Esta garantía no cubre fusibles,
baterías desechables, ni daños como resultado de un accidente, negligencia, mala
aplicación, contaminación, modificación, mantenimiento o reparación indebida,
uso fuera de las especificaciones, o manipulación anormal del producto. La única
responsabilidad de Southwire, y el único remedio del comprador, por cualquier
incumplimiento de esta garantía está limitada expresamente a la reparación o
reemplazo del producto por parte de Southwire. La reparación o reemplazo del
producto se hará bajo la determinación de Southwire y a su discreción.
SOUTHWIRE NO GARANTIZA QUE ESTE PRODUCTO SERÁ COMERCIABLE O ADECUADO PARA ALGÚN
PROPÓSITO EN PARTICULAR. SOUTHWIRE NO HACE NINGUNA OTRA GARANTÍA, EXPRESA O IMPLÍCITA,
SALVO QUE LA GARANTÍA ESPECÍFICAMENTE MENCIONADA EN ESTE PÁRRAFO. SOUTHWIRE NO SERÁ
RESPONSABLE DE DAÑOS INCIDENTALES, CONSECUENCIALES, INDIRECTOS, ESPECIALES, O PUNITIVOS
POR CUALQUIER INCUMPLIMIENTO DE ESTA GARANTÍA. Esta garantía no será válida si el
producto se utiliza para propósitos de alquiler. Ningún vendedor de productos está
autorizado para extender la garantía a nombre de Southwire en relación a este
producto, y la garantía de ningún vendedor será vinculante para Southwire. Si necesita
reclamar una garantía, o si el producto necesita servicio durante o después del periodo
de garantía mencionado en este documento, por favor contacte a Servicio al Cliente al
855-SWTOOLS (855-798-6657) o visite www.southwiretools.com para obtener una
autorización para devolver (RA) el producto, en la página web, haga clic en “Service
Department” para pedir un número de RA).
Usted debe obtener un número RA de Southwire antes que Southwire pueda procesar
la reclamación de garantía o pueda hacer cualquier servicio. La persona que haga la
devolución será responsable de los costos de envío y seguro asociados con enviar un
producto a Southwire. Southwire no se responsabiliza por productos dañados o
perdidos durante la devolución relacionada a esta garantía.
Todos los productos que se devuelvan a Southwire bajo esta garantía se deben
enviar a:
Southwire Company, LLC
Attention: Tool Warranty Return
840 Old Bremen Road
Carrollton, GA 30117
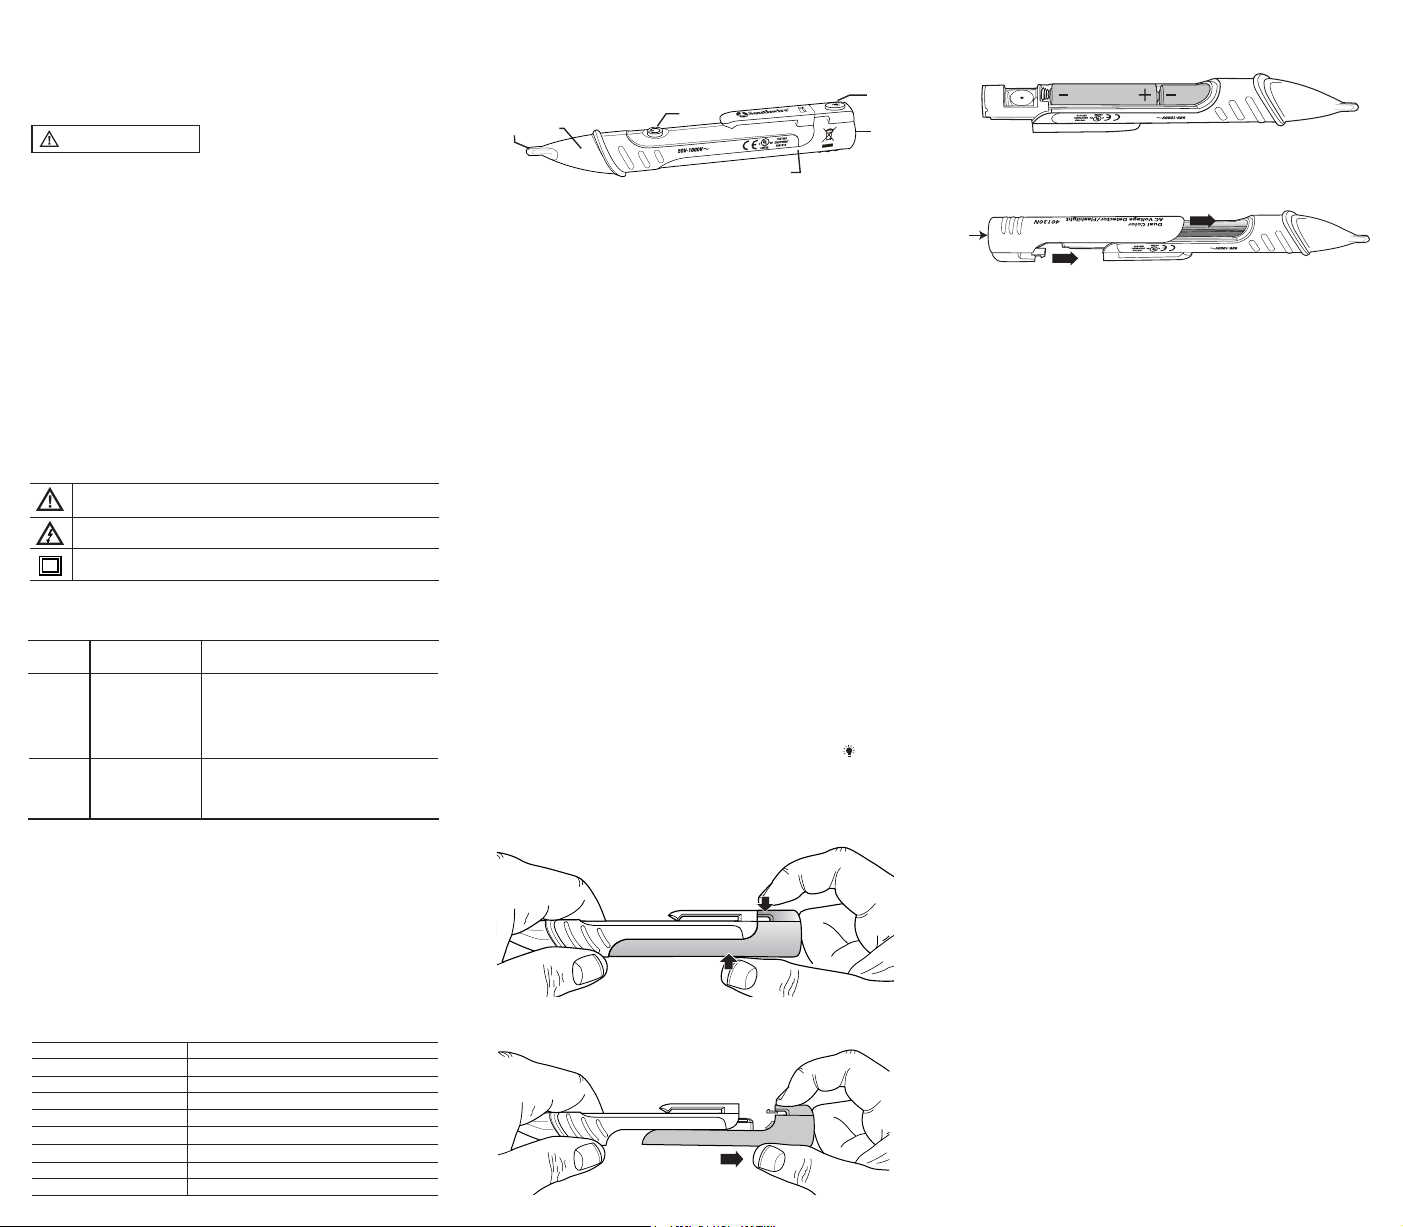
Reemplazo de las Pilas
Pasos 1. y 2.
3. Cambie las baterías (mantenga la polaridad correcta).
Utilice dos baterías nuevas “AAA” de 1.5V.
3.
A.
B.
1. Presione AQUÍ (A.)
2. Tire de aquí abajo (B.), aplicando una
fuerza de flexión suave hasta que
escuche un clic, luego retire la
cubierta de la batería.
Retire la cubierta
de la batería