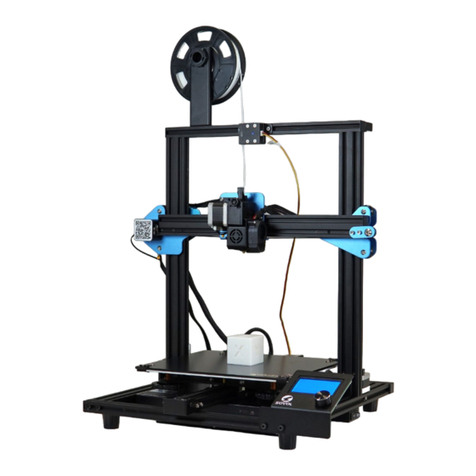
Sovol SV02 Manual

V.1.0
SOVOL-SV02 Printer
Guidebook To:
Constructing Sovol’s Top-quality 3D printer
This guidebook is for Sovol’s SV02 3D printer.
Select the correct input voltage to match your local mains
(220V or 110V).
Please plug the power cord into a three-hole power jack.
Detailed instructions for use are available on the SD card.

Notes
1
2
3
4
5
6
7
8
9
10
Do not use this machine in any way other than described herein. Failure to do so may result in personal
injury and/or damage to property.
Do not place the printer near any heat source or flammable or explosive materials. We suggest placing it
in a well-ventilated, low-dust environment.
Do not expose the printer to violent vibration or any unstable environment, as this may cause poor print
quality.
Before using experimental or exotic filaments, we suggest using standard filaments such as ABS or PLA to
calibrate and test the machine.
Do not use any other power cable except the one supplied. Always use a grounded three-prong power
outlet.
Do not touch the nozzle or printing surface during operation as they may be hot. Keep hands away from
machine while in use to avoid burns or personal injury.
Do not wear gloves or loose clothing when operating the printer. Such cloths may become tangled in the
printers moving parts leading to burns, possible bodily injury, or printer damage.
When cleaning debris from the printer hotend, always use the provided tools. Do not touch the nozzle
directly when heated. This can cause serious burns and injuries.
Clean the printer frequently. Always turn the power off when cleaning, and wipe with a dry cloth to
remove dust, adhered printing plastics or any other material off the frame, guide rails, or wheels . Use
glass cleaner or isopropyl alcohol to clean the print surface before every print for consistent results.
Children under 10 years of age should not use the printer without supervision.

1
Contents
Preface
This Guide is designed for Sovol users and contains vital
information regarding the SV02 to assist in your 3D printing
journey.
We recommend that all users read and understand the
information in this guide, even if you are familiar with 3D
Printing technology.
Additional resources and information:
(1) Quick Start Guide
Quick Start with user guide or view the video on the TF card.
(2) Official Website: http://www.sovol3d.com
Find out all latest news which contains the up-to-date
information concerning software, firmware, device
maintenance and so on.
(3) Sovol User Group on Facebook. Be a part of the Sovol
community sharing your projects and helping each other.
01 ......................... Contents
02 ......................... Introduction
03 ......................... General List
04 ......................... Assembly
06 ......................... Cable Connection
07 ......................... Screen Information
08 ......................... Loading Filament
09 ......................... Bed Leveling
10 ......................... Software Installation
11 ......................... Slicing
12 ......................... Preparing to printing
13 ......................... Circuit Wiring Diagram
14 ......................... After-Sales Service

Filament Holder
Gantry
Assembly
Extruders
Hot end
Hot bed
Touch- Screen
No.
Image
Name
Qty
1
Wrench &
Screwdriver
1set
2
TF Card & Reader
1set
3
Spatula
1
4
Pliers
1
5
0.4mm
Nozzle Cleaner
1
6
Power Cable
1
7
USB Cable
1
8
Spare Parts
1set
on-off control
2
Tool List 1

Gantry Assembly Base
Tool Box
Display screen Filament Holder(*2)
Tool List 2
3
Filament (200g)
No.
Image
Name
Qty
9
M5x25 Black Hex-Bolt and Lock Washer
4
10
Z-axis limit plate assembly
1set
11
M3x4 Screw
4
12
Touch screen support
1

Front
Back
4pcs
M5X25
Gantry Frame Installation
4
1. Carefully remove all parts from the box
and remove any tape or padding from them.
a. Inspect each component and ensure
nothing was damaged during shipment.
Gantry
Base
2. Install the gantry frame (A) to the base frame (B)
a. On the gantry frame, make sure the nozzle assembly is to the front, and
the long vertical lead screw is to the back. On the base frame, make sure
the black belt cover is on the front, and the stepper motor is on the back.
b. Use the M5x25 screws (4) and lock washers (4). Lift the base frame.
Install the screws through the base frame into the threaded holes in the
gantry frame. Tighten with the M5 hex key (Allen) wrench.

Filament Holder Installation
Z-axis limit plate installation
4pcs
M4 T-nut
M4X6
3. Installation of the filament spool holder.
a. Secure the filament holder using two M4*8 screws and
T-nuts. Loosen the t-nuts by hand and align them so
they will fit inside the grooves of the frame. It is
essential that the nuts are loose so that when you
tighten the screws, the nuts will rotate 90° and grab
onto the inside of the groove of the extrusion.
b. Align the round cylinder through the hole of the
filament plate. Turn the large nut to lock in place.
4. Installation of the Z-axis limit plate.
a. The Z-axis limit switch board is installed at the lower
left of the gantry, and the installation method is the
same as that of the filament bracket.
5. Touch Screen Display installation.
a. Attach the bracket to display with M3x4 screws (4)
b. Mount the touchscreen to the front right side of the
frame with M4x6 screws (2) and T-nuts (2).
C
2pcs
M4X10 M4 T-nut
5
Display screen Installation
2pcs
M4 T-nut
M4X6

Y
X
Z
The Y cables go to the motor and
switch at the back of the base frame
that move the build plate.
The Z cables go to the motor and
switch on the left side of the base
frame that raise and lower the nozzle.
The X cable is connected to the
motor and running belt switch
Tip: Try not to bend the
pin connectors as you push
them in. Pay attention to the
working voltage of your
machine
*Plug the power cord into a
three-hole power jack.
6
Select the correct input voltage to match your
local mains (220V or 110V).
Ribbon Cable
Touch Screen Cable

Information Displayed
7
Print Speed
Automatic
Manual
Cooling
Fan
Levelling
Refuel
Moving
Motor
Printer info
Language
Set temperature
of the Nozzle
Current temperature
of the Nozzle
Set temperature
of the Nozzle
Current temperature
of the Nozzle

1. Preheat
Method 1
Method 2
2. Feeding Filament
Press and hold the extrusion clip, insert the filiment from the
inlet to the position with red line above the small pneusmatic
connector.
Tip : How to Replace the Filament ?
1. Preheat the nozzle.
Push and hold extruder arm and feed 5-10mm of filament
by hand, then quickly withdraw the filament.
Using this method helps to avoid pulling liquid filament
through the PTFE tube, potentially causing clogs.
8

1. Tighten the four levelling nuts at the bottom of the platform before
initial levelling.
2. Select Settings→Levelling, click on the number ②
3. Adjust the platform height by turning the knob underneath. Use a piece
of A4 paper (standard printer paper) to assist with the adjustment,
making sure that the nozzle lightly scratches the paper.
4. Complete the adjustment of the screw on all 4 corners.
5. Click the number ① to test whether the middle gap of the platform is
suitable.
6. Repeat above steps 1-2 times if necessary.
7. Slight adjustments can be made while brim
or first layer is printing.
9
5
1
2 3
4
Pro Tip: If the hot bed is not perfectly level
and adjusted, the Z axis compensation
function can be used when printing the first
layer to get a perfect first layer.

10
1. Install the Cura 4.5
2. Add the machine
(How to add the choice of SV02 Machine in Cura, please refer to 'SV02 Machine
Profile guide.docx' in the 'Machine Profile' folder in SD card.)

11
1. Add and merge the models 2. Select custom
3. Select the profile “Draft” 4. Select Enable Prime Tower

1. Save file to SD card
Insert SD card into computer with Reader.
2. Printing
Select “Print from SD”
Select the file to be
printed
Insert the SD card
12

13

Service
1.The printer can be returned within seven days, 15 days replacement, one-year warranty, lifetime maintenance.
Every machine is assembled and tested by our expert staff before departing our facilities.
Replacement requirement
1. The appearance of the product is intact, without damage, cracks, deformation, etc.;
2. Machine is complete including all parts, tools, original box, and foam padding;
3. Provide a valid purchase invoice, product numbers should be the same.
Warranty coverage
1. The following accessories are not included in the warranty coverage ( unless damaged by transportation): platform sticker; platform forming
plate; acrylic cover; card reader and TF card; platform glass; USB cable; filament; rack and tools, etc.
2. Profile: Small blemishes in the black paint due to testing or shipping are not covered in the premise that the blemish does not affect normal use;
3. Nozzle assembly (nozzle, heating block, throat pipe , heat sink, Teflon tube, etc.) warranty period is 3 months. If damage occurs after the warranty
expires, you will be responsible for replacement;
4. 12 Month Warranty on the motherboard, LCD display, power supply, heated bed. The free warranty maintenance is provided by the original factory
over the warranty period. After Warranty expires, original factory maintenance is available, but the customer is responsible for shipping and
maintenance costs;
Not included in warranty coverage:
(1) It will be difficult to provide an effective warranty service if you can not provide a correct serial number;
(2) The whole machine and components exceed the warranty period;
(3) Equipment failure or damage caused by unauthorized modification of the equipment (private modification includes: 1. modification of the nozzle
assembly; 2. modification of the machine structure; 3. use of third-party components; 4. use of third-party firmware procedures or change the original
Factory firmware program, etc.);
(4) Equipment failure or damage due to incorrect installation and use;
(5) Equipment failure or damage caused by use in a non recommended working environment specified by this manual (Unstable, dusty, moisture);
(6) Equipment failure or damage due to improper use (beyond workload, etc.) or maintenance;
(7) Equipment failure or damage due to the use of other branded components or other inferior consumables.
14

SHENZHEN Lian Dian Chuang Technology LTD.
Official Website: www.sovol3d.com
Tel: +86-0755-2107 4700
E-mail: sale@sovol3d.com info@sovol3d.com
Table of contents
Other Sovol 3D Printer manuals
