0113211R9 Page 8 of 12
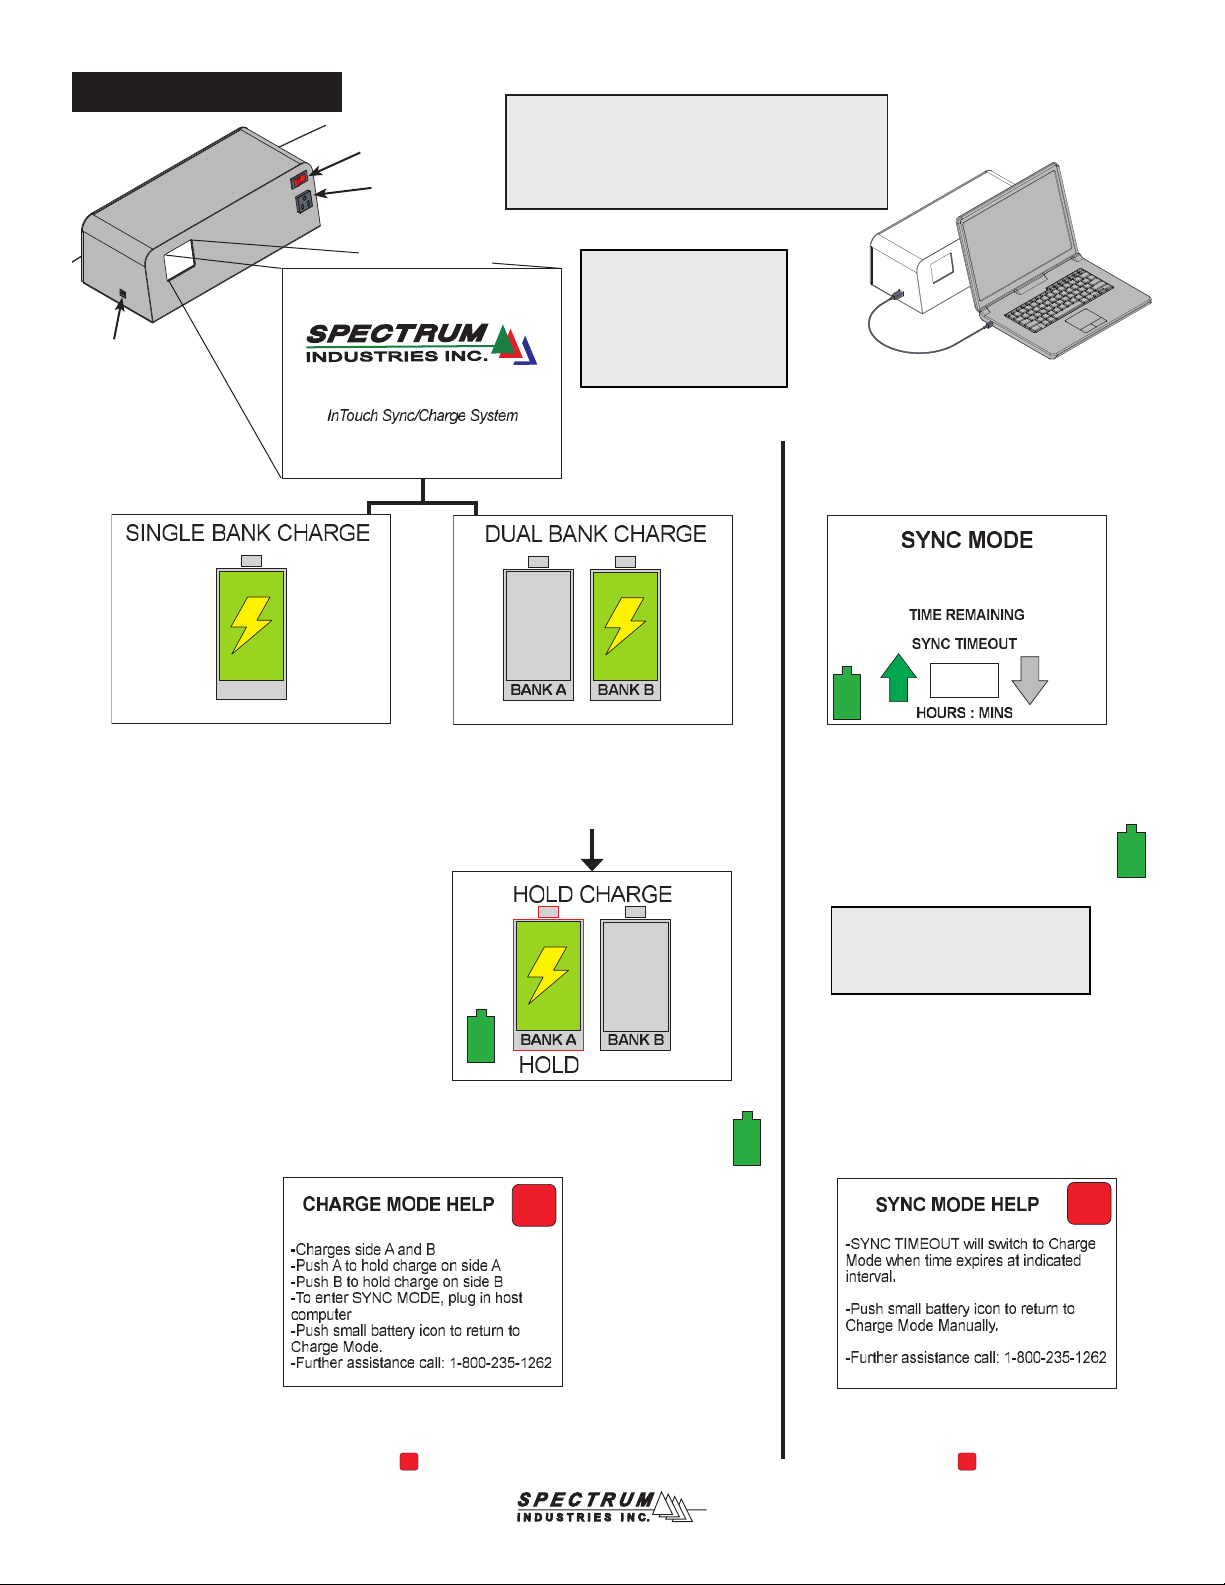
To access the help screen, press in the lower
right corner. When the help screen is displayed,
the system remains on and continues operation in
Charge Mode. Press to return to the previous
screen.
Sync Mode Timer
• Syncs up to 40 iPads at once
• Can be set from 30 min to 9.5 hrs by
touching arrows (default setting: 30 min)
• Shows countdown in minutes
• Switches to Charge Mode after time
expires or battery (charge) icon button
is pressed
If two banks are plugged in and detected
(InTouch 40 Cart), the Dual Bank Charge
mode is displayed until the host computer
is plugged in. Charging will cycle
between banks at 15 minute intervals.
If only one bank is plugged in and detected
(InTouch 20 Cart), the Single Bank Charge
Mode is displayed until the host computer is
plugged in.
Press the ‘A’ or ‘B’ battery icon hold charge
on either bank and discontinue cycling.
Press the small battery (charge) icon to
return to the Dual Bank Charge Mode.
Plugging a host computer USB cable into
the side USB port at any time while the
unit is powered on will cause the system to
switch to Sync Mode. Unplugging the USB
cable will return system to Charge Mode.
To access the help screen, press in the lower
right corner. When the help screen is displayed,
the system remains on and continues operation
in Sync Mode. Press to return to the previous
screen.
touch screen intro
on power up
power switch
auxiliary outlet
(2 amp)
USB port
USB
cable
Note: Be sure to allow enough time
on the automatic sync time-out for
all downloading and syncing to be
completed to iPad’s.
Note: All cables should
remain plugged in while
power is present. If cables
are removed and recon-
nected, the power must be
reset to the host computer
and cart.
Sync / Charge™Unit Note: For best syncing results, use an Apple
Mac product as the host computer with enough
memory to download to iPads. Windows-
based products have limitations on quantity of
iPads they can sync at one time.
1:30
1:29:56
X
X
X
X