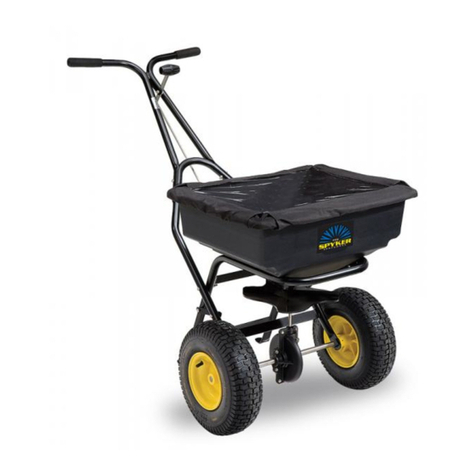
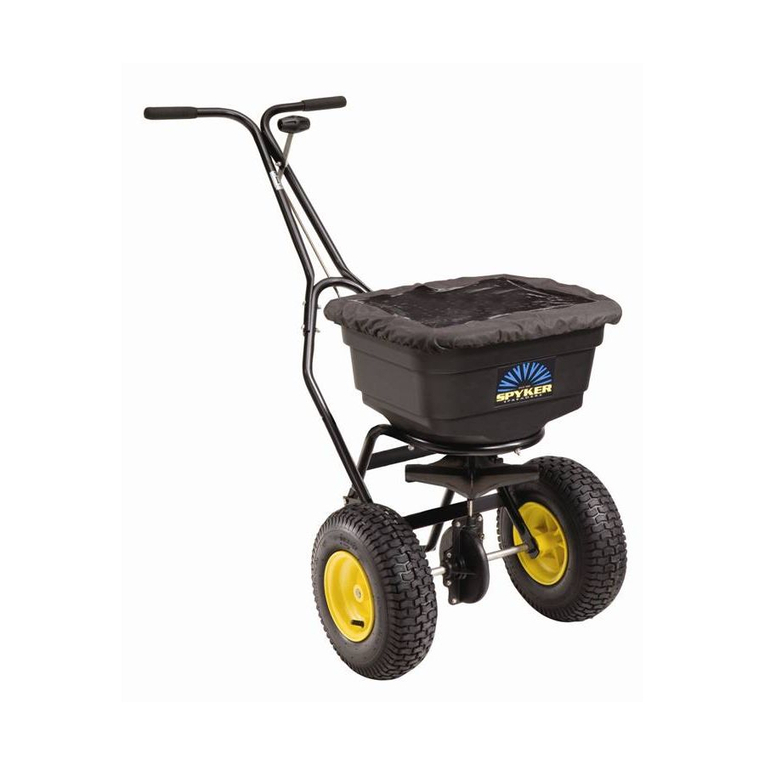
SPYKER 88 User manual

spread with confidence
Spreading Chart
Operation Guide
Service Manual
Parts List
spread with confidence
It’s the spread that counts
For Models:
88, 296, 298
298
296
88
P.O. Box 210
810 W. Main Street
N. Manchester, IN
46962 USA
1-800-972-6130
Fax: 219-774-3416

Tools You will Need:
Screwdriver
7/16 Wrench
3/8 Wrench
Mallet
Parts You will Use:
Parts for Models:
296, 298
• (1) Drive Wheel
• (1) Idle Wheel
• (2) Handle - SS.
• (2) Bump Bar - SS.
• (1) Screw 10-24x1-3/4 Bolt
• (1) Nut 1/4 - 20
• (2) Washer - Finishing
• (2) Handle Grip
• (9) Nut
• (1) Agitator Wire
• (1) Felt Washer
• (1) Upper Spinner Shaft
• (1) Coupling
• (1) Spring Clip
• (1) Cotter Pin
• (6) 1/4 - 20x1-1/2 Bolt
• (3) 1/4 - 20x2-3/4 Bolt
• (1) Screen
• (1) Spinner
For Quick and Easy Assembly - First Read Entire Procedure
Then Follow Carefully The Step by Step Instructions
2
Assembly Instructions
NOTE: Painted model 296 shown in assembly instructions. 298 is stainless
frame (not shown).

1.
Insert the ground
prop (46) into the
frame and fasten
with two bolts
(47) and nuts (5)
supplied.
Spreader Assembly
3
2.
a. Mount tires on
axle as shown to
the right, noting
that the drive
wheel (33) has a
hole in the hub
for the bolt (42)
to go through the
axle and fasten
with nut (44) as
illustrated with an
arrow in diagram
2b.
34
33
2b. Washers (50)
go on either side.

4
Spreader Assembly
continued
3.
Attach the idle (34)
wheel to axle with
the washer (45)
and cotter pin (25)
as shown right.
4.
Insert handles (40)
into frame as
shown right and
fasten handles
loosely (40) to
frame (14) with 4
bolts (48) and 4
nuts (5). Attach
handles (40)
loosely together
with 1 bolt (41)
and nut (5) at
location illustrated
with arrow. Leave
the top two holes
empty until you
attach the levers.
5.
Attach on/off
control lever (37)
and Accuway
control lever (38)
to the handles as
shown and bolt
together with two
of the longer bolts
(41) supplied (5).
Tighten all nuts &
bolts at this time.
38 37
41
48

5
Cable Adjustment Procedure
for Model 88 and Current Models 296 & 298
1.
Make sure that both levers are pulled all the way
back towards the handles.

6
Cable Adjustment Procedure
for Model 88 and Current Models 296 & 298
2.
Turn the rate control dial (10) to the highest
setting, (all the way past the number (9) until the
notch on the linkage stops against the flat surface
of the dial. Insert control cables in the holes in the
cable mount bracket (3) and guide the inner wire
through the hole in the cable fasteners (13). Slide
cables over so that the slots in the cable ends are
held firmly by cable mount bracket. NOTE: The
on/off control lever (37) goes into the lower hole in
this illustration which then attaches to the rate gate
linkage (9). Secure cable by inserting screw (52)
into hole of cable retainer (53) and screwing into
cable mount bracket (3). Make sure that the
diffuser assembly (12) is slid back completely
against the upper spinner shaft (28), and the rate
gate linkage (9) is slid back against the dial (10).
Now tighten the set screws in the cable fasteners
(13) to secure the wires to the fasteners.
28
3
13
13
53
12
9
10
52

1.
Insert upper
spinner shaft (28)
into the bottom of
hopper so that
the end with the
hole for the
agitator wire goes
up into the
hopper.
Spreader Assembly
continued
Spinner Assembly
7
6.
Insert the bump
bar (46) into
frame as shown
to the right and
fasten with two
bolts (15) that
fasten the front of
the hopper to the
frame. The bolts
go through the
bump bar and are
fastened with
nuts (5).
2.
Slide spinner (31)
onto upper spinner
shaft (28).

Spinner Assembly
continued
8
4.
Connect upper
spinner shaft (28)
and lower spinner
shaft (23).
3
.
Slide coupling (29)
onto upper spinner
shaft (28).
5.
Slide coupling (29)
down to secure
connection of
upper & lower
spinner shafts.

Spinner Assembly
continued
9
7.
Snap the loop of
the spinner clip
(30) around upper
spinner shaft (28)
to secure spinner
(31).
6.
Insert spinner clip
(30) through hole
in spinner (31) and
hole in upper
spinner shaft (28).
NOTE: Use upper
hole in spinner
shaft for the
regular spinner
(31) and use the
lower hole for the
mulch spinner.
8.
The slot in the dial
is to allow the rate
gate linkage to
travel all the way
open for the mulch
setting on models
296 & 298 only.

18
20
18
32
18
20
18
42
19
19
25
15
16
15
16
15
16
15
16
1
5
5
5
46
33
34
55
5
48
38
41
40
47
47
5
46
5
47
14
5
5
37
44
50
50
10
Exploded View Model 88
Rear View
39 Screen
54 Retainer Wire
Hopper & Frame
Assembly

18
18
27
18
20
20
18
42
43
45
36
30
28
23
24
26
25
25
29
31
35
50
50
44
44
11
Exploded View Model 88
7
4
4
4
4
7
37
38
51
8
2
12
3
53
52
6
13
13
Hopper Bottom
Gear Assembly
Gear Box Housing
11
10
9
Rate Dial
Assembly
22
21
21
32
32

12
Exploded View Model 296 & 298
15
16
15
16
15
16
15
16
1
5
5
5
5
17
46
34
33
55
5
48
41
40
47
5
46 5
47
47
14
5
519
19
37
18
18
18
18
44
38
20
32
20
45
45
42
25
39 Screen
Spinner Dish
51

13
Exploded View Model 296 & 298
4
4
4
4
4
4
49
49
13
13
3
7
7
7
7
8
12
2
6
38
37
11
10
9
18
18
27
18
20
20
18
42
43
45
36
30
28
23
24
26
25
25
29
31
35
50
50
44
44
22
21
21
32
32
Hopper Bottom
Gear Assembly
Gear Box Housing
Rate Dial
Assembly

Parts List
Item # Part # Quantity Description Price
1 05-296-2210 1 Hopper 73.44
2 05-296-2215 1 Hopper Bottom 21.36
3 05-296-0180 1 Cable Mount Bracket 19.56
4 05-90-0049 8 Hopper Bottom Bolt 1/4-20 X 1/2 .10
5 SS-91-0004 21 Nut .12
6 SS-94-0007 1 Hopper Bottom Bearing .21
7 05-94-0042 4 Rate Gate Diffuser Guide .54
8 05-296-2220 1 Rate Gate 9.99
9 05-296-0110 1 Rate Gate Linkage 2.94
10 05-296-0131 1 Dial 2.58
11 05-94-0069 1 Dial Mount 1.74
12 05-296-0175 1 Diffuser Assy. 17.70
13 05-90-0044 2 Cable Fastener .57
14 05-296-1020 1 Frame 98.07
15 05-90-0016 4 Bolt 1/4-20 X 1-3/4 / Hopper to Frame .21
16 05-94-0064 4 Plastic Washer .10
17 05-296-1040 1 Axle 18.69
18 05-94-0071 4 Axle Bushing .48
19 05-98-0051 2 Grease Zerk .84
20 05-90-0013-R 3 Collar 1.50
21 05-94-0039 2 O Ring .10
22 05-94-0038 1 O Ring .10
23 05-97-0029 1 Lower Spinner Shaft 25.71
24 05-94-0035 1 Gear Support / Yoke 5.34
25 99-50-1081 2 Cotter Pin / Idle Wheel .10
26 05-94-0034 1 Pinion Gear 2.16
27 05-94-0033 1 Bevel Gear 4.62
28 05-97-0028 1 Upper Spinner Shaft 29.79
29 05-97-0030 1 Coupling 29.04
30 05-97-0031 1 Spinner Clip 1.53
31 05-296-0140 1 Spinner 6.57
32 05-94-0036 2 Gear Box Housing 1.98
33 05-95-0016 1 12” Drive Wheel 34.83
34 05-95-0017 1 12” Idle Wheel 35.94
35 SS-92-0002 1 Felt Washer .10
36 SS-96-0003 1 Agitator Wire .39
37 05-296-0155 1 On/Off Control Lever Assy. 41.79
38 05-296-0190 1 Accuway Control Lever 45.75
39 05-296-1070 1 Screen 8.43
40 05-296-1010 2 Handle 25.29
41 05-90-0017 3 Bolt 1/4-20 X 2-3/4 / Handle & Controls .54
42 05-90-031 1 Screw 10-24 X 1-3/4 / Drive Wheel .12
43 05-90-0015 1 Screw 10-24 X 1-3/8 / Bevel Gear .15
44 05-91-0008 2 Drive Wheel & Bevel Gear Nut .10
45 05-92-0004 2 Washer, Finishing / Idle Wheel .18
46 05-296-1030 2 Bump Bar/Ground Prop 14.37
47 SS-90-0012 6 Screw 1/4-20 X 1-1/2 / Ground Prop .18
48 05-94-0072 2 Handle Grip 1.77
49 05-91-0009 4 Jamb Nut .30
50 05-92-0007 2 Washer, Finishing .18
51 05-296-0115 1 Spinner Dish 59.45
14
296

Parts List
Item # Part # Quantity Description Price
1 05-296-2210 1 Hopper 73.44
2 05-296-2215 1 Hopper Bottom 21.36
3 05-296-0180 1 Cable Mount Bracket 19.56
4 05-90-0049 8 Hopper Bottom Bolt 1/4-20 X 1/2 .10
5 SS-91-0004 21 Nut .12
6 SS-94-0007 1 Hopper Bottom Bearing .21
7 05-94-0042 4 Rate Gate Diffuser Guide .54
8 05-296-2220 1 Rate Gate 9.99
9 05-296-0110 1 Rate Gate Linkage 2.94
10 05-296-0131 1 Dial 2.58
11 05-94-0069 1 Dial Mount 1.74
12 05-296-0175 1 Diffuser Assy. 17.70
13 05-90-0044 2 Cable Fastener .57
14 05-298-3020 1 Frame 165.33
15 05-90-0016 4 Bolt 1/4-20 X 1-3/4 / Hopper to Frame .21
16 05-94-0064 4 Plastic Washer .10
17 05-296-1040 1 Axle 18.69
18 05-94-0071 4 Axle Bushing .48
19 05-98-0051 2 Grease Zerk .84
20 05-90-0013-R 3 Collar 1.50
21 05-94-0039 2 O Ring .10
22 05-94-0038 1 O Ring .10
23 05-97-0029 1 Lower Spinner Shaft 25.71
24 05-94-0035 1 Gear Support / Yoke 5.34
25 99-50-1081 2 Cotter Pin / Idle Wheel .10
26 05-94-0034 1 Pinion Gear 2.16
27 05-94-0033 1 Bevel Gear 4.62
28 05-97-0028 1 Upper Spinner Shaft 29.79
29 05-97-0030 1 Coupling 29.04
30 05-97-0031 1 Spinner Clip 1.53
31 05-296-0140 1 Spinner 6.57
32 05-94-0036 2 Gear Box Housing 1.98
33 05-95-0016 1 12” Drive Wheel 34.83
34 05-95-0017 1 12” Idle Wheel 35.94
35 SS-92-0002 1 Felt Washer .10
36 SS-96-0003 1 Agitator Wire .39
37 05-296-0155 1 On/Off Control Lever Assy. 41.79
38 05-296-0190 1 Accuway Control Lever 45.75
39 05-296-1070 1 Screen 8.43
40 05-298-3010 2 Handle 30.75
41 05-90-0017 3 Bolt 1/4-20 X 2-3/4 / Handle & Controls .54
42 05-90-0031 1 Screw 10-24 X 1-3/4 / Drive Wheel .12
43 05-90-0015 1 Screw 10-24 X 1-3/8 / Bevel Gear .15
44 05-91-0008 2 Drive Wheel & Bevel Gear Nut .10
45 05-92-0004 2 Washer, Finishing / Idle Wheel .18
46 05-298-3030 2 Bump Bar/Ground Prop 20.61
47 SS-90-0012 6 Screw 1/4-20 X 1-1/2 / Ground Prop .18
48 05-94-0072 2 Handle Grip 1.77
49 05-91-0009 4 Jamb Nut .30
50 05-92-0007 2 Washer, Finishing .18
51 05-296-0115 1 Spinner Dish 59.45
15
298

16
Parts List
Item # Part # Quantity Description Price
1 05-94-0054 1 Hopper 54.00
2 05-71-2205 1 Hopper Bottom 7.02
3 05-88-2235 1 Cable Mount Bracket 18.84
4 99-10-0205 5 Bolt 1/4-20 x 1/2
" Hex Head / Hopper Bottom
.15
5 SS-91-0004 13 Nut .10
6 SS-94-0007 1 Hopper Bottom Bearing .35
7 05-94-0042 2 Rate Gate Diffuser Guide .66
8 05-94-0068 1 Rate Gate 1.23
9 05-24-1102 1 Linkage 2.73
10 SS-94-0006 1 Dial .51
11 05-94-0069 1 Dial Mount 1.74
12 05-88-2245 1 Diffuser Assembly 19.38
13 05-90-0044 2 Cable Fastener .57
14 05-88-2220 1 Frame 159.63
15 05-90-0016 4 1/4-20 X 1-3/4 Bolt / Hopper to Frame .30
16 05-94-0064 4 Plastic Washer .05
17 05-88-2230 1 Axle 21.25
18 05-94-0071 4 Axle Bushing .48
19 05-98-0051 2 Grease Zerk .54
20 05-90-0013-R 3 Collar 1.38
21 05-94-0039 2 O-Ring .15
22 05-94-0038 1 O-Ring .10
23 05-97-0029 1 Lower Spinner Shaft 17.10
24 05-94-0035 1 Gear Support/Yoke 2.01
25 99-50-1081 2 Cotter Pin .15
26 05-94-0034 1 Pinion Gear 2.43
27 05-94-0033 1 Bevel Gear 4.98
28 05-97-0028 1 Upper Spinner Shaft 19.50
29 05-97-0030 1 Coupling 9.00
30 05-97-0031 1 Spinner Clip
1.53
31 SS-94-0012-1 1 Spinner 5.31
32 05-94-0036 2 Gear Box Housing 1.95
33 05-95-0016 1 12" Drive Wheel 34.83
34 05-95-0017 1 12" Idle Wheel 35.94
35 SS-92-0002 1 Felt Washer .10
36 SS-96-0003 1 Agitator Wire .40
37 05-98-0063 1 On/Off Control Lever 3.75
38 05-98-0062 1 Accuway Control Lever 3.75
39 SS-96-0002 1 Screen 2.07
40 05-88-2215 2 Handle 40.89
41 05-90-0017 3 Bolt 1/4-20 X 2-3/4 / Handle Controls .50
42 05-90-0031 1 Screw 10-24 X 1-3/4 / Drive Wheel .20
43 05-90-0015 1 Screw 10-24 X 1-3/8 / Bevel Gear .20
44 05-91-0008 2 Drive Wheel & Bevel Gear Nut .10
45 05-92-0004 2 Washer, Finishing / Idle Wheel .40
46 05-97-3030 2 Bump Bar/Ground Prop 18.54
47
SS
-90-0012 6 Screw 1/4-20 X 1-1/2 .25
48 05-94-0072 2 Handle Grip 1.77
49 05-91-0009 4 Jamb Nut .30
50 05-92-0007 2 Washer, Finishing/Drive Wheel .18
51 05-94-0052 1 Rubber Plug .45
52 05-90-0055 1 Screw 10-32 X 1/2" / Cable Retainer .10
53 05-88-2240 1 Cable Retainer 1.29
54 05-98-0019 1 Retainer Wire 1.62
88

Read Before Using
SPEED - ACCURACY - FREEDOM FROM STRIPES AND STREAKS
are yours - when you use this Spreader.
The spread width ranges from 4 ft. to 12 ft. wide, depending on the
volume/density, particle size of the material and the rate of travel.
The spread thins or feathers at the outer edges, eliminating sharp,
“Edge of spread” lines which cause stripes and streaks. Extra coverage
can be given under trees and other heavy feeding areas without show-
ing “edge of spread” lines.
Gaps and double overlaps are less likely. Small errors in travel are for-
given and do not show.
WARNING: When spreading products containing herbicides, exercise extreme
caution with respect to careless spreading and to wind-drift.
CONTACT OF SOME PRODUCTS ON SOME PLANTS CAN BE FATAL.
If a dial setting is not found, use the size and weight comparison table
found on the back page.
Determine a dial setting on the low side. If the setting proves to be
too low, cover the area more than one time. A higher setting can be
used when a proven dial setting is established.
REMEMBER - Published dial settings can be approximate only. The
operation of the spreader, the condition of the material (damp or dry
or over-pulverized) and weather conditions, are all contributing factors.
For these reasons, it’s often a good idea to spread the area 2 times -
at one-half rate - in cross directions (SEE INFORMATION ON ONE-HALF
RATE DIAL SETTINGS ON REFERENCE CHART ON THE BACK PAGE.
SPREADING AT ONE-HALF RATE DIAL SETTINGS IS HIGHLY RECOM-
MENDED UNDER DAMP & HUMID CONDITIONS.
BECOME FAMILIAR WITH THE OPERATION OF THE SPREADER
BEFORE YOU PUT MATERIAL IN THE HOPPER.
Practice walking with the spreader, opening and closing the rate gate
at the appropriate times.
Travel at a constant speed and operate the spreader lever position.
Remember: Open the rate gate after the spreader is in motion at
operating speed (about 3 mph., or at a brisk walking pace).
Close the rate gate while spreader is still at operational speed.
17

Read Before Using
Rotary Agitator
Use the rotary agitator only if needed. Free-flowing, lump-free materi-
als will not require the agitator. The rotary agitator is easily installed or
removed. Note the clockwise rotation & sweep. Place felt washer
around spinner shaft before inserting agitator. - See page #11.
OIL BEARINGS AND ALL MOVING PARTS
Make certain the spreader is running freely!
Now You are Ready to Put Material in the Hopper
• Make certain the rate gate is in closed position.
• As insurance against spill damage and spill loss, put material in the
hopper with the spreader on a walk, driveway, paper, plastic, etc.
• The spreader will be easier to use if you only half-fill the hopper. Later
on you can fill the hopper if you so choose.
• Or for added capacity, the inverted bag in the hopper can serve as a
capacity extension. Also, an extension hopper, complete with filtering
and pulverizing screen, is available from the manufacturer.
Now You are Ready to Spread
• Spread header strips at the ends of the area
OPPOSITE the direction of spreading. This will
provide a “turn-around” area, an area to re-
align the spreader for the return spread.
• Example is for 6 ft. wide spread: Make the
first spreading pass at one-half the spread
width from the edge of the spreading area or
in this case approximately 3 feet or one big
step.
• Additional spreading passes will be at the full
spread width or approximately 6 feet apart.
• TAKE A SIGHTING AT THE FAR END. Keep
your eye on the sighting as you spread. You
will not need to wonder where you are or
where you have been. Continue until spread-
ing is completed.
• Left over fertilizer can be spread under trees and other high feeding
areas without showing “edge of spread” lines.
Header
Header
6’3’ 6’
18

19
Read Before Using
NOTE: With the rotary agitator installed, the rate gate closed (not spreading) and with
material in the hopper, the spreader will push harder than normal. (This is because the
agitator is stirring the material and it has no place to go.)
RECOMMENDATION: When not spreading and the spreader is being
pushed some distance, tip the spreader so only the idle wheel is on
the ground.
Cleaning the Spreader is Part of the Spreading Job.
IMMEDIATELY AFTER USE - CLEAN AND OIL THE SPREADER
• Method #1 - Wipe spreader thoroughly with an oily cloth. Oil all
bearings and bearing areas.
• Method #2 - Wash, rinse, and dry the spreader. Note: Drying
takes time. (Moisture trapped in bearing areas is slow to go.)
Immediately after drying - oil all bearings and moving parts. Make
certain all operations are thorough.
Note: Good “Dry Cleaning” is preferable to poor “Wet Cleaning”.
• It is virtually impossible to have rust and corrosion on a clean, dry,
oiled surface.
• Again - just before using - oil all bearings and moving parts.
• In storage, ideally the spreader should be hung by the handle. In
any case, do not pile weight on the spreader, as excess weight over
a period of time can distort the tires.

Grass Seed Spreading Chart
Dial settings are approximate only. Spreading at one half rate in cross directions
is usually recommended.
Manufacturer
and Product
Manufacturer’s
Bag Rate
Bag Sq. Ft.
Weight Coverage
Micro-Dial Settings
Full Rate Half rate
Once Over Twice Over
Spread
Width
(In feet
based on
brisk walking)
Bent Grass or Red Top .5# 1,000 1.25 4
1# 1,000 2.0 4
2# 1,000 2.5 4
Park, Merion, Delta, or Kentucky Bluegrass .5# 1,000 2.5 4
1# 1,000 3.0 4
2# 1,000 3.5 4
Hulled Bermuda 2# 1,000 2.75 2.25 6
3# 1,000 3.0 2.5 6
4# 1,000 3.25 2.75 6
Mixtures including coarse seeds 2# 1,000 6.0 6
4# 1,000 6.5 6
6# 1,000 7.0 6
Rye Grasses or Tall Fescue 2# 1,000 6.0 6
4# 1,000 7.0 6
6# 1,000 7.75 6
Dichondra 4 oz. 1,000 1.9 8
8 oz. 1,000 2.1 8
12 oz. 1,000 2.5 8
Pensacola Bahia 4# 1,000 4.5 3.75 7
5# 1,000 4.75 4.0 7
6# 1,000 5.0 4.25 7
20
This manual suits for next models
2
Table of contents
Other SPYKER Spreader manuals

SPYKER
SPYKER SPY50L-2S User manual

SPYKER
SPYKER R28-1824 User manual

SPYKER
SPYKER P40 Series User manual

SPYKER
SPYKER S40 Series User manual

SPYKER
SPYKER S30 Series User manual

SPYKER
SPYKER S100-12010 User manual

SPYKER
SPYKER S100-12010 User manual

SPYKER
SPYKER S60-12020 User manual

SPYKER
SPYKER SPY200T-1P User manual

SPYKER
SPYKER P20-5010 Series User manual