1017459 Rev. A 8©2016 Spyker Spreaders/A Brinly-Hardy Co.
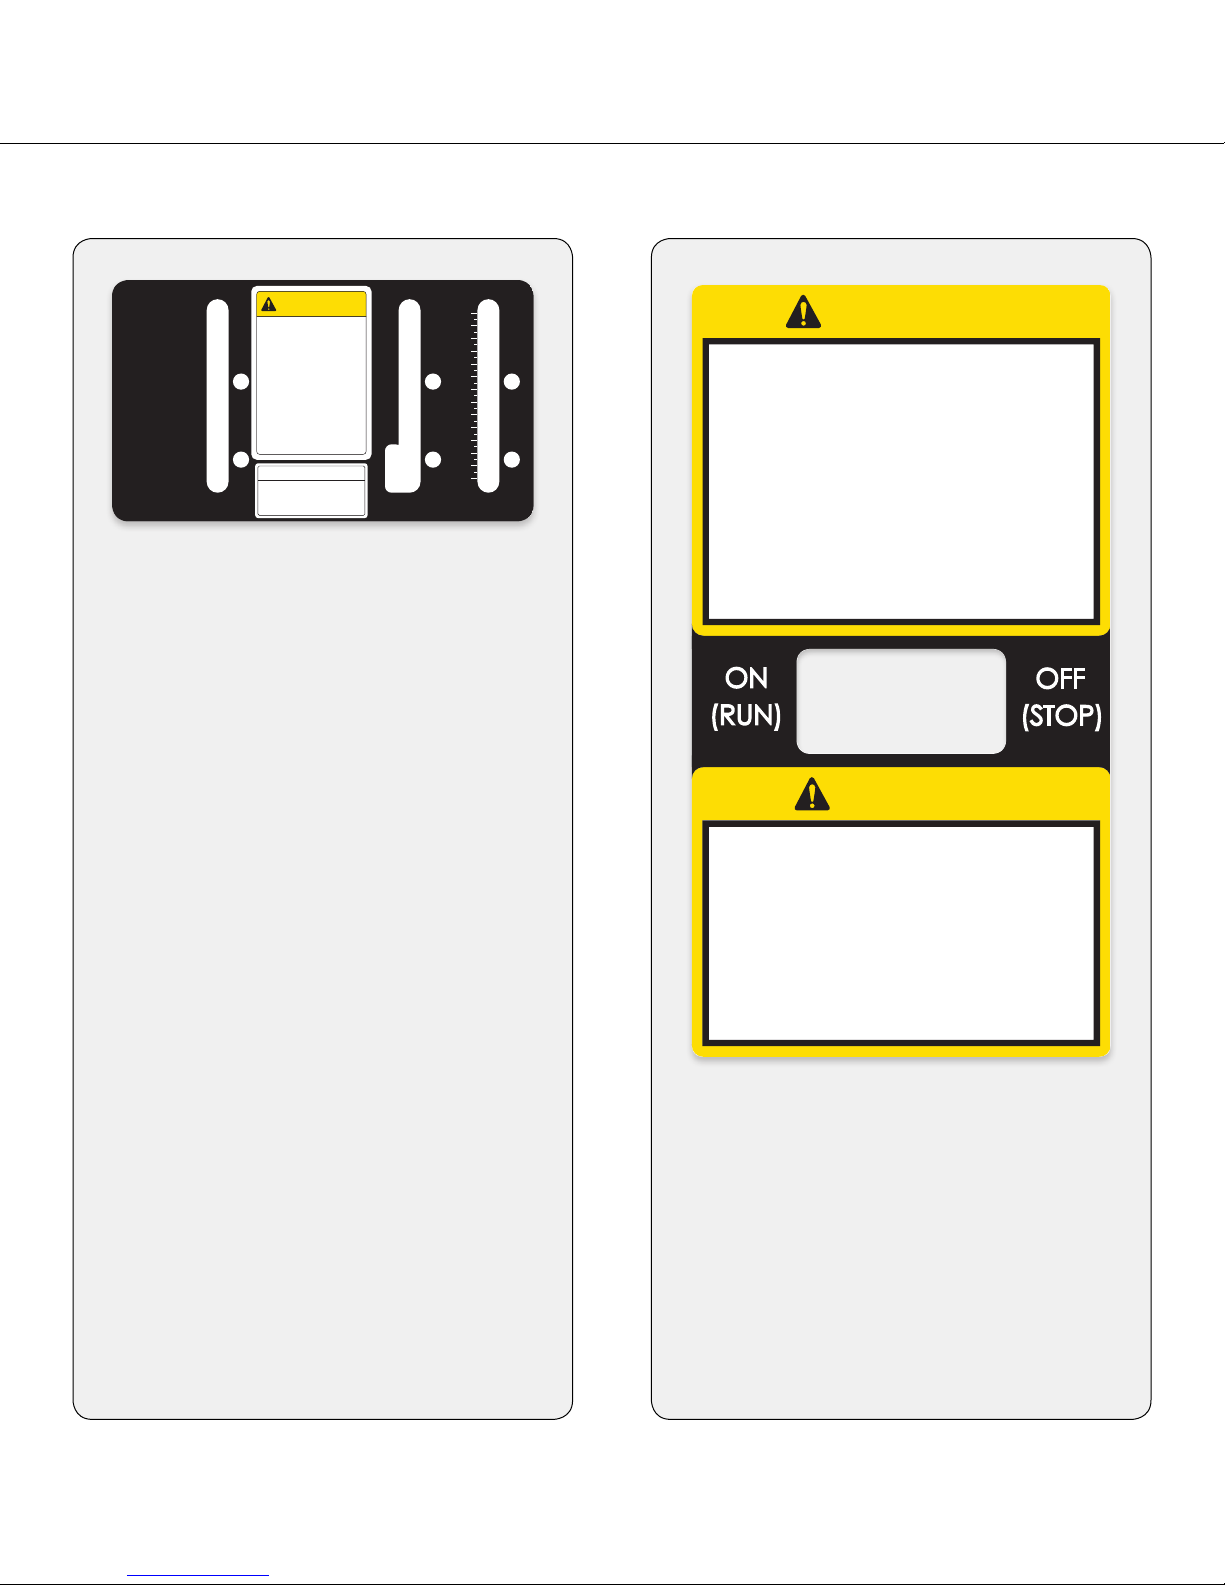
3. SPEED CONTROL LEVER:
The speed control lever limits the forward speed of
the unit by limiting the travel of the forward control
lever. “Application speed” sets the unit’s ground
speed to about 3 mph. Use a slower speed while
learning how to use and control the unit.
4. GROUND SPEED CONTROL LEVERS:
Located on the right side of the control panel is the
forward ground speed control lever. The left lever
is for reverse. These two levers control the
maximum output of the hydrostatic transaxle and
thus the ground speed of the spreader independent
of the engine speed. Pulling the right lever rearward
increases the forward speed and pulling the left
lever rearward Increases the reverse speed. Do
not move both levers in unison, only pull one at a
time. When the levers are moved in unison they
will place excessive pressure on the cables, which
could cause them to break. To start the engine,
ensure both levers are in their neutral position.
5. HOPPER SHUT-OFF LEVER:
Open and close the hopper gate by pushing the
lever forward to open the gate, and pulling the lever
rearward to close the gate.
6. ACCUWAY SPREAD CALIBRATION LEVER:
To adjust spread pattern for uniform distribution,
adjust the Accuway. See Accuway Spreader
Pattern Adjustment Section for instructions.
7. SIDE DEFLECTOR
Raise and lower the side deector by pushing the
lever forward to lower the deector, and pulling the
lever rearward to raise the deector.
8. FREEWHEEL ROD:
A rod is located in the platform area. When the rod
is pulled out, the spreader can be manually pushed
forward or pulled in reverse. Push rod in to engage
transmission.
9. PARKING BRAKE:
The brake is activated by the lever in the foot
platform area. Press down on the lever to engage
the park brake, and lift up the lever to release. (See
Figure 5).
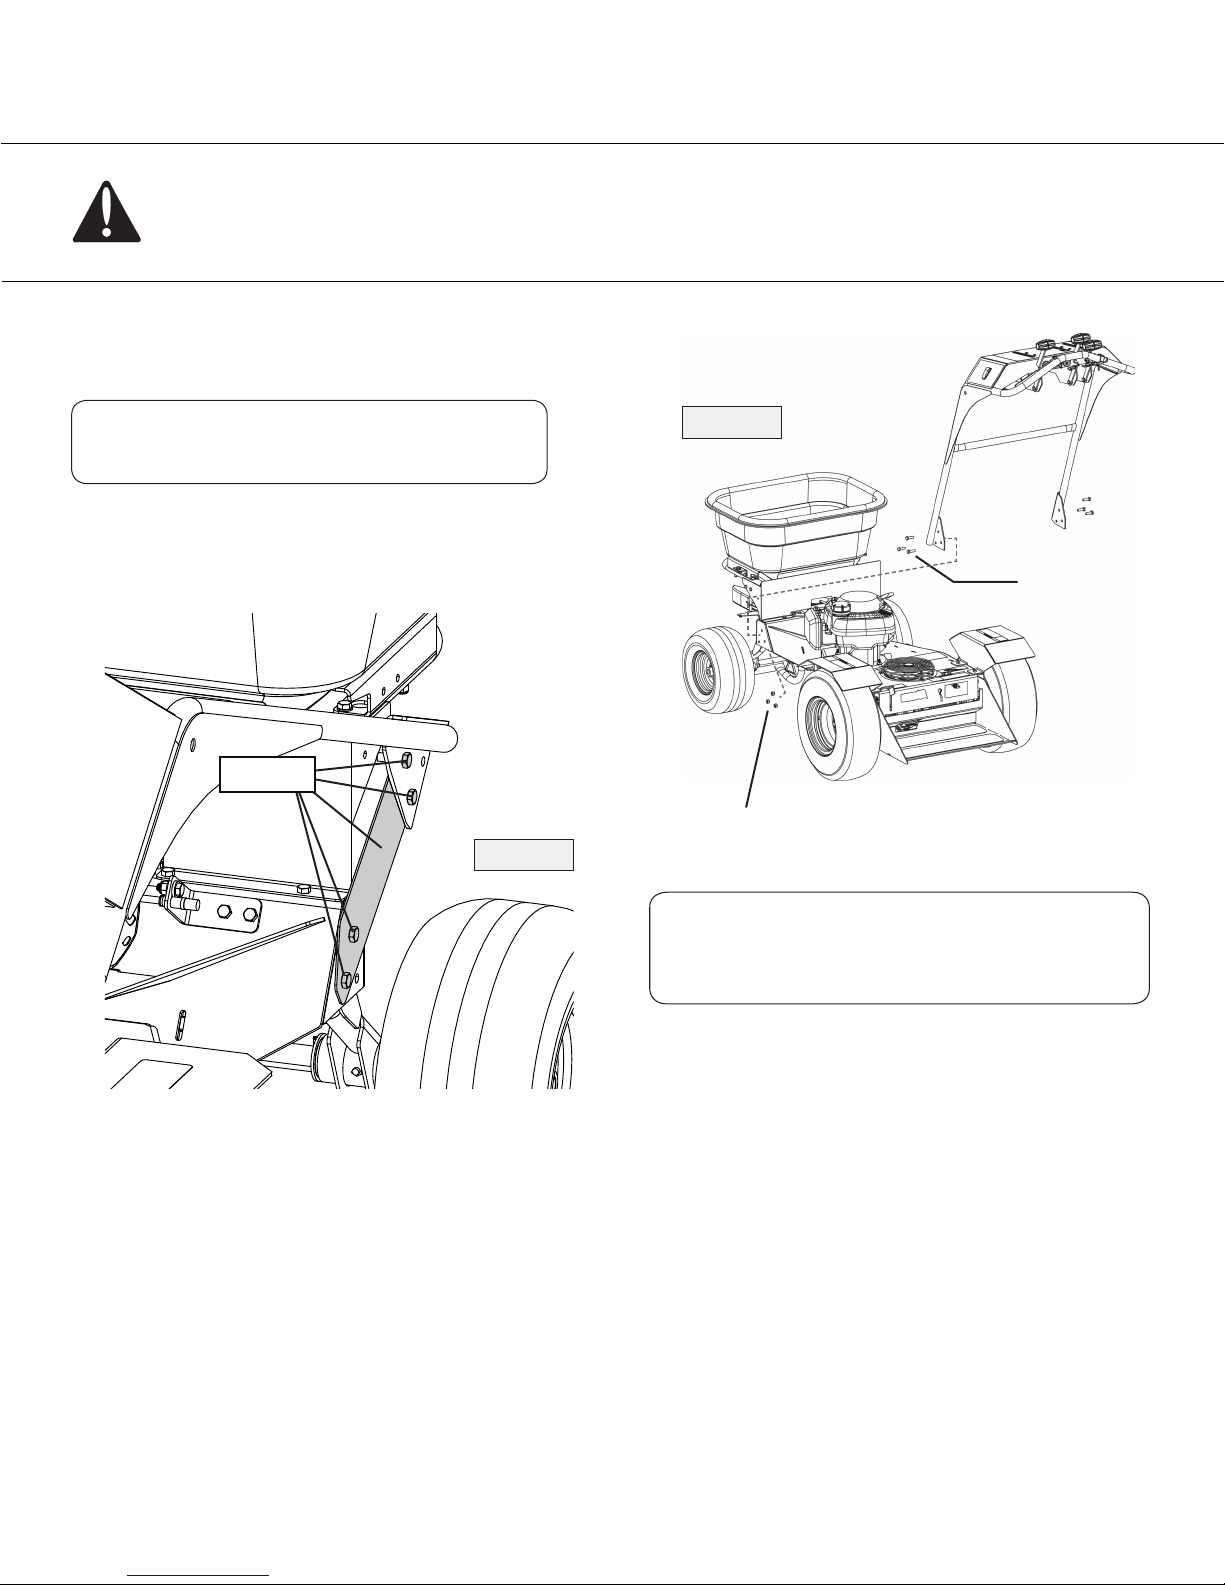
Operating Instructions
A. CONTROLS
1. ENGINE ON/OFF SWITCH:
The ON/OFF switch is located on the far left side of
the control panel. To start the engine, set the switch
to the “ON” Position. To turn off, throttle down the
engine, then set the switch to the “OFF” Position.
2. FUEL SHUTOFF VALVE:
The fuel shutoff valve is located between the
carburetor and the fuel tank on the LH side of the
engine. The handle turns 90 degrees to open or
close. When the handle is in the horizontal position,
it will open the ow of fuel to the engine. When it is
turned to a vertical position, it will shut off the fuel
ow to the engine. Anytime the spreader is being
trailered, or if the machine will not be in use for 30
minutes or more, close the fuel shutoff valve to
prevent ooding the engine.
ACCUWAY
®
SPREAD CALIBRATION
OFF
ADJUSTMENT
OFF
SIDE
DEFLECTOR
DOWN
UP
HOPPER
SHUT-OFF
OPEN
CLOSED
Serious bodily injury may
result from failure to follow
safe operator procedure.
•Read the operator’s manual before
operating this machine.
•Clear area of debris.
•Do not remove or disable shields, guards,
or safety devices.
•Always chock the wheel or engage the
parking brake when transporting the
machine or when parking on a grade.
•Stop engine, disconnect spark plug, set
parking brake before adjusting or servicing.
•Keep people and pets a safe distance away
from machine.
•Do not add fuel while engine is warm or
running.
•Use caution on slopes.
•Before leaving the operator’s position, wait
for all movement to stop.
•Do not allow operation of the machine by
untrained personel.
CAUTION
FOR FIRST-TIME OPERATORS
•START OFF IN A FLAT, OPEN AREA.
•KEEP BYSTANDERS AWAY
•SET THROTTLE AT A LOW SPEED.
•PRACTICE MANEUVERING,
(FORWARD, REVERSE, LEFT, RIGHT)
Reverse
Ground
Speed
Control
Speed
Control Lever
(Application
Transport)
Forward
Ground Speed
Control
Engine
ON/OFF
Switch
Hopper
Shut-Off
Side
Deector
Accuway
Spread
Calibration
Fig. 4