SR SUNTOUR OWNERS MANUAL HESC components
1
Table Of Contents
Quick Start Guide ........................ 2
1. How do Iturn the
system on?.........................................2
2. Support modes?..........................2
Factors that inuence the
cruising range ..................................2
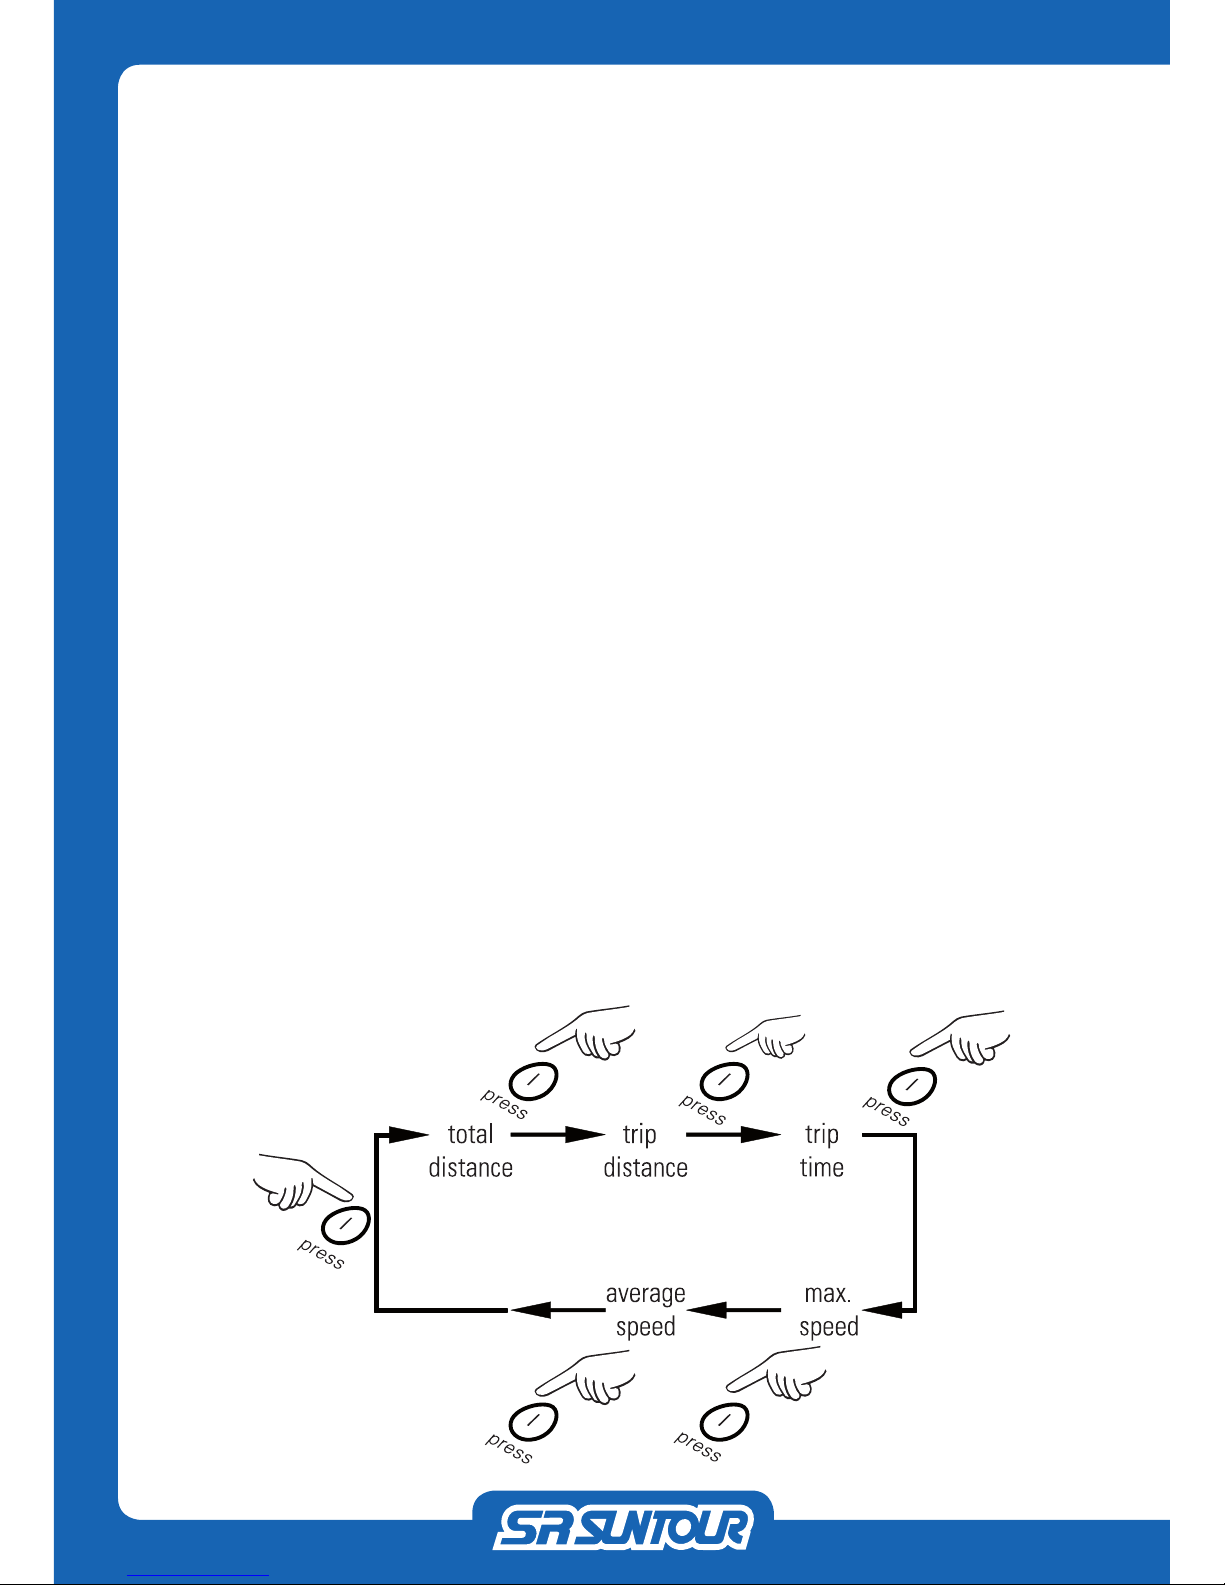
3. What information does the
system oer you? ............................3
Information mode ..........................3
4. How do Iremove the
display unit?......................................3
5. How do Icharge the
battery?...............................................4
6. How to reset trip distance .......5
7. Error Code 05 / E05.....................5
Important Safety Information!... 6
Before Each Ride!..........................7
Foreword ...................................... 8
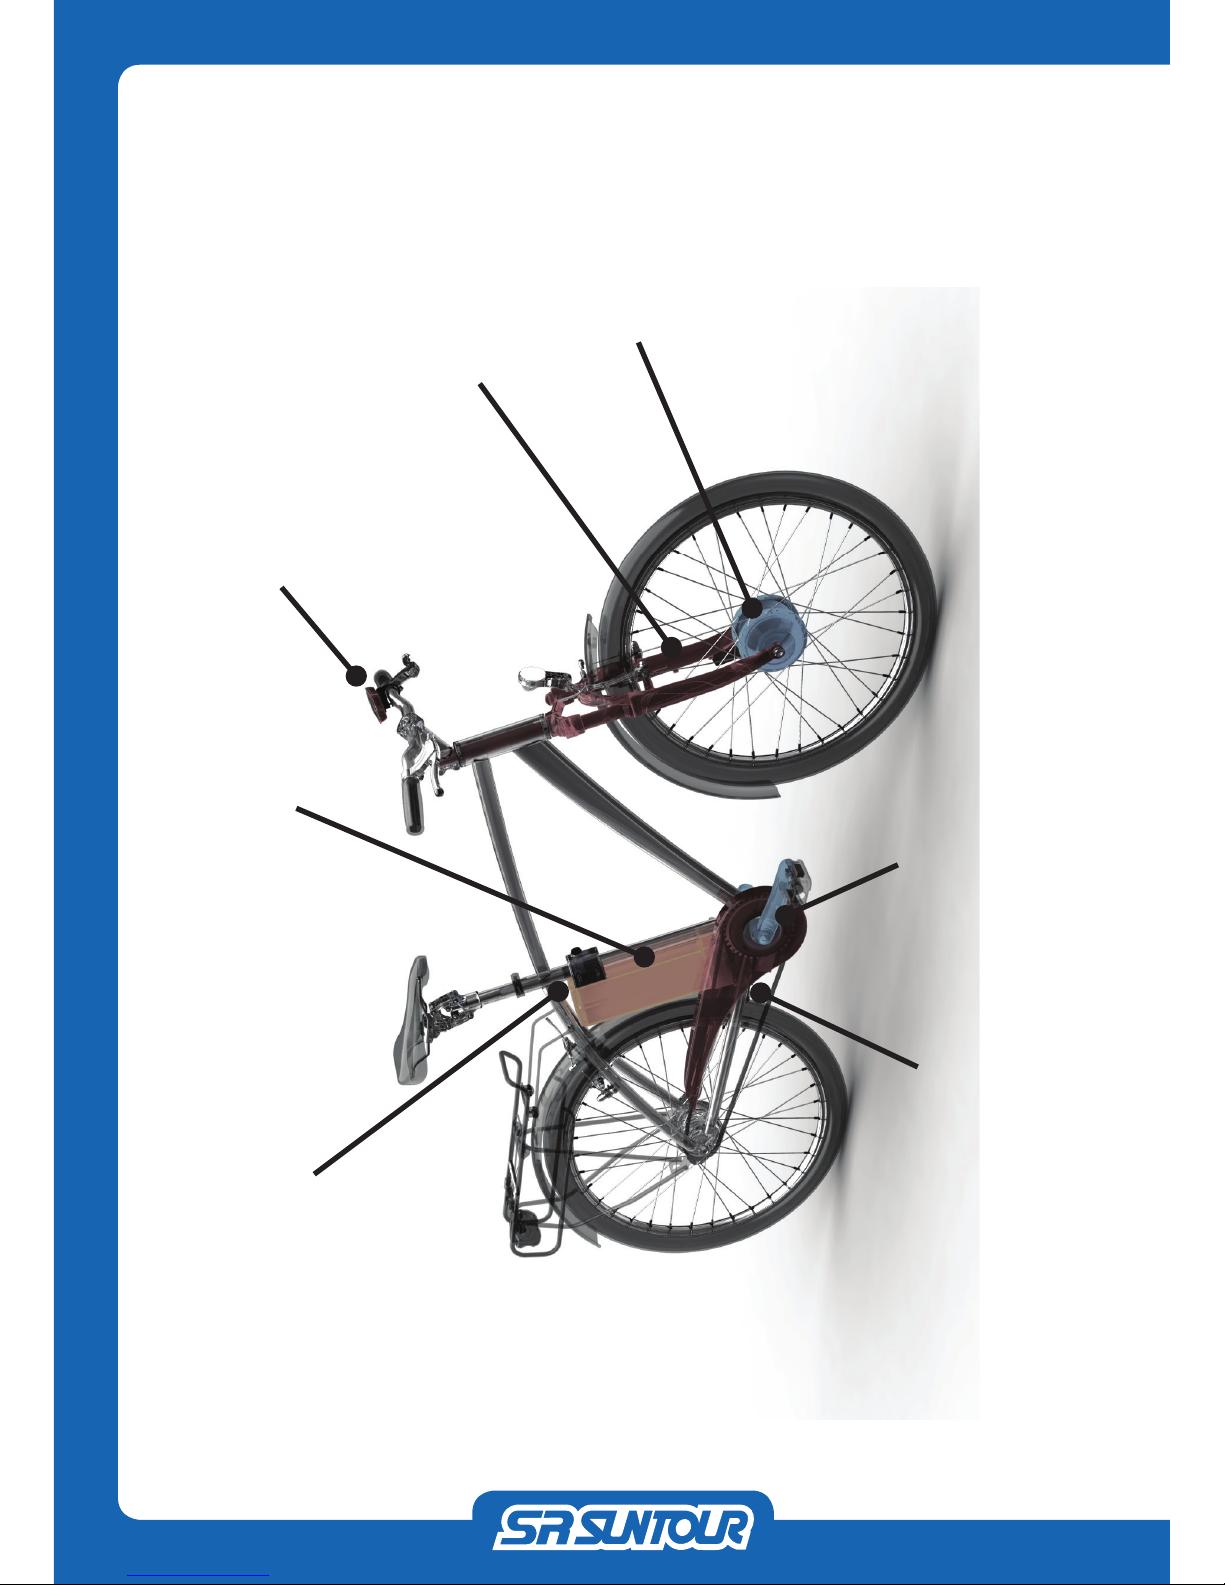
Drive Unit Components ............ 10
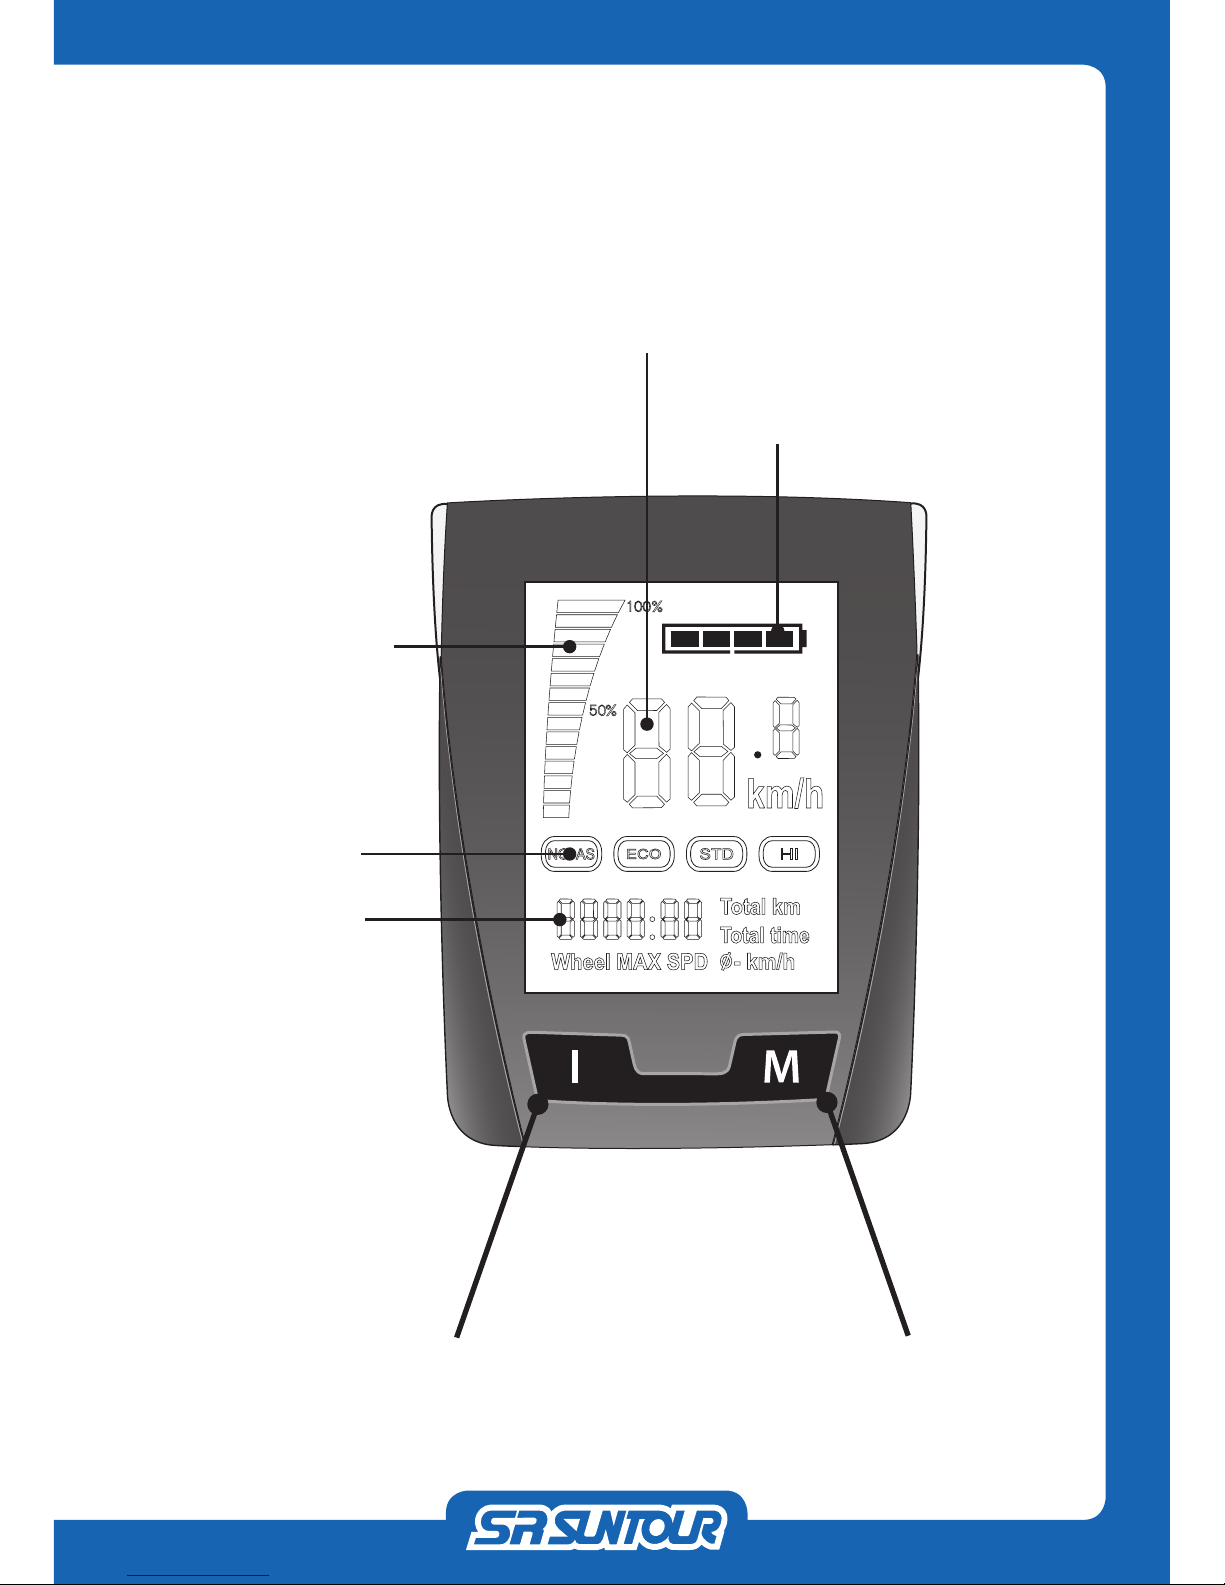
Display / User Interface............. 11
How to remove the display....... 12
How to operate the display/user
interface ..................................... 13
General Information.................... 13
How to switch ON/OFF ............. 14
Headlamp control........................ 14
Push-up support switch ............ 15
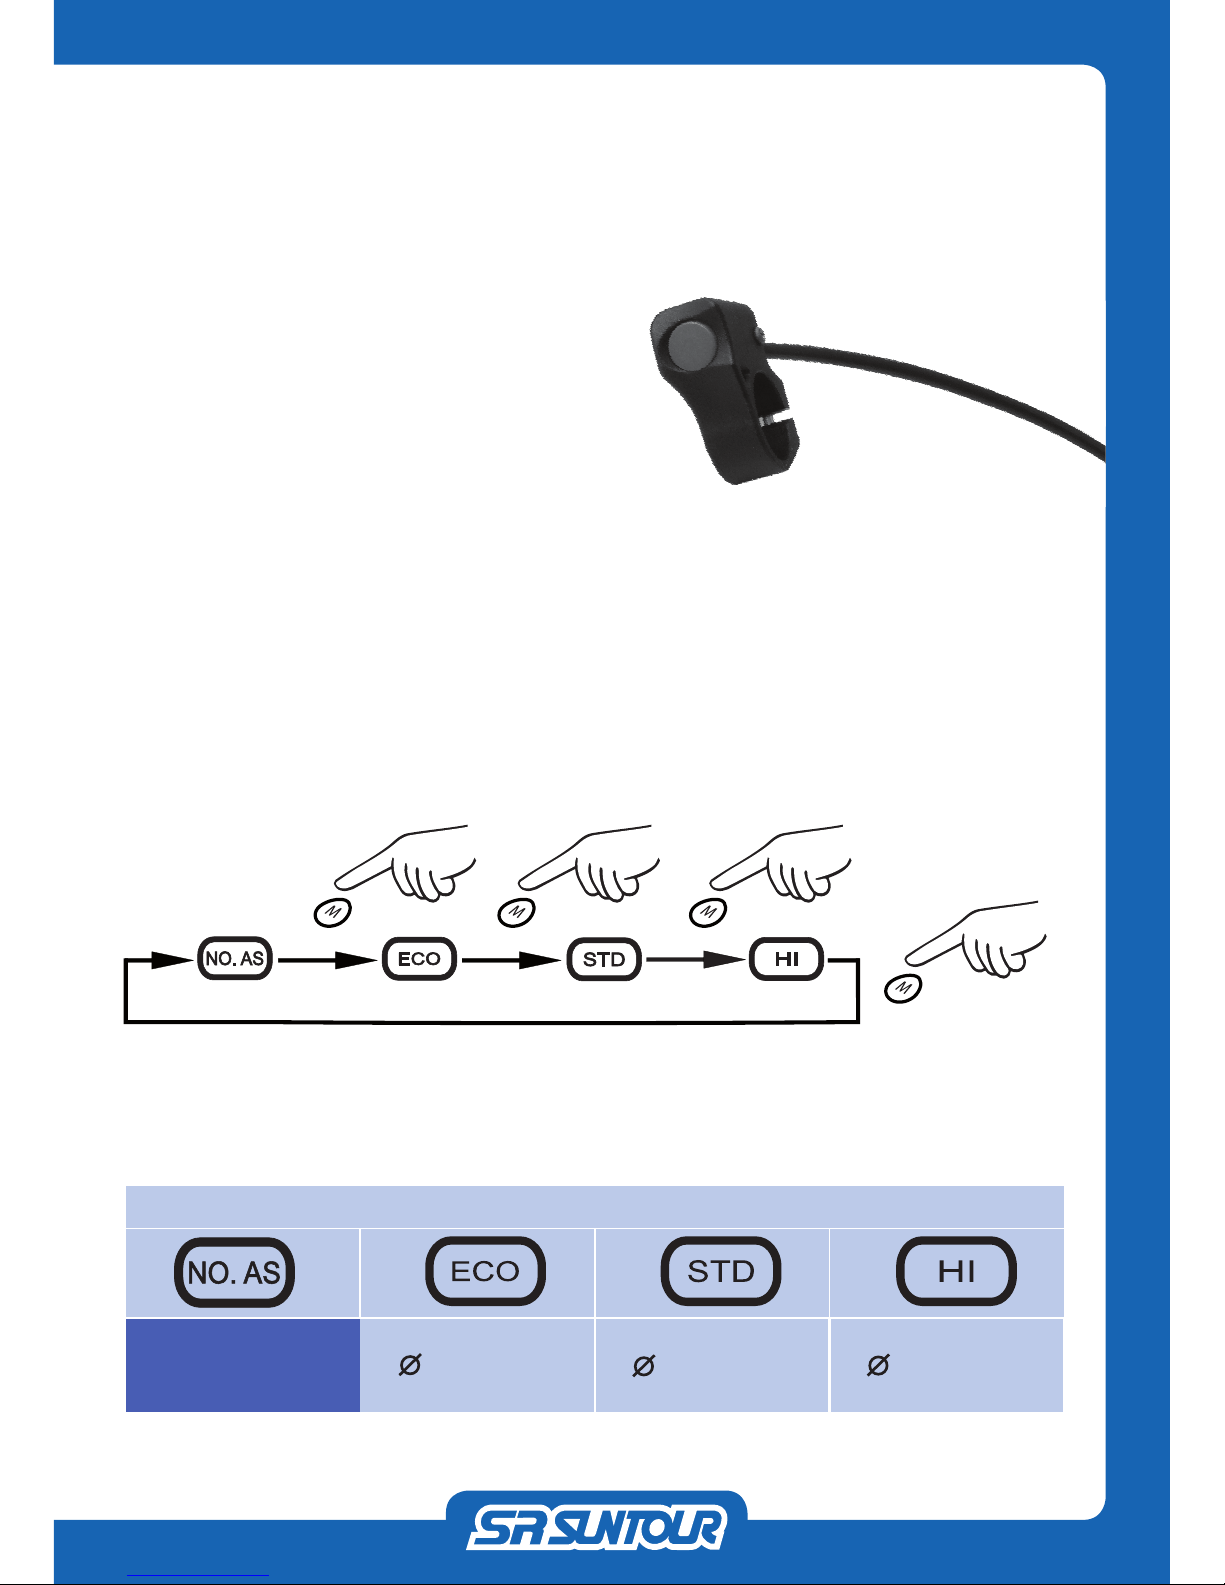
How to change the
“Assist Mode”................................... 15
Operating Range.......................... 15
Range Inuencing Factors ........ 16
How to change the
“Information Modes”.................... 16
How to reset the trip distance..17
How to reset the trip time
(total time).......................................17
How to reset the maximum
speed................................................17
Display Indications.................... 17
Speed.................................................17
Total Distance ................................ 18
Trip Distance .................................. 18
Trip Time (Total Time).................. 19
Max. Speed..................................... 19
Average Speed .............................. 20
Motor status................................... 20
Remaining capacity(fuel gauge)21
Battery - General information .. 22
Always keep in mind! ........................ 24
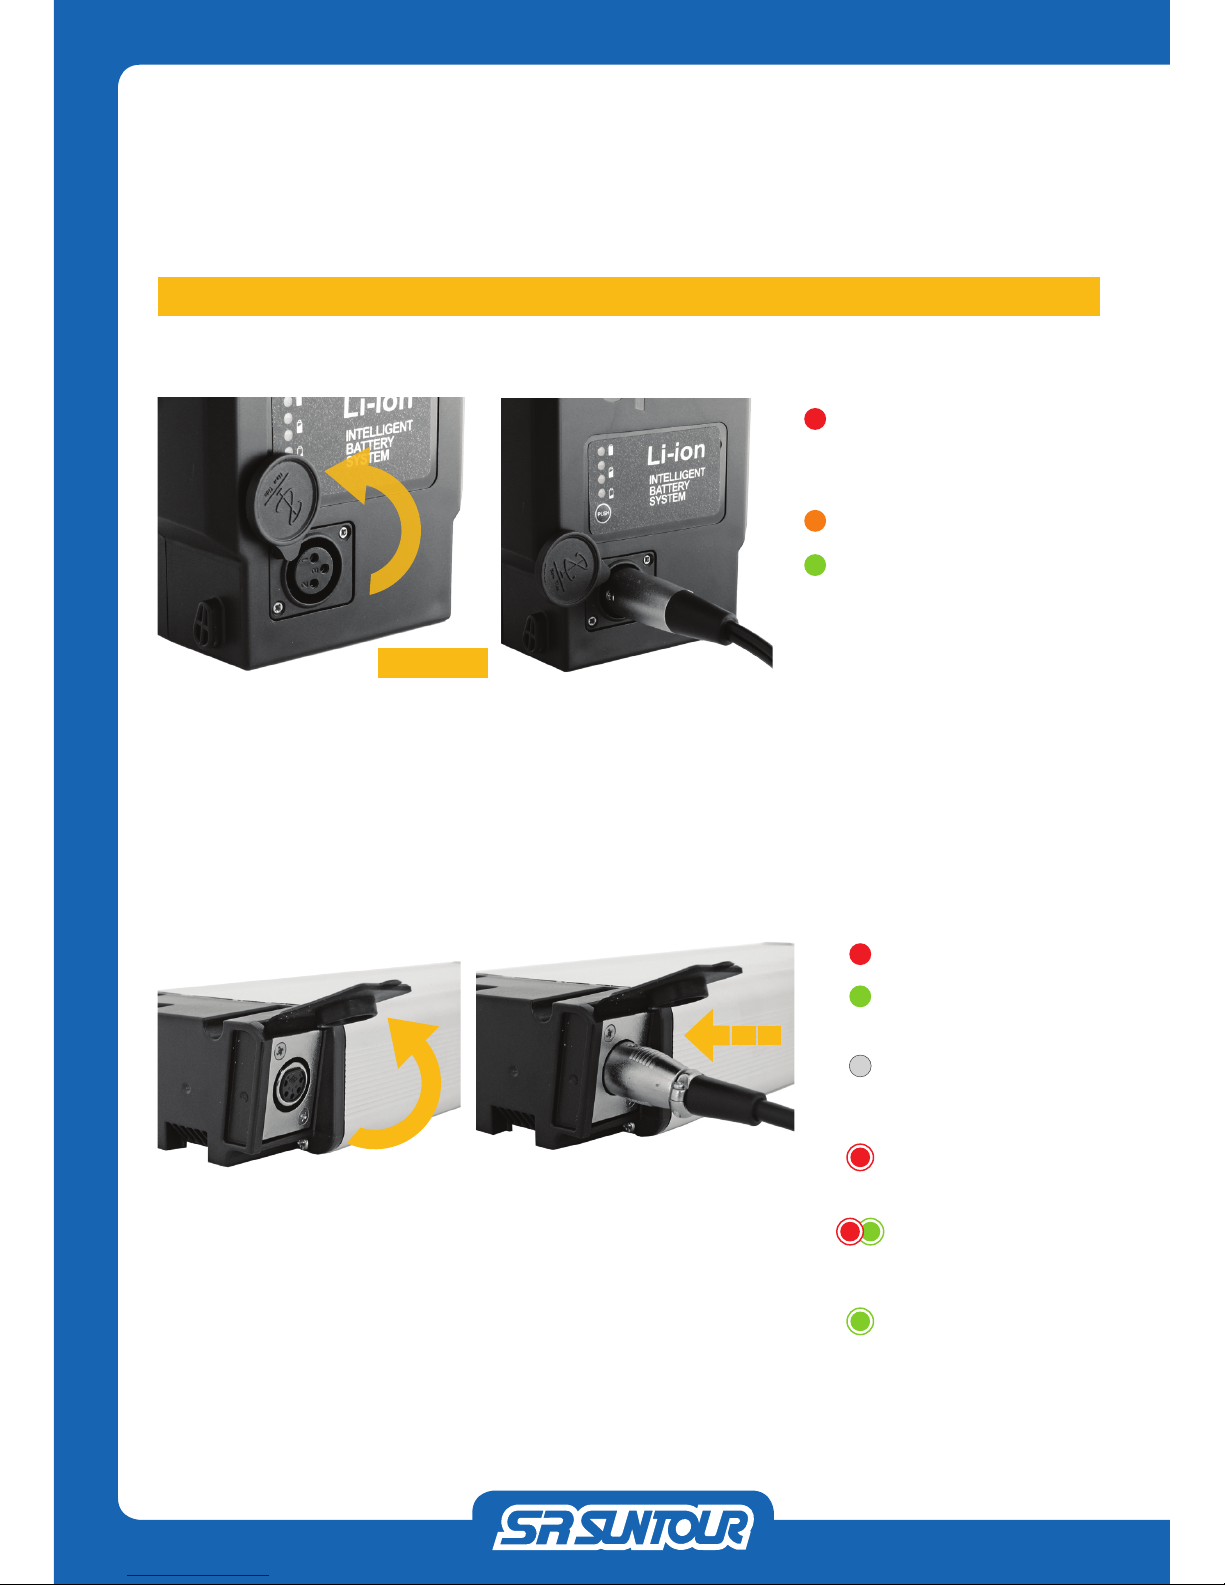
Battery Charging (upright type
battery) ...................................... 25
Charging status..............................27
Battery indication .........................27
Battery Charging (at type bat-
tery) ............................................ 28
Charging status............................. 30
Battery indication ........................ 30
Error Codes................................. 32
Maintenance and cleaning ....... 32
Cleaning .......................................... 32
How to dissamble the front
wheel................................................ 33
How to assemble front wheel.. 35
Limited Warranty....................... 37
English