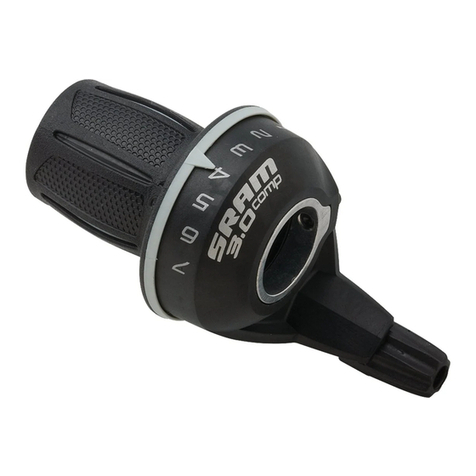
SRAM SRAM SPECTRO S7 User manual

69
Technical Manual Gear Hub Systems 2010 · GEN.0000000002002 · Rev. A
SRAM S7 with coaster brake SRAM S7 without brake
Type
MH 7215 MH 7205
Brake
With coaster brake Without brake
Over Locknut Dim., OLD
130 mm 130 mm
Length, L
183.4 mm 183.4 mm
Ends Diameter, T FG 10.5 FG 10.5
Dropout Width Dim.
A1max.=12.5 mm / A2max. =12 mm
A1max.=12.5 mm / A2max. =10 mm
Holes
36 36
Hole Diameter, DS 3.0 mm 3.0 mm
Hole Ref. ø, HR 75 mm 75 mm
Flange Dist. to 1/2OLD
F1= 33 mm / F2= 34 mm F1= 33 mm / F2= 34 mm
Totally
303 %
Speed 1
0,574
Speed 2
0,677
Speed 3
0,809
Speed 4
1,000
Speed 5
1,236
Speed 6
1,476
Speed 7
1,742
Usable Dimensions
1/2" x 1/8" or 1/2" x 3/32" 1/2" x 1/8" or 1/2" x 3/32"
Line, C/D/E C = 54 mm / D = 51 mm / E = 48 mm C = 54 mm / D = 51 mm / E = 48 mm
Ratio 24", 26", 28"= 1.83 – 1.90 / 20"= 1.83 – 2.00 min. 1.83
Sprocket 16 – 24 Teeth (outward offset - Chain Line C) / 18 Teeth (straight - CL D) / 19 – 24 Teeth (inward offset - CL E)
Shifter SRAM Grip 7
Clickbox Clickbox S7
Tandem Not suitable for tandems, transport bicycles or similar
Weight 1714 g 1556 g
Hub Shell Material
Steel Steel
Finish Matt Chrome Plated or Black Matt Chrome Plated or Black
SRAM®S7
TECHNICAL DATA / ASSEMBLY REQUIREMENTS
Caution:
Not suitable for tandems, transport
bicycles and similar.
Cycle frame:
• Dropouts must be parallel.
• Slot width at rear dropout 10+0.5 mm.
• The strength must be such that with a
maximum braking torque of 250 Nm
(2200 in.lbs.) on the rear wheel no
residual deformation can occur on the
rear structure.
Compatibility AxleSpokeGear Hub RatioChainFinish
G
E
A
R
H
U
B
S
Gear steps
18 %
19 %
24 %
24 %
19 %
18 %
Version with Coaster Brake
R 100
Ø 7.3
HR
DS
A
1
maxA
2
max
F
2
F
1
L
1/2 OLD
OLD
C
D
E
7min.
13.5
83
T
3.5

70 Technical Manual Gear Hub Systems 2010 · Copyright © SRAM 2009, LLC
SRAM®S7
TECHNICAL DATA / ASSEMBLY REQUIREMENTS
SRAM S7
ASSEMBLY
SRAM Grip 7
Shifter Type
Twist Shifter mit Clickbox
Cable Length
Black housing: 1400 mm
❘
1500 mm
❘
1600 mm
❘
1700 mm
❘
1800 mm
❘
1900 mm
❘
Grey housing: 1650 mm
❘
1750 mm
Gear Indication
Window
Clamping Diameter
22.1 – 22.3 mm
Straight handlebar ends
Minimum necessary length for shifter and handlebar grip = 150 mm
Length of shifter 76 mm
Weight
N/A
Housing
Glass filled PA, black or grey
Grip
PP
Grip Cover
Thermoplastic elastomer, Overmolded
Clamping Collar Aluminum
Design
S
H
I
F
T
E
R
1
2
3
10
9
87
12
45
6
3
Montagewerkzeug
Art.-Nr. 0582 104 000
Spoke lengths are approximate values. They must be checked through lacing attempts
and adjusted accordingly.
ASSEMBLY HUB
• Lace the wheel as normal. See spoke
length table.
• Place the dust cap (1, Fig. 1) and
sprocket (2) on the driver.
Advice:
When fitting a straight sprocket (not
an offset version), the beadings of the
sprocket must lie against the dust cap.
• Push sprocket circlip (3, Fig. 2) onto the
cone of tool sleeve (4). Place tool sleeve
with large diameter on the driver.
• Push the spring end of sliding sleeve (5)
of the tool over the tool sleeve. Thrust
sliding sleeve in direction (6), this forces
circlip into the recess of the driver.
• Remove tool and check that the circlip
is seated correctly.
Tire Size Cross Length
47–406 20" x 1.75 x 2 3 x 181 mm
37–490 22" x 1 3/83 x 225 mm
47–507 24" x 1.75 x 2 3 x 232 mm
37–540 24" x 1 3/83 x 251 mm
47–559 26" x 1.75 x 2 3 x 259 mm
37–590 26" x 1 3/83 x 275 mm
47–622 28" x 1.75 3 x 289 mm
37–622 28" x 1 3/8x 1 5/83 x 289 mm
28–622 28" x 1 1/83 x 289 mm
32–622 28" x 1 5/8x 1 1/43 x 289 mm
28–630 27" x 1 1/4fifty 3 x 294 mm
32–630 27" x 1 1/43 x 294 mm
Spoke length table
76
Ø 22.1 – 22.3
Ø 34.5
SHIFTER

71
Technical Manual Gear Hub Systems 2010 · GEN.0000000002002 · Rev. A
SRAM®S7
ASSEMBLY
• Turn dust cap (7, Fig. 3) until the three
lugs (8) are between the three beads (9)
on the sprocket (10).
• Position dust cap and push towards
sprocket until it is felt to lock into place.
• Placing the wheel in the rear frame.
• Fit new retaining washer (3,5 mm thick)
on left axle end (1, Fig. 4).
The serrations must bear against the
dropout and the lug must engage in the
dropout slot.
• Fit the hoop guard (1, Fig. 5) on the right
axle side (drive side).
No additional washers or any acces-
sories are permitted.
Advice:
If a different protective bracket is used
the thickness of the attachment plate
must be max. 3 mm.
At least the beginning of the axle
thread must be visible in front of the
axle nut.
• Mount the axle nuts. Tightening torque
on axle nuts 30 – 40 Nm (266 – 350 in.lbs.)
• Version with coaster brake:
Mount the brake lever using a suitable
frame clamp (2, Fig. 4).
Caution:
Mount the brake lever between the two
straps of the frame clamp.
The clamp must be seated on the frame
without play.
Use a self-locking nut! Tightening
torque: 2 – 3 Nm (18 – 27 in.lbs.).
Caution:
Check that all the brake system
components are functioning properly!
ASSEMBLY SHIFTER
Advice:
• When choosing cable housing lengths,
be sure to allow enough housing for an
extreme turn of the handlebars in both
directions.
• Note also, that different stem lengths
and handlebar positions effects cable
housing length.
• Slide the shifter (1, Fig. 6) onto the
handlebar.
• Slide the handlebar grip (2) onto the
handlebar.
Caution:
Never use lubricants or solvents when
fitting handlebar grips. They have a
safety function and must not come free
from the handlebar.
• Place the shifter on the handlebar grip
and position so that you can use it com-
fortably. Tighten the clamping bolt (3). 3
mm Allen key, torque 3.5 – 4 Nm (31 – 35
in.lbs.).
Caution:
• Check that shifter and brake lever
can be easily operated (if necessary,
realign).
• Never ride without handlebar grips. The
turning grip of the twist shifter could
become loose. This can result in severe
injuries.
• When fitting the cable avoid small radi-
us. Attach the cable 3 times to the down
tube (1, Fig. 7).
• Last attachment point is on the lower
rear wheel fork (2, Fig. 7) immediately
behind the chain wheel.
Cable housing must be movable inside
attachment.
INSTALLING CLICKBOX
• Insert shift rod (1, Fig. 8) in shift tube (2)
(oil parts lightly) and then push into axle
bore as far as the stop. Turn slot (6) in
shift tube to a position where it is easily
visible.
• Push locating sleeve (3) with guiding rib
(4) to the front onto the hub axle – mak-
ing sure that the internal lug (5) is guid-
ed in the slot (6) of the shift tube until it
can be felt – and heard – to engage.
• Turn locating sleeve on the axle until
the guiding rib (4) is facing roughly
upwards.
• Place shifter in gear position “1“.
• Push on Clickbox (2, Fig. 5) to the stop
on the hub axle. The guiding rib (4, Fig.
8) of the locating sleeve thereby engag-
es in the slot on the housing. In the end
position tighten up the knurled bolt (3,
Fig. 5) by hand (0.3 Nm / 2.7 in.lbs.).
ADJUSTMENT
• Be sure to reset rotational shifter from
5th to 4th gear.
• Match up the marks in the Clickbox
viewing window (4, Fig. 6) by turning
the barrel adjuster (5).
Caution:
Check that all the brake system
components are functioning properly!
4
6
7
8
1
32
1
4
5
2
3
7
64
5
213
1
2
5
1
2

72 Technical Manual Gear Hub Systems 2010 · Copyright © SRAM 2009, LLC
SRAM®S7
MAINTENANCE
2
SRAM S7 mounting aid
Part No. 65 0324 103 000
1
SERVICE
To maintain optimal performance and
durability of your compoments, periodic
maintenance is requiered. We recommend
that you have your components serviced
every 2 year or 5000 km by a qualified
bicycle mechanic.
REMOVE WHEEL
• Place shifter in gear position “1“.
• Loosen the knurled screw (44, Fig. 1)
and pull the Clickbox off the axle.
• Disengage the red location sleeve (43)
and pull it off.
• Remove shift rod (42) and shift tube (41)
out of the axle bore.
• Remove wheel.
DISMANTLING HUB
see Fig. 1
• Remove circlip (39), sprocket (38) and
dust cap (37) as normal.
• Clamp hub by the axle between alu-
minum jaws with sprocket side facing
downwards.
• Unscrew both locknuts (1).
• While turning clockwise, remove lever
cone (2) with friction spring (3) and ball
retainer (4).
• Take out 3 brake segments (5).
• Withdraw hub sleeve (6) upwards.
• Remove brake cone (7).
• Take out retaining washer (8) and thrust
washer (9).
• Remove planetary gear carrier (10),
washer (11) compression spring (12) and
the three sun gears (13, 14, 15).
• Clamp other axle end.
• Unscrew fixed cone (36).
• Remove driver (35), compression spring
(33) with cover (32), large compression
spring (31), ball retainer (34), gear ring (30)
and coupling gear (29).
• Compress spring (26) and remove thrust
block (28).
• Remove cover (27), spring (26) and
cover (25).
• Dismantle retaining washer (24).
• Remove thrust washer (23) and plastic
profile washer (22).
• Unscrew grub screw (17) (Caution: It
is subject to spring pressure) – and
dismantle the long compression spring
(18) guide pin (19), thrust block (20) and
the short compression spring (21).
1
2
3
4
5
6
7
89
16
17
18
21
22
23 24 25
26
15
12 13
14
10
11
31 32
33
42 43
40
41
39
38
37
36
35
34
27
28
29
30
19
20
X
44
3

73
Technical Manual Gear Hub Systems 2010 · GEN.0000000002002 · Rev. A
SRAM®S7
MAINTENANCE
REASSEMBLY HUB
see Fig. 1
Lubrication see “MAINTENANCE /
LUBRICATION“.
• Insert into the axle (on the side with the
internal thread):
Short compression spring (21), thrust
block (20) – it is the same both sides, guide
rod (19) – it is the same both sides, long
compression spring (18).
• Compress spring and fit grub screw (17).
• Clamp axle, end with groove for
Clickbox facing upwards.
• Fit plastic profile washer (22) with its
large diameter upwards.
• Fit thrust washer (23) and retaining
washer (24).
• Locate cover (25), compression spring (26)
with 7 turns and cover (27, insides to the
spring).
• Compress spring and position thrust
block (28) – it is the same both sides –
centrally in the axle.
• Clamp other axle end (groove is facing
downwards).
• Fit large sun gear (15), with deflector
bevels upwards.
• Position medium sun gear (14), with
deflector bevels upwards.
• Fit small sun gear (13) – with recesses in
front, thrust block engages in the slots.
• Position smallest compression spring (12).
• Fit 1 mm thick washer (11).
• Fit planetary gear carrier (10):
Place the mounting aid(Fig. 2) on the
planetary gear carrier such that the
markings (X) on the 3 small planet gears
and the mounting aid match up.
• Turn planetary gear carrier and at the
same time push it downwards over the
sun gears.
• Fit thrust washer (9) and retaining
washer (8) in the undercut.
Now remove the mounting aid.
Advice:
If the gears are not accurately assembled
the hub may feel tight in use. This may
lead to gear wheel damage during travel.
• Clamp other axle end (groove for
Clickbox facing upwards).
• Fit coupling gear (29) with carrier plate
downwards
• Push ring gear (30) over the coupling
gear.
• Locate large spring (31).
• Fit largest ball retainer (34) with balls
underneath.
• Fit cover (32, inside to the spring).
• Assemble the compression spring (33)
with 12 turns.
• Position driver (35) – push it down – and
screw on fixed cone (36) to the stop,
tightening torque 20 Nm (177 in.lbs.).
• Clamp other axle end (groove for
Clickbox is facing downwards).
• Assemble hub shell (6) with a slight
counter-clockwise movement.
In case the hub shell jams, position the
plastic ring (Fig. 3) correctly. The plastic
ring is only fitted to some hub versions.
• Screw brake cone (7) clockwise onto
the planetary gear carrier (10) until it
stops.
• Insert 3 brake segments (5).
• Turn in friction spring (3) counterclock-
wise into the lever cone (2) (inlying
winding of the spring has to lie against
the lever cone) (Fig. 4).
• Insert ball retainer (4) (balls are facing
upwards) into lever cone (2): the 3 re-
cesses have to engage into the retaining
lugs of the lever cone. Slightly turn ball
retainer to prevent it from falling off.
• Fit lever cone onto hub shell: the
retaining lugs of the lever cone have to
engage into the openings between the
brake segments. Make sure that lever
cone engages while turning it back and
forth slightly.
• Screw on locknuts (1), adjust bearing
so that there is no play and lock nuts
together with 15 – 20 Nm (133 – 177in.lbs.).
Caution:
Check that all the brake system
components are functioning properly!
Advice:
Dismantling and reassembly of hub ver-
sion without brake should be carried out
in the same way.
Differences: Instead of brake segments /
cone a click-and-pawl carrier is installed
on the planetary gear carrier.
4
74 Technical Manual Gear Hub Systems 2010 · Copyright © SRAM 2009, LLC
SRAM®S7
MAINTENANCE
CHANGING THE SHIFT
CABLE
Advice:
Always use new, high-quality cables and
compressionless cable housings with end
caps.
• Turn the twist shifter to 1st gear.
Advice:
Do not remove the Clickbox from the axle
end.
• Unscrew the barrel adjuster (1, Fig. 5)
completely. Unscrew the cover screw
(2), brush aside the barrel adjuster (1)
and remove the cover (3).
• Withdraw the shifter cable and clamping
bolt (1, Fig. 6) upwards, loosen the clamp
screw with a 2.5 mm Allen key and pull
the clamping piece from the cable.
• Remove and discard the old cable hou-
sing.
• Remove the cap (1, Fig. 7) from the
shifter. The nipple of the inner cable is
now visible.
• Push or pull the old inner cable (Fig. 7)
out of the shifter, e.g. using a small
screwdriver.
• Guide the new inner cable into the cable
inlet, through the shifter and the new
cable housing. Pull the cable tight.
• Insert the cap in the shifter.
• Position clamping bolt (1, Fig. 8) at a
distance of 90 mm.
Advice:
For positioning the clamping bolt use
adjust gauge (Fig. 9) (Part. No. 65 0324
107 000).
Tighten the clamping screw with a 2.5 mm
Allen key. Tightening torque 1.5 Nm (13
in.lbs.).
Cut off the cable end to 2 – 3 mm.
• Locate clamping bolt (1, Fig. 6) and
place shifter cable around the carrier
cylinder (counter-clockwise winding).
• Position the cover (3, Fig. 5) and tighten
up with the cover screw (2).
Torque 0.35 – 0.45 Nm (3.1 – 4.0 in.lbs.).
Screw in the barrel adjuster (1) com-
pletely.
Advice:
• If you want to remove the Clickbox from
the axle end for changing the cable, do
as follows:
– Place shifter in gear position “1“.
– Loosen the knurled screw and pull
the Clickbox off the axle.
– Now it’s essential to push the end (1,
Fig. 9) of the adjust gauge completely
into the Clickbox and tighten up the
knurled bolt (so that you maintain the
initial tension of the spring inside the
Clickbox).
– Change cable as per description above.
• If you remove the Clickbox from the
axle and change the cable without
using the end of the adjust gauge, then
you will lose the initial tension of the
spring inside the Clickbox. In this case
you must assemble the cable by placing
it around the carrier cylinder with an
additional winding (Fig. 6).
• Adjust the gears as described on
page 71.
5
6
7
8
9
23
1
2
1
1
2+1 mm 90±0,5 mm
1
1
Other manuals for SRAM SPECTRO S7
1
Table of contents
Other SRAM Bicycle Accessories manuals

SRAM
SRAM BB30 User manual

SRAM
SRAM Quarq User manual

SRAM
SRAM SRAM S-900 Aero HRD User manual

SRAM
SRAM Stealth-a-majig User manual

SRAM
SRAM BOXXER TEAM 2015 User manual

SRAM
SRAM DualDrive 27 User manual

SRAM
SRAM G2 RS User manual

SRAM
SRAM Quarq Power Meter User manual

SRAM
SRAM eTap AXS User manual

SRAM
SRAM rock shox User manual

SRAM
SRAM X.0 User manual

SRAM
SRAM eTap HRD Series User manual

SRAM
SRAM i-motion 3 User manual

SRAM
SRAM MTB Wheels User manual

SRAM
SRAM Zipp User manual

SRAM
SRAM Guide Ultimate User manual

SRAM
SRAM eTap AXS User manual

SRAM
SRAM eTap HRD Series User manual

SRAM
SRAM G2 RE User manual

SRAM
SRAM 1x Road Systems User manual