manuals.online logo
Brands
  1. Home
  2. •
  3. Brands
  4. •
  5. Ss Brewtech
  6. •
  7. Brewing System
  8. •
  9. Ss Brewtech The Brew Bucket User manual

Ss Brewtech The Brew Bucket User manual

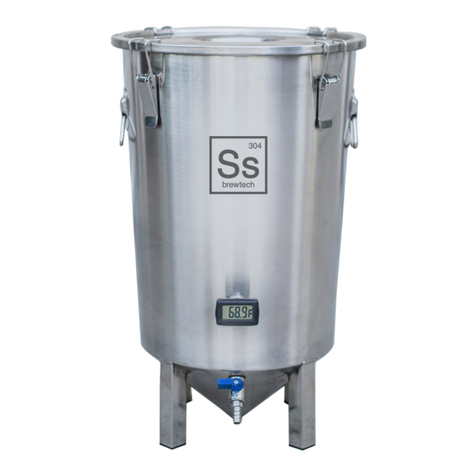
The Brew Bucket
Quick Reference Guide
Stainless Steel Prep
Pre-Clean: Prior to rst time use, thoroughly wash all surfaces of the
Brew Bucket, including all valves and ttings, with Tri-Sodium Phosphate
(TSP) in hot water, mixed to the manufacturer’s recommendations. Scrub
with a soft terry cloth, and after the initial TSP wash, rinse thoroughly
and dry all surfaces.
Passivation: It’s good practice to periodically passivate all stainless
steel equipment with an acid based solution to establish a uniform
passive oxide layer that will maximize corrosion resistance. Following the
pre-clean step, ll the Brew Bucket with Star San at a concentration of 1
ounce per gallon at 70-80°F for 30 minutes. Moving forward, for best
stainless performance, passivation should be performed at least
once a year or anytime you believe you may have inadvertently
scratched the surface.
Cleaning and Sanitizing: As part of a regular cleaning regimen both pre
and post-fermentation, wash the interior surfaces of your Brew Bucket
with an alkali cleaner such as PBW at a ratio of 0.75 ounce per gallon.
Then sanitize with Star San or another acid based sanitizer per the
manufacturer’s recommendations.
Brew Bucket Set Up
Installing the Ball Valve: Install the included 3/8″ ball valve as shown.
As a result of tight machining tolerances, and to reduce the chances
of tearing, pinching, or displacing an O-ring, always use food-safe
lubricant or Star San when inserting the racking arm into the racking
valve. Please note that although a spare O-ring is included, two are
required to ensure an effective seal.
Use two large O-rings; one
between the valve body and outer
sidewall, and the second between
the inner sidewall and locknut.
One spare O-ring in each size is
provided. Should you ever need
replacements, or just want spares,
they are available for purchase on
our website.
Racking Arm: The racking arm inserts directly into the ball valve, and
is held in place by the O-rings. We recommend that you orientate the
valve as shown, so that the racking arm aligns with the blue lever. This
way you will know the orientation of the arm when it is submerged.
Setting Up a Blow-off: It is important to always rig a blow-off tube prior
to active primary fermentation. Not doing so could clog a small airlock,
and result in damage to the lid clamps from over-pressurization.
Racking Your Beer
The ball valve is designed to rotate during wort transfer, which allows
the racking arm to extend into the conical bottom, thus enabling you
to transfer the maximum amount of beer possible. However, bear in
mind that the ball valve should always be rotated clockwise, as this will
prevent the valve’s locknut from loosening.
What’s in the Box
• The Brew Bucket
• Lid with Gasket
• 3/8″ Ball Valve
• Racking Arm
• Silicone Stopper for Lid
• (1) Replacement large O-ring
• (1) Replacement small O-ring
• (4) Silicone Feet Inserts
• Thermowell (Brewmaster)
• Thermometer (Brewmaster)
Warranty information can be found at www.ssbrewtech.com/warranty
© Ss Brewing Technologies
USE THE FOLLOWING WITH CAUTION:
• Stainless steel scrubbing pads or Scotch-Brite pads. These will
remove the protective oxide layer on the stainless and may cause
discoloring, and in severe cases rust can form.
• Oxalic Acid cleaners such as Bar Keeper’s Friend, Kleen King, or
Revere Ware Stainless cleaners on the electrically etched volume
markings and logo. They may cause the markings to fade.
NEVER USE THE FOLLOWING:
• Chlorine bleach or chlorine based products. Chlorine can cause
pitting of stainless steel, or pin holes through the surface which
cannot be repaired.
• OxiClean or other peroxide cleaners in combination with hard
water. These can cause calcium carbonate to precipitate onto the
surface. If this happens re-passivate your Brew Bucket.
If you have any further questions about your Brew Bucket go to our website and take
a look at our extensive knowledge base in the FAQ section. Over the years it has be-
come a treasure trove of information. If after searching our FAQs, you still can’t nd
an answer to your specic question(s), please email us at [email protected].
www.ssbrewtech.com
Brewmaster Edtion Features
Installing the Thermowell: Begin by removing the included locknut
from the thermowell assembly. There will be two O-rings found on the
threaded portion of the tting. Remove one of the O-rings and retain
it as a spare, the thermowell only requires ONE O-ring to form a liquid
tight seal.
Next, feed the thermowell through the 17 mm punch found just below
the Ss Brewing Technologies logo on the front of the Brew Bucket. The
O-ring should be seated against the interior sidewall of the vessel, as
shown. Lastly, thread the locknut onto the tting from the exterior and
tighten.
Once the thermowell is in place, install the included batteries into the
LCD thermometer, then install the LCD assembly into the included
silicone boot. Lastly, feed the thermoprobe into the thermowell, and
seat the silicone boot as close to the thermowell’s lock nut as possible.

Other Ss Brewtech Brewing System manuals

Ss Brewtech Ssparge Arm User manual

Ss Brewtech

Ss Brewtech Ssparge Arm User manual

Ss Brewtech E-Kettle 304 User manual

Ss Brewtech

Ss Brewtech E-Kettle 304 User manual

Ss Brewtech E-Kettle 304 User manual

Ss Brewtech

Ss Brewtech E-Kettle 304 User manual

Ss Brewtech FTSs Pro User manual

Ss Brewtech

Ss Brewtech FTSs Pro User manual

Ss Brewtech E-Kettle 304 User manual

Ss Brewtech

Ss Brewtech E-Kettle 304 User manual

Ss Brewtech Keg WaSsher User manual

Ss Brewtech

Ss Brewtech Keg WaSsher User manual

Ss Brewtech BREWMASTER User manual

Ss Brewtech

Ss Brewtech BREWMASTER User manual

Ss Brewtech Jacketed Unitank User manual

Ss Brewtech

Ss Brewtech Jacketed Unitank User manual

Popular Brewing System manuals by other brands

Speidel Braumeister 47070 Operating and brewing instructions

Speidel

Speidel Braumeister 47070 Operating and brewing instructions

Blichmann Engineering Pro Series Assembly operation maintenance

Blichmann Engineering

Blichmann Engineering Pro Series Assembly operation maintenance

KegLand KL10955 instruction manual

KegLand

KegLand KL10955 instruction manual

Speidel Braumeister 200 Official Instruction Manual

Speidel

Speidel Braumeister 200 Official Instruction Manual

MoreBeer KEG400 Instructions for use

MoreBeer

MoreBeer KEG400 Instructions for use

Curtis G3 D60 Series user guide

Curtis

Curtis G3 D60 Series user guide

Curtis MILANO G3 user guide

Curtis

Curtis MILANO G3 user guide

Hamilton Beach The Scoop manual

Hamilton Beach

Hamilton Beach The Scoop manual

Bunn ITCB instructions

Bunn

Bunn ITCB instructions

Grindmaster VS-1.5 Specification sheet

Grindmaster

Grindmaster VS-1.5 Specification sheet

VINCI NITRO COLD BREW instructions

VINCI

VINCI NITRO COLD BREW instructions

Keurig K-CUP K140 Operator's manual

Keurig

Keurig K-CUP K140 Operator's manual

Mangrove Jack's Kegerator Series User manual and assembly instructions

Mangrove Jack's

Mangrove Jack's Kegerator Series User manual and assembly instructions

TrailKeg 128PC-SS Instructional guide

TrailKeg

TrailKeg 128PC-SS Instructional guide

Newco 20:1 Restarting

Newco

Newco 20:1 Restarting

Fetco Extractor Plus CBS-1241 Users guide and operator instructions

Fetco

Fetco Extractor Plus CBS-1241 Users guide and operator instructions

Bloomfield 8740 owner's manual

Bloomfield

Bloomfield 8740 owner's manual

PicoBrew 2AJZKS1PICO instruction manual

PicoBrew

PicoBrew 2AJZKS1PICO instruction manual

manuals.online logo
manuals.online logoBrands
  • About & Mission
  • Contact us
  • Privacy Policy
  • Terms and Conditions

Copyright 2025 Manuals.Online. All Rights Reserved.