manuals.online logo
Brands
  1. Home
  2. •
  3. Brands
  4. •
  5. PicoBrew
  6. •
  7. Brewing System
  8. •
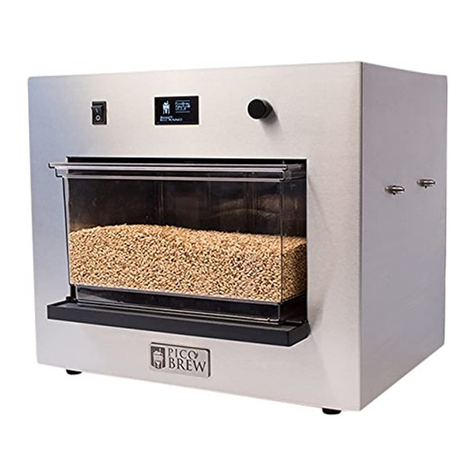
  9. PicoBrew 2AJZKS1PICO User manual

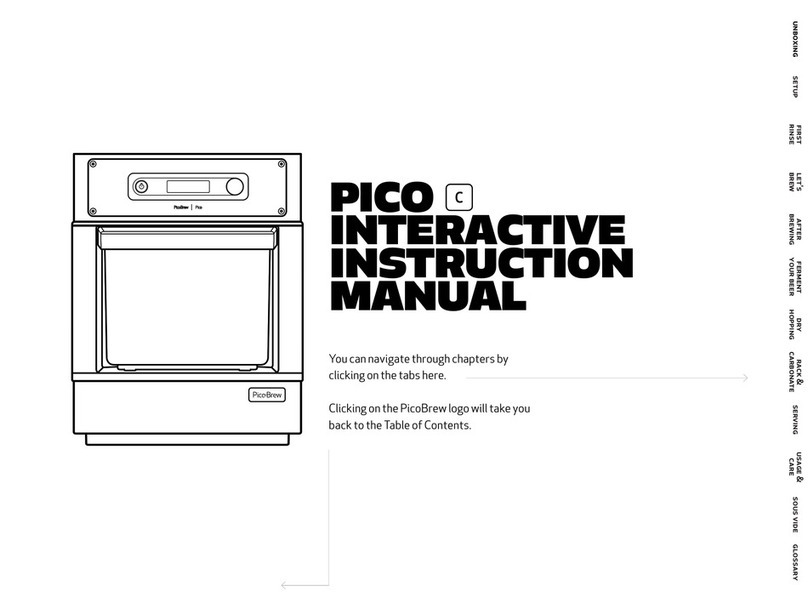
PicoBrew 2AJZKS1PICO User manual

craft
beer
your
way.
Produced by:
Picobrew Inc.
2121 N 35th St,
Seattle, WA 98103
www.picobrew.com
© 2016 PicoBrew
All rights reserved. No part of this publication may be reproduced,
stored in retrieval systems or transmitted in any form or by any means
electronic or mechanical, including, photocopying, record or any
information storage and retrieval systems, without the written permission
in writing from the copyright owners.
Printed and bound in Seattle,WA, USA
pico
instruction
manual
craft
beer
your
way.
important
safety
information
• Exercise common sense while operating the Pico.
• Always use the keg cozy to shield the hot metal of the keg.
• Close supervision is needed when used around children.
• Allow machine to fully cool before removing or replacing parts.
• Do not operate with a frayed cord or broken plug.
• Do not remove Step Filter from the Pico unless in pause
mode or brew cycle is completed.
• The Step Filter and contents may be hot when
removing from the machine.
• Do not immerse or soak the machine.
• Make sure all hoses are connected before starting
a brewing, rinsing or cleaning cycle.
• To avoid risk of electrical shock hazard do not disassemble
the Pico.There are no user serviceable parts inside.
• Various surfaces can get extremely hot during the
brewing cycle, use caution when handling the keg,
hoses and components.
• Do not remove the hose clamps, hot liquid spray may result.
• Do not remove the keg attachments while brewing.
• The product is intended for household use.
• The appliance is not to be used, or played with, by children.
• The appliance is not be to be used by persons with reduced
physical, sensory or mental capabilities, or lack of experience and
knowledge, unless they have been given supervision or instruction.
• If the power supply cord is damaged, it must be replaced by the
manufacturer, its service agent or similarly qualified person in
order to avoid a hazard.
• Per FCC 15.19(a)(3) and (a)(4)This device complies with Part 15 of
the FCC Rules. Operation is subject to the following two conditions:
(1) this device may not cause harmful interference, and (2) this device
must accept any interference received, including interference that may
cause undesired operation.
• Per FCC 15.21 Change or Modifications that are not expressly
approved by the manufacturer could void the user’s authority to
operate the equipment.
• Per RSS-Gen, Section 8.4This device complies with Industry Canada
license-exempt RSS standard(s). Operation is subject to the following
two conditions: (1) this device may not cause interference, and (2) this
device must accept any interference, including interference that may
cause undesired operation of the device.
• Par RSS-Gen, Section 8.4 Cet appareil est conforme à Industrie
Canada exempts de licence standard(s) RSS. Le fonctionnement est
soumis aux deux conditions suivantes: (1) ce dispositif ne peut pas
provoquer d'interférences et (2) cet appareil doit accepter toute
interférence, y compris les interférences qui peuvent causer un
mauvais fonctionnement de l'appareil.
table of
contents



 
' 
 

 
 &

 &













pico instruction manual
89
welcome
to the
easiest
countertop
brewing
appliance,
ever.
seriously.it's
really easy
to use. this is your new
best friend.
(it makes beer)
pico instruction manual
10 11
unboxing setup first
rinse
let's
brew
after
brewing
ferment
your beer
dry
hopping
rack &
carbonate serving usage &
care glossary
PICO SYSTEM BOX
BOX 1
BREWING KEG BOX
BOX 6
SERVING KEG BOX
BOX 5
PICOPAK BOX
BOX 4
PICOPAK
ACCESSORIES BOX
BOX 3 APPLIANCE BOX
BOX 2
PICO
STEP FILTER
STEP FILTER LID
BREWING KEG
METAL KEG LID
(ATTACHED TO KEG)
SERVING KEG
DISPENSING
BUNG PLUG
CARBONATION
ADAPTER
congratulations!
You are about to experience the joy of homebrewing using
Pico, the most advanced homebrewing appliance in the
world! We know you’re eager to get started so let’s make
sure you have everything to brew and that each item
arrived in perfect condition.
Inside your Pico system box you will find 5 smaller boxes:
- Pico Appliance
- Accessories
- 1 PicoPak
- 1 Serving Keg
- 1 Brewing Keg
pico
unboxing
guide
12 13
unboxing setup first
rinse
let's
brew
after
brewing
ferment
your beer
dry
hopping
rack &
carbonate serving usage &
care glossary
  
For transferring your beer from
Brewing to Serving Keg.
  
To keep your keg warm during brewing.
   
Used during rinsing and cleaning.
 ” 
Used on Keg Wands during First Rinse
and After Brewing Rinse cycles to suction
up remaining distilled water in Water
Reservoir. If this is not included in Box 3
than it's built into your machine.
  
Used on Brewing Keg while brewing and
during Standard Fermentation.
   
Fits in Keg Seal vent hole, used only
after brewing cycle is completed
 
To force-carbonate your beer.
box ₃
CLEANING
TAB
   
To clean your Brewing Keg Dip Tubes
and Keg Posts.
  
To clean your Brewing Keg and Serving Keg.
   
For your Brewing Keg during Fast
Fermentation.
 
For your Brewing Keg during Standard
Fermentation.
   
The cradle for your Hops Pak,
used during the brewing cycle.
  
Used when Deep Cleaning to thoroughly
clean your Pico after every 3 brew sessions.
pico instruction manual
14 15
unboxing setup first
rinse
let's
brew
after
brewing
ferment
your beer
dry
hopping
rack &
carbonate serving usage &
care glossary
  
Grain and water amendments
for your mash.
  
*Hops for the boil cycle.
  
Dry yeast for fermentation.
 
Used with the CO2regulator.
   
Attach to Brewing Keg to monitor
fermentation temperature.
   
Stick to Serving Keg to brand
finished beer.
   
To Keg Condition and Naturally
Carbonate your beer. This is not
used if you Force Carbonate.
   
Found inside Yeast Box in PicoPaks
that require dry hopping. Store in
your refrigerator.
HOPS
SUGAR
box ₄box ₅
   
Used on the Serving Keg during serving
or if doing Keg Conditioning.
  
For your Serving Keg during Forced
Carbonation. Not used if Keg Conditioning .
  
For your serving your beer.
pico instruction manual
16 17
unboxing setup first
rinse
let's
brew
after
brewing
ferment
your beer
dry
hopping
rack &
carbonate serving usage &
care glossary
double
check
your
supplies
and
inventory.
If any boxes look damaged or parts appear to be missing,
please contact us immediately via email anytime at
support@picobrew.com. We’re here for you and want
you to have a great Pico brewing experience!
* the hops pak arrives vacuum-sealed
to ensure freshness. if you won't start
brewing today, keep the hops pak and dry
hops sachet in your refrigerator for
best results.
pico instruction manual
18 19
unboxing setup first
rinse
let's
brew
after
brewing
ferment
your beer
dry
hopping
rack &
carbonate serving usage &
care glossary
estimated time:
5minutes
pico
setup
pico instruction manual
20 21
unboxing setup first
rinse
let's
brew
after
brewing
ferment
your beer
dry
hopping
rack &
carbonate serving usage &
care glossary
Remove the red packing tape and gray protective film
from your Pico.
₁Plug the power cord into a standard household
outlet. Press the power button to turn on your Pico.
₂
pico instruction manual
22 23
unboxing setup first
rinse
let's
brew
after
brewing
ferment
your beer
dry
hopping
rack &
carbonate serving usage &
care glossary
Connect to your home WiFi network by selecting it
with the Control Knob, then enter your WiFi password.
Once you enter your password, select the OK icon.
₃Once connected, note the registration code
displayed on screen.
Go to: www.picobrew.com/newpico Sign in to
your account or create an account if you do not
already have one, and enter the registration code
displayed on your Pico.
₄
pico instruction manual
24 25
unboxing setup first
rinse
let's
brew
after
brewing
ferment
your beer
dry
hopping
rack &
carbonate serving usage &
care glossary
   :
 
now it's
time to
give your
pico the
first
rinse.
after that
you are
ready to
brew!
26 pico instruction manual 27
unboxing setup first
rinse
let's
brew
after
brewing
ferment
your beer
dry
hopping
rack &
carbonate serving usage &
care glossary
estimated time:
10 minutes
first
rinse
you will need:
- ¹/ gallon distilled water (or reverse osmosis)
- Keg Seal
- Brewing Keg
- Keg Wand
- Plastic Tubing Extension (if included)
ian's
pro tip:
Clean equipment is critical
to crafting great beer.
This first rinse ensures you
start brewing with a sparkling
clean Pico and accessories.
28 pico instruction manual 29
unboxing setup first
rinse
let's
brew
after
brewing
ferment
your beer
dry
hopping
rack &
carbonate serving usage &
care glossary
After connecting up your Pico to the internet, rinse
the Brewing Keg, Keg Seal, Step Filter, and lid with tap
water. The Step Filter is located in the front of your
Pico. To remove it lift it up and slide it out. After rinsing
the Step Filter and lid slide them back into the Pico
until the Step Filter clicks into place. Remove the Keg
Seal Stopper located in the center of the Keg Seal. Set
the Keg Seal Stopper aside, this will not be needed
until after the brew session is finished.
₁Add about 2 inches of tap water into the Brewing
Keg. On top of the Pico unit, lift the black lid to
reveal the Water Reservoir. Add ¹/ gallon (or 8
cups) of distilled water to the Water Reservoir.
Place Black Keg Seal over the opening of Brewing
Keg and press into the center of it until it pops into
place.
NOTE: Do NOT use tap water inside the Pico Water
Reservoir, only use distilled water. Tap or distilled
water is fine inside the Brewing Keg.
₂
30 pico instruction manual 31
unboxing setup first
rinse
let's
brew
after
brewing
ferment
your beer
dry
hopping
rack &
carbonate serving usage &
care glossary
Locate the post on the Brewing Keg marked “OUT” –
locate the BLACK Ball Lock Connector on the end of the
hose. Pull up on the outer plastic ring of the BLACK Ball
Lock Connector, place the Connector on the OUT keg
post, release outer plastic ring and press down firmly on
Ball Lock Connector. Press down on the Connector until it
audibly clicks into place. Repeat this procedure with the
GRAY Ball Lock Connector on the keg post marked “IN”.
NOTE: Make sure Keg Seal Stopper has been removed
from black Keg Seal prior to starting the brewing session.
₃
OUT IN
CLICK
CLICK
Use the Control Knob to select Utilities.
Press Control Knob to select First Rinse.
After approximately 5 minutes the Pico
First Rinse Cycle will complete.
₄
FIRST RINSE
32 pico instruction manual 33
unboxing setup first
rinse
let's
brew
after
brewing
ferment
your beer
dry
hopping
rack &
carbonate serving usage &
care glossary
There will be approximately 1-2 inches of water in
your Brewing Keg and the same amount in the Step
Filter. The Water Reservoir will contain almost all the
water you put in originally. Disconnect the Ball Lock
Connectors from Brewing Keg by pulling up on the
outer plastic rings and lifting up off of Brewing Keg
posts.
₅
OUT IN
Connect a clean Keg Wand to the BLACK Ball Lock
Connector by pulling up on the outer ring of the
Connector and inserting Keg Wand, release outer ring
and make sure it is securely connected to Connector.
Attach 8” Tubing Extension to the end of the Keg
Wand (if included with your Pico) and insert the end
of the Keg Wand Extension into the Water Reservoir.
Press Control Knob to begin pumping water out of
Water Reservoir and into the Step Filter. Follow on-
screen instructions and press Control Knob between
steps. Press Control Knob when the Water Reservoir
is empty.
₆
34 pico instruction manual 35
unboxing setup first
rinse
let's
brew
after
brewing
ferment
your beer
dry
hopping
rack &
carbonate serving usage &
care glossary
The Inline Filter is a black plastic cylinder in the middle
of the Black Ball Lock Connector hose . Unscrew and
remove the Inline Filter cap. Remove the blue Inline
Filter wire mesh insert and rinse it thoroughly using
tap water. Place the Inline Filter mesh insert back into
the Inline Filter and screw the filter cap back on, finger
tight. This step should be performed after every Rinse
Cycle to ensure cleanliness and longevity of your Pico.
₇Empty your Brewing Keg and Step Filter. Rinse
Brewing Keg, Step Filter, Keg Wand, and Keg Wand
Tubing Extension with clean tap water.
You are now ready to begin your first
Pico brew session!
₈
pico instruction manual 37
unboxing setup first
rinse
let's
brew
after
brewing
ferment
your beer
dry
hopping
rack &
carbonate serving usage &
care glossary
36
let's
brew
you will need:
- PicoPak
- 2.5 gallons distilled water (or reverse osmosis)
- Hops Cradle
- Racking Tube (optional)
- Brewing Keg
- Black Keg Seal
- Keg Cozy
estimated time:
hands on 10 minutes
(total time: ₂.₅ hours)
pico instruction manual
38 39
unboxing setup first
rinse
let's
brew
after
brewing
ferment
your beer
dry
hopping
rack &
carbonate serving usage &
care glossary
Remove the vacuum-sealed wrapping and insert the
Pico Hops Pak all the way into the metal Hops Pak
Cradle. The fingers of the Cradle fit in the grooves
of the Hops Pak.
₁Unwrap and set the Grain Pak in the front
of the Pico Step Filter, with the beer design
facing the front. Place Hops Pak and Cradle
in the rear of the Step Filter, pushed all the
way to the left.
STEAM
DEFLECTOR
FACING UP
2a

Other PicoBrew Brewing System manuals

PicoBrew Pico C User manual

PicoBrew

PicoBrew Pico C User manual

PicoBrew C User manual

PicoBrew

PicoBrew C User manual

PicoBrew Z2 User manual

PicoBrew

PicoBrew Z2 User manual

PicoBrew Z Series User manual

PicoBrew

PicoBrew Z Series User manual

PicoBrew Zymatic User manual

PicoBrew

PicoBrew Zymatic User manual

PicoBrew PicoStill Operating instructions

PicoBrew

PicoBrew PicoStill Operating instructions

PicoBrew Z Series User manual

PicoBrew

PicoBrew Z Series User manual

PicoBrew Z Series User manual

PicoBrew

PicoBrew Z Series User manual

PicoBrew Z User manual

PicoBrew

PicoBrew Z User manual

Popular Brewing System manuals by other brands

KegLand KL25959 Quick start manual

KegLand

KegLand KL25959 Quick start manual

Bloomfield 8740 owner's manual

Bloomfield

Bloomfield 8740 owner's manual

Bunn ITCB Single Series Technical training

Bunn

Bunn ITCB Single Series Technical training

BRAVILOR BONAMAT Bolero Series Technical manual

BRAVILOR BONAMAT

BRAVILOR BONAMAT Bolero Series Technical manual

Bunn ITCB instructions

Bunn

Bunn ITCB instructions

BRAVILOR BONAMAT Bolero 20 operating instructions

BRAVILOR BONAMAT

BRAVILOR BONAMAT Bolero 20 operating instructions

Curtis G4 Omega Series instructions

Curtis

Curtis G4 Omega Series instructions

Curtis RSTB Service manual

Curtis

Curtis RSTB Service manual

Coobra CB5PRO-SV manual

Coobra

Coobra CB5PRO-SV manual

Fetco CBS-1221 Users guide and operator instructions

Fetco

Fetco CBS-1221 Users guide and operator instructions

Keurig Vue V12000 Use & care guide

Keurig

Keurig Vue V12000 Use & care guide

Grindmaster AT-2W Brochure & specs

Grindmaster

Grindmaster AT-2W Brochure & specs

Hamilton Beach The Scoop manual

Hamilton Beach

Hamilton Beach The Scoop manual

Fetco Extractor Plus CBS-1231 Users guide and operator instructions

Fetco

Fetco Extractor Plus CBS-1231 Users guide and operator instructions

Newco LCD-TCH Operating instructions manual

Newco

Newco LCD-TCH Operating instructions manual

Curtis Gem-230A instructions

Curtis

Curtis Gem-230A instructions

Speidel Braumeister PLUS 10 litres Original instruction manual

Speidel

Speidel Braumeister PLUS 10 litres Original instruction manual

Newco BISTRO TOUCH LARGE CAPACITY manual

Newco

Newco BISTRO TOUCH LARGE CAPACITY manual

manuals.online logo
manuals.online logoBrands
  • About & Mission
  • Contact us
  • Privacy Policy
  • Terms and Conditions

Copyright 2025 Manuals.Online. All Rights Reserved.