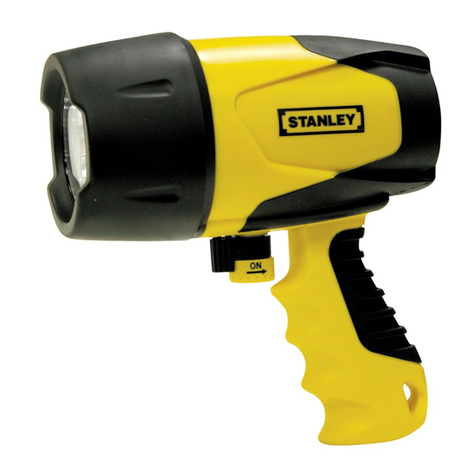
Stanley SPQAK User manual

116
Waterproof Halogen SpotligHt
inStruction Manual
linterna iMperMeable Halógena
Manual de inStrucción
SAVE THIS INSTUCTION MANUAL FOR FUTURE REFERENCE.
CONSERVE ESTE MANUAL PARA FUTURAS CONSULTAS.
© 2011 Baccus Global LLC
Boca Raton, FL 33432
Customer Service: (877) 571-2391
SPQAK
English page 3
Español página 8
SPQAK_ManualENSP_092711.indd 16-1 9/27/2011 9:10:49 PM

2 3
FEATURES
CARACTERÍSTICAS
FEATURES
1. Rubber Bezel
2. Power On/Off Knob
3. On/Off Lock Bar
4. Grip Handle
5. 12VDC Power Port (for use with 12 Volt DC Power Cord)
6. Rear Rubber “O” Ring
7. Carry Lanyard (optional accessory)
8. Waterproof End Cap and Bracket
9. Light Reflector
10. Halogen Bulb Assembly
11. Light Holder Assembly
12. Battery Compartment containing eight (8) “C” alkaline dry
cell batteries (not included)
13. Front Rubber “O” Ring
14. 12 Volt DC Power Cord
CARACTERÍSTICAS
1. Bisel de goma
2. Perilla de encendido / apagado
3. Barra para bloquear la unidad de encendido / apagado
4. Manija del apretón
5. Puerto de alimentación 12 V CC (para usar con cable de
alimentación de 12 voltios CC)
6. Tórica de goma trasero
7. Cordón para llevar (accesorio opcional)
8. Casquillo de extremo impermeable y soporte
9. Reflector de luz
10. Asamblea de bombilla halógeno
11. Asamblea de titular de la luz
12. Compartimiento de batería con ocho (8) “C” pilas alcalinas
secas (no incluido)
13. Tórica de goma frontal
14. Cable de alimentación de 12 voltios CC
GENERAL SAFETY WARNINGS AND INSTRUCTIONS
READ ALL INSTRUCTIONS
WARNING: Read all instructions before operating spotlight. Failure to follow all instructions listed below may result
in electric shock, fire and/or serious injury.
SAFETY GUIDELINES / DEFINITIONS
DANGER: Indicates an imminently hazardous situation which, if not avoided, will result in death or serious injury.
WARNING: Indicates a potentially hazardous situation which, if not avoided, could result in death or serious injury.
CAUTION: Indicates a potentially hazardous situation which, if not avoided, may result in minor or moderate injury.
CAUTION: Used without the safety alert symbol indicates potentially hazardous situation which, if not avoided, may result in
property damage.
RISK OF UNSAFE OPERATION. When using tools or equipment, basic safety precautions should always be followed to reduce the
risk of personal injury. Improper operation, maintenance or modification of tools or equipment could result in serious injury and
property damage. There are certain applications for which tools and equipment are designed. Manufacturer strongly recommends
that this product NOT be modified and/or used for any application other than for which it was designed. Read and understand all
warnings and operating instructions before using any tool or equipment.
IMPORTANT SAFETY INSTRUCTIONS
INSTRUCTIONS PERTAINING TO A RISK OF FIRE, ELECTRIC SHOCK, EXPOSURE TO EXCESSIVE
UV RADIATION, OR INJURY TO PERSONS
Lighted lamp is HOT.
WARNING TO REDUCE THE RISK OF FIRE, ELECTRIC SHOCK, EXPOSURE TO EXCESSIVE UV RADIATION, OR INJURY
TO PERSONS:
• Turn off/unplug and allow to cool before replacing the Halogen bulb.
• Halogen bulb gets HOT quickly!
• Do not touch the bulb at any time when operating.
• Only contact switch/plug when turning on.
• Do not touch hot lens or enclosure.
• Do not remain in light if skin feels warm.
• Use only with a 12 volt/13 watt or smaller Halogen bulb.
• When changing bulb, use a soft cloth. Oil from skin may damage bulb.
• Do not operate the spotlight with a missing or damaged lens or enclosure.
7
3
2
1
9 11 1210 13
4
5
6
8
14
SPQAK_ManualENSP_092711.indd 2-3 9/27/2011 9:10:50 PM

4 5
POWER SUPPLY
Using the Spotlight in Waterproof Mode (powered by alkaline batteries)
The unit is powered by eight “C” alkaline dry cell batteries (not supplied).
1. Unscrew the rubber bezel counterclockwise and remove it.
2. Carefully remove the light reflector and the light holder assembly.
3. Insert batteries as described in compartment, observing the cautions that follow.
4. Replace the light reflector and the light holder assembly.
5. Screw back the rubber bezel clockwise. Do not be over-tighten.
Note:
Use only “C” alkaline dry cell batteries in this unit.
CAUTIONS:
• When replacing the “C” alkaline dry cell batteries: DO NOT mix old and new batteries. Always insert batteries correctly with regard
to polarity (+ and –), marked on the battery and the equipment. Remove dead batteries immediately and dispose of per local
codes.
• Follow all warnings regarding batteries in the Important Safety Instructions section of this manual.
Using the Spotlight in Corded Mode (powered by the 12 Volt DC Power Cord)
Refer to the “Corded Use” section of the Operating Instructions.
WARNING TO REDUCE THE RISK ELECTRIC SHOCK, INJURY TO PERSONS OR PROPERTY DAMAGE:
This spotlight is NOT waterproof when used with the 12 Volt DC Power Cord. Submerging the spotlight with the 12 Volt DC Power
Cord plugged in to a 12 volt DC power source may result in electric shock and/or permanent damage to the spotlight.
OPERATING INSTRUCTIONS
CAUTION: TO REDUCE THE RISK OF PROPERTY DAMAGE:
• Never operate this spotlight unless the rubber “O” ring, rubber bezel and lens are intact and properly seated; and the waterproof
end cap is securely in place.
• Never operate this spotlight at depths greater than 3 feet.
• Never operate this spotlight in water temperatures other than between 41ºF and104ºF (5ºC and 40ºC).
• This spotlight is designed to operate for up to one hour under water.
Operating the spotlight
1. The on/off power knob is located in the front of the handle of the spotlight.
2. To turn on the spotlight, rotate the on/off power knob to the furthest position clockwise.
3. To turn off the spotlight, rotate the on/off power knob to the furthest position counterclockwise.
IMPORTANT: To avoid sustaining damage, this spotlight should not be used under water for any longer than one hour.
Using the On/Off Lock Bar
The spotlight can be locked in the off position by sliding the On/Off Lock Bar towards to the On/Off Power Knob. The spotlight will
stay off until the On/Off Lock Bar has been returned to the unlocked position.
Corded Use
• Make sure the spotlight is turned off by rotating the on/off power knob to the furthest position counterclockwise.
• Unscrew (counterclockwise) the waterproof end cap on the back of the unit and remove it.
TRIANGULAR ARROW
ICON FOR ALIGNMENT
TO THE RECTANGULAR
ICON ON THE
REAR OF UNIT
END CAP DETAIL
RECTANGULAR
ICON
• Plug the barrel tip of the supplied 12 Volt DC Power Cord into the 12 Volt DC Power Port.
• Insert the 12 volt DC plug end into the accessory outlet of your vehicle or other 12 volt DC power source.
• Operate the unit as outlined in the previous section.
WARNING – WHEN USING ELECTRICAL APPLIANCES, BASIC PRECAUTIONS SHOULD ALWAYS BE FOLLOWED, INCLUDING
THE FOLLOWING:
• To reduce the risk of injury, close supervision is necessary when the spotlight is used near children.
• Use only attachments recommended or sold by the manufacturer.
WARNING: FIRE HAZARD: Keep spotlight lamp away from materials that may burn.
CAUTION: TO REDUCE THE RISK OF INJURY OR PROPERTY DAMAGE:
• All halogen lights give off heat:
– Do not touch lens while operating.
– Never place the light face-down on any surface when lit.
• Never look directly into the light or shine the light into another person’s eyes.
• Keep sharp objects away from lens — it can crack or break.
• Do not expose this unit to extremely high temperatures.
• Do not drop or throw spotlight.
• Use only with DC power cord provided with unit. Plug in the power cord at the spotlight first, then plug into the power source.
• Do not crush, cut, pull or expose the power cord to extreme heat.
• Position the power cord so it does not become entangled or become a safety hazard. Keep the power cord away from sharp edges.
• Do not open body casing. There are no user-serviceable parts inside.
• Do not operate the spotlight without the lens in place.
• To reduce risk of damage to the plug and cord, pull by the plug rather than cord when disconnecting.
• Do not attempt to use the 12 volt DC power cord if it is damaged – return it to the manufacturer for repair or replacement.
ALKALINE BATTERY SAFETY INSTRUCTIONS
WARNING: Batteries can explode, or leak, and can cause injury or fire. To reduce this risk:
• Carefully follow all instructions and warnings on the battery label and package.
• Always insert batteries correctly with regard to polarity (+ and –), marked on the battery and the equipment.
• Do not short battery terminals.
• Do not charge batteries.
• Do not mix old and new batteries. Replace all of them at the same time with new batteries of the same brand and type.
• Remove dead batteries immediately and dispose of per local codes.
• Do not dispose of batteries in fire.
• Keep batteries out of reach of children.
• Remove batteries if the device will not be used for several months.
“Transporting batteries can possibly cause fires if the battery terminals inadvertently come in contact with conductive materials such
as keys, coins, hand tools and the like. The US Department of Transportation Hazardous Material Regulations (HMR) actually prohibit
transporting batteries in commerce or on airplanes (i.e. packed in suitcases and carryon luggage) UNLESS they are properly protected
from short circuits. So when transporting individual batteries, make sure that the battery terminals are protected and well insulated from
materials that could contact them and cause a short circuit.”
INSTRUCTIONS PERTAINING TO WATERPROOF SPOTLIGHTS
The front and rear rubber “O” rings act to preserve the waterproof qualities of the spotlight. The “O” rings contact the rubber bezel
and the end cap, respectively, to prevent water from entering the gap. Undamaged rubber “O” rings, rubber bezel and lens; and
proper sealing of the end cap before use are very important.
CAUTION: TO REDUCE THE RISK OF PROPERTY DAMAGE:
• Attempting to remove either of the rubber “O” rings; use of the unit with a damaged “O” ring, rubber bezel or lens; improper
sealing of the waterproof end cap; and/or submerging this unit in depths greater than 3 feet may cause the unit to no longer be
waterproof. Do not submerge the unit if these conditions exist or the unit could sustain permanent damage.
• Submerging this unit in depths greater than 3 feet and/or operating it in water temperature other than between 41ºF and 104ºF
(5ºC and 40ºC) could result in leakage, warping or malfunction, causing permanent damage to the spotlight.
SAVE THESE INSTRUCTIONS
INTRODUCTION
Congratulations on purchasing your new spotlight. Read this Instruction Manual and follow the instructions carefully
before using your new spotlight.
SPQAK_ManualENSP_092711.indd 4-5 9/27/2011 9:10:51 PM

6 7
• When the unit is not in use, make sure to the spotlight is turned off by rotating the On/Off Power Knob to the furthest position
counterclockwise. Disconnect the 12 volt DC plug end from the accessory outlet of your vehicle or other 12 volt DC power source.
Then unplug the barrel tip of the supplied 12 Volt DC Power Cord from the 12 Volt DC Power Port.
• Replace the end cap on the unit, screwing clockwise until the triangular arrow on the end cap is pointing to the rectangular icon
on the rear of unit. Make sure it fits securely, but do NOT over-tighten.
Note:
When using a vehicle’s 12 volt DC accessory outlet as a charging source, be aware that some vehicles require you to turn on the ignition to power the
accessory outlet.
IMPORTANT NOTES:
• If the 12VDC power cord is plugged during operating by alkaline batteries, the unit will automatically switch to corded use.
• If the 12VDC power cord is unplugged during corded use, the unit will automatically switch to the alkaline batteries mode.
• The unit is NOT waterproof when the waterproof end cap is removed.
WARNING TO REDUCE THE RISK ELECTRIC SHOCK, INJURY TO PERSONS OR PROPERTY DAMAGE:
This spotlight is NOT waterproof when used with the 12 Volt DC Power Cord. Submerging the spotlight with the 12 Volt DC Power
Cord plugged in to a 12 volt DC power source may result in electric shock and/or permanent damage to the spotlight.
Using the carry lanyard (optional accessory)
The carry lanyard may be used to carry the unit or to hang it for storage. Always adjust the slide on the cords to keep the lanyard
secure around any supporting object.
CAUTION: TO REDUCE THE RISK OF PRODUCT DAMAGE:
• When light is hung by the carry lanyard, do not shake the spotlight or object that it is hanging from. Do not hang the spotlight
from any electrical wires or anything that it is not secure.
• Only use the carry lanyard for hanging this spotlight. The carry lanyard is not intended to support additional weight. Do not attach
or hang anything additional to the spotlight or risk of breakage may occur.
CARE AND MAINTENANCE
If the unit gets dirty, gently clean the outer surfaces of the spotlight unit with a soft cloth moistened with a mild solution of water and
detergent. There are no user-replaceable parts. Periodically inspect the condition of the 12 Volt DC Power Cord, connectors and wires.
Contact manufacturer to replace any components that have become worn or broken.
Safe Battery Disposal
Refer to the Safety Warnings in the front of this Instruction Manual when selecting and replacing batteries. Always dispose of used
batteries properly.
WARNING: TO REDUCE THE RISK OF INJURY/EXPLOSION:
• Do not dispose of batteries in fire as this may result in an explosion.
• Do not expose the unit containing batteries to fire or intense heat as it may explode.
Halogen Bulb Replacement
• Make sure the spotlight is turned off by rotating the on/off power knob to the furthest position counterclockwise.
• Unscrew the rubber bezel counterclockwise and remove it.
• Carefully remove the light reflector and then the light holder assembly.
GROOVES IN THE LIGHT HOLDER ASSEMBLY ALIGN
AND FIT INTO THE TWO CORRESPONDING RIBS IN THE
HOUSING
HALOGEN BULB HOLDER HALOGEN BULB ASSEMBLY HALOGEN BULB
TERMINAL
RIBS IN THE HOUSING ALIGN AND FIT INTO
THE TWO CORRESPONDING GROOVES IN THE
LIGHT HOLDER ASSEMBLY
• On the light holder assembly, lift out the halogen bulb from the halogen bulb holder first, then detach the lead wire of halogen
bulb assembly from the halogen bulb terminal.
• Insert the lead wire of replacement bulb assembly into the halogen bulb terminal and place the halogen bulb back into the
halogen bulb holder.
• Put back and align the grooves of the light holder assembly snugly into the ribs of the housing.
• Replace the light reflector.
• Replace the rubber bezel and screw it clockwise. Do not over-tighten.
12 Volt DC Power Cord Fuse Replacement
1. Unscrew the end cap of the DC plug (counterclockwise).
2. Remove spring center contact and fuse.
3. Check fuse with a continuity checker.
4. If blown, locate a replacement 5 amp.
5. Replace the fuse, spring, contact and end cap.
6. Screw end cap clockwise until it is finger tight – DO NOT OVER-TIGHTEN.
7. Test for proper operation of the 12 Volt DC Power Cord.
TROUBLESHOOTING
Unit will not operate
1. Make sure the On/Off Lock Bar is in the unlocked position.
2. The Rubber Bezel may be loose after the battery or halogen bulb have been replaced. Screw the Rubber Bezel clockwise to
secure. Do not over-tighten. Make sure the internal components are correctly in place following the directions in this manual.
3. The batteries may be completely discharged. Replace the batteries following the directions given in this manual. Make sure
they are correctly installed regarding polarity (+, –) and are properly inserted in the battery compartment as described.
4. The halogen bulb may have blown. Check bulb filament. If the filament is coiled and unbroken, the bulb is not blown.
Otherwise, replace the bulb following the instructions in the manual.
5. If the light does not operate after replacing the batteries, replacing the bulb and/or tightening the rubber bezel, contact the
manufacturer at (877) 571-2391.
Unit will operate in corded mode
1. Check connection to the 12VDC power port.
2. Check connection to the DC power source.
3. Confirm there is a functioning DC current.
4. Check ito see if the fuse if opened (blown).
ACCESSORIES
Recommended accessories for use with your tool are available from the manufacturer. If you need assistance regarding accessories,
please contact the manufacturer at (877) 571-2391.
WARNING: The use of any accessory not recommended for use with this appliance could be hazardous.
SERVICE INFORMATION
Whether you need technical advice, repair, or genuine factory replacement parts, contact the manufacturer at (877) 571-2391.
ONEYEAR LIMITED WARRANTY
The manufacturer warrants this product against defects in materials and workmanship for a period of ONE (1) YEAR from the date
of retail purchase by the original end-user purchaser (“Warranty Period”).
If there is a defect and a valid claim is received within the Warranty Period, the defective product can be replaced or repaired in the
following ways: (1) Return the product to the manufacturer for repair or replacement at manufacturer’s option. Proof of purchase
may be required by manufacturer. (2) Return the product to the retailer where product was purchased for an exchange (provided
that the store is a participating retailer). Returns to retailer should be made within the time period of the retailer’s return policy
for exchanges only (usually 30 to 90 days after the sale). Proof of purchase may be required. Please check with the retailer for their
specific return policy regarding returns that are beyond the time set for exchanges.
This warranty does not apply to accessories, bulbs, fuses and batteries; defects resulting from normal wear and tear, accidents;
damages sustained during shipping; alterations; unauthorized use or repair; neglect, misuse, abuse; and failure to follow
instructions for care and maintenance for the product.
This warranty gives you, the original retail purchaser, specific legal rights and you may have other rights which vary from state to
state or province to province. This product is not intended for commercial use.
Please complete the Product Registration Card and return within 30 days from purchase of the product to: Baccus Global LLC, 595 S.
Federal Highway, Suite 210, Boca Raton, FL 33432. Baccus Global LLC, toll-free number: (877) 571-2391.
SPQAK_ManualENSP_092711.indd 6-7 9/27/2011 9:10:51 PM
8 9
SPECIFICATIONS
Halogen Bulb: 12 volt, H3 series, 13 watt
Power Source: 12 volt DC or 8 “C” type alkaline batteries (not included)
Imported by
Baccus Global LLC
595 S. Federal Highway, Suite 210
Boca Raton, FL 33432
(877) 571-2391
RD092711
ADVERTENCIAS E INSTRUCCIONES DE SEGURIDAD GENERALES
LEA LAS INSTRUCCIONES
ADVERTENCIA: Lea todas las instrucciones antes de operar el linterna. El incumplimiento de todas las instrucciones
enumeradas a continuación puede provocar una descarga eléctrica, un incendio o lesiones graves.
NORMAS DE SEGURIDAD / DEFINICIONES
PELIGRO: Indica una situación de peligro inminente que, si no se evita, provocará la muerte o lesiones graves.
ADVERTENCIA: Indica una situación de peligro inminente que, si no se evita, provocará la muerte o lesiones graves.
PRECAUCIÓN: Indica una situación de peligro potencial que, si no se evita, puede provocar lesiones leves o moderadas.
PRECAUCIÓN: Utilizado sin el símbolo de alerta de seguridad indica una situación de peligro potencial que, si no se evita, puede
provocar daños en la propiedad.
RIESGO DE OPERACIÓN INSEGURA. Cuando se utilizan herramientas o equipos, siempre se deben respetar las precauciones
de seguridad para reducir el riesgo de lesiones personales. La operación, el mantenimiento o la modificación incorrectos de
herramientas o equipos pueden provocar lesiones graves y daños a la propiedad. Las herramientas y los equipos están diseñados
para determinados usos. Fabricante recomienda encarecidamente que NO se modifique este producto y que NO se utilice para
ningún otro uso que aquél para el que fue diseñado. Lea y comprenda todas las instrucciones operativas y las advertencias antes de
utilizar cualquier herramienta o equipo.
INSTRUCCIONES IMPORTANTES SOBRE SEGURIDAD
INSTRUCCIONES REFERENTE A UN RIESGO DE FUEGO, DE DESCARGA ELÉCTRICA, DE
EXPOSICIÓN A LA RADIACIÓN ULTRAVIOLETA EXCESIVA, O DE LESIÓN A LAS PERSONAS
La lámpara encendida es CALIENTE.
ADVERTENCIA REDUCIR EL RIESGO DE FUEGO, DE DESCARGA ELÉCTRICA, DE EXPOSICIÓN A LA RADIACIÓN
ULTRAVIOLETA EXCESIVA, O DE LESIÓN A LAS PERSONAS:
• Apague/desenchufe y permita refrescarse antes de substituir el bulbo de halógeno.
• ¡El bulbo de halógeno consigue CALIENTE rápidamente!
• No toque el bulbo en cualquier momento al funcionar.
• Entre en contacto con solamente el interruptor/el enchufe al girarse.
• No toque la lente caliente o el recinto.
• No siga siendo en luz si la piel siente caliente.
• Utilice solamente con 12 voltios/13 vatios o un bulbo de halógeno más pequeño.
• Al cambiar el bulbo, utilice un paño suave. El aceite de la piel puede dañar el bulbo.
• No funcione el proyector con desaparecidos o una lente dañada o un recinto.
ADVERTENCIA – AL USAR APLICACIONES ELÉCTRICAS, LAS PRECAUCIONES DEL BASIC SE DEBEN SEGUIR SIEMPRE,
INCLUYENDO EL SIGUIENTE:
• Reducir el riesgo de lesión, la supervisión cercana es necesaria cuando una aplicación se utiliza cerca de niños.
• Utilice solamente los accesorios recomendados o vendidos por el fabricante.
ADVERTENCIA: RIESGO DE INCENDIO: Guarde la linterna lejos de los materiales que pueden quemar.
PRECAUCIÓN: PARA REDUCIR EL RIESGO DE LESIONES O DAÑOS A LA PROPIEDAD:
• Todas las luces halógenas emiten calor.
– No toque el lente mientras la unidad esté en uso.
– Nunca coloque el reflector boca abajo mientras esté encendido.
• Nunca mire directamente a la luz ni la apunte directamente a los ojos de otra persona.
• Proteja la lente contra objetos agudos. Puede agrietarse o romperse.
• No exponga esta unidad extremadamente a las temperaturas altas.
• No tire ni deje caer el reflector.
• Use sólo con el cable de alimentación CC suministrado con la unidad. Conecte el cable de alimentación en la linterna, a
continuación, conecte a la fuente de alimentación.
• No triture, corte, arrastre o exponer el cable de alimentación al calor extremo.
• Coloque el cable de alimentación para que no se enreda o se convierten en un peligro de seguridad. Mantenga el cable eléctrico
lejos de los bordes afilados.
• No abra la cubierta del reflector. No contiene piezas serviciables por el usuario.
• No funcione el proyector sin la lente en el lugar.
• Para reducir el riesgo de daños en el enchufe y el cable, tire del enchufe y no del cable al desconectar.
• No intente utilizar el cable de alimentación de 12 voltios DC si está dañado – devolverlo al fabricante para su reparación o
reemplazo.
SPQAK_ManualENSP_092711.indd 8-9 9/27/2011 9:10:51 PM
10 11
INSTRUCCIONES DE SEGURIDAD DE LAS BATERÍAS ALCALINOS
ADVERTENCIA: Las baterías pueden estallar, o escape, y pueden causar lesión o el fuego. Para reducir este riesgo:
• Siga cuidadosamente todas las instrucciones y advertencias en la etiqueta de la batería y empaquételos.
• Inserte siempre las baterías correctamente con respecto a la polaridad (+ y -), marcada en la batería y el equipo.
• No ponga en cortocircuito los terminales de la batería.
• No cargue las baterías.
• No mezcle las baterías viejas y nuevas. Substituya todos en el mismo tiempo por las baterías nuevas de la misma marca de fábrica
y mecanografíe.
• Quite las baterías muertas inmediatamente y disponga por códigos locales.
• No disponga de las baterías en fuego.
• Baterías de la subsistencia fuera del alcance de niños.
• Quite las baterías si el dispositivo no es utilizado por varios meses.
“El transporte de las baterías puede causar posiblemente los fuegos si los terminales de la batería vienen inadvertidamente en
contacto con los materiales conductores tales como llaves, monedas, herramientas de la mano y similares. El departamento de los
E.E.U.U. de las regulaciones materiales peligrosas del transporte (HMR) prohíbe realmente el transportar de las baterías en comercio
o en los aeroplanos (es decir embalado en maletas y equipaje del carryon) A MENOS QUE se protejan correctamente contra los
circuitos cortos. Tan al transportar las baterías individuales, cerciórese de que los terminales de la batería están protegidos y
aislados bien de los materiales que podrían entrarlos en contacto con y causan un cortocircuito.”
INSTRUCCIONES REFERENTE A LINTERNAS IMPERMEABLES
El tórica de goma frontal y el tórica de goma trasero actuar para preservar la impermeabilidad de los reflectores. Los tóricas de
goma en contacto con el bisel de goma y la tapa, respectivamente, para evitar que entre agua en la brecha. En buen estado de
tórica de goma, el bisel de goma y lentes, y el sellado correcto de la tapa antes de su uso son muy importantes..
PRECAUCIÓN: PARA REDUCIR EL RIESGO DE DAÑOS A LA PROPIEDAD:
• Intentando eliminar cualquiera de las juntas tóricas de goma; uso de la unidad con una junta tórica, el bisel de goma y la
lente dañada; lacre incorrecto del casquillo de extremo impermeable; y/o sumergir esta unidad en mayores de 3 pies de las
profundidades puede hacer la unidad no más ser impermeable. No sumerja la unidad si existen estas condiciones o la unidad
podría sostener daño permanente.
• Sumergir esta unidad en mayores de 3 pies de las profundidades y/o el funcionamiento de ella en temperatura del agua con
excepción entre de 41ºF y de 104ºF (5ºC y 40ºC) podrían dar lugar a la salida, al combeo o al malfuncionamiento, causando daño
permanente a la linterna.
CONSERVE ESTAS INSTRUCCIONES
INTRODUCCIÓN
Felicitaciones por adquirir su nuevo linterna. Lea el manual de instrucción y siga las instrucciones cuidadosamente antes
de utilizar su nuevo linterna.
FUENTE DE ENERGÍA
Utilizando la linterna en el modo impermeable (con baterías alcalinas)
La unidad funciona con ocho “C” pilas alcalinas secas (no suministrado).
1. Desenroscar el bisel de goma hacia la izquierda y retírelo.
2. Retire con cuidado el reflector de la luz y el conjunto titular de la luz.
3. Introduzca las pilas como se describe en el compartimiento, observando las precauciones que siguen.
4. Vuelva a colocar el reflector de la luz y el conjunto titular de la luz.
5. Volver a enroscar el bisel de goma hacia la derecha. No se lo apriete demasiado.
Nota:
Utilice solamente las baterías alcalinas de la pila seca de “AA” en esta unidad.
PRECAUCIONES:
• Al substituir las baterías alcalinas de la pila seca del “C: No mezcle las baterías viejas y nuevas. Inserte siempre las baterías
correctamente con respecto a la polaridad (+ y –), marcada en la batería y el equipo. Quite las baterías muertas inmediatamente
y disponga por códigos locales.
• Siga todas las advertencias con respecto a las baterías en la sección “instrucciones importantes sobre seguridad” de este manual.
Utilizando la linterna en el modo de cable (alimentado por el cable de alimentación de 12 voltios CC)
Consulte la sección “Uso con cable” de las instrucciones de funcionamiento.
ADVERTENCIA PARA REDUCIR EL RIESGO DE DESCARGA ELÉCTRICA Y LESIONES A PERSONAS O DAÑOS A LA
PROPIEDAD:
Este linterna NO es a prueba de agua cuando se utiliza con el cable de alimentación de 12 voltios CC. Sumergiendo la linterna con
el cable de alimentación de 12 voltios CC conectado a una fuente de 12 voltios de corriente continua puede provocar una descarga
eléctrica y / o daños permanentes en la linterna.
INSTRUCCIONES PARA EL FUNCIONAMIENTO
PRECAUCIÓN: PARA REDUCIR EL RIESGO DE DAÑOS A LA PROPIEDAD:
• Nunca funcione esta linterna a menos que junta tórica, el bisel de goma y la lente estén intactos y se asienten correctamente; y el
casquillo de extremo impermeable está con seguridad en el lugar.
• Nunca sumergir y operar esto linterna abajo depths mayor que 3 pies.
• Nunca funcione esta linterna en temperaturas del agua con excepción entre de 41ºF y de 104ºF (5ºC y 40ºC).
• Este linterna se diseña para funcionar para hasta una hora debajo del agua.
Funcionamiento de la linterna
1. La perilla con./desc. de la energía es localizado en el frente de la mango de la linterna y debajo la perilla más dévil.
2. Para encender la linterna, gire la perilla con./desc. de la energía a la posición más futura a la derecha.
3. Para dar vuelta apagado la linterna, gire la perilla con./desc. de la energía a la posición más futura a la izquierda.
IMPORTANTE: Para evitar sostener daño, este linterna no se debe utilizar debajo del agua para más de largo de una hora.
Usando la barra para bloquear la unidad de encendido / apagado
La linterna se puede bloquear en la posición de apagado. Deslice la barra hacia la perilla de encendido / apagado. La linterna se
mantendrá hasta que la barra ha sido devuelto a la posición de desbloqueo.
Usando la linterna con el cable de alimentación de 12 voltios CC
• Asegúrese de que la linterna se apaga girando la perilla de encendido / apagado a la posición más a la izquierda.
• Desatornillar (izquierda) de la tapa a prueba de agua en la parte posterior de la unidad y retírela.
ICONO DEL PUNTO PARA
LA ALINEACIÓN AL ICONO
DE RECTÁNGULO
EN
EL CASQUILLO
DE EXTREMO
DETALLE DEL CASQUILLO DE
EXTREMO
EL ICONO DE
RECTÁNGULO
• Conecte la punta de cañón de 12 voltios CC cable de alimentación que se suministra en el puerto 12 voltios DC.
• Inserte el extremo del enchufe en la toma de accesorios de su vehículo u otro de 12 voltios fuente de alimentación de CC.
• Utilice la unidad como se describe en la sección anterior.
• Cuando la unidad no está en uso, asegúrese de que la linterna se apaga al girar el botón de encendido hacia la posición más a la
izquierda. Desconecte el extremo del enchufe de la toma de accesorios de su vehículo o de otros 12 voltios fuente de alimentación
de CC. A continuación, desenchufe la punta barril de 12 voltios CC cable de alimentación que se suministra a partir de los 12
puertos voltios DC.
• Reemplace la tapa de la unidad, atornillar las agujas del reloj hasta que la flecha triangular en la tapa está apuntando al icono
rectangular en la parte posterior de la unidad. Asegúrese de que le quede bien, pero no apriete en exceso.
Nota:
Si utiliza un vehículo de 12 voltios CC de accesorios como fuente de carga, tenga en cuenta que algunos vehículos requieren que se active el contacto con el
poder en la toma accesoria.
NOTAS IMPORTANTES:
• Si el cable de alimentación 12 V CC está conectado durante el funcionamiento de las pilas alcalinas, la unidad pasará
automáticamente a utilizar con cable.
• Si el cable de alimentación 12 V CC se desconecta durante el uso de cable, la unidad cambiará automáticamente al modo de pilas
alcalinas.
• La unidad no es resistente al agua cuando la tapa a prueba de agua se elimina.
SPQAK_ManualENSP_092711.indd 10-11 9/27/2011 9:10:51 PM

12 13
Reemplazo del fusible del enchufe del adaptador de carga de 12 voltios CC
1. Destornille la tapa trasera del enchufe de CC (en sentido contrario a las manecillas del reloj).
2. Retire el resorte central de contacto y el fusible.
3. Inspeccione el fusible con un control de continuidad.
4. En caso de estar quemado, busque un fusible de reemplazo de 5 amp.
5. Coloque el fusible, el resorte de contacto y el cobertor posterior.
6. Atornille la tapa trasera en sentido de las manecillas del reloj hasta que esté apretado. NO LO APRIETE DEMASIADO.
7. Asegúrese que el cable de alimentación de 12 voltios CC esté funcionado de forma correctar.
DETECCIÓN DE PROBLEMAS
La unidad no funcionará
1. Asegúrese de que la barra para bloquear la unidad de encendido / apagado está en la posición de desbloqueo.
2. De la cubierta de goma se pueden perder después de la batería o la lámpara halógena han sido reemplazados. Tornillo de la
cubierta de goma hacia la derecha para asegurarlo. No apriete demasiado. Asegúrese de que los componentes internos estén
correctamente en su lugar siguiendo las instrucciones de este manual.
3. Las baterías pueden estar completamente descargada. Reemplace las baterías siguiendo las instrucciones dadas en este
manual. Asegúrese de que estén correctamente instalados debido a la polaridad (+, –) y se ha insertado correctamente en el
compartimiento de la batería como se describe.
4. El bulbo de halógeno pudo haber soplado. Compruebe el filamento del bulbo. Si el filamento es en espiral e intacto, el bulbo no
está soplado. Si no, substituya el bulbo después de las instrucciones en el manual.
5. Si la luz no funciona después de reemplazar las baterías, en sustitución de la lámpara y / o ajuste del bisel de goma, contacto el
fabricante en (877) 571-2391.
Unidad funcionará en el modo de cable
1. Compruebe la conexión al puerto de alimentación 12 V CC.
2. Compruebe la conexión a la fuente de alimentación de CC.
3. Confirmar que es un CC funcionamiento actual.
4. Compruebe ito ver si el fusible si se abre (soplado).
ACCESORIOS
Los accesorios que se recomiendan para la herramienta están disponibles en el fabricante. Si necesita asistencia en relación con los
accesorios, por favor contacto el fabricante en (877) 571-2391.
ADVERTENCIA: El uso de accesorios no recomendados para utilizar con esta herramienta puede resultar peligroso.
INFORMACIÓN DE SERVICIO
Si usted necesita asesoramiento técnico, reparación, o una verdadera fábrica piezas de recambio, contacto con el fabricante en
(877) 571-2391.
UNA GARANTÍA LIMITADA DEL AÑO
El fabricante garantiza este producto contra defectos en materiales y mano de obra durante un período de UN (1) AÑO desde la
fecha de compra por el usuario final comprador ("período de Garantía").
Si hay un defecto y una reclamación válida es recibido dentro del periodo de garantía, el producto defectuoso puede ser
reemplazado o reparado en las siguientes maneras: (1) Devolver el producto al minorista donde producto fue comprado por
un intercambio (siempre que la tienda es una participación minorista). Regresa al minorista debe hacerse dentro del plazo del
minorista, política de retorno de intercambios sólo (generalmente de 30 a 90 días después de la venta). Prueba de compra puede
ser necesaria. Por favor consulte con el minorista para su regreso específicas política sobre rendimientos que están fuera del plazo
establecido para el intercambio. (2) Devolver el producto al fabricante de reparación o sustitución de fabricante, opción. Prueba de
compra puede ser requerida por el fabricante.
Esta garantía no se aplicará a los accesorios, bulbos, fusibles y baterías; defectos resultantes de desgaste normal; accidentes; daños
y perjuicios sufridos durante el envío; alteraciones; el uso no autorizado o reparación; abandono; mal uso; abuso; y no seguir las
instrucciones de cuidado y mantenimiento del producto.
Esta garantía le da, el original comprador minorista, determinados derechos jurídicos y puede tener otros derechos que varían de
estado a estado o provincia a provincia. Este producto no está destinado para uso comercial.
Termine por favor la tarjeta de registro del producto y vuelva en el plazo de 30 días de la compra del producto a: Baccus Global LLC,
595 S. Federal Highway, Suite 210, Boca Raton, FL 33432. Baccus Global LLC, discado gratuito: (877) 571-2391.
ADVERTENCIA PARA REDUCIR EL RIESGO DE DESCARGA ELÉCTRICA Y LESIONES A PERSONAS O DAÑOS A LA
PROPIEDAD:
Este linterna NO es a prueba de agua cuando se utiliza con el cable de alimentación de 12 voltios CC. Sumergiendo la linterna con
el cable de alimentación de 12 voltios CC conectado a una fuente de 12 voltios de corriente continua puede provocar una descarga
eléctrica y / o daños permanentes en la linterna.
Usando el cordón para llevar el reflector (accesorio opcional)
El cordón del llevar se puede utilizar para llevar la unidad o para colgarla para el almacenaje. Ajuste siempre la diapositiva en las
cuerdas para mantener el acollador seguro alrededor de cualquier objeto favorable.
PRECAUCIÓN: PARA REDUCIR EL RIESGO DE DAÑO DEL PRODUCTO:
• Cuando la luz es colgada por el acollador del llevar, no sacuda el reflector o no se oponga que está colgando de. No cuelgue el
reflector de ninguna alambres eléctrica o cualquier cosa que no es seguro.
• Utilice solamente el acollador del llevar para colgar este reflector. El acollador del llevar no se piensa para apoyar el peso adicional.
No ate o colgar cualquier cosa adicional al reflector o al riesgo de fractura puede ocurrir.
CUIDADO Y MANTENIMIENTO
Si la unidad se ensucia, limpie las superficies exteriores con cuidado. Utilize una tela suave humedecida con una mezcla diluida de agua y
detergente. No hay ningún usuario-sustituibles piezas. Periódicamente inspeccione la condición del cable de 12 voltios CC, conectores y
alambres. Contacto fabricante para sustituir los componentes que han pasado a ser gastado o rotas.
Disposición segura de las baterías
Refiera a las advertencias de seguridad en el frente de este manual de instrucción al seleccionar y substituyendo las baterías.
Disponga siempre de las baterías usadas correctamente.
ADVERTENCIA: PARA REDUCIR EL RIESGO DE LESIÓN/DE LA EXPLOSIÓN:
• No disponga de las baterías en fuego como esto puede dar lugar a una explosión.
• No exponga la unidad que contiene las baterías al fuego o al calor intenso como puede estallar.
Reemplazar la bombilla halógena
• Asegúrese de que la linterna se apaga girando la perilla de encendido en la posición más lejano a la izquierda.
• Desatornillar el bisel de goma hacia la izquierda y retírelo.
• Retire con cuidado el reflector de la luz y la asamblea del titular de la luz.
RANURAS EN EL CONJUNTO DE SOPORTE DE LUZ
ALINEAR Y ENCAJAR EN LAS DOS COSTILLAS DE LA
CAJA DE LUZ
SOPORTE PARA LA
BOMBILLA HALÓGENA
ASAMBLEA DE LA BOMBILLA HALÓGENA TERMINAL DE LA
BOMBILLA HALÓGENA
LAS COSTILLAS EN LA VIVIENDA ALINEAR Y SE
ADAPTAN A LAS DOS RANURAS CORRESPONDIENTES
EN EL CONJUNTO DE SOPORTE DE LUZ
• En la asamblea del titular de la luz, salir de la bombilla halógena de la titular de la bombilla halógena y luego desconectar el
cable de la asamblea del titular de la luz de la terminal de la bombilla halógena.
• Inserte el cable de la asamblea reemplazo de las lámparas en el terminal de la bombilla halógena y el lugar de la bombilla
halógena de nuevo en el soporte del titular de la bombilla halógena.
• Vuelva a colocar y alinear las ranuras de la asamblea de la titular perfectamente la luz en las costillas de la caja.
• Reemplace el reflector de la luz.
• Monte el bisel de goma y el tornillo en sentido horario. No apriete demasiado.
SPQAK_ManualENSP_092711.indd 12-13 9/27/2011 9:10:52 PM

14 15
ESPECIFICACIONES
Bombilla halógena: 12 voltios, H3 serie, 13 vatios
Fuente de alimentación: 12 V CC o de 8 “C” pilas alcalinas (no incluido)
Importados por
Baccus Global LLC
595 S. Federal Highway, Suite 210
Boca Raton, FL 33432
(877) 571-2391
RD092711
SPQAK_ManualENSP_092711.indd 14-15 9/27/2011 9:10:52 PM
Table of contents
Languages:
Other Stanley Spotlight manuals

Stanley
Stanley SL2M09 User manual

Stanley
Stanley HIDC10 User manual

Stanley
Stanley SL5HS User manual

Stanley
Stanley FL5W10 User manual

Stanley
Stanley SL5W09 User manual

Stanley
Stanley FL5W10 User manual

Stanley
Stanley SL12VDC User manual

Stanley
Stanley SL3WAKS User manual

Stanley
Stanley LLF0016A User manual

Stanley
Stanley FATMAX SL10LEDS User manual

Stanley
Stanley SL5HS User manual

Stanley
Stanley FATMAX SL10LEDS User manual

Stanley
Stanley SL3HS User manual

Stanley
Stanley SL1M09 User manual

Stanley
Stanley LIONLEDS User manual

Stanley
Stanley SL5W09 User manual

Stanley
Stanley HIDLISL User manual

Stanley
Stanley SL3HS User manual

Stanley
Stanley HID0109 User manual

Stanley
Stanley SL3WAKS User manual