Status Instruments DM640P User manual

D2394-01-02 CN4435 DM640P & TC User Guide.doc
1.0 DESCRIPTION
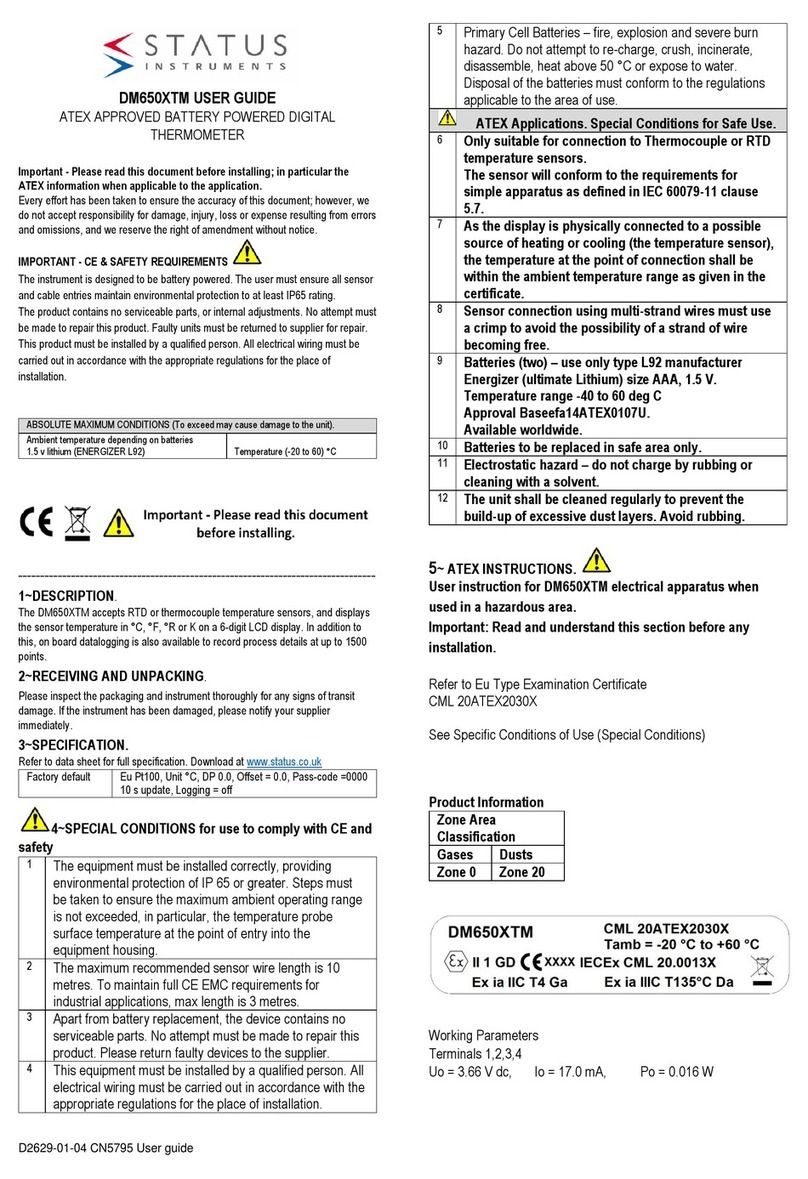
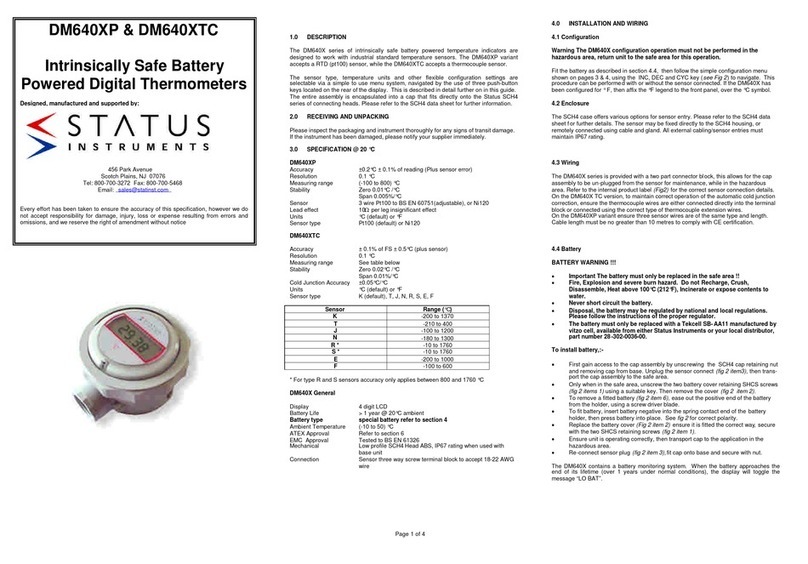
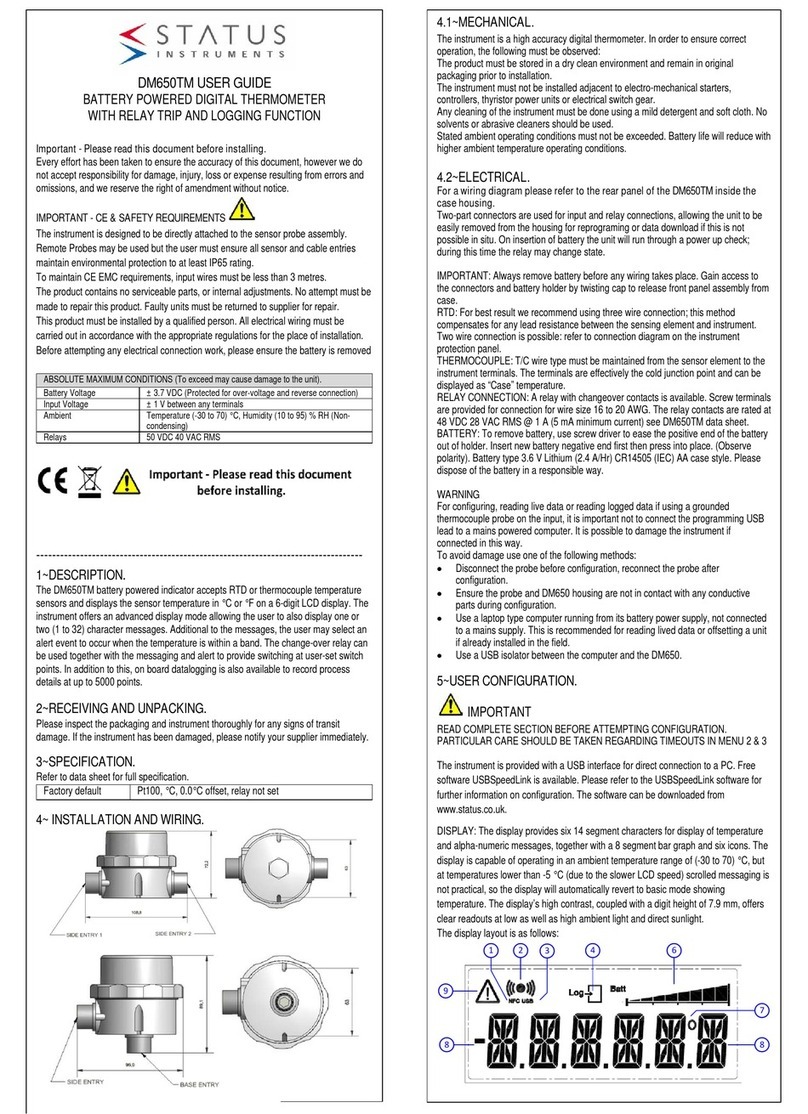
The DM640 series is a range of battery powered temperature indicators.
The DM640P accepts an RTD sensor.
The DM640TC accepts a thermocouple sensor.
The sensor type, temperature units and other flexible configuration settings are
selectable via a simple to use menu system, which is navigated by the use of three push-
button keys located on the rear of the display. This is described over the page in detail.
The entire assembly is sealed into a cap that fits directly onto the SCH4 series of
connecting heads. Please refer to the SCH4 data sheet for further information.
ATEX approved versions will be available for hazardous, dust and gas areas.
2.0 RECEIVING AND UNPACKING
Please inspect the packaging and instrument thoroughly for any signs of transit damage.
If the instrument has been damaged, please notify your supplier immediately.
3.0 SPECIFICATION @ 20 °C
DM640P
Accuracy ± 0.2 °C ± 0.1% of reading (plus sensor error)
Resolution 0.1 °C (User configurable)
Measuring range (-100 to +800) °C
Stability Zero 0.01 °C / °C
Span 0.005 %/°C
Sensor 3 wire Pt100 to BS EN 60751(adjustable), or Ni120
Lead effect 10 Ωper leg insignificant effect
Units °C (default) or °F
Sensor type Pt100 (default) or Ni120
DM640TC
Accuracy ± 0.1 % of FS ± 0.5 °C (plus sensor error)
Resolution 0.1 °C (User configurable)
Measuring range See table
Stability Zero 0.02 °C / °C
Span 0.01 %/°C
Cold Junction Tracking ± 0.05 °C / °C
Units °C (default) or °F
Sensor type K (default),J,T,R,S,E,L,N,B
Sensor Range (°C)
K -200 to 1370
J -100 to 1200
T -210 to 400
R* -10 to 1760
S* -10 to 1760
E -200 to 1000
L -100 to 600
N -180 to 1300
B* 0 to 1800
* For type R, S and B sensors, accuracy only applies between 800 and 1760°C
DM640 General
Display 4 digit LCD
Battery Standard ANSI AA ER14505: IEC ER6
Dimensions Diameter 14.5 mm, length 50.5 mm
Type 3.6 V Lithium Thionyl Chloride (2.4 Ahr)
Operating Current 80 µA average
Battery Life > 1 year @ 20 °C
Ambient Temperature (-10 to 70) °C [Storage (-20 to 85)°C]
EMC Approval Tested to BS EN 61326
Mechanical Low profile SCH4 Head ABS, IP67 rating when used with base
unit
Connection Sensor three way screw terminal block to accept 18-22 AWG
wire
4.0 INSTALLATION AND WIRING
4.1 Configuration
Fit the battery as described in section 4.4, then follow the simple
configuration menus printed on the reverse side of this sheet. This
procedure can be performed with or without the sensor connected. Fit the correct units
legend to the front panel face.
4.2 Enclosure
The SCH4 case offers various options for sensor entry. Please refer to the SCH4 data
sheet for further details. The sensor may be fixed directly to the SCH4 housing, or
remotely connected using cable and gland. Cable length must be no greater than 10
metres to comply with CE certification. All external cabling/sensor entries must maintain
IP67 rating.
4.3 Wiring
DM640P Connection DM640TC Connection
Use correct compensating wire
4.4 Battery
BATTERY WARNING
•Fire, explosion and severe burn hazard, DO NOT recharge, crush,
disassemble, heat above 100 °C (212 °F), incinerate or expose contents to
water.
•Never short circuit the battery.
•Disposal of the battery may be regulated by national and local regulations.
Please follow the instructions of the proper regulator.
To install the battery, first gain access to the battery by unscrewing the SCH4 cap
retaining the nut and removing the cap from the base. To remove the old battery, ease
out the positive end of the battery from the holder, using a screw driver blade. To fit the
new battery, insert battery negative into the spring contact end of the battery holder BH1,
then press the battery into place. Replace the cap and secure the nut. Listed below are
suitable
battery types.
Manufacturer Part Number Capacity Ahr
Saft LS-14500, LS-14500C 2.25/2.75
Xeno Energy XL-060F 2.4
Maxell ER6 2.0
Tadiran Tl-2100 2.1
RS 596-602 2.1
Tekcell SBAA11-TC 2.2
The DM640 devices monitor their batteries. When the battery approaches the end of its
lifetime (over 1 year under normal conditions), the display will toggle the message "LO
BAT".
5.0 MAINTENANCE
Apart from battery replacement this equipment requires no user
maintenance. If re-calibration is required, please contact your supplier for further
information. Under certain circumstances, it may be possible to
re-calibrate the device while it is in an application.
6.0 GENERAL RECOMMENDATIONS
Please observe the battery warning.
Ensure the instrument is installed with adequate protection against the
environment. IP67 rating must be maintained.
Avoid installing the equipment close to sources of extreme temperature and electrical or
electromagnetic interference.
Any cleaning of the instrument should be carried out using a mild detergent and a soft
cloth. No solvents or abrasive cleaner should be used.
7.0 MECHANICAL DETAIL
The example below shows an in-head indicator with rotating head
temperature sensor assembly.
8.0 CONFIGURATION MENUS
The two sections overleaf describe the menus accessible on (1) the DM640P, and (2) the
DM640TC.
DM640P & DM640TC
BATTERY POWERED DIGITAL
THERMOMETERS
Designed, manufactured and supported by:
Green Lane, Business Park, Green Lane
Tewkesbury Glos. G20 8DE. UK
Tel: +44 (0)1684 296818 Fax: +44 (0)1684 293746
Email: [email protected].uk
Every effort has been taken to ensure the accuracy of this specification, however we do
not accept responsibility for damage, injury, loss or expense resulting from errors and
omissions, and we reserve the right of amendment without notice
Stock code 52-314-2394-01
85.0 mm

D2394-01-02 CN4435 DM640P & TC User Guide.doc
8.1 DM640P CONFIGURATION MENU GUIDE
See application note (available from www.status.co.uk) for more details regarding Pt100 offset/scale
adjustment, in-the-field re-calibration, resetting to factory default, and bypassing a forgotten menu passcode.
PTO for details of device specification, wiring connections and other important information.
8.1 DM640TC CONFIGURATION MENU GUIDE
See application note (available from www.status.co.uk) for more details regarding Pt100 offset/scale
adjustment, in-the-field re-calibration, resetting to factory default, and bypassing a forgotten menu passcode.
PTO for details of device specification, wiring connections and other important information.
8.8.8.8
Run-time
then
If no buttons are pressed for a minute or more, the device
assumes run-time mode. The LCD shows the temperature (if
the input is in range) or shows or to indicate
over/under range . In order to access menu configuration
mode, the user must press ENTer followed immediately
by CYCle . In order to exit the menu and return to run-
time, a user must press ESCape .
CYC INC
DEC
8.8.8.8
There are three buttons, which the operator must press in various
combinations in order to configure and/or calibrate the device. These
buttons are located on the underside of the indicator's circuit board.
V
iewed from the front, the three buttons (CYCle ,
INCrement and DECrement ) are shown in
black and located as shown in the diagram to the
left. Pressing 2 buttons simultaneously causes
ENTer or ESCape actions.
When cycling around the menu, the title
(e.g. type,UNIT, etc.) is displayed for
some time. To edit the chosen
parameter, the user should press
INCrement
or DECrement
CYCle around menu
60S
HOUr
The device will return
from menu- mode to
run-time if no button is
pressed for the time
selected here.
tOUt
PASS
88.88
If non-zero, the user
will be prompted for
this number in order
to enter the menu
from run-time.
8888.
888.8
88.88
8.888
dECP
88.88
After the input
processing stage where
electrical input has been
linearised to produce a
temperature, the
temperature is offset by
the number entered
here.
OFSt
Choose
temperature
units
de9C
de9F
UNit
tyPE
P100
NI20
USER
Choose RTD type. If
User is chosen, PT100
BS EN30751
linearisation is used, but
the 0ºC & 100ºC
calibration points are
shifted by a user-
configurable amount.
INCrement menu entry
DECrement menu entry
ENTer to confirm entry, or:
CYCle to reject and move on.
Choose the position of
the decimal place in
run-time.
8.8.8.8
Run-time
then
If no buttons are pressed for a minute or more, the device
assumes run-time mode. The LCD shows the temperature (if
the input is in range) or shows or to indicate
over/under range . In order to access menu configuration
mode, the user must press ENTer followed immediately
by CYCle . In order to exit the menu and return to run-
time, a user must press ESCape .
CYC INC
DEC
8.8.8.8
There are three buttons, which the operator must press in various
combinations in order to configure and/or calibrate the device. These
buttons are located on the underside of the indicator's circuit board.
V
iewed from the front, the three buttons (CYCle ,
INCrement and DECrement ) are shown in
black and located as shown in the diagram to the
left. Pressing 2 buttons simultaneously causes
ENTer or ESCape actions.
When cycling around the menu, the title
(e.g. type,UNIT, etc.) is displayed for
some time. To edit the chosen
parameter, the user should press
INCrement
or DECrement
CYCle around menu
60S
HOUr
The device will return
from menu- mode to
run-time if no button is
pressed for the time
selected here.
tOUt
PASS
88.88
If non-zero, the user
will be prompted for
this number in order
to enter the menu
from run-time.
8888.
888.8
88.88
8.888
dECP
88.88
After the input
processing stage where
electrical input has been
linearised to produce a
temperature, the
temperature is offset by
the number entered
here.
OFSt
Choose
temperature
units
de9C
de9F
UNit
tyPE
Ca
J
T
R
S
E
L
N
B
Choose TC type.
INCrement menu entry
DECrement menu entry
ENTer to confirm entry, or:
CYCle to reject and move on.
Choose the position of
the decimal place in
run-time.
This manual suits for next models
1
Other Status Instruments Thermometer manuals
Popular Thermometer manuals by other brands
CO/Tech
CO/Tech E0201ST2H2 Original instructions

Easy@Home
Easy@Home NCT-301 Faq
FLORABEST
FLORABEST FFGT 433 A1 Operating instructions and safety instructions
sauermann
sauermann KIRAY 100 user manual
Dwyer Instruments
Dwyer Instruments IR4 Series quick start guide
VOLTCRAFT
VOLTCRAFT IR 500-8S SE operating instructions
