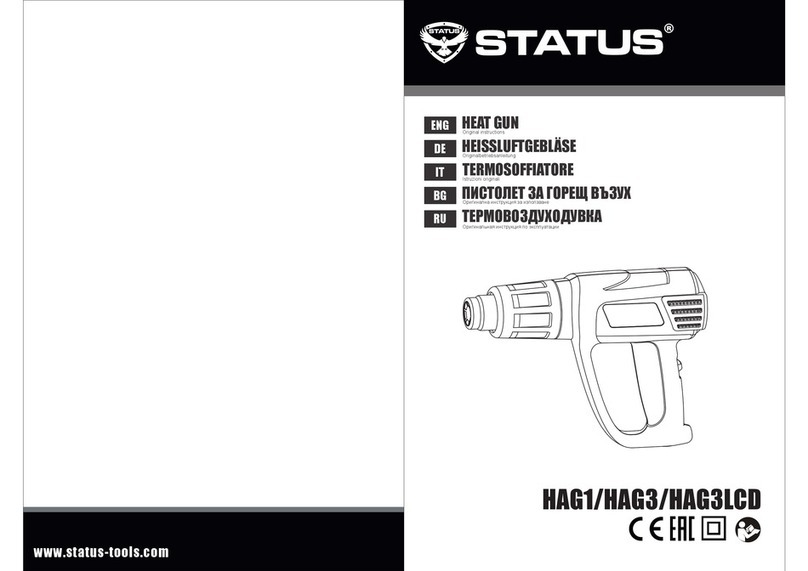
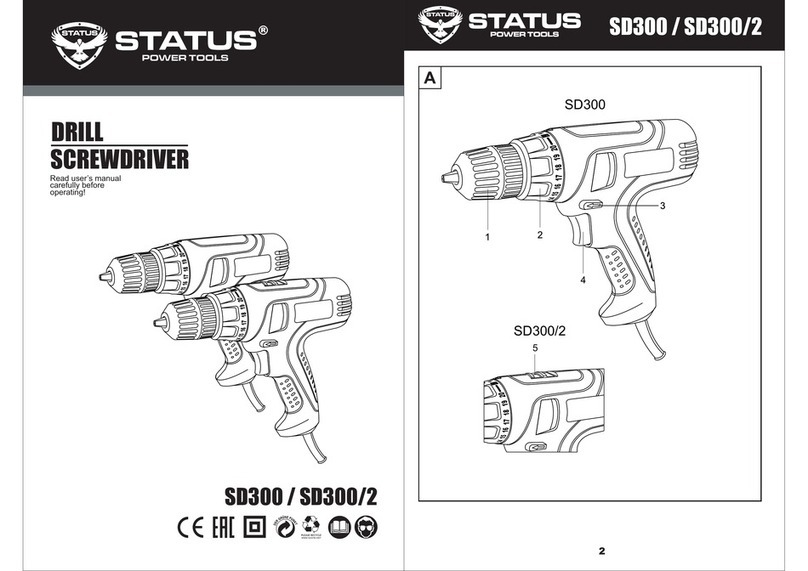
Status JS750M User manual

JS750M
Jig saw
Seghetto alternativo
Stichsäge
Ножов трион
Лобзик
IT
EN
DE
BG
RU
Original instructions
Istruzioni originali
Originalbetriebsanleitung
Оригинална инструкция за използване
Оригинальная инструкция по эксплуатации

2
JS750M
61618
12
10
9
B
7
1 144
A5
2
3
17
11
8
15

3
JS750M
CD
Blow eect is on.
Обдув включен.
Blow eect is o.
Обдув выключен.

4
INTENDED USE
GENERAL SAFETY RULES
INTENDED USE
GENERAL SAFETY RULES
EN
This tool is intended for making cut-throughs and cut-outs in wood, plastic, metal, ceramic
plates and rubber, and is suitable for straight and curved cuts with mitre angles to 45°.
WARNING! Read all safety warnings and all instructions. Failure to follow the warnings and
instructions may result in electric shock, re and/or serious injury.
Save all warnings and instructions for future reference.
The term "power tool" in the warnings refers to your mains-operated (corded) power tool or
batteryoperated (cordless) power tool.
WORK AREA
• Keep work area clean and well lit. Cluttered and dark areas invite accidents.
• Do not operate power tools in explosive atmospheres, such as in the presence of
ammable liquids, gases or dust. Power tools create sparks which may ignite the dust or
fumes.
• Keep children and bystanders away while operating a power tool. Distractions can
cause you to lose control.
ELECTRICAL SAFETY
• Power tool plugs must match the outlet. Never modify the plug in any way. Do not
use any adapter plugs with earthed (grounded) power tools. Unmodied plugs and
matching outlets will reduce risk of electric shock.
• Avoid body contact with earthed or grounded surfaces such as pipes, radiators,
ranges and refrigerators. There is an increased risk of electric shock if your body is earthed
or grounded.
• Do not expose power tools to rain or wet conditions. Water entering a power tool will
increase the risk of electric shock.
• Do not abuse the cord. Never use the cord for carrying, pulling or unplugging the
power tool. Keep cord away from heat, oil, sharp edges or moving parts. Damaged or
entangled cords increase the risk of electric shock.
• When operating a power tool outdoors, use an extension cord suitable for outdoor
use. Use of a cord suitable for outdoor use reduces the risk of electric shock.
• If operating a power tool in a damp location is unavoidable, use a residual current
device (RCD) protected supply. Use of an RCD reduces the risk of electric shock.

5
GENERAL SAFETY RULES
EN
PERSONAL SAFETY
• Stay alert, watch what you are doing and use common sense when operating a
power tool. Do not use a power tool while you are tired or under the inuence of
drugs, alcohol or medication. A moment of inattention while operating power tools may
result in serious personal injury.
• Use safety equipment. Always wear eye protection. Safety equipment such as
dust mask, non-skid safety shoes, hard hat, or hearing protection used for appropriate
conditions will reduce personal injuries.
• Avoid accidental starting. Ensure the switch is in the o position before plugging in.
Carrying power tools with your nger on the switch or plugging in power tools that have
the switch on invites accidents.
• Remove any adjusting key or wrench before turning the power tool on. A wrench or a
key left attached to a rotating part of the power tool may result in personal injury.
• Do not overreach. Keep proper footing and balance at all times. This enables better
control of the power tool in unexpected situations.
• Dress properly. Do not wear loose clothing or jewellery. Keep your hair, clothing and
gloves away from moving parts. Loose clothes, jewellery or long hair can be caught in
moving parts.
• If devices are provided for the connection of dust extraction and collection facilities,
ensure these are connected and properly used. Use of these devices can reduce dust
related hazards.
POWER TOOL USE AND CARE
• Do not force the power tool. Use the correct power tool for your application. The
correct power tool will do the job better and safer at the rate for which it was designed.
• Do not use the power tool if the switch does not turn it on and o. Any power tool
that cannot be controlled with the switch is dangerous and must be repaired.
• Disconnect the plug from the power source before making any adjustments,
changing accessories, or storing power tools. Such preventive safety measures reduce
the risk of starting the power tool accidentally.
• Store idle power tools out of the reach of children and do not allow persons
unfamiliar with the power tool or these instructions to operate the power tool.
Power tools are dangerous in the hands of untrained users.
• Maintain power tools. Check for misalignment or binding of moving parts, breakage
of parts and any other condition that may aect the power tools operation. If
damaged, have the power tool repaired before use. Many accidents are caused by
poorly maintained power tools.
• Keep cutting tools sharp and clean. Properly maintained cutting tools with sharp
cutting edges are less likely to bind and are easier to control.


6
SAFETY INSTRUCTIONS FOR JIG SAWS
EN
• Use the power tool, accessories and tool bits etc. in accordance with these
instructions, taking into account the working conditions and the work to be
performed. Use of the power tool for op-erations dierent from those intended could
result in a hazardous situation.
SERVICE
• Have your power tool serviced by a qualied repair person using only identical
replacement parts. This will ensure that the safety of the power tool is maintained.
• Your tool is double insulated for additional protection against a possible electrical
insulation failure within the tool.
• Always remove the plug from the mains socket before making any adjustments or
maintenance, including changing the blade.
• Ensure that the lighting is adequate.
• Do not use the saw unless the guards are in place.
• Keep the shoe at on the work piece.
• Do not put pressure on the saw, such that it slows the motor down. Allow the saw
blade to cut without pressure. You will get better results and you will be taking better
care of your tool.
• Keep the area free of tripping hazards.
• Do not let anyone under 18 years operate this jigsaw.
• Only use blades in good condition.
• Before cutting, check that there is sucient clearance for the blade under the work
piece.
• Do not touch the blade after operation. It will be very hot.
• Keep your hands away from under the work piece.
• Never use your hands to remove sawdust, chips or waste close by the blade.
• Rags, cloths, cord, string and the like should never be left around the work area.
• Avoid cutting nails. Inspect the work piece and remove all nails and other foreign
objects before beginning sawing.
• Support the work properly.
• Never reach over the blade to remove waste or o cuts.
• Do not attempt to free a jammed blade before rst switching o the machine.
• If you are interrupted when operating the saw, complete the process and switch o
before looking up.
• Periodically check that all nuts, bolts and other xings are properly tightened.
• Do not store materials or equipment above a machine in such a way that they could fall
into it.
SAFETY INSTRUCTIONS FOR JIG SAWS

7
• Hold power tool by insulated gripping surfaces only, when performing an operation
where the cutting accessory may contact hidden wiring or its own cord. Cutting
accessory contacting a “live”wire may make exposed metal parts of the power tool
“live” and could give the operator an electric shock.
• Do not secure the jigsaw upside down in a vice or work bench and use it as a saw
bench. This can lead to serious injury.
• When using the jigsaw, use safety equipment including safety goggles or shield, ear
defenders, dust mask and protective clothing including safety gloves.
• Leave the jigsaw down only after the blade has come to a standstill. Unattended
jigsaw with moving blade can cause a serious injury.
These lasers do not normally present an optical hazard,
although staring at the beam may cause ash blindness.
WARNING: Do not stare directly at the laser beam. A
hazard may exist if you deliberately stare into the beam.
• The laser shall be used and maintained in accordance with the manufacturer’s
instructions.
• Never aim the beam at any person or an object other than the work piece.
• The laser beam shall not be deliberately aimed at personnel and shall be prevented
from being directed towards the eye of a person.
• Always ensure the laser beam is aimed at a sturdy work piece without reective
surfaces i.e. wood or rough coated surfaces are acceptable. Bright shiny reective sheet
steel or the like is not suitable for laser use as the reective surface could direct the
beam back at the operator.
• Do not change the laser light assembly with a dierent type. Repairs must only be
carried out by the laser manufacturer or an authorized agent.
EN
SAFETY RULES FOR LASER LIGHTS
TOOLS PARTS OVERVIEW
TOOL PARTS OVERVIEW
SAFETY RULES FOR LASER LIGHTS
1. Lock-on button
2. Laser light on/o switch
3. Laser aperture
4. Jigsaw on/o switch
5. Soft grip handle
6. Shoe plate
7. Shoe bracket
8. Blade guard
9. Blade guide
10. Cutting angle scale
11. Parallel guide
12. Pendulum lever
14. Variable speed control
15. Tool-free blade change control
16. Dust extraction adaptor
17. Parallel guide xing screw
18. Locking lever

8
OPERATION
EN
ADJUSTING THE CUTTING SPEED
The variable speed feature of this jigsaw enhances the сutting performance and saves the
blade from undue wear.
• The variable speed control (14) is used to programme the speed of the blade. The
speed should be adapted to the material being cut.
• To increase the speed turn the knob counterclockwise. To decrease the speed turn the
knob clockwise..
• Determine the optimum speed by making a trial cut in a scrap piece of material.
Note: using the correct speed for the job increases the life of the blade.
CHANGING A BLADE
Warning: Always ensure that the saw is switched o and plug is removed from the power
point before making any adjustments.
• Remove the blade guard (8) .
• Turn the quick-release chuck (15) and hold it in this position.
• Push the required saw blade into the quickrelease chuck (15) as far as the limit stop.
• Release the quick-release chuck so that it returns to its initial position. The saw blade is
now locked.
• Replace the guard (8) back onto the appliance.
PENDULUM ADJUSTMENT
• The pendulum lever (12) has 4 positions.
• Position “0” selects normal cutting without pendulum action.
• The next three positions“1, 2 & 3”cause the blade to swing slightly backwards and
forwards as it cuts. This pendulum actions increases the eciency of cutting.
• Set the pendulum lever (12) to one of the three settings“1, 2 or 3”according to degree
of pendulum action required. Experiment on a piece of scrap material to determine the
optimum pendulum action setting for the material of the work piece.
LASER LINE SYSTEM
Warning: Do not stare directly at the laser beam.
Never aim the beam at any person or an object other than the work piece.
OPERATION
SWITCHING ON - SWITCHING OFF
Brief activation
• Switching on: press and hold switch 4.
• Switching o: release switch 4.
Continuous use
• Switching on: press ON/OFF switch 4 and lock it by button 1.
• Switching o: press and release ON/OFF switch 4.

9EN
Do not deliberately aim the beam at personnel and ensure that it is not directed towards
the eye of a person.
Always ensure the laser beam is aimed at a sturdy work piece without reective surfaces i.e.
wood or rough coated surfaces are acceptable.
Bright shiny reective sheet steel or the like is not suitable for laser use as the reective
surface could direct the beam back at the operator. Only turn laser beam on when tool is on
workpiece.
• Mark the line of the cut on the work piece.
• Adjust the bevel angle of cut as required.
• Plug in the machine and start the motor.
• When the blade is at its maximum speed (approximately 2 seconds), place the saw on
the work piece.
• Switch on the laser beam using the switch (2)
• Align the beam with the mark on the work piece and slowly push the saw forward
using both hands, keeping the red light beam on the mark.
• Switch o the laser beam on completion of the cut.
ADJUSTING THE SHOE FOR ANGULAR CUTTING
Warning: Always ensure the tool is switched o and the plug is removed before making
any adjustments or maintenance procedures.
• To adjust the angle of cutting, rst turn the jigsaw upside down. Loosen the hex screw
securing the blade guide assembly using the hex key provided.
• Next, loosen the hex screw securing the shoe plate (6) using the same hex key.
• Move the shoe plate slightly forward. It can now be tilted to set the required angle
between 0° and 45° using the scale marked on the shoe bracket (10).
• Next slide the shoe plate (6) until the blade guide (9) rests against the back edge of the
blade.
• Finally, retighten the hex screw. For accurate work it is necessary to make a trial cut,
measure the work and reset the angle until the correct setting is achieve.
FITTING THE PARALLEL GUIDE
The parallel guide (11) ts into the shoe plate (6) and is locked in place with the locking
knob. It is used to guide the jigsaw along a straight line which can be an edge of the work
piece or a piece of straight timber clamped to the work piece. By changing the position of
the guide and using the same straight edge as a guide, it is possible to quickly and easily
make parallel cuts in the work piece.
• Push the parallel guide (11) into the slot in the shoeplate (6).
• Adjust the guide to the required position and lock it inplace with the locking knob at
location (17).
OPERATION

10
EN
DUST EXTRACTION ADAPTOR
The dust extraction adaptor (16) allows a dust extraction system or a household vacuum
cleaner to be connected to the tool in order to remove dust whilst the tool is in use.
Warning: Do not use a dust extraction system or a vacuum cleaner when cutting metal.
Sparks may ignite residual wood dust.
MAKING A CUT
• Switch on the jigsaw and allow the blade to reach maximum speed.
• Slowly guide the jigsaw forward using both hands, keeping the shoe plate at against
the work piece.
• Do not force the jigsaw.
Note: Use only enough pressure to keep the blade cutting. Do not force the cutting, allow
the blade and the sawto do the work.
POCKET & ROUND CUTTING
• When starting a cut from the centre of a work piece, drill a 12 mm diameter hole to
ensure that there is clearance for the blade.
• When cutting tight curves, reduce the speed of the saw.
Warning: Do not move the saw forward along its cut until the blade has completely
entered the material and the shoe comes to rest on its surface.
CUTTING METAL
• When cutting metals, a suitable cooling/cutting oil must be used.
• Squirt the lubricant onto the blade or work piece at regular intervals during cutting in
order to reduce wear of the blade.
GENERAL INSPECTION
Regularly inspect all fasteners and ensure they are properly tightened. Should any of the
screws be loose, retighten it immediately to avoid hazards.
If the replacement of the supply cord is necessary, this has to be done by the manufacturer
or his agent in order to avoid a safety hazard.
CLEANING
For safe operation always keep the machine and its ventilation slots clean.
Regularly check to see if any dust or foreign matter has entered the ventilation slots and the
grills around the switches. Use a soft brush and/or air jet to remove any accumulated dust.
Wear safety glasses to protect your eyes whilst cleaning.
Exterior plastic parts may be cleaned with a damp cloth and mild detergent if necessary.
MAINTENANCE
MAINTENANCE

11 EN
TECHNICAL SPECIFICATIONS
The manufacturer reserves the right to make changes and improvements to the products and to
alter specications without prior notice.
Includes:
Parallel guide, saw blade, foot cover, 2xbatteries, dust adapter, anti-burr plate.
TECHNICAL SPECIFICATIONS
Model JS750M
Voltage 220-240 V~ 50 Hz
Input power 750 W
No load speed 0-3000/min.
Max. cutting capacity
- wood 120 mm
- steel/aluminum 8/12 mm
Stroke length 26 mm
Blade type T
Weight 2,9 kg
А-weighted sound pressure level LpA 85 db(A), uncertainty 5 dB(A)
А-weighted sound power level LwA 96 dB(A), uncertainty 5 dB(A)
Vibration emission value ahb/ahm 9.48/10.75 m/s2, uncertainty 1,5 m/s2
Protection class II
WARNING!
Never use alcohol, petrol or other cleaning agent. Never use caustic agents to
clean plastic parts. Water must never come into contact with the tool.
REPLACEMENT PARTS
To assure product safety and reliability, repairs, maintenance and adjustment (including
brush inspection and replacement) should be performed by authorised service centres
always using genuine replacement parts.

12
EN
CE DECLARATION OF CONFORMITY
We STATUS ITALIA S.R.L. as the responsible manufacturer declare that the following STATUS
machine(s): Circular Saw Model No./ Type: JS750M.
are of series production and сonforms to the following European Directives: 2006/42/EC,
2014/30/EU.
And are manufactured in accordance with the following standards or standardised
documents: EN62841-1:2015+AC:15, EN62841-2-11:2016, AfPS GS 2019:01 PAK, EK9-BE-
88(V2):2020, EN55014-1:2017, EN55014-5:2015, EN61000-3-2:2014, EN61000-3-3:2013.
The technical documentation kept by the manufacturer: STATUS ITALIA S.R.L.,
via Aldo Moro, 14/A, 36060 - Pianezze (VI), ITALY
Caron Giacinto
Director
STATUS Italia S.r.l.
CE DECLARATION OF CONFORMITY

13
DESTINAZIONE D’USO
AVVERTENZE GENERALI DI PERICOLO PER ELETTROUTENSILI
DESTINAZIONE D’USO
AVVERTENZE GENERALI DI PERICOLO PER ELETTROUTENSILI
IT
Quest' utensile è idoneo per l'esecuzione di tagli di troncatura nel legno, in materie
plastiche, nel metallo, nella ceramica e nella gomma; di tagli diritti e di tagli con angolazioni
no a 45°.
AVVERTENZA! Leggere tutte le indicazioni relative alla sicurezza e le istruzioni. L'errata
applicazione delle indicazioni relative alla sicurezza e delle istruzioni può causare scosse
elettriche, incendi e / o gravi lesioni.
Conservare le indicazioni relative alla sicurezza e le istruzioni per il futuro.
Il termine "elettroutensile" utilizzato nelle indicazioni relative alla sicurezza si riferisce a
elettroutensili collegabili alla rete elettrica (con cavo di rete) e a elettroutensili a batteria
(senza cavo di rete).
AREA DI LAVORO
• Mantenere l’area di lavoro pulita e ben illuminata. Le zone buie ed ingombre di oggetti
favoriscono incidenti.
• Non utilizzare l’utensile in presenza di liquidi inammabili, gas o polvere. Le scintille
generate potrebbero inammare polvere e/o vapore.
• Tenere a distanza bambini e terzi durante il funzionamento. Per una distrazione
potreste perdere il controllo dell’utensile.
SICUREZZA ELETTRICA
• La spina dell’utensile deve essere adatta alla presa utilizzata. Non modicare la
spina in alcun modo. Non utilizzare adattatori con gli utensili collegati a terra.
L’impiego di una spina integra ed una presa adatta riduce i rischi di folgorazione.
• Evitare di toccare con il corpo le superci collegate a terra quali tubi, radiatori, forni
e frigoriferi. Il rischio di folgorazione aumenta se il corpo è collegato a terra.
• Non esporre l’utensile alla pioggia e all’umidità. La penetrazione d’acqua nell’utensile
aumenta il rischio di folgorazione.
• Non utilizzare il cavo per scopi diversi da quello previsto. Non utilizzare il cavo per
trasportare o tirare l’utensile, oppure per staccare la spina dalla presa. Tenere il cavo
lontano da fonti di calore, olio, parti appuntite o in movimento. Cavi danneggiati o
attorcigliati aumentano il rischio di folgorazione.
• Se l’utensile viene utilizzato all’aperto, usare una prolunga adatta all’uso esterno.
L’impiego di una prolunga da esterno riduce il rischio di folgorazione.
• Se è inevitabile l'uso dell'elettroutensile in un ambiente umido, utilizzare un circuito
di sicurezza per correnti di guasto. L'uso di un circuito di sicurezza per correnti di guasto
evita il rischio di scosse elettriche.

14
AVVERTENZE GENERALI DI PERICOLO PER ELETTROUTENSILI
IT
SICUREZZA PERSONALE
• L’uso di elettroutensili richiede attenzione e buon senso. Non utilizzare gli utensili
se si è stanchi o sotto l’eetto di droghe, alcol o medicinali. Una breve disattenzione
può provocare gravi danni alle persone.
• Munirsi di indumenti e dispositivi di protezione. Indossare sempre occhiali da
lavoro. L’uso di dispositivi di protezione tra cui mascherina antipolvere, scarpe antiscivolo,
casco e protezioni per l’udito riduce il rischio di danni a persone.
• Evitare l’accensione accidentale. Accertarsi che l’interruttore sia in posizione “OFF”
prima di inserire la spina. Se si trasportano gli utensili con il dito sull’interruttore o si
inserisce la spina nella presa con l’interruttore in posizione “ON” aumenta il rischio di
incidenti.
• Togliere tutte le chiavi di regolazione prima di accendere l’utensile. Una chiave
lasciata inserita in una parte rotante di un utensile può provocare danni a persone.
• Non utilizzare l’utensile in condizioni estreme. Mantenere sempre l’equilibrio ed i
piedi ben appoggiati a terra. Questo consente un maggior controllo dell’utensile in caso
di imprevisti.
• Indossare un abbigliamento adeguato. Non indossare abiti svolazzanti o gioielli.
Tenere capelli, vestiti, e guanti lontani dalle parti in movimento. Abiti svolazzanti,
gioielli o capelli potrebbero impigliarsi nelle parti in movimento.
• In presenza di apparecchiature per il collegamento a dispositivi di aspirazione e
raccolta delle polveri, accertarsi che essi siano collegati ed utilizzarli correttamente.
L’uso di queste apparecchiature può ridurre i rischi causati dalla polvere.
USO E MANUTENZIONE DELL’UTENSILE
• Utilizzare l’utensile più adatto per il lavoro da svolgere. L’impiego dell’utensile giusto
migliora la qualità del lavoro e la sicurezza.
• Non utilizzare l’utensile se non è possibile accenderlo e spegnerlo con l’apposito
interruttore. Gli utensili che non possono essere controllati con l’interruttore sono
pericolosi e devono essere riparati.
• Staccare la spina dall’alimentazione di corrente prima di eseguire regolazioni,
cambiare accessori o riporre l’utensile. Osservando queste precauzioni si riduce il rischio
di accensione accidentale dell’utensile.
• Riporre gli utensili non utilizzati fuori dalla portata dei bambini e non consentirne
l’utilizzo a persone che non conoscono l’utensile o queste istruzioni. Nelle mani di
persone inesperte gli utensili possono diventare pericolosi.
• Sottoporre l’utensile a manutenzione. Vericare il corretto allineamento di tutte
le parti mobili, controllare che non siano grippate e che non vi siano rotture o
altri guasti che potrebbero inuire sul funzionamento dell’utensile. Far riparare gli
utensili danneggiati prima di riutilizzarli. Molti incidenti sono causati da utensili in pessime
condizioni.

15
• Questo elettroutensile dispone di un doppio isolamento che garantisce maggiore
protezione in caso mancato isolamento elettrico all’interno della macchina stessa.
• Prima di sostituire qualsiasi accessorio o eseguire operazioni di manutenzione
accertarsi sempre che l’utensile sia spento e la spina staccata dalla presa di corrente.
• Assicurarsi che l’area di lavoro sia ben illuminata.
• Non utilizzare il seghetto se il paratrucioli non è ssato correttamente.
• Assicurarsi che la base aderisca perfettamente al pezzo durante il lavoro di taglio.
• Non sovraccaricare la macchina, operare una pressione moderata. Una pressione
eccessiva genera un sovraccarico e quindi una riduzione della velocità, causando
possibili danni al motore.
• Tenere sempre l’area di lavoro libera da intoppi.
• Non permettere l’uso della macchina a minori di 18 anni.
• Utilizzare solo lame aliate ed in buone condizioni.
• Prima di procedere con il lavoro, assicurarsi che vi sia suciente spazio vuoto sotto il
pezzo così da permettere alla lama di correre senza intoppi.
• Non toccare la lama durante o dopo l’uso, essendo questa surriscaldata.
• Tenere le mani ed altre parti del corpo lontane dall’area di taglio. Il contatto con la lama
potrebbe causare danni all’utente.
• Non rimuovere polvere, trucioli o altro nelle vicinanze della lama con le mani.
• Non lasciare stracci, panni, corde, spaghi e simili nell’area di lavoro.
• Rimuovere eventuali viti o chiodi prima di tagliare nel legno.
• Se possibile ssare sempre il pezzo da forare con morsetti o con una morsa a vite.
• In caso una lama rimanga incastrata, tentare di rimuoverla solo a motore spento.
• In caso di qualsiasi interruzione spegnere sempre la macchina prima di volgere lo
sguardo lontano dall’area di lavoro.
• Controllare periodicamente che tutte le viti e i dadi siano ssati correttamente.
• Tenere le punte e gli strumenti da taglio puliti ed alati. Se sottoposti ad una regolare
manutenzione e pulizia consentono di lavorare in modo più preciso e sono maggiormente
controllabili.
• Utilizzare l’utensile, gli accessori, gli attrezzi etc. secondo quanto indicato in queste
istruzioni nonché tenendo in considerazione le condizioni di lavoro e il lavoro da
eseguire. L’impiego di utensili per scopi diversi da quelli per cui sono stati progettati può
dare origine a situazioni pericolose.
MANUTENZIONE
• Far riparare l’utensile da personale qualicato che utilizzi solo parti di ricambio
originali. In caso contrario la sicurezza dell’utensile potrebbe risultare compromessa.
ULTERIORI NORME DI SICUREZZA PER SEGHETTI ALTERNATIVI
IT
ULTERIORI NORME DI SICUREZZA PER SEGHETTI ALTERNATIVI

16
AVVERTENZE DI SICUREZZA PER INDICATORI LASER
IT
AVVERTENZE DI SICUREZZA PER INDICATORI LASER
DESCRIZIONE DEL FUNZIONAMENTO
Tali laser di solito non rappresentano un pericolo per gli
occhi, ma ciò nonostante se si guarda direttamente al
laser può accecare.
ATTENZIONE: Non guardare direttamente il raggio laser.
Se si ssa lo sguardo apposta al raggio laser, esiste un
pericolo per la vostra salute.
• Il laser va usato e mantenuto in conformità alle istruzioni del fabbricante.
• Mai puntare il raggio laser verso persona od oggetto che non sia il materiale lavorato.
• Il raggio laser non deve essere puntato contro una persona e bisogna stare
particolarmente attenti di non puntarlo negli occhi di persone.
• Accertarsi sempre che il raggio laser sia puntato contro un materiale duro, la cui
supercie non riette, p.es. legno o superci di rivestimento ruvido. La lucente lamiera
di acciaio non è adatta al trattamento con laser, a causa della sua supercie riettente,
la quale può dirigere il usso di raggi laser indietro all’operatore.
• Non sostituire il laser incorporato con un altro che non è dello stesso tipo. Riparazioni
vanno eettuate soltanto dal fabbricante o dai centri assistenza autorizzati.
DESCRIZIONE DEL FUNZIONAMENTO
1. Pulsante di blocco dell’interruttore
2. Interruttore ON/OFF laser
3. Fonte di luce
4. Interruttore ON/OFF
5. Impugnatura antiscivolo
6. Base
7. Ganascia base
8. Paratrucioli per aspirazione
9. Guida lama
10. Scala angolo obliquo
11. Guida parallela
12. Interruttore per azione oscillante
14. Rondella di regolazione della velocità
15. Dispositivo di cambio rapido della lama
16. Raccordo per aspirapolvere
17. Pomello di ssaggio della guida parallela
18. Leva di bloccaggio
• Non porre materiali o altri utensili sulla macchina in posizione tale da farli cadere
all’interno.
• Si consiglia di aerrare l’utensile con entrambe le mani e di assumere una stabile
posizione operativa, ciò consente di guidare l’utensile con maggiore sicurezza.
• Non ssare il seghetto a testa in giù in una morsa o su una panca da lavoro. Potrebbe
causare gravi danni all’utente.
• Utilizzare sempre dispositivi di protezione, quali occhiali da lavoro, cue antirumore,
mascherina antipolvere e guanti da lavoro.
• Spegnere sempre il seghetto prima di appoggiarlo.

17
AVVIAMENTO - ARRESTO
Messa in moto per breve tempo
• Avviamento: premere l’interruttore 4 e trattenerlo.
• Arresto: rilasciare l’interruttore 4.
Lavoro continuativo
• Avviamento: premere l’interruttore 4 e bloccarlo con il pulsante 1.
• Arresto: premere l’interruttore 4 una sola volta e rilasciarlo.
ISTRUZIONI PER L’USO
ISTRUZIONI PER L'USO
IT
REGOLAZIONE DEL NUMERO DI CORSE
Questa funzione garantisce un taglio preciso ed evita che la supercie del materiale da
lavorare venga danneggiata.
• Il numero delle corse può essere regolato facendo scorrere l’apposita rondella (14). Il
numero delle corse deve essere impostato a seconda del materiale da lavorare.
• Per aumentare la velocità, ruotare la manopola in senso antiorario. Per ridurre la
velocità di rotazione la manopola in senso orario.
• Controllare che la velocità sia adatta facendo una prova su uno scarto di materiale.
Importante! Utilizzare il numero di corse adatto per ciascun tipo di materiale e/o di lavoro
preserva la lama dall’usura.
CAMBIO DELLA LAMA
Attenzione: Prima di sostituire qualsiasi accessorio o eseguire operazioni di manutenzione
accertarsi sempre che l’utensile sia spento e la spina staccata dalla presa di corrente.
• Rimuovere la cappa di protezione (8) .
• Ruotare il mandrino ad attacco rapido (15) e mantenerlo ruotato.
• Premere la lama nel mandrino ad attacco rapido (15) no alla battuta.
• Rilasciare il mandrino ad attacco rapido , che deve ritornare nella posizione di partenza.
La lama è ora bloccata.
• Rimettere la cappa di protezione (8) sull’apparecchio.
REGOLAZIONE DELL'AZIONE OSCILLANTE
• L’interruttore per l’azione oscillante (12) può essere impostato su 4 funzioni.
• La funzione“0”è indicata per il semplice taglio diritto.
• Le posizioni da“1”a“3”permettono di impostare la frequenza delle oscillazioni.
• Ruotare l’interruttore (12) in una tra le posizioni da “1” a “3”. Si consiglia di controllare
che l’azione oscillante sia adatta facendo una prova su uno scarto di materiale.
•
SISTEMA LASER
Attenzione: Non ssare la fonte di luce.
Non puntare mai il raggio luminoso contro un oggetto diverso dal pezzo da lavorare.
Non puntare deliberatamente il raggio laser agli occhi di persone.

18
IT
Assicurarsi che il pezzo da lavorare sia puntato su un pezzo solido, dalla supercie non
riettente, come ad esempio legno e superci ruvide.
Lamiere di acciaio non sono indicate per l’uso del laser in quanto la supercie riettente
potrebbe rimandare il raggio luminoso all’utente. Accendere il lasere solo quando la
macchina è posizionata sul pezzo da lavorare.
• Disegnare la linea di taglio sul pezzo da lavorare.
• Regolare l’angolo di taglio.
• Inserire la spina nella presa di corrente.
• Attendere che la lama abbia raggiunto la velocità impostata (circa 2 secondi) e porre il
seghetto sul pezzo da lavorare.
• Accendere il laser premendo l’apposito interruttore (2).
• Far combaciare il raggio laser con la linea di taglio disegnata e spingere la macchina nel
materiale, cercando di mantenere il raggio sulla linea.
• Spegnere il laser una volta terminato il taglio.
REGOLAZIONE DELLA BASE PER TAGLI OBLIQUI (Fig. C)
Attenzione: Prima di sostituire qualsiasi accessorio o eseguire operazioni di manutenzione
accertarsi sempre che l’utensile sia spento e la spina staccata dalla presa di corrente.
• Allentare la leva di bloccaggio (18).
• Far scorrere la base leggermente in avanti così da staccarla dalle ganasce della cassa
ingranaggi. La base può dunque essere inclinata per raggiungere l’angolo desiderato
tra 0° e 45° come indicato sull’apposita scala (10).
• Spingere la base (6) all’indietro no a quando la guida della lama (9) non raggiunga la
parte posteriore della lama.
• Bloccare la leva (18).
MONTAGGIO DELLA GUIDA PARALLELA
La guida parallela (11) è inserita nella base (6) e viene bloccata con un apposito pomello
(17). Permette di guidare il seghetto lungo una linea dritta, come ad esempio il bordo
del pezzo da lavorare o di un pezzo di legno ssato al pezzo da lavorare con una morsa.
Cambiando la posizione della guida (11) ma mantenendola lungo lo stesso bordo è
possibile eettuare dei tagli paralleli con estrema facilità e rapidità.
• Inserire la guida parallela (11) negli appositi passanti sulla base (6).
• Regolare la guida alla distanza desiderata dal bordo del materiale e ssarla mediante il
pomello di ssaggio (17).
ISTRUZIONI PER L'USO

19 IT
RACCORDO PER ASPIRAPOLVERE
Il raccordo per l’aspirapolvere (16) permette di collegare un aspirapolvere o qualsiasi altro
dispositivo di aspirazione alla macchina e di aspirare la polvere e/o i trucioli durante il
lavoro con la macchina.
Attenzione: Non collegare la macchina ad un aspirapolvere quando si lavora il metallo. Le
scintille potrebbero inammare i trucioli.
OPERAZIONI DI TAGLIO
• Accendere il seghetto e lasciare che la lama abbia raggiunto la massima velocità.
• Poggiare la parte anteriore della base sul pezzo da lavorare e condurre la lama lungo
la linea di taglio desiderata, prestando particolare attenzione che la base aderisca alla
supercie del pezzo da lavorare.
• Non forzare troppo la lama onde evitare che il motore si surriscaldi o che la lama si
rompa.
Importante: Esercitare una pressione suciente per permettere alla lama di tagliare
gradatamente.
TAGLI ROTONDI E AD“U”
• Prima di iniziare il taglio nel centro di una supercie, eettuare un foro di diametro 12
mm per assicurare margine d’azione alla lama.
• Per tagli curvilinei stretti si consiglia di ridurre il numero di corse.
Attenzione: Non muovere la lama lungo la linea di taglio prima che questa non sia
completamente entrata nel materiale e che la base non sia completamente poggiata sulla
supercie.
TAGLIO IN LAMIERE DI METALLO
• Si consiglia l’uso di un olio refrigerante o lubricante adatto per questo tipo di lavoro.
• Spargere il lubricante sulla lama o sul pezzo da lavorare ad intervalli regolari così da
preservare la qualità della lama.
CONTROLLI GENERICI
Controllare regolarmente tutti gli elementi di ssaggio ed accertarsi che siano saldamente
assicurati. Nel caso in cui qualche vite si è allentata, stringerla subito, per evitare situazioni
di rischio.
Lubricare regolarmente tutte le parti in movimento. Se il cavo di alimentazione è guasto,
la sostituzione deve essere fatta dal costruttore o da un suo specialista di centro assistenza,
per ovviare ai pericoli relativi alla sostituzione.
MANUTENZIONE
ISTRUZIONI PER L'USO
MANUTENZIONE

20
IT
MANUTENZIONE
PULIZIA
Per un lavoro sicuro mantenere sempre puliti la macchina e i fori di ventilazione. Vericare
regolarmente che non siano penetrati polvere o corpi estranei nella griglia di ventilazione
vicino al motore elettrico o intorno ai commutatori. Usare una spazzola soce per
rimuovere la polvere ammassata. Per proteggere gli occhi durante la pulitura, portare
occhiali di protezione.
Se la carcassa della macchina necessita la pulitura, spolverarla con un canovaccio morbido
e umido. Si può usare un debole detergente.
ATTENZIONE: Non è ammesso l’uso di alcool, benzina o altri solventi. Non adoperare mai
preparati attaccanti per la pulitura delle parti plastiche. Non è ammessa l’entrata di acqua in
contatto con la macchina.
PARTI DI RICAMBIO
Per provvedere a un lavoro sicuro con l’elettroutensile, e alla sua adabilità, tutte le
attività relative alla riparazione, la manutenzione e la regolazione (ivi incluse la verica e
la sostituzione delle spazzole) vanno eettuare nei centri assistenza autorizzati, usando
soltanto pezzi di ricambio originali.
DATI TECNICI
DATI TECNICI
Modello JS750M
Tensione 220-240 V~ 50 Hz
Potenza assorbita 750 W
Numero di giri a vuoto 0-3000/min.
Profondità massima di taglio
- legno 120 mm
- acciaio / alluminio 8/12 mm
Altezza della corsa 26 mm
Tipo di lama T
Peso 2,9 kg
А-livello di pressione sonora ponderata LpA 85 db(A), uncertainty 5 dB(A)
А-livello di potenza sonora ponderata LwA 96 dB(A), uncertainty 5 dB(A)
Valore delle vibrazioni emesse аhb, ahm 9.48/10.75 m/s2, uncertainty 1,5 m/s2
Classe di protezione II
Table of contents
Languages:
Other Status Power Tools manuals

Status
Status JS800 User manual

Status
Status CTW12-2Li User manual

Status
Status NC380 User manual

Status
Status C16PRLi User manual

Status
Status ST16 User manual

Status
Status CTX12-2Li User manual

Status
Status NC380 User manual

Status
Status HAG1 User manual

Status
Status SD300 User manual

Status
Status CTR20Li User manual
Popular Power Tools manuals by other brands

RED ROOSTER
RED ROOSTER RRI-BA30S3 manual

Martello
Martello Blastrac BMS 220ADB user guide

Polar Electro
Polar Electro 7314-2030 instruction manual

Retsch
Retsch SR 200 operating instructions

Edwards
Edwards HPST2375 Installation and operation manual

Parkside
Parkside AIR STAPLER SET - 2 Operation and safety notes