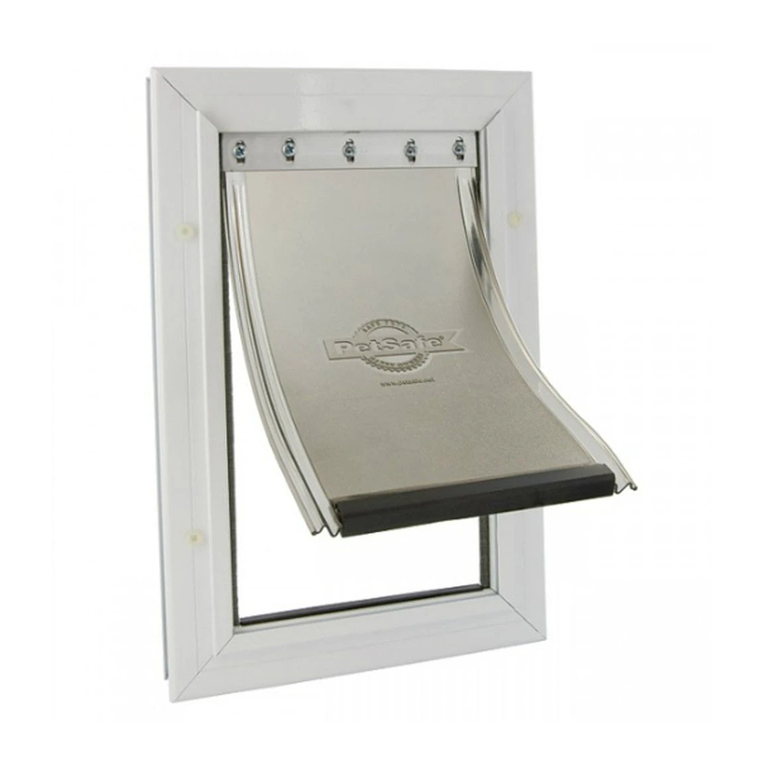
Staywell 500 series User manual

1
Staywell®Pet Door - The user’s guide
Chatière Staywell®- Guide de l’utilisateur
Staywell®huisdierenluik - Gebruiksaanwijzingen
Staywell®Haustiertür - Benutzerhandbuch
Porticina Staywell®per animali domestici - Guida per l’utente
Puerta para mascota de Staywell®- Guía del usuario
500 Series
Infra-red
4 Way Locking Deluxe Cat Flap
Eighth Edition
See page 12 for details
Veuillez vous référer à la page 24 pour plus de détails
Zie blz 36 voor meer details
Spezielle Details finden Sie auf Seite 48
Per ulteriori dettagli andare a pagina 60
Para más detalles véase la página 72
WARNING
WAARSCHUWING
ADVERTENCIA
AVVERTENZA
WARNUNG
AVERTISSEMENT

2
All Staywell®pet doors are suitable to fit any door, wall or partition although additional materials and competent DIY skills may be required.
* It is not possible to cut holes in toughened glass or double glazed units except at the time of manufacture. Please consult a glazier.
**The range of the key is dependent on the reflection off the immediate surrounds such as your pet’s fur, the floor, the pet door and other walls or surfaces. Infra red signals cannot pass through walls or most other objects but our patented reflection system will give you
approximately 15 cm (6 inches) of range for the cat door key and 60 cm (24 inches) for the dog door key. However, the better the reflective surfaces around your pet door, the larger the range of the collar key. Strong sunlight will affect the range of the collar key. It is strongly
recommended not to fit the pet door where it is exposed to strong sunlight conditions. The optional cat door tunnel should always be fitted when installing the Infra Red cat door.
Additional tunnel extensions
available
Fits wooden doors
Fits glass windows & doors,
single and double glazed*
Fits brick walls
Fits PVC/uPVC/metal
Optional tunnel included is suitable
for most thickness of doors
Cat
Infra-red**
4 way locking system
Thank you for choosing Staywell®by PetSafe®. Our mission is to be the
most trusted brand in the pet ownership experience. We want to ensure
your pet’s safety by providing you with the products and techniques
to create the most comfortable lifestyle for your pet. If you have any
questions, please contact the Customer Care Centre. For a listing of
Customer Care Centre telephone numbers, visit our website
at www.staywell.co.uk.
To get the most protection out of your warranty, please register your
product within 30 days at www.staywell.co.uk. By registering and
keeping your receipt, you will enjoy the product’s full warranty and should
you ever need to call the Customer Care Centre, we will be able to help
you faster. Most importantly, Staywell®by PetSafe® will never give or sell
your valuable information to anyone. Complete warranty information is
available online at www.staywell.co.uk.
Your Staywell®Pet Door...

3
Before installing your cat flap please
read the following step-by-step
instructions carefully.
Tools required
•Pencil
•Ruler
•Jig or Keyhole Saw
•Drill
•Screwdriver
•Tape measure
•Glue
•Sand paper
Measurement and marking
Measure the belly height of your cat. This is usually 100 -150mm (4-6”) (Fig. 1).
Mark this measurement on the outside of your door and draw a straight
horizontal line 168mm (6 5/8”) (Fig. 2).
Please bear in mind that this line will eventually be the bottom of the hole
you will cut in your door and that the frame of the cat flap will be slightly
lower. If necessary, this line may have to be raised slightly to account for this.
FIG.1 FIG.2
Cutting a hole for your cat flap
a) In Wood and PVC/uPVC/Metal
The cat flap requires a square cut-out of 175mm x 168mm (6 7/8” x 6 5/8”). (Fig. 3).
Not to scale - for best results you should refer
to the enclosed cutting template.
(x)
(x)
Wooden doors PVC/uPVC/Metal
168mm (6 5/8”)
175mm
(6 7/8”)
FIG.3

4
b) In Glass
* It is not possible to cut holes in toughened glass or double glazed
units except at the time of manufacture. Please consult a glazier.
The cat flap requires a circular cut out with a diameter of 212mm (8 3/8”).
(Fig. 4).
Not to scale - for best results you should refer
your glazier to the enclosed cutting template.
c) In Walls
Follow the instructions for “Wood and PVC/
uPVC/Metal”, by using the enclosed
cutting template. Please note that
additional tools, materials and
competent DIY skills may be
required.
Glass windows & doors,
single and double glazed*
212mm (8 3/8”)
FIG.4
Fits brick walls

5
Fitting your cat flap
Your Staywell®cat flap is fitted with the red 4 way lock on the
inside of your house.
Temporarily place the cat flap in the hole and position the outside cover on
the outside of the house. From the outside mark screw holes through the
holes in the outside cover. (Fig 5.).
Remove the cat flap and drill the holes with a 4.5mm (3/16”) drill bit (Fig. 6).
FIG.5 FIG.6
Replace the cat flap in the hole and from the outside screw into place. (Fig. 7).
If the screws are too long they may need to be cut down to match the
depth of your door. Using over long screws may damage the cat flap. The
screws should be removed from the cat flap before cutting. File down to
ensure there are no sharp edges.
Push fit the 4 way locking turning dial into place (Fig. 7).
Finally, cover the screw holes with the blanking plugs on the outside frame
to ensure a neat finish (Fig. 7).
4.5mm
(
3
/
16
")
If fitting into glass, the cat flap is ‘clamped’ to the glass
using two screws from the outside of the house.
FIG.7

6
Tunnels (optional)
The cat flap is designed to fit any depth of hole. It is recommended that
the tunnels be glued on to the frame and each other. (Fig. 8).
One tunnel is supplied with the cat flap which is 47mm (17/8”).
To purchase additional tunnels at the same depth and to make
up the depth of the hole in your wall, visit the Staywell®website -
www.staywell.co.uk
Using the 4 way lock
The 4 way lock allows you to control your cat’s access in and out of
your home.
It is a good idea not to use the 4 way lock until your pet is thoroughly
familiar with using the door. Your pet may become confused as to why
you have installed it.
Your Staywell®cat flap is now
ready to use.
Optional tunnel included Additional tunnel
extensions available
• In only • Out only
• In or Out • Fully locked
FIG.8
4 way locking system

7
Powering the Infra-red cat flap
Remove the battery cover by pushing firmly in the direction of the arrows.
(Fig. 9).
Place 4 x AA 1.5V Alkaline Long Life batteries in position. (Fig. 10).
Batteries should be replaced every 3-6 months. Do not use
rechargeable batteries.
After you have powered the cat flap it emits a low tone bleep indicating the
cat flap is ready for programming. In addition to the bleep the red LED will flash.
(Fig. 10).
FIG.9 FIG.10
Powering the Infra-red key
Open the collar key by twisting a coin between the two flanges (Fig. 11).
Remove battery holder (Fig. 12).
Place 2 x LR44 (A76, SR44, D357/303) coin cell batteries into the battery
holder. The collar key LED will flash 3 times indicating that the key is active
(Fig. 13).
Replace battery holder into the clear base. Replace coloured cap by
clipping the two halves of the key together, ensuring that the green circuit
board is visible through the clear base. (Fig. 14).
The key will continue to flash at 2 minute intervals (Fig. 15).
FIG. 11 FIG. 12 FIG. 13 FIG. 14 FIG. 15
Batteries should be replaced every 3-6 months or when the
LED stops flashing.

8
Programming the Infra-red cat flap
for additional cats
If you have more than one cat, you will need to purchase additional
collar keys. If you use the same coloured collar keys as you originally
purchased, no further programming will be required. However, if you
prefer to use different coloured collar keys (Green, Yellow, Blue, or Pink),
you will need to program each collar key to the cat flap. All four collar
keys can be programmed to the cat flap. Follow the above steps for
programming each collar key.
Erasing programmed collar keys from
the cat flap memory
If it becomes necessary to change the collar keys used with the cat flap
(i.e. discontinue use of a certain colour), you will first need to delete all of
the original coloured collar keys from the cat flap memory.
1. Remove the battery cover by pressing in the direction of the arrows.
2. Press and release BOTH of the buttons.
3. The LED will flash RED for 2 seconds.
4. The cat flap memory has been erased.
Refer to the steps above for programming new collar keys to the cat flap.
Programming the Infra-red cat flap
After powering the cat flap and the collar key, program your collar key to the
cat flap by following these steps:
1. Remove the battery cover by pushing in the direction of the arrows.
2. Press and release the LEARN button (right button).
3. Bring the collar key near the cat flap.
4. The LED will flash RED, then flash GREEN 3 times and then turn off.
5. Your collar key is now programmed to the cat flap.
Note: If the LED stops flashing red, but doesn’t illuminate green, then the
programming was not successful. Check the battery in the collar key and
also check to make sure the collar key is oriented correctly. Then, repeat
the above steps to program the cat flap.
Your cat flap is now programmed to recognise the collar key and the latch
mechanism will be activated every time you approach the cat flap with the
collar key. (Fig. 16). The latch will not relock until the collar key is out of
range of the cat flap.
Note: The latch on your cat flap has been
factory set to re-latch after 3 seconds.
The colour codes available are: Green,
Yellow, Blue, and Pink. Extra keys can be
purchased from the Staywell®website -
www.staywell.co.uk
FIG.16
MANUAL LEARN

9
Low battery power
Cat flap
When the batteries are starting to run low, the LED will flash RED every 2
seconds until the battery runs dead.
Remove the battery cover by pushing in the direction of the arrows.
Remove the old batteries and insert 4 x new AA 1.5V Alkaline Long Life
batteries. (Fig. 19). Replace
battery cover. Your cat flap
will retain all programming.
Collar key
As the power in the collar key batteries runs low you will notice a loss
of range as your cat approaches the door. Eventually the battery power
will become so low that the cat door will not open and the LED will stop
flashing. To restore power, replace the two batteries in the collar key and
refer to “Powering the Infra-red key”.
Attaching the Infra-red collar key
The key must be attached to the collar so that it hangs forwards (Fig. 17).
Manual operation
Please note, this feature CANNOT be used until the cat flap has
been fully powered and programmed. If you do not wish to use the
electronic latch the cat flap can be placed in manual mode.
Remove the battery cover by pushing in the direction of the arrows.
Press the manual button once (Fig. 18). and the latch will unlock and the
LED flashes. The cat flap is now in manual mode.
To place the cat flap back in
automatic mode press the
manual button. The latch will
relock and the LED flashes.
The cat flap is now back
in automatic mode.
FIG. 18
FIG. 19
FIG. 17

10
Mains power adaptor (optional)
A mains power transformer kit can be purchased from the Staywell®
website - www.staywell.co.uk. Instructions are provided explaining how
to install. Once installed, place the jack plug into the socket at the side
of the cat flap (Fig. 20). Plug adaptor into a household electric socket
(Fig. 21).
FIG. 20 FIG. 21
Batteries can be left installed as a back-up power supply. If you are
powering the cat flap with the mains power adaptor, and there have been
no batteries installed, you will need to program your cat flap. Follow
instructions for “Programming the Infra-red cat flap”.
Training your cat to use the cat flap
Most cats will learn to use the cat flap almost at once but there are a few
who may be a little nervous at first. The following tips will help your pet to
take full advantage of the outdoor freedom and indoor comfort – which
you want for your cat – and which your new cat flap provides.
The most important rule is to be patient with your cat. Don’t be in a hurry.
Let your cat work out for itself that it can go in and out of doors. Don’t
force it through the flap or it may become frightened.
Many cat owners install cat flaps when they move house. If this applies to
you, make sure that your cat is familiar with his or her surroundings before
you fit the cat flap. Take it on supervised trips outdoors on a leash and make
sure it also feels secure and comfortable in its new indoor environment.
Cats can develop long lasting fears in unfamiliar surroundings.
Once you have installed your cat flap, leave the flap open for some time.
You can do this by using a long strip of masking tape; open the flap and
use the tape to keep it held open by fixing the other end of the tape to the
surface above. Make sure that the fixing is secure so that the flap can not
fall down accidentally. Let your cat become familiar with it and go in and
out freely.
Establish a motive for your cat to use the door. A good one is food. First
feed the cat near the door, inside and then near the door outside. Repeat
as often as you need to. Most cats, especially kittens, also have a strong

11
urge for freedom, perhaps to hunt. Cats are also social creatures – they
enjoy the company of other cats. This can be another reason for them to
explore outside.
If this is something new to your cat, it may take some patience to teach
your cat how to use it. When your cat makes progress, give them a lot of
praise - they’ve earned it.
Training your cat to use
the Infra-red collar key
Before allowing your cat to use the cat flap,
it is wise to acquaint your self with
the operation of the Infra-red lock.
You firstly need to power up both the
cat flap and the collar key and then
program the Infra-red collar key to
the cat flap.
From the outside of the house take
the ‘powered’ and ‘programmed’
collar key in your hand and then
move it towards the cat flap. You
should hear the lock mechanism
“click” and see the red latch drop
down inside the cat flap.
The latch will remain inside the cat flap until the key is moved away from
the cat flap where it will return to the locked position. (Please note that the
Infra-red collar key is required only to enter the cat flap.)
Only when the cat is comfortable going in and out of the cat flap whilst the
flap has been propped open, (in line with the general training tips in the
previous section) should you fit the collar key onto your cat’s collar. When
fixing the collar to your cat, ensure that the clear base of the key (through
which you should see the green PCB) is pointing forwards and away from
the cat. This is to ensure that the Infra-red beam can reach the sensor on
the cat flap.
Due to the generous range of the Infra-red collar key, most cats will have
no problem learning how the cat flap is activated and how to gain entry.
There are some cats however, who can take a little longer to become more
confident and familiar with the Infra-red functions. Use a favourite treat to
coax your cat towards and through the cat flap and reward them when
they get it right.
If your cat has only just become familiar with the using a cat flap, it may
take some patience to teach your cat how it the Infra-red function works.
When your cat makes progress, give them a lot of praise. Keep repeating
the exercise until your cat can come through the cat flap comfortably.

12
Cleaning the cat flap
Your cat flap is constructed in the highest quality material with a
toughened flap and has been designed to last for many years.
To maintain its appearance, occasional wiping with a damp cloth is
all that is necessary.
Cleaning the Infra-red lens
For best performance wipe the lens clean every
4 weeks with a soft cloth (Fig. 22). FIG. 22
When children are present in the home, it is important
to consider the pet door during child proofing activities, the pet door may be
misused by a child resulting in the child accessing potential hazards that may
be on the other side of the pet door. Purchasers/Homeowners with swimming
pools should ensure that the pet door is monitored at all times and that the
swimming pool has adequate barriers to entry. If a new hazard is created
inside or outside of your home, which may be accessed through the pet door,
Radio Systems Corporation®recommends that you properly guard access
to the hazard or remove the pet door. The closing panel or lock, if applicable,
is provided for aesthetic and energy efficiency purposes and is not intended
as a security device. Radio Systems Corporation®will not be liable for
unintended use and the purchaser of this product accepts full responsibility
for oversight of the opening it creates.
The user, prior to installation, must become familiar
with all building codes that may affect the installation of the pet door and
determine, along with a licensed contractor, its suitability in a given installation.
This pet door is not a fire door. It is important for the owner and contractor to
consider any risks that may be present inside or outside of the pet door,
and any risks that may be created by subsequent changes to your property
and how they may relate to the existence and use, including misuse of the
pet door.
WARNING
CAUTION

13
How to dispose of your Infra-red cat
flap safely
Important recycling advice
Please respect the Waste Electrical and Electrical Equipment regulations in your country.
This equipment must be recycled. If you no longer require this equipment, do not place
it in the normal municipal waste system. Please return it to where it was purchased in
order that it can be placed in our recycling system. If this is not possible, please contact
Staywell®Customer Care for further information.
Battery Disposal
Separate collection of spent batteries is required in many regions; check the regulations
in your area before discarding spent batteries. Please see page 7 for instructions on
how to remove the batteries from these devices for separate disposal. The cat flap
operates on 4 batteries of the type AA/LR6, 1.5 V, alkaline manganese, with a 1200 m Ah
capacity. Replace only with equivalent batteries. The collar key operates on 2 batteries
of the type LR44, 1.5 V, alkaline button cell with a 150 m Ah capacity. Replace only with
equivalent batteries (A76, SR44, D357/303).
Compliance
This equipment has been tested and found to comply with the EU Electromagnetic
Compatibility and Low Voltage Directives. Unauthorised changes or modifications to the
equipment that are not approved by Radio Systems Corporation®are in violation of EU
regulations, could void the user’s authority to operate the equipment, and void the
warranty.
The Declaration of Conformity can be found at:
http://www.petsafe.net/customercare/eu_docs.php
Terms of Use and Limitation of Liability
1. Terms of Use
Use of this Product is subject to your acceptance without modification of the terms, conditions
and notices contained herein. Use of this Product implies acceptance of all such terms,
conditions and notices. If you do not wish to accept these terms, conditions and notices, please
return the Product, unused, in its original packaging and at your own cost and risk to the relevant
customer care centre together with proof of purchase for a full refund.
2. Proper Use
This Product is designed for use with pets where training is desired. The specific temperament or
size/weight of your pet may not be suitable for this Product (please refer to this Operating Guide
for details). Radio Systems Corporation®recommends that this Product is not used if your pet is
aggressive and accepts no liability for determining suitability in individual cases. If you are unsure
whether this Product is appropriate for your pet, please consult your veterinarian or certified trainer
prior to use. Proper use includes, without limitation, reviewing the entire Operating Guide and any
specific Caution statements.
3. No Unlawful or Prohibited Use
This Product is designed for use with pets only. This pet training device is not intended to harm,
injure or provoke. Using this Product in a way that is not intended could result in violation of
Federal, State or local laws.
4. Limitation of Liability
In no event shall Radio Systems Corporation®or any of its associated companies be liable for
(i) any indirect, punitive, incidental, special or consequential damage and/or (ii) any loss or
damages whatsoever arising out of or connected with the misuse of this Product. The Purchaser
assumes all risks and liability from the use of this Product to the fullest extent permissible by law.
For the avoidance of doubt, nothing in this clause 4 shall limit Radio Systems Corporation®’s
liability for human death or personal injury or fraud or fraudulent misrepresentation.
5. Modification of Terms and Conditions
Radio Systems Corporation®reserves the right to change the terms, conditions and notices
governing this Product from time to time. If such changes have been notified to you prior to your
use of this Product, they shall be binding on you as if incorporated herein.

14
Les chatières Staywell®s’adaptent à toutes les portes, à tous les murs et à toutes les cloisons, bien que du matériel supplémentaire et des compétences en bricolage se révèlent peut-être nécessaires..
* Il n’est pas possible de découper du verre trempé ou un double vitrage sauf au moment de la fabrication. Veuillez consulter un vitrier.
**La portée de la clef dépend du degré de réverbération de son environnement immédiat et notamment de la fourrure de l’animal, du sol, de la porte pour animaux de compagnie et de toutes autres parois ou surfaces. Les signaux infrarouges ne traversent pas les murs ou la plupart des autres objets,
mais notre système de réverbération breveté vous donne environ 15 cm de portée pour la clef de chatière et 60 cm pour la clef de porte pour chien. Ceci dit, la portée de la clef de collier dépend proportionnellement des propriétés réfléchissantes des surfaces qui entourent la porte pour animaux de
compagnie. Les rayons du soleil particulièrement forts ont une incidence sur la portée de la clef de collier. Nous vous recommandons vivement de na pas installer la porte pour animaux de compagnie où elle risque d’être exposée à un fort ensoleillement. L’installation de la chatière à infrarouge doit
toujours s’accompagner du montage du tunnel de chatière proposé en option.
Extensions de tunnels
supplémentaires disponibles
Convient aux portes en bois
Convient aux fenêtres et aux
portes en verre à simple ou
à double vitrage*
Convient aux murs en
briques
Convient au PVC, au PVC
rigide et au métal
Le tunnel inclus convient à la
majorité des épaisseurs de portes
Chat
Infrarouge**
Système de verrouillage à
4 positions
FR
Merci d’avoir choisi Staywell®by PetSafe®. Notre objectif est d’être
reconnus comme la marque la plus fiable par les propriétaires d’animaux.
Notre volonté est de garantir la sécurité de votre animal en mettant à votre
disposition des produits et des techniques susceptibles de lui assurer
le style de vie le plus confortable. Nous voulons garantir la sécurité de
votre animal en vous donnant les outils et les techniques nécessaires à
un dressage réussi. Pour connaître les numéros de téléphone du Service
clientèle, visitez notre site Internet www.staywell.co.uk.
Pour bénéficier pleinement de notre garantie, veuillez enregistrer votre article
dans les 30 jours sur le site www.staywell.co.uk. Grâce à cet enregistrement
et en conservant le reçu, votre produit sera totalement couvert par notre
garantie. Si vous avez la moindre question, veuillez contacter notre Service
clientèle, nous serons heureux de vous aider. Enfin, vous pouvez avoir la
certitude que Staywell®by PetSafe®ne communiqué jamais les informations
personnelles de ses clients à des tiers. Une description complète de la
garantie est disponible sur le site Internet www.staywell.co.uk.
Votre chatière Staywell®...

15
(x)
Avant d’installer la chatière, veuillez
lire attentivement les instructions
suivantes étape par étape.
Outils nécessaires
•Crayon
•Règle
•Scie sauteuse ou scie
à guichet
•Perceuse
•Tournevis
•Ruban à mesurer
•Colle
•Papier abrasif
Mesure et marquage
Mesurez la hauteur de votre chat au niveau du ventre. Elle est en générale
comprise entre 100 et 150 mm (de 4 à 6 po) (Fig. 1).
Mesurez cette hauteur sur votre porte et tracez une ligne horizontale de
168 mm (6 5/8
po) (Fig. 2)
Gardez à l’esprit que cette ligne correspondra en fait à la limite inférieure
du trou que vous allez découper dans la porte et que l’encadrement de la
trappe sera situé légèrement plus bas. En cas de besoin, il est peut-être
nécessaire de tracer la ligne plus haut en prenant en compte l’encadrement.
FIG. 1 FIG. 2
Découper un trou pour la chatière
a) Dans le bois, le PVC, le PVC
rigide et le métal
Il s’agit de découper un trou carré de 175 mm x 168 mm
(6 pi 7/8po x 6 pi 5/8po). (Fig. 3)
Le schéma n’est pas à l’échelle; pour de
meilleurs résultats, consultez le modèle de
découpage inclus.
(x)
168mm (6 5/8po)
175mm
(6 7/8po)
Portes en bois PVC, PVC rigide
ou métal
FIG. 3

16
b) Dans le verre
* Il n’est pas possible de découper du verre trempé ou un double
vitrage sauf au moment de la fabrication. Veuillez consulter un vitrier.
Il s’agit de découper un cercle de 212 mm de diamètre (8 pi 3/8po).
(Fig. 4)
Le schéma n’est pas à l’échelle; pour de
meilleurs résultats, montrez le modèle de
découpage inclus à votre vitrier.
c) Dans les murs
Suivez les mêmes instructions que pour
le bois, le PVC, le PVC rigide et le
métal en vous servant du modèle de
découpage inclus. Veuillez noter
que des outils et du matériel
complémentaires, ainsi que
des compétences en bricolage
se révèleront peut-être
nécessaires.
212mm (8
3/8po)
Fenêtres et portes en verre à
simple ou double vitrage*
FIG. 4
Convient aux murs en
briques

17
Mise en place de votre chatière
Votre chatière Staywell®se met en place à l’aide des verrous
rouges à 4 positions sur le côté intérieur de votre maison.
Mettez la trappe dans le trou pendant quelques instants et positionnez
le couvercle externe sur le côté extérieur de la maison. Depuis l’extérieur,
faites une marque à l’emplacement des trous de vis sur la porte à travers
les trous du couvercle extérieur. (Fig. 5)
Retirez la trappe et percez les trous à l’aide d’un foret de 4,5 mm (3/16 po)
(Fig. 6).
FIG. 5 FIG. 6
Remettez la trappe en place dans le trou et vissez-la depuis l’extérieur. (Fig. 7).
Si les vis sont trop longues, il sera peut-être nécessaire de les couper pour
qu’elles correspondent à la profondeur de votre porte. L’utilisation de vis
trop longues pourrait abîmer la chatière. En cas de besoin, il faut retirer les
vis de la chatière avant de les couper. Limez la pointe des vis pour qu’elles
ne soient pas coupantes.
Mettez le cadran circulaire du vérouillage à 4 directions en place (Fig. 7).
Recouvrez ensuite les trous des vis à l’aide des bouchons d’obturation sur
l’encadrement extérieur pour un fini soigneux (Fig. 7).
FIG. 7
Pour les portes en verre, la trappe se fixe sur le verre à
l’aide de deux vis depuis l’extérieur de la maison.
4.5mm
(
3
/
16
")

18
Tunnels (facultatifs)
La trappe est conçue pour s’adapter à toutes les profondeurs de trou. Il
est recommandé de coller les tunnels ensemble et à l’encadrement.
(Fig. 8).
Un tunnel est fourni avec la trappe et mesure 47 mm (1 7/8po). Si vous
souhaitez acheter des tunnels de la même profondeur s’adaptant à la
profondeur du trou dans votre mur, consultez le site Web de Staywell,
www.staywell.co.uk
Utilisation du
système de verrouillage à 4 positions
Le verrou à 4 positions vous permet de contrôler l’accès de votre animal à
votre maison.
Il est préférable de ne pas utiliser le système de verrouillage à 4 positions
tant que votre animal ne s’est pas habitué à la chatière. Votre animal
risquerait de ne pas comprendre pourquoi vous avez installé la chatière.
Tunnel facultatif
inclus
Extensions de tunnels
supplémentaires
disponibles
• Entrée uniquement • Sortie uniquement
• Entrée ou sortie • Verrouillée
Système de verrouillage à
4 positions
Votre chatière Staywell®est maintenant
prête à l’emploi.
FIG. 8

19
Mise en marche de la chatière
à infrarouge
Retirez le couvercle du compartiment des piles en poussant fermement
dans le sens des flèches.
(Fig. 9).
Placez 4 piles alcalines AA de longue durée d’1,5 V. (Fig. 10).
Les piles doivent être remplacées tous les 3-6 mois. N’utilisez pas de
piles rechargeables.
Lorsque la chatière est allumée, elle émet un bip grave indiquant qu’elle
est prête à être programmée. En même temps que le bip, le voyant lumineux
rouge clignote. (Fig. 10).
FIG. 9 FIG. 10
Mise en marche de l’émetteur
à infrarouge
Ouvrez l’émetteur en insérant une pièce entre les deux brides (Fig. 11).
Retirez le compartiment à piles (Fig. 12).
Placez 2 piles LR44 (A76, SR44, D357/303) dans le compartiment à piles.
Le voyant lumineux du collier émetteur clignote 3 fois, ce qui indique que
l’émetteur est actif (Fig. 13).
Remettez le compartiment à piles dans la base transparente. Replacez
le bouchon de couleur en emboîtant les deux parties de l’émetteur et en
vous assurant que la carte de circuit imprimé verte soit visible à travers la
base transparente. (Fig. 14).
L’émetteur continuera de clignoter toutes les deux minutes (Fig. 15).
FIG. 11 FIG. 12 FIG. 13 FIG. 14 FIG. 15
Les piles doivent être remplacées tous les 3-6 mois ou lorsque le
voyant lumineux s’arrête de clignoter.

20
Programmation de la chatière
à infrarouge
Après avoir mis la chatière et le collier émetteur sous tension, programmez
votre le collier émetteur avec votre chatière en suivant les étapes ci-dessous
1. Retirez le couvercle du compartiment des piles en le faisant glisser dans
le sens des flèches.
2. Appuyez brièvement sur le bouton LEARN (situé à droite).
3. Approchez le collier émetteur de la chatière.
4. Le voyant lumineux s’allume fixement en ROUGE et émet ensuite 3
clignotements VERTS avant de s’éteindre.
5. Votre collier émetteur est à présent prêt à fonctionner avec votre chatière.
Remarque : Si le voyant lumineux rouge s’allume, mais n’emet pas de
clignotements verts, alors la procédure de programmation a échoué.
Veuillez vérifier les piles dans le collier émetteur et vous assurer que le
collier émetteur est bien orienté. Veuillez ensuite répéter les étapes ci-
dessus pour programmer à nouveau votre chatière.
Votre chatière est maintenant programmée pour reconnaître le collier émetteur,
et le mécanisme du verrou sera activé à chaque fois que vous approcherez de
la chatière en tenant le collier émetteur. (Fig. 16). Le verrou se refermera une
fois que le collier émetteur se trouvera hors de portée de la chatière.
Remarque: Le verrou de votre chatière
a été programmé par défaut pour se
refermer automatiquement après 3
secondes.
Voici les codes de couleur
disponibles : vert, jaune, bleu et
rose. Vous pouvez acheter des
émetteurs supplémentaires
sur le site Web de Staywell®,
www.staywell.co.uk
FIG. 16
Programmation de la chatière à
infrarouge pour une utilisation avec
plusieurs chats
Si vous possédez plusieurs chats, vous devrez acquérir d’autres colliers
émetteur. Si vous utilisez des colliers de la même couleur que celui
vendu initialement avec votre chatière, vous ne devrez pas effectuer de
programmation. En revanche, si vous souhaitez utiliser des colliers émetteur
de couleur différente (vert, jaune, bleu ou rose), il faudra alors programmer
chaque collier avec la chatière. Les 4 couleurs de colliers peuvent être
programmées avec la chatière. Pour ce faire, assurez-vous de suivre les
étapes décrites ci-dessus afin de programmer chaque collier émetteur.
Déprogrammation d’un
collier émetteur
Si vous deviez changer l’un des colliers utilisés avec la chatière (par
exemple, si une couleur n’était plus disponible), vous devrez tout d’abord
déprogrammer tous les colliers émetteur initialement programmés dans la
mémoire de votre chatière.
1. Retirez le couvercle du compartiment des piles en le faisant glisser
dans le sens des flèches.
2. Appuyez brièvement sur les DEUX boutons.
3. Le voyant lumineux clignote en ROUGE pendant 2 secondes.
4. La mémoire de votre chatière est à présent effacée.
Veuillez suivre les différentes étapes décrites ci-dessus afin de
programmer les nouveaux colliers émetteur avec la chatière.
MANUAL LEARN
Table of contents
Languages:
Other Staywell Pet Care Product manuals

Staywell
Staywell petPod User manual

Staywell
Staywell 300 series User manual

Staywell
Staywell 800 Series User manual

Staywell
Staywell 600 SERIES Aluminium User manual

Staywell
Staywell 400 Sereis User manual

Staywell
Staywell 900 Series User manual

Staywell
Staywell 400 Series Magnetic User manual

Staywell
Staywell 917 User manual
Popular Pet Care Product manuals by other brands

DogWatch
DogWatch BigLeash V-10 owner's guide

LitterMaid
LitterMaid Kitty Kabana LME9000MW Getting started

Kerbl
Kerbl HAPPYCOW Uno operating instructions

SportDOG
SportDOG Field Trainer 425 user manual

DogWatch
DogWatch The Bark Collar BT-7 owner's guide

Canine Innovations
Canine Innovations Invisible Fence ICT 801 installation manual