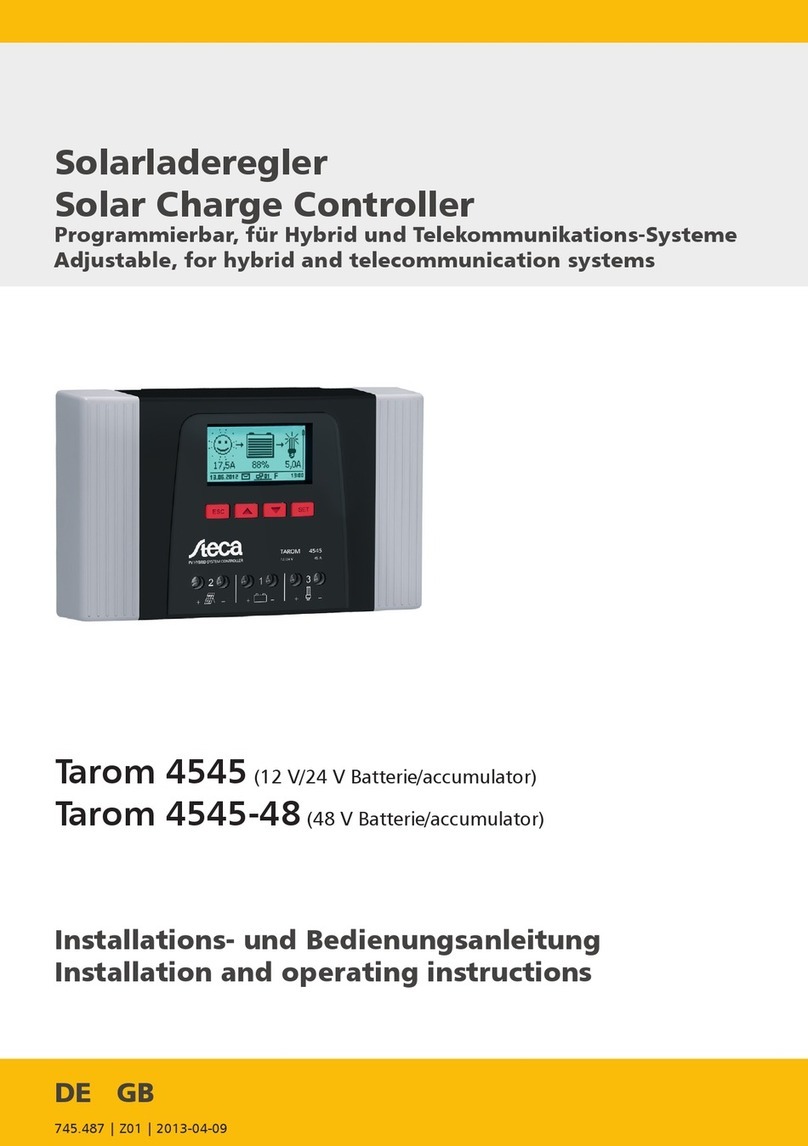
Steca Tarom 4545 User manual

Solarladeregler
Solar Charge Controller
Programmierbar, für Hybrid und Telekommunikations-Systeme
Adjustable, for hybrid and telecommunication systems
745.487 | Z01.1 | 2013-05-23
DE GB
Installations- und Bedienungsanleitung
Installation and operating instructions
Tarom 4545 (12 V/24 V Batterie/accumulator)
Tarom 4545-48 (12 V/24 V/48 V Batterie/accumulator)

Table of contents
1 General safety instructions.................................................................................................... 80
2 Identification........................................................................................................................ 81
3 Scope of delivery................................................................................................................... 82
4 Proper usage......................................................................................................................... 83
5 Markings............................................................................................................................... 84
5.1 Symbols for warnings and notices............................................................................... 84
5.2 Keywords..................................................................................................................... 84
6 Quick guide.......................................................................................................................... 85
7 Overview of the controller.................................................................................................... 86
8 Menu structure..................................................................................................................... 88
9 Installation............................................................................................................................ 89
9.1 Safety instructions........................................................................................................ 90
9.2 Connections and operating buttons............................................................................. 91
9.2.1 RJ45 socket for Master bus (⑥ in Fig. 1).................................................................. 91
9.2.2 RJ45 socket for Slave bus (⑤ in Fig. 1)..................................................................... 91
9.2.3 Slot for microSD card (④ in Fig. 1)........................................................................... 92
9.2.4 Relay outputs AUX 1, AUX 2 (⑨, ⑩ in Fig. 1).......................................................... 92
9.2.5 Temperature sensor connection TEMP (⑧ in Fig. 1)................................................. 93
9.2.6 Open UART interface, 3,3 V (⑦ in Fig. 1)................................................................. 93
9.2.7 Function ground (➑ in Fig. 1)................................................................................... 93
9.2.8 Operating buttons.................................................................................................... 94
9.3 Removing/installing the cover...................................................................................... 95
9.3.1 Removing the cover.................................................................................................. 95
9.3.2 Installing the cover.................................................................................................... 95
9.4 Installing the device..................................................................................................... 96
9.5 Establishing the electrical connections......................................................................... 97
9.5.1 Preparing the cables.................................................................................................. 98
9.5.2 Connecting the battery and switching on the controller........................................... 98
9.5.3 Connecting the solar module.................................................................................... 99
9.5.4 Connecting loads.................................................................................................... 100
9.5.5 Connecting optional components........................................................................... 100
9.6 Performing initial commissioning............................................................................... 102
10 Performing initial commissioning....................................................................................... 103
10.1 Overview.................................................................................................................. 103
10.2 Performing initial commissioning............................................................................. 103
11 Dismounting the controller................................................................................................. 107
12 System functions................................................................................................................ 109
12.1 Protection functions................................................................................................. 109
12.1.1 Controller overload............................................................................................... 109
GB
745.487 77

12.1.2 Overheating of the controller................................................................................ 109
12.1.3 Deep discharging of the battery............................................................................ 109
12.2 Control mode........................................................................................................... 109
12.3 Battery charging functions....................................................................................... 110
12.3.1 Float charging....................................................................................................... 110
12.3.2 Boost charging...................................................................................................... 110
12.3.3 Equalise charging.................................................................................................. 111
12.4 Data logger.............................................................................................................. 112
13 Display (layout, function, operation)................................................................................... 113
13.1 Overview (menu structure)....................................................................................... 113
13.2 Status display........................................................................................................... 113
13.3 Display of special states........................................................................................... 115
13.4 General operation ................................................................................................... 115
13.5 Advanced operation................................................................................................. 116
14 Control functions................................................................................................................ 118
14.1 Overview.................................................................................................................. 118
14.2 Operation................................................................................................................. 118
14.3 Functionality............................................................................................................ 121
14.3.1 Deep discharge protection.................................................................................... 121
14.3.2 Morning light function.......................................................................................... 122
14.3.3 Evening light function........................................................................................... 122
14.3.4 Night light function.............................................................................................. 123
14.3.5 Excess energy control............................................................................................ 123
14.3.6 Generator manager............................................................................................... 124
14.3.7 Alarm.................................................................................................................... 125
14.3.8 Timer 1 ... 4........................................................................................................... 125
15 Troubleshooting................................................................................................................. 126
15.1 Event messages........................................................................................................ 126
15.2 Errors without event messages................................................................................ 130
15.3 Self test.................................................................................................................... 132
16 Maintenance....................................................................................................................... 133
16.1 Controller................................................................................................................. 133
16.1.1 Removing dust...................................................................................................... 133
16.1.2 Removing heavy soiling......................................................................................... 133
16.1.3 Checking the charging functionality...................................................................... 134
16.2 System..................................................................................................................... 134
17 Disposal.............................................................................................................................. 135
18 Technical data..................................................................................................................... 136
18.1 Controller................................................................................................................. 136
18.2 Connection cables.................................................................................................... 138
18.3 Protocol of the open UART interface........................................................................ 139
18.3.1 Settings................................................................................................................. 139
GB
745.487
78

18.3.2 Data...................................................................................................................... 139
19 Exclusion of liability............................................................................................................ 143
20 Commercial and legal guarantee conditions....................................................................... 144
21 Contact............................................................................................................................... 147
22 Notes.................................................................................................................................. 148
GB
745.487 79

1 General safety instructions
nThis document is part of the product.
nOnly technical professionals may perform the work described in this manual.
nInstall and use the device only after reading and understanding this document.
nAlways perform the measures described in this document in the sequence specified.
nKeep this document in a safe place for the entire service life of the device. Pass the document
on to subsequent owners and operators of the device.
nIncorrect operation can reduce solar system yields or damage system components.
nThe device must not be connected to the DC cables if it has a damaged casing.
nIf one of the following components is damaged immediately take the device out of operation
and disconnect it from the battery and modules.
–Device (not functioning, visible damage, smoke, penetration of liquid etc.),
– Connected cables,
– Solar module.
Do not switch the system on again before
– the device has been repaired by a dealer or the manufacturer,
– damaged cables or solar modules have been repaired by a technical specialist.
nBattery acid splashes on skin or clothing should be immediately treated with soap suds and
rinsed with plenty of water. Immediately seek medical advice in the case of injuries.
nIf battery acid splashes into the eyes, immediately rinse with plenty of water and seek medical
advice.
nNever cover the device.
nDo not open the casing: Risk of death. Invalidation of the guarantee.
nFactory labels and markings must never be altered, removed or rendered unreadable.
nObserve the manufacturer's manual when connecting an external device that is not described in
this document. Incorrectly connected devices can damage the controller.
nThis device is not intended for
– children,
– persons with physical, sensory or mental impairment,
– persons without sufficient experience or knowledge unless they are instructed in the use of
the device, and initially supervised, by a person responsible for their safety.
GB
745.487
80

2 Identification
General information
Feature Description
Type Tarom 4545, Tarom 4545–48
Issue version of the manual Z01
Manufacturer's address see
Ä Contact, p. 147
.
Optional accessories nExternal temperature sensor Steca PA TS-S
nDevice-specific Steca current sensor
nTermination plug
Display
The controller indicates the version of the manual matching the software under
‘Main menu’
▶
‘Information’
▶
‘System info’
GB
745.487 81

3 Scope of delivery
nTarom 4545 or Tarom 4545–48
nOperating instructions
GB
745.487
82

4 Proper usage
The solar charge controller, hereinafter named as the
controller
or
device
, may only be used in stand-
alone photovoltaic systems for charging and controlling a lead-acid battery containing liquid or gel
electrolyte. The following applies in addition:
nThe controller must not be connected to the public power grid.
nOnly solar modules may be connected to the solar module connection.
nDepending on the battery used, the connected loads must be suitable for use with one of the
following voltages:
Tarom 4545: 12 VDC, 24 VDC
Tarom 4545–48: 12 VDC, 24 VDC, 48 VDC
nThe controller performs the following tasks:
– Monitoring of the battery charging process
– Controlling of the charging process, protection of the battery from overcharging
– Switching loads on and off, protection of the battery from deep discharge
GB
745.487 83

5 Markings
5.1 Symbols for warnings and notices
Symbol Description Location
general danger warning Manual
Danger from electricity Manual
Read the manual before using the product. Device
Danger from hot surfaces Manual, Device
5.2 Keywords
The following symbols are used in conjunction with the symbols from
Ä 5.1
.
Keyword Description
Danger immediate danger of death or serious bodily injury
Warning possible danger of death or serious bodily injury
Caution possible danger of light or medium bodily injury
Notice possible damage to property
Note Note on operation of the device or use of the manual
GB
745.487
84

7 Overview of the controller
1
4
5
67
9
10
8
Tarom 4545: max. 60 Vpeak
Tarom 4545–48: max. 100 Vpeak
M+
M+
M–
B+
B– L+ L–
M–
B+
B–
L+
L–
Tarom 4545: 12/24 V
Tarom 4545–48: 12/24/48 V
2
3 5
6
7
4
2 1 3
8
Fig. 1: Overview of casing and connections
Connections Other components
①Battery connection: terminals 1+ and 1− ➊External battery fuse (safety fuse or DC line
circuit breaker 1) 2)
②Solar module connection: terminals 2+ and
2−
➋DC load circuit breaker 1) 2)
③Load output for connecting the loads: ter-
minals 3+ and 3−
➌Left cover
④Micro SD slot for microSD card ➍Display
⑤SLAVE IN and SLAVE OUT RJ45 sockets
for RS485 Slave bus
➎Right cover
⑥MASTER RJ45 socket for RS485 Master bus ➏ESC, r, s, SET operating buttons
⑦Open UART interface, 3.3 V ➐Type plate
⑧Temperature sensor connection TEMP for
Steca PA TS-S
➑Positive ground, optional
⑨AUX 2 relay output
GB
745.487
86

8 Menu structure
For the sake of clarity, only the s and
‘SET’
operating buttons are illustrated.
SET SET SET
SET SET 1)
SET SET SET 1)
SET SET SET SET
SET
SET
SET SET SET
SET SET
SET
SET
SET
SET
1)
2)
4) SET
5)
7)
3) Submenus: Operation mode, cycle
Device
temperature
Remaining
capacity
Cable
compensation
Expert menu
Same menus as with load but also with alarm
AUX1and AUX2only
Factory
reset
6) Submenus: On/Off, temp. coefficient
Submenus: Contact details, system info Temp.
compensation
Submenus for displaying the stored energy/current values
Submenus: Float charging, boost charging, equal. charging
Equal. charge
dur.
Temperature
sensor
Battery current
Load current
Daily input
device
Daily load device
Self test
Information 4)
Date
Operation
mode
Night light
Boost charge
dur.
Contrast
RS485 slave
addr.
UART/RS232
open
Timer 1
Excess energy
contr.
Morning light
Alarm 7)
Deep discharge
protection
Select function
Evening light
Generator
manager
Clear log data
Clear
event log
Equal.
charge
6)
State of charge
Time
Language
Timer 4
Start boost
charge
Battery
capacity
Charge
voltages
Function
settings
5)
System voltage
Status display Main menu
Basic setting
Battery
voltage
Output settings
Internal data
logger 2)
System
settings
Submenus
Load
AUX 1
AUX 2
Time format
Date format
Input current
Battery settingsPV current
Event
log
3)
Control mode
Battery type
Time/date
GB
745.487
88

9 Installation
The following section describes only the installation of the controller. Observe the respective
manufacturer's manual when connecting external components (solar module, battery, load, sen-
sors).
Topics
1. Safety instructions
2.
Ä Connections and operating buttons, p. 91
3.
Ä Removing/installing the cover, p. 95
4.
Ä Installing the device, p. 96
5.
Ä Establishing the electrical connections, p. 97
GB
745.487 89

9.1 Safety instructions
DANGER!
Risk of death by electrocution! Observe the following safety instructions when performing the
measures described in the installation section.
General information
–Only technical professionals may perform the work described in the 'installation' section.
– Do not open the controller case.
– All covers must be installed during operation.
–Always take the following measures before working on the controller:
1. Switch off all loads.
2. If present, switch off the DC load circuit breaker (solar module) and secure it against
being switched on again or safely cover the solar module (wind).
3. Switch off the external battery fuse: Remove the fuse insert from the fuse holder (safety
fuse) or switch off the DC line circuit breaker and secure it against being switched on
again.
4. Disconnect the battery cable from both battery terminals.
Cable connections
– The module cables carry voltage when the solar module is illuminated.
– Insulate exposed cable ends with insulation tape or wire connector blocks.
–Connect the cables for the battery, solar module and loads to the controller in the
described sequence.
– Secure the cables with a strain relief clamp. Clearance of strain-relief to controller: 200 mm.
– Connect only 1 cable to each connection terminal.
– Cables used: Observe the specifications in the Technical data section.
– Lay the cables so that
– connections cannot accidentally come loose,
– persons cannot tread on or trip over these,
– fire protection devices must not be impaired.
– The entire installation must be designed with Protection Class II if the open-circuit module
voltage exceeds 60 V DC at least once anywhere over the entire temperature range.
– Observe all applicable installation regulations and standards, national laws and connection
values specified by the regional power supply company.
Fuses and switching devices
Installation of an external battery fuse (line fuse or DC line circuit breaker) is mandatory.
Observe the following:
– Mount the external battery fuse directly next to the battery.
– The external battery fuse must conform to the specifications in the technical data section
– The external battery fuse is not included in the scope of delivery.
GB
745.487
90

WARNING!
Danger of acid injuries.
– Do not subject the battery to open flames or sparks.
– Provide adequate ventilation in the installation location of the battery. Inflammable gases
can escape from the battery.
– Follow the charging instructions of the battery manufacturer.
ATTENTION!
Danger of destroying the device through overloading
– Conform to the technical specifications, especially the connection values. See the type plate
and
Ä 18, p. 136
et seqq.
– When selecting the solar module, note that the open-circuit module voltage is higher than
the value specified on the type plate at temperatures below 25 °C.
– Connect only 1 controller to each solar module.
– Tighten the connection terminals as shown: Battery, solar module and loads with
2.5 ... 4.5 Nm
9.2 Connections and operating buttons
The following section describes the connections and operating buttons. For information on the dis-
play and operation see
Ä 13, p. 113
.
9.2.1 RJ45 socket for Master bus (⑥ in Fig. 1)
For future functions.
9.2.2 RJ45 socket for Slave bus (⑤ in Fig. 1)
The controller is one of a maximum of 31 Slaves on the Slave bus. The following applies in addition:
nMultiple controllers can be connected.
nOnly 1 Master may be connected ① (Fig. 2). Possible Masters: PC or data logger or another
Steca Master device suitable for use in stand-alone systems.
nEach Slave ②, ③, ④ must have its own unique address within a range of 1 to 99; duplicate
addresses must not be present. Set the Slave address of the controller under
‘Main menu’
▶
‘System settings’
▶
‘RS485 slave addr.’
.
nThe Master at one end of the bus and the last Slave at the other end must be terminated ⑦; see
Master/Slave instructions.
nBus cable ⑥: Standard RJ45 cable (Cat-5 Patch cable, 1:1, not supplied, for length see
Ä 18.2
).
nFor pin assignments of the RJ45 socket: see table in
Ä 9.2.1
.
GB
745.487 91

MASTER SLAVE
IN OUT
MASTER SLAVE
IN OUT
MASTER SLAVE
IN OUT
MASTER SLAVE
IN OUT
RJ45
RS485 RS485 RS485
1
2 3
5
4
1
6 66
7
Fig. 2: Wiring the Slave bus
9.2.3 Slot for microSD card (④ in Fig. 1)
For future functions.
9.2.4 Relay outputs AUX 1, AUX 2 (⑨, ⑩ in Fig. 1)
The relay outputs can be used for switching devices or loads (loads via an external power relay).
Devices connected to the relay outputs are controlled via the control functions provided by the con-
troller. Relay output pin assignments:
AUX 1 AUX 2 Description
1 (NC) 4 (NC)
Normally closed
relay contact; the contact is closed when the relay is
switched off.
2 (COM) 5 (COM) Common relay contact
3 (NO) 6 (NO)
Normally open
relay contact; the contact is open when the relay is
switched off.
Heavy loads directly connected to the battery can be switched using an additional power relay
connected to the AUX 1 or AUX 2 outputs, e.g. via the Steca PA EV 200 A.
Related topics:
GB
745.487
92

n
Ä Connecting optional components, p. 100
n
Ä Control functions, p. 118
nTechnical data for the relay outputs at
Ä 18.1, p. 136
9.2.5 Temperature sensor connection TEMP (⑧ in Fig. 1)
If the controller and battery are not located in the same room then an external temperature sensor
for measuring the battery temperature must be installed. We recommend using the optionally avail-
able Steca PA TS-S. Pin assignments:
Pin 7 (EXT.) 8 (GND)
Signal Sensor connection1) Sensor connection1)
1) Any polarity can be used.
Related topics:
Ä Control mode, p. 109
.
9.2.6 Open UART interface, 3,3 V (⑦ in Fig. 1)
The open UART outputs the current and voltage values of the loads, battery, solar module and other
values measured by the controller. The interface can be switched on and off.
Interface protocol: see
Ä 18.3, p. 139
.
Pin assignments:
Pin 9 (GND) 10 (TX) 11 (RX)
Signal Ground TX RX
9.2.7 Function ground (➑ in Fig. 1)
DANGER!
Risk of death by electrocution.. Grounding causes the system to leave the safety extra-low
voltage range. Protection against directly touching live components must be restored via appro-
priate isolation measures.
GB
745.487 93

ATTENTION!
– The system voltage of thin-film modules must be positive to avoid corrosion. This require-
ment is satisfied in stand-alone systems that are
not
grounded.
– Danger of damaging the devices (e.g. computer) connected to the Master/Slave bus or the
UART interface.
All
bus connections must be galvanically isolated when the system is
grounded.
The controller does not need to be grounded in stand-alone systems. We recommend not
grounding the controller. Also observe the local regulations.
If required, the controller can be grounded via the positive battery terminal
‘1+’
of the controller.
Observe the following:
nThe connection point must lie between the external battery fuse and the controller.
nThe connection point can be used as a common ground for all system components.
nTake the grounding of the entire system into account.
9.2.8 Operating buttons
The operating buttons have the following functions:
Button Function
SET njumps down by one menu level
nchanges the state of a control element (check box/radio button)
ncauses the selected numeral to blink so that it can be modified
nanswers a query dialog with
Yes
nadopts a change
ESC njumps up by one menu level
njumps to the status display (press for 1 s)
nanswers a query dialog with
No
ndiscards any changes
r/snmoves the selection bar or the display content upwards/downwards
nmoves the selection 1 position to the left/right on a settings page
nincreases/reduces the setting value by 1 step
nrepeated button presses: press button for a longer time
GB
745.487
94

9.3 Removing/installing the cover
9.3.1 Removing the cover
1. Grip the cover with both hands as shown in Fig. 3.
2. Use your index fingers to pull the edges slightly outwards and then pull upwards so that the
cover is released from the end position.
3. Pull off the cover entirely by lifting it upwards.
Fig. 3: Release the cover from the end position (here the right cover)
9.3.2 Installing the cover
1. Position the cover on the casing so that the two guide lugs on the cover fit into the guide
slots in the casing.
2. Slide the cover onto the casing until it audibly latches into place.
GB
745.487 95
Other manuals for Tarom 4545
4
This manual suits for next models
1
Table of contents
Other Steca Controllers manuals
Steca
Steca Tarom 4545 User manual

Steca
Steca Tarom 4545 User manual
Steca
Steca Solarix 2401 User manual
Steca
Steca Power Tarom 2070 Service manual

Steca
Steca Suntana User guide
Steca
Steca Solsum F User manual

Steca
Steca PR 1010 User manual
Steca
Steca PA RC100 User manual
Steca
Steca Solarix MPPT 2010 User guide

Steca
Steca Tarom 4545 User manual


