manuals.online logo
Brands
  1. Home
  2. •
  3. Brands
  4. •
  5. Steelcraft
  6. •
  7. Automobile Accessories
  8. •
  9. Steelcraft HD11370RW User manual

Steelcraft HD11370RW User manual

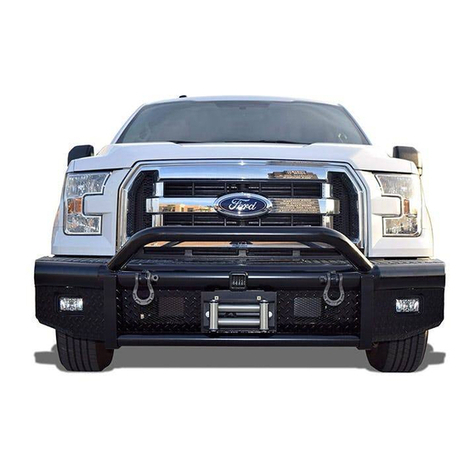
HD REPLACEMENT WINCH FRONT BUMPER
2011-16 FORD SUPERDUTY F250-350
Page 1 of 6 11/13/19 (DP)
PARTS LIST:
1
HD Replacement Front Bumper Assembly
18
12-1.75mm Hex Nuts
1
Winch Tray Bracket Assembly
5
6mm Combo Button Head Bolts (cover)
1
Bumper Cover Plate
4
5mm x 20mm Button Head Bolts
2
Plastic Plugs for license plate mount
8
5mm x 10mm x 1mm Flat Washers
18
12-1.75mm x 50mm Hex Bolts
4
5mm Nylon Lock Nuts
36
12mm x 32mm x 3mm Flat Washers
1
4mm Wrench
18
12mm Lock Washers
1
3mm Wrench
PROCEDURE:
REMOVE CONTENTS FROM BOX. VERIFY ALL PARTS ARE PRESENT. READ INSTRUCTIONS
CAREFULLY BEFORE STARTING INSTALLATION. BUMPER IS HEAVY, ASSISTANCE IS
HIGHLY RECOMMENDED TO AVOID POSSIBLE INJURY OR DAMAGE TO THE VEHICLE.
1. Remove the license plate and bracket. On models with factory fog lights, unplug wiring
harness leading to the bumper, (Figures 1 & 2). Move harness away from bumper.
2. Release the rubber air deflector from the back of the bumper. Next, remove the driver and
passenger side outer bumper supports attached to the outside of the frame, (Figure 2).
3. Place blocks or jack stands under the front bumper to support it during mounting bolt removal.
Once the bumper has been safely supported, remove the (4) factory bumper bolts, (Figure 3).
WARNING! Assistance is required to hold the bumper in place during bolt removal to prevent
the bumper from falling. Carefully slide the bumper off and over the tow hooks.
4. Remove the driver/left side tow hook from the top of the frame, (Figure 4). Next, remove the
(4) factory hex nuts, lower frame extension, (if equipped), and double bolt plates from the end
of the frame, (Figures 1, 4 & 5). Repeat this Step to remove the passenger/right side tow hook
and lower frame extension.
5. Next, select the Winch Tray/Bracket Assembly. Slide the assembly over the end of the frame.
Line up the slots in the top of the Bracket Assembly with the holes in the top of the frame for
the tow hooks. Attach the Bracket Assembly to the driver/left side of the frame with the
included (3) 12mm Hex Bolts, (6) 12mm Flat Washers, (3) 12mm Lock Washers and (3) 12mm
Hex Nuts, (Figures 6 & 7). Leave hardware loose.
(2) License
Plate Plugs
Winch Tray and
Bracket Assembly
HD REPLACEMENT WINCH FRONT BUMPER
2011-16 FORD SUPERDUTY F250-350
Page 2 of 6 11/13/19 (DP)
6. Line up the (2) slots in the outside of the Bracket Assembly with the holes in the side of the
frame, (Figure 8). Attach the Bracket Assembly to the outside of the frame with (2) 12mm Hex
Bolts, (4) 12mm Flat Washers, (2) 12mm Lock Washers and (2) 12mm Hex Nuts, (Figures 8 &
9). Leave hardware loose.
7. Attach the rear corner of the driver/left side of the Winch Tray to the hole in the inside of the
frame with (1) 12mm Hex Bolt, (2) 12mm Flat Washers, (1) 12mm Lock Washer and (1) 12mm
Hex Nut, (Figures 10 & 11). Leave hardware loose.
8. Repeat Steps 5—7to attach the passenger/right side of the Winch Tray/Bracket Assembly to
the frame.
9. If installing winch, attach winch to Winch Tray at this time. Winch must be installed before
Bumper is placed in position against Brackets. Also attach winch cable guide to Bumper.
Follow manufacturer’s instructions to properly wire the winch to the electrical system.
10.With assistance, carefully position the Bumper Assembly up to the ends of the Winch Tray.
Temporarily support the weight of the Bumper. WARNING: To avoid possible injury or damage
to the vehicle, do not proceed until the Bumper is fully and safely supported. Models with
winch, check for clearance between Bumper and winch before fully installing Bumper.
11.Line up the (3) mounting holes in the driver/left side of the Bumper with the (3) holes in the
Winch Tray/Bracket Assembly. Attach the Bumper to the Bracket Assembly with the included
(3) 12mm Hex Bolts, (6) 12mm Flat Washers, (3) 12mm Lock Washers and (3) 12mm Hex
Nuts, (Figures 12 & 13). Do not fully tighten hardware at this time. Repeat to attach the
passenger/right side of the Bumper to the Bracket Assembly.
12.Level and adjust the bumper and fully tighten all 12mm hardware to 65-70ft-lbs.
13.Models with factory fog lights:
a. Use a flat blade screwdriver or pliers to pop off the round outer metal clip over each of the
hex nuts attaching the plastic light bracket to the back of the factory bumper, (Figure 14).
Remove the hex nuts and the light assembly, (Figure 15).
b. Next, use a flat blade screwdriver to pry up the center pin on the (2) fasteners attaching the
top of the light to the bracket, (Figure 15).
c. Remove the adjustment screw, spring and plastic nut from the bottom of the light.
d. Slide the light into place between the mounting tabs on the back of the Bumper. Use the
included (2) 5mm Button Head Bolts, (4) 5mm Flat Washers and (2) 5mm Nylon Lock Nuts
to attach the top of the light to the mounting tabs, (Figure 16). Attach the plastic nut to the
lower bent tab on the Bumper. Insert the screw through the tab on the light, the spring
(between light and tab on bumper), and into the plastic nut. Adjust the light as needed.
e. Repeat to install the remaining fog light.
f. Reattach the factory wiring harness to both lights.
14.Use the included (2) push-in plastic plugs to attach the front license plate, (if required), to the
(2) holes in the front bumper, (Figure 17).
15.Remove winch access cover if desired, (Figure 17).
16.Do periodic inspections to the installation to make sure that all hardware is secure and tight.
To protect your investment, Do not use any type of polish or wax that may contain abrasives that could damage the
finish. Mild soap may be used to clean the Front Bumper assembly.
HD REPLACEMENT WINCH FRONT BUMPER
2011-16 FORD SUPERDUTY F250-350
Page 3 of 6 11/13/19 (DP)
Driver Side Installation Pictured
WARNING! Do not remove bumper bolts
unless the bumper is properly supported on
blocks or stands or the bumper may fall.
(Fig 5) Driver/left side frame
(Fig 3) Remove factory bumper bolts
(Fig 4) Remove the tow hook and
lower frame extension if equipped
(Fig 1) Driver/left lower frame extension and fog
light wire harness pictured from behind bumper
(Fig 2) Release clips attaching fog light
wire harness if equipped. Passenger/right
side pictured from behind bumper
Remove hardware attaching
bumper support brackets to frame
Lower frame
extension
Tow hook
Front
Front
HD REPLACEMENT WINCH FRONT BUMPER
2011-16 FORD SUPERDUTY F250-350
Page 4 of 6 11/13/19 (DP)
Driver Side Installation Pictured
WARNING! Do not crawl under bumper
unless the bumper is properly supported on
blocks or stands or the bumper may fall.
(Fig 6) Top of driver/left side of Winch
Tray/Bracket Assembly. Line up mounting
holes with holes for tow hook
(Fig 8) Attach side of Bracket
Assembly to outside of frame
Front
Front
(2) 12mm x 50mm Hex Bolts
(4) 12mm Flat Washers
(2) 12mm Lock Washers
(2) 12mm Hex Nuts
Front
(Fig 9) Attach driver/left side of Bracket
Assembly to outside of frame
(3) 12mm x 50mm Hex Bolts
(6) 12mm Flat Washers
(3) 12mm Lock Washers
(3) 12mm Hex Nuts
(Fig 7) Attach top of Bracket Assembly to
tow hook mounting holes in top of frame
Front
See Fig 10 & 11
HD REPLACEMENT WINCH FRONT BUMPER
2011-16 FORD SUPERDUTY F250-350
Page 5 of 6 11/13/19 (DP)
Driver Side Installation Pictured
(Fig 11) Driver/left side of Winch Tray
12mm x 50mm Hex Bolt
(2) 12mm Flat Washers
12mm Lock Washer
12mm Hex Nut
Front
(Fig 12) Attach Bumper to side of Hitch Tray
(3) 12mm x 50mm Hex Bolts
(6) 12mm Flat Washers
(3) 12mm Lock Washers
(3) 12mm Hex Nuts
(Fig 13) Attach Bumper to side of Hitch Tray
(3) 12mm x 50mm Hex Bolts
(6) 12mm Flat Washers
(3) 12mm Lock Washers
(3) 12mm Hex Nuts
Front
Front
WARNING! Do not crawl under bumper
unless the bumper is properly supported on
blocks or stands or the bumper may fall.
(Fig 10) Attach rear corner of
Winch Tray to inside of frame
Front
HD REPLACEMENT WINCH FRONT BUMPER
2011-16 FORD SUPERDUTY F250-350
Page 6 of 6 11/13/19 (DP)
(Fig 17) Push plastic plugs into holes
in Bumper for license plate if required
(Fig 15) Fog light w/factory bracket
(Fig 14) Remove hex nuts to remove
complete fog light assembly with bracket
(Fig 16) Attach fog light to bracket
Reuse
Factory screw
Spring
Plastic nut
Pry off tin clips
covering hex nuts
Carefully pry up center
pin to release clip
(2) 5mm Screws
(4) 5mm Flat Washers
(2) 5mm Nylon Lock Nuts
Remove cover over
winch if desired

Other Steelcraft Automobile Accessories manuals

Steelcraft 2011-15 User manual

Steelcraft

Steelcraft 2011-15 User manual

Steelcraft EVO3 User manual

Steelcraft

Steelcraft EVO3 User manual

Steelcraft 223200 User manual

Steelcraft

Steelcraft 223200 User manual

Steelcraft DS5 RUNNING BOARD User manual

Steelcraft

Steelcraft DS5 RUNNING BOARD User manual

Steelcraft DS5 User manual

Steelcraft

Steelcraft DS5 User manual

Steelcraft DS5 User manual

Steelcraft

Steelcraft DS5 User manual

Steelcraft hd10410 User manual

Steelcraft

Steelcraft hd10410 User manual

Steelcraft HEAVY DUTY BULL NOSE FRONT BUMPER User manual

Steelcraft

Steelcraft HEAVY DUTY BULL NOSE FRONT BUMPER User manual

Steelcraft 60-11380 User manual

Steelcraft

Steelcraft 60-11380 User manual

Steelcraft DS5 User manual

Steelcraft

Steelcraft DS5 User manual

Steelcraft DS5 User manual

Steelcraft

Steelcraft DS5 User manual

Steelcraft Fortis User manual

Steelcraft

Steelcraft Fortis User manual

Steelcraft 40-15020 User manual

Steelcraft

Steelcraft 40-15020 User manual

Steelcraft DS5 User manual

Steelcraft

Steelcraft DS5 User manual

Steelcraft STX100 User manual

Steelcraft

Steelcraft STX100 User manual

Steelcraft 50320 User manual

Steelcraft

Steelcraft 50320 User manual

Steelcraft EVO3 User manual

Steelcraft

Steelcraft EVO3 User manual

Steelcraft DS5 User manual

Steelcraft

Steelcraft DS5 User manual

Steelcraft 213900 User manual

Steelcraft

Steelcraft 213900 User manual

Steelcraft Elevation Bull Nose Front Bumper User manual

Steelcraft

Steelcraft Elevation Bull Nose Front Bumper User manual

Steelcraft DS5 User manual

Steelcraft

Steelcraft DS5 User manual

Popular Automobile Accessories manuals by other brands

BlueBuilt BBAL2422 manual

BlueBuilt

BlueBuilt BBAL2422 manual

TAUBENREUTHER 50-10JT9863 manual

TAUBENREUTHER

TAUBENREUTHER 50-10JT9863 manual

Whispbar K420 instructions

Whispbar

Whispbar K420 instructions

Mont Blanc FK93 Fitting instructions

Mont Blanc

Mont Blanc FK93 Fitting instructions

Streetwize SWMAS3 quick start guide

Streetwize

Streetwize SWMAS3 quick start guide

Witter HY55U Fitting instructions

Witter

Witter HY55U Fitting instructions

Gator HUDGPS2 user guide

Gator

Gator HUDGPS2 user guide

BMW 84 64 0 025 816 installation instructions

BMW

BMW 84 64 0 025 816 installation instructions

ARB 341 4480 Fitting instructions

ARB

ARB 341 4480 Fitting instructions

VOLTCRAFT CPS-1500 operating instructions

VOLTCRAFT

VOLTCRAFT CPS-1500 operating instructions

Jabra FREEWAY datasheet

Jabra

Jabra FREEWAY datasheet

AMP Research BedStep AMP 75304-01A manual

AMP Research

AMP Research BedStep AMP 75304-01A manual

Haldex L31296A Instruction guide

Haldex

Haldex L31296A Instruction guide

Stag 400 DPI installation guide

Stag

Stag 400 DPI installation guide

IDEC HT3P instruction sheet

IDEC

IDEC HT3P instruction sheet

Metra Electronics 99-7310 installation instructions

Metra Electronics

Metra Electronics 99-7310 installation instructions

Zone Offroad Products F2302 installation instructions

Zone Offroad Products

Zone Offroad Products F2302 installation instructions

A-Tach Mounts 20025 manual

A-Tach Mounts

A-Tach Mounts 20025 manual

manuals.online logo
manuals.online logoBrands
  • About & Mission
  • Contact us
  • Privacy Policy
  • Terms and Conditions

Copyright 2025 Manuals.Online. All Rights Reserved.