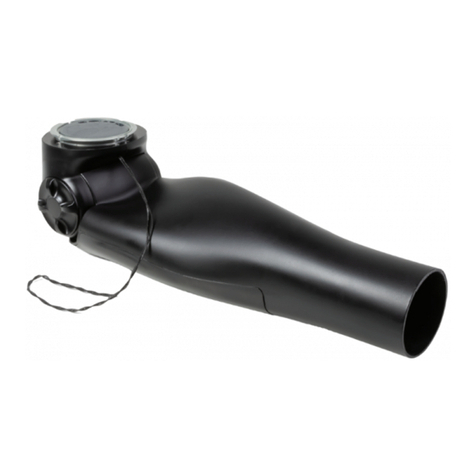
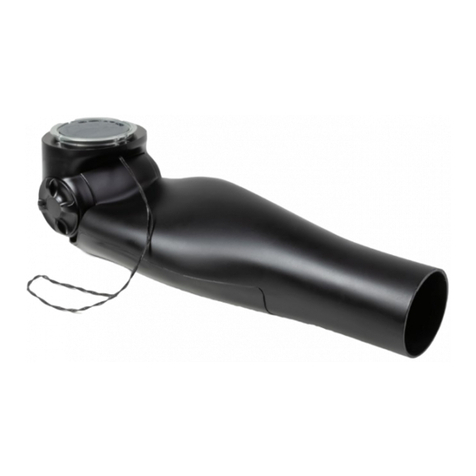
Steeper Espire Elbow Pro & Hybrid User manual

EspireTM Elbow
Pro & Hybrid
Instruction Manual -
for Prosthetist
DistributeurDistributeur


EN
Espire Elleboog Pro & Hybrid van Steeper Group, distributeur Loth Fabenim B.V.
EspireTM Elbow Pro & Hybrid Instruction Manual - For Prosthetists 3
Contents
1. System Overview ......................................................................................................................5
1.1 Introduction..........................................................................................................................5
1.2 Anatomy ............................................................................................................................... 6
1.3 Pre-Installation Checklist .................................................................................................... 7
1.4 Technical Specications ...................................................................................................... 9
2. Batteriesand Charging.........................................................................................................11
2.1 The Battery ......................................................................................................................... 11
2.2 Battery Installation and Removal ..................................................................................... 12
2.3 LED Indicator ...................................................................................................................... 13
2.4 Battery Charger ..................................................................................................................14
2.5 ChargingtheBattery.......................................................................................................... 15
3. Inputs.........................................................................................................................................16
3.1 Input Overview ...................................................................................................................16
3.2 Input Connector Board ..................................................................................................... 17
3.3 Input Colour Coding System ............................................................................................. 19
3.4 Haptic Feedback Motor ..................................................................................................... 20
3.5 Connecting Cables to the Input Board .............................................................................20
3.6 Strain Relief Disc ................................................................................................................ 21
4. AC Myo Elektrodes with TruSignalTM Technology ......................................................... 23
4.1 ElectrodeOverview............................................................................................................23
4.2 ElectrodeKits......................................................................................................................24
4.3 ElectrodePlacement..........................................................................................................25
4.4 Electrode Installation Instructions ................................................................................... 27
5. Pattern Recognition .............................................................................................................. 28
5.1 Pattern Recognition Overview ..........................................................................................28
5.2 Coapt - COMPLETE CONTROL System Gen2 ................................................................... 28
5.3 Innite Biomedical Technologies (IBT) - Sense ................................................................30
6. Axis electronic Lock Actuator ............................................................................................. 32
6.1 ElectronicLockActuatorOverview...................................................................................32
6.2 Routing Cables Through the Exoskeletal Shoulder Joint ................................................32
6.3 Routing Cables Through the Endoskeletal Shoulder Joint ............................................. 33
7. Measuring and Cutting Forearm ....................................................................................... 34
7.1 Measuring the Forearm .................................................................................................... 34
7.2 Protective Foam Insert ...................................................................................................... 35
7.3 Cutting the Forearm to Length ......................................................................................... 35

EN
Espire Elleboog Pro & Hybrid van Steeper Group, distributeur Loth Fabenim B.V.
EspireTM Elleboog Pro & Hybrid Instruction Manual - For Prosthetists4
Contents
8. Wrist Installation .................................................................................................................... 36
8.1 Wrist Options Overview .................................................................................................... 36
8.2 Output Wires for Terminal Devices ..................................................................................37
8.3 Quick Disconnect Wrist Installation .................................................................................38
8.4 MotionControlStandardElectronicWristRotatorInstallation.....................................39
8.5 Ottobock 10S17 Electronic Wrist Rotator Installation ....................................................41
8.6 Output Wires for Pattern Recognition Systems ..............................................................42
8.7 Advanced Grip Control Installation ..................................................................................43
9. TheLmanination Collar and Clamp Ring .........................................................................46
9.1 Orientation of the Lamination Collar and Clamp Ring ................................................... 46
9.2 Internal-External Rotation ................................................................................................ 47
9.3 Attachingthe Lamination Collar to the Elbow .................................................................47
9.4 Determining Proper Orientation on Test Socket ............................................................48
9.5 Final Adjustment with the User ........................................................................................48
10. Forearm Cable Lift Kit (Hybrid) ........................................................................................49
10.1 CableMounting Overview ...............................................................................................49
10.2 Setting Up the Cable Mounting ......................................................................................49
10.3 TerminalEnd Connections ..............................................................................................50
11. Setting up the Counterbalance (Hybrid) .......................................................................51
11.1 Counterbalance Overview .............................................................................................. 51
11.2 Counterbalance Adjustment .......................................................................................... 52
12. Maintenanceand Troubleshooting................................................................................53
12.1 Troubleshooting .............................................................................................................. 53
12.2 Maintenance .................................................................................................................... 54
13. Intended Use and Safety ................................................................................................... 55
13.1 Intended Use ....................................................................................................................55
13.2 Indications and Contraindications ................................................................................. 55
13.3 Safety ................................................................................................................................ 56

EN
Espire Elleboog Pro & Hybrid van Steeper Group, distributeur Loth Fabenim B.V.
EspireTM Elbow Pro & Hybrid Instruction Manual - For Prosthetists 5
System Overview
1
The Espire Elbow system is only to be purchased, congured and tted by a qualied
prosthetist. This device is intended for use in accordance with the information
contained in this document. Instruct the patient on proper use of this device before
transferring device to patient.
Intended Use Statement:
The Espire Pro and Espire Hybid Elbows are to be used exclusively for external
prosthetic ttings of the upper limbs. The Espire Elbow processes the end-user’s
input signals to activate and control powered elbow movement.
1.1 Introduction
Thank you for purchasing the Espire Elbow system from Steeper Group. In the
following document you will nd information on everything from fabrication, to
maintenance and care of the Espire Elbow system. Read these instructions carefully
and educate the end user on all functions of this product before nal delivery.
If you have any questions, concerns or comments, please contact us at +31 30 27 32
The Espire Elbow is a state-of-the-art, internally powered, myoelectric elbow
prosthesis. The Espire Pro uses electrical signals from muscles to proportionally
control a powered elbow and terminal devices, whereas the Espire Hybrid uses
electrical signals from muscles to control terminal devices only. Steeper Group
does not recommend that the device contain more than 3 degrees of freedom;
the clinician should evaluate according to the combination of terminal devices that
are required by the patient. The system’s versatility also allows many other control
schemes such as switches, linear transducers, pattern recognition systems, etc.
Signals from these inputs are processed by the Espire’s internal microprocessor unit
and then sent to the respective devices.

EN
Espire Elleboog Pro & Hybrid van Steeper Group, distributeur Loth Fabenim B.V.
EspireTM Elleboog Pro & Hybrid Instruction Manual - For Prosthetists6
System Overview
1
1.2 Anatomy
Strain Relief Disc
Lamination Collar
Drive Unit
Input Connector
Board
LED Indicator
Forearm
Haptic
Feedback Motor
Forearm Cable Lift
Kit Hybrid Only
(optional)
Battery
Battery Cover
Lamination Clamp
(Clamp Ring)

EN
Espire Elleboog Pro & Hybrid van Steeper Group, distributeur Loth Fabenim B.V.
EspireTM Elbow Pro & Hybrid Instruction Manual - For Prosthetists 7
System Overview
1
1.3 Pre-Installation Checklist
The Espire Elbow Pro and Hybrid versions are fully assembled and undergo
electronic testing verication before they are shipped.
What’s in the box:
Hardware
• Espire Elbow
• iPad (included with rst purchase of
Pro/Hybrid model only)
• Lamination Collar and Clamp Ring
• Lamination Dummy
Wat zit er in de doos:
Hardware
• Strain Relief Disc
• 2 Lithium-Ion Batteries
• Battery Charger with Adapter
• Forearm Cable Lift Kit -
Hybrid only (optional extra)
Instruction Manuals
• Espire Elbow Quick Setup Guide
• Espire Elbow Technical Manual
• Espire Elbow User Manual
Hardware
• Espire Elbow Fabrication
Instructions
• Espire Elbow Hub App
Instructions
Note: All manuals are available at lothfabenim.nl.
Powering on the Espire Elbow
Power Button
MEDIAL LOCATION
The power button is located on the medial underside of the Espire. To turn the
device on or o, press and hold the power button for 4 seconds. When the device is
powered on or o, a multi-coloured light on the LED indicator will ash for 1 second.
The system may also be congured with an external switch for turning the Espire
Elbow on and o. Pressing the switch will also turn the system on or o.

EN
Espire Elleboog Pro & Hybrid van Steeper Group, distributeur Loth Fabenim B.V.
EspireTM Elleboog Pro & Hybrid Instruction Manual - For Prosthetists8
System Overview
1
Feature Description
Power Button Press and hold for 4 seconds to turn Espire ON or OFF
Elbow LED Indication - Power
Colour Indicator Status
Multi-Colour Blink Power ON or OFF
Pairing Espire to the iPad
The Espire Elbow will emit a Bluetooth signal for 2 minutes after the battery is
installed and the elbow is powered on, during which time it can be paired with
the Hub App software. Bluetooth signal is ONLY sent when the elbow is “power
cycled” (the battery is removed and re-installed). Once a Bluetooth connection is
established, the LED indicator will display a blue light while paired.
Note: For information on use with the iPad, refer to the Espire Elbow Hub App
Instructions - Pro and Hybrid.
Elbow LED Indication - Bluetooth
Colour Indicator Status
Blue Solid Bluetooth connection

EN
Espire Elleboog Pro & Hybrid van Steeper Group, distributeur Loth Fabenim B.V.
EspireTM Elbow Pro & Hybrid Instruction Manual - For Prosthetists 9
System Overview
1
1.4 Technical Specications
Specications
Weight Limit 11.3 kg
Maximum Lifting Force 13.6 N-m
Flexion Angle (preset control) -5 - 135°
Speed (preset control) 135°/sec
Max Cable Length (AC Electrode Cable) 609 mm
Mode of Operation Continuous
Connections
Inputs 12
Outputs 4
Device Operation – Internally Powered
Battery (Removable) Smart Li-Ion
10.8 V, 3,000 mAh, 32 WI
Time to Full Charge 3.5 hours
Voltage (Elbow) 11,1 V nominal
Voltage (Hand) 7,4 V regulated
Charger 100-250 VAC, 24 V, 2,5A DC
Wireless
Connection Bluetooth 4.2
Maximum Speed 24 Mbps
Maximum Range 10 m
Operating Frequency 2.402 - 2.480 GHz
BLE Power 4 dBm

EN
Espire Elleboog Pro & Hybrid van Steeper Group, distributeur Loth Fabenim B.V.
EspireTM Elleboog Pro & Hybrid Instruction Manual - For Prosthetists10
System Overview
1
System Requirements
Hardware Minimum Requirements iPad 5th generation or later
with iOS 10.3 or later
Software Download the Espire Hub App
from the Apple App Store
Note: If storing device above or below operating temperature, allow the device to
return to within operating temperature range and leave the device to sit for 15
minutes before using.
IP Rating
IP22 Protected from touch by fingers and objects greater than 12 millimetres. Protected
from water spray less than 15 degrees from vertical.
Manufacturer Product
Steeper Group All Steeper Myoelectric Hands
Ossur iLimb hands
OttoBock Bebionic hand, Electric Greifer, Electronic
Wrist Rotator, SensorHand Speed, Other
Ottobock Myoelectric Hands
Taska Prosthetics Taska Hand
Motion Control Electronic Wrist Rotator, ETD2
Hy5 Hy5 Hand
List of Currently Approved Terminal Devices
Environmental Use Conditions
Charging (Temperature) 0°C to +45°C
Operating (Temperature) 5°C to +40°C
Storage & Transport (Temperature) -20°C to +60°C
Operating Relative Humidity 15% to 90%

EN
Espire Elleboog Pro & Hybrid van Steeper Group, distributeur Loth Fabenim B.V.
EspireTM Elbow Pro & Hybrid Instruction Manual - For Prosthetists 11
Batteries and Charging
2
2.1 The Battery
The Espire Elbow system is supplied with two removable lithium-ion batteries. This
battery supplies 3000 mAh at 11.1 volts for the elbow and 7.4 volts for the terminal
device(s). It is advised to rotate use of these batteries, keeping one as a spare for
backup power. For most users, one battery will last an entire day*, depending on
the prosthetic components, condition of the battery and the frequency of use.
The batteries are shipped with a partial-charge (up to 30%). We recommend charging
both batteries to 100% upon receipt of the Espire Elbow system.
*based on average use during an 8-hour period
Caution: Use only the Steeper Group manufactured Espire Elbow battery pack and
the provided battery charger with the Espire Pro and Hybrid systems.
Always follow the manufacturer’s instructions for proper removal of and
replacement of battery pack.
Note: To extend battery life, rotate battery usage on a weekly or monthly basis.
Note: If storing the Espire Elbow for an extended period without using, remove
battery pack from the elbow before storage.
Battery Fuel Gauge
A fuel gauge is located on the side of the battery for quickly checking the charge
status.

EN
Espire Elleboog Pro & Hybrid van Steeper Group, distributeur Loth Fabenim B.V.
EspireTM Elleboog Pro & Hybrid Instruction Manual - For Prosthetists12
Batteries and Charging
2
Pull Tab
Fuel Gauge
Indicator Symbol Battery Status
5 Bars Full Charge
No Bars None No Charge
2.2 Battery Installation and Removal
Batteries can be removed and replaced as necessary. To remove the battery, simply
push the battery cover clip and gently lift it o the elbow. Use the pull tab to remove
the battery.
Installing a battery is the reverse process. Insert the battery into the elbow, ensuring
that the pull tab is accessible for future removal. Then, apply the battery cover. The
battery cover clip will “click” into place when seated.
Elbow – Bottom View
Pull Tab Battery Cover Clip

EN
Espire Elleboog Pro & Hybrid van Steeper Group, distributeur Loth Fabenim B.V.
EspireTM Elbow Pro & Hybrid Instruction Manual - For Prosthetists 13
Batteries and Charging
2
2.3 LED Indicator
The Espire Elbow is equipped with a state-of-charge LED indicator. This indicator tells
the user how much life is left in their current battery. The Espire must be powered
on to use this feature.
Press the power button for one second to activate the LED indicator light on the
forearm. The number of blinks indicates the state of the charge.
Feature Description
Power Button Press and hold for 1 second to indicate the battery status
Elbow LED Indications – Battery
Colour Indicator Battery Status
4 Green Blinks 100% Charged
3 Green Blinks Less Than 75%
2 Green Blinks Less Than 50%
1 Green Blink Less Than 25%
Yellow Solid Critically Low - Charge Battery

EN
Espire Elleboog Pro & Hybrid van Steeper Group, distributeur Loth Fabenim B.V.
EspireTM Elleboog Pro & Hybrid Instruction Manual - For Prosthetists14
Batteries and Charging
2
2.4 Battery Charger
Espire Elbow Pro and Hybrid systems are supplied with a Smart Charger for the
lithium-ion battery. The charger is recommended for daily use and will assure that
the battery will receive a full charge and provide maximum running time. There are
two charger types (single-bay or dual-bay) and three power adapter options (US,
UK, or European) to match the needs of dierent regions. There is also a car charger
available.
Caution: Using a different AC adapter than the one provided with the battery
charger may cause damage to the Espire battery or battery charger.
Single-Bay Charger
(Also available in Dual-Bay)

EN
Espire Elleboog Pro & Hybrid van Steeper Group, distributeur Loth Fabenim B.V.
EspireTM Elbow Pro & Hybrid Instruction Manual - For Prosthetists 15
Batteries and Charging
2
2.5 Charging the Battery
Charging the Espire Elbow Battery
1. Place the charger on a at, level surface away from sources of heat and
moisture. Plug the AC connector from the power supply into the back of the
charger and connect the power supply to the main AC supply using the cable
supplied.
2. If the battery you wish to charge is inside of the Espire Elbow, it must rst be
removed from the battery compartment. Remove the battery cover via the
clip and remove the battery by using the pull tab.
3. Place the battery into the battery bay ensuring that the 5-way connector is
fully seated. The LEDs in the status window will provide status information
and the charger will automatically begin charging.
Recharge time from empty is approximately 3.5 hours.
Battery Charger LED Indications
Colour Indicator Battery Status
Green Blinking Charging
Green Solid Fully Charged
Red Solid Error (Contact Loth Fabenim)

EN
Espire Elleboog Pro & Hybrid van Steeper Group, distributeur Loth Fabenim B.V.
EspireTM Elleboog Pro & Hybrid Instruction Manual - For Prosthetists16
Inputs
3
3.1 Input Overview
The Espire Elbow is compatible with many types of inputs, which will be installed
with the conguration specied at the time of ordering.
List of Supported Inputs
Manufactured by Steeper Group:
• AC Myoelectrodes with TruSignalTM Technology (see section 4)
• Linear Transducers
• Touch Pads
• DC Cased Electrodes (requires Espire input cable)
Note: Input components from other manufacturers will require a unique wire
harness and must be installed and tested by Steeper Group prior to delivery.
Other Manufacturers:
• Switches - Single-State, Dual-State, Bump, etc. (requires Espire input cable)
• Remote Power Switches
Items Not Listed: Contact Steeper Group for customised cable and adapter options.
Other Control Methods:
TMR
• Can utilise either AC or DC electrodes
Pattern Recognition (see Section 5)
• COMPLETE CONTROL System Gen2 - Coapt
• Sense - Innite Biomedical Technologies (IBT)

EN
Espire Elleboog Pro & Hybrid van Steeper Group, distributeur Loth Fabenim B.V.
EspireTM Elbow Pro & Hybrid Instruction Manual - For Prosthetists 17
Inputs
3
3.2 Input Connector Board
Every Espire Elbow will be shipped with the conguration specied at the time
of ordering. Your current setup can be viewed in the Espire Hub App under the
diagnostics tab: Espire Hub App > System > Settings > Diagnostics > Connections.
The table adjacent lists the location, the type of connection that can be used, and
its setup type.
Note: The image below is shown with the TruSignal circuit board installed, which
includes connections A-D for use with TruSignal AC electrodes.
This board is only factory installed when specified during the order process but can
be added later if desired. Contact Steeper Group for more information.

EN
Espire Elleboog Pro & Hybrid van Steeper Group, distributeur Loth Fabenim B.V.
EspireTM Elleboog Pro & Hybrid Instruction Manual - For Prosthetists18
WITH TRUSIGNAL BOARD NO TRUSIGNAL BOARD
Posterior Posterior
1
11
13 12
23
4
9
10
658
7
A B C D
1
11
13 12
23
4
9
10
658
7
Input Connector Board
Inputs
3
Board Location Input Option Setup Type
+TruSignal AC Electrodes 1-site or 2-sites
+ + TruSignal AC Electrodes w/TMR 4-sites
+ + + TruSignal AC Electrodes w/TMR 6-sites
- DC Electrodes
DC Electrodes w/ TMR
Linear Transducer
Touch Pads
Switches
Any combination
up to 9 inputs
Remote Power Switch 1 input
Shoulder Lock/Unlock 1 input
Auxiliary Port ---
Haptic Feedback 1 input
A D
A B D
A B C D
1 9
10
11
12
13

EN
Espire Elleboog Pro & Hybrid van Steeper Group, distributeur Loth Fabenim B.V.
EspireTM Elbow Pro & Hybrid Instruction Manual - For Prosthetists 19
Inputs
3
3.3 Input Colour Coding System
Coloured labels will be applied to the wires during the order fulllment process to
identify the input type and its location on the input board.
Board Location Input Type Colour
AC Pair 1 Red
AC Pair 2 Orange
AC Pair 3 Yellow
AC Pair 4 Green
AC Pair 5 Blue
AC Pair 6 Purple
AC Grounds White
- Linear Transducer Purple
Touchpads Yellow/Green Stripe
DC Electrodes Blue
Remote Power Switch Black
Shoulder Lock (Output) Grey
Haptic Feedback (Output) Black
A
B
C
D
1 9
10
11
13

EN
Espire Elleboog Pro & Hybrid van Steeper Group, distributeur Loth Fabenim B.V.
EspireTM Elleboog Pro & Hybrid Instruction Manual - For Prosthetists20
Inputs
3
3.4 Haptic Feedback Motor
A haptic feedback motor is located on the underside of the
strain relief disc. It vibrates to alert the end user when a
preprogrammed action occurs, such as conrmation of a
successful myoelectric switching event. This function can
be congured in the Espire Hub App.
To connect the haptic feedback motor, plug the cable to the
input board (port 13) like any other connector.
3.5 Connecting Cables to the Input Board
1. Apply silicone grease to the plug connectors before inserting into the board.
2. When attaching cables, note the proper orientation. The connectors are “keyed”
or asymmetrical to assure proper alignment. The connector should plug in
easily and is held in place with friction.
3. Once the cables are attached, apply more silicone grease on top of the
connectors to prevent moisture from entering receptacles.
4. When removing cables, pull close to the connector to avoid pulling on the wires.
Wires that become loose could cause intermittent operation.
Other manuals for Espire Elbow Pro & Hybrid
1
Table of contents
Other Steeper Medical Equipment manuals
Popular Medical Equipment manuals by other brands

Getinge
Getinge Arjohuntleigh Nimbus 3 Professional Instructions for use

Mettler Electronics
Mettler Electronics Sonicator 730 Maintenance manual

Pressalit Care
Pressalit Care R1100 Mounting instruction

Denas MS
Denas MS DENAS-T operating manual

bort medical
bort medical ActiveColor quick guide

AccuVein
AccuVein AV400 user manual

