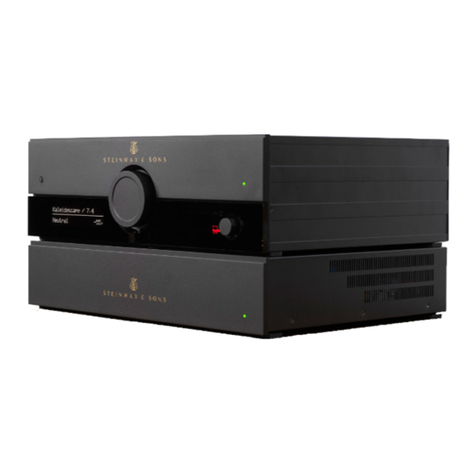
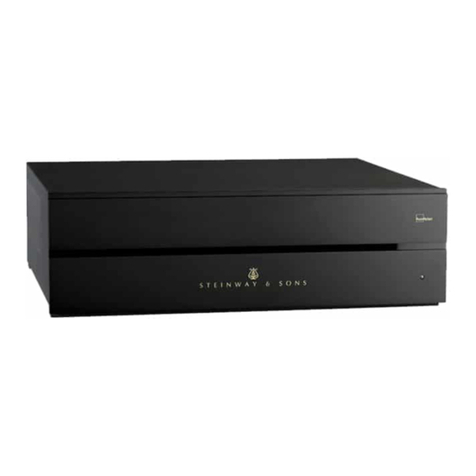
STEINWAY LYNGDORF P300 2.1 User manual

[Skriv tekst]
PRELIMINARY INSTALLATION MANUAL
MODEL P300 2.1
Version 0.1/fsm
Steinway & Sons P300 2.1
OWNER’S
MANUAL
Version 2.0

Steinway & Sons P300 2.1 Owner’s manual 2
March 2021
Table of Contents
Compliance 5
WEEE 5
FCC 5
Pre-Installation 6
Unpacking the Product 6
Inventory 6
LED Signaling 6
Operating Voltage 6
Ventilation Requirements 7
Heat output 7
Cables and Plugs 7
Connecting 7
Home Automation System Integration 8
IP Control 8
Preparing for Mounting in a Rack 8
Rear Panel 9
Remote 10
How to Pair Remote 11
Switching the Remote to RF or IR Mode 11
Setup Procedure 12
Installation via OSD 13
Installation via Web Interface 13
HOME Screen 14
SETUP 14
Source 14
Create 14
Source name 14
Lipsync offset 14
Volume offset 14
Audio input 14
Default post processing 14
Default voicing 14
Video input 15
Preset vTuner station 15
Speaker configuration 15
Trigger out 15
Edit 15
Arrange 15
Delete 15

Steinway & Sons P300 2.1 Owner’s manual 3
Speaker and Room 16
Speaker Configuration 16
Manage 16
Verify speakers 16
RoomPerfect™ 16
Focus position 16
Edit distance 16
How to measure distances to speakers and subwoofers 16
How to Set Up RoomPerfect™ 18
Volume Setting 18
RoomPerfect™ Preparations 18
Placing the Microphone in the Focus Position 18
Measuring the Focus Position 19
Measuring Random Room Positions 19
Calculation of Focus and Global Filters 20
Video Setup 21
Video Output 21
Video Input 21
Video Settings 21
Audio 22
HDMI Bandwidth 22
Audio Setup 23
Audio Processing 23
Voicing Setup 23
Editing and adding voicings 23
Zone B 23
Setup 23
System Configuration 24
General Setup 24
Power management 24
Default volume settings 24
HDMI CEC settings 24
Display timeout 24
Password protection 24
Control of speaker setups 24
Show bypass 24
Enable front IR sensor 24
OSD info level 25
Trigger In Setup 25
Trigger Out Setup 25
Network Configuration 25
Streaming Setup 25

Steinway & Sons P300 2.1 Owner’s manual 4
Manage Software 26
Software Information 26
Network Information 26
Backup 26
Restore 26
Factory Reset 26
Software Update 26
Update from Local Files 26
Update via OSD Interface 27
Update from Remote Files 27
Troubleshooting 28
RoomPerfect™ 28
Error Messages 28
No microphone connected 28
Fault – No signal 28
Fault – Signal clipping 28
Fault – Low signal 28
Can’t Turn on via LAN or Control System 29
Retrieving and Sending an Error Log 29
3D Compatibility Not Detected 29
Remote Control Doesn’t Work 29
Network Setup 30
Connecting to Model P300 2.1 with a Network Cable 30
Set Up a Fixed IP Address in Windows XP or Windows 7 31
Set Up a Fixed IP Address in Windows Vista or Windows 10 32
Trademarks 33
Service Information 34

Steinway & Sons P300 2.1 Owner’s manual 5
Compliance
WEEE
The European Parliament and the Council of the European Union have issued the Waste Electrical
and Electronic Equipment Directive. The purpose of the Directive is to prevent waste of electrical and
electronic equipment and to promote reuse, recycling, and other forms of waste recovery. Steinway
Lyngdorf products and the accessories packed with them are subject to the WEEE Directive. Please
dispose of any waste materials in accordance with your local recycling regulations. Products and
equipment which must be collected for reuse, recycling, and other forms of recovery are marked with
the icon of the crossed-out waste receptacle.
FCC
Steinway Lyngdorf products and accessories comply with parts 15 and 68 of the FCC rules.
Operation is subject to the following two conditions: (1) this device may not cause harmful
interference; and (2) this device must accept any interference received, including any interference
that may cause undesired operation. Model A1/A2 amplifier and Model P300 2.1 processor contain
TX FCC ID: TYOJN5139M0.
Changes or modifications not expressly approved by the party responsible for compliance could void
the user’s authority to operate the equipment. Equipment marketed to a consumer must be capable
of complying with the necessary regulations in the configuration in which the equipment is marketed.

Steinway & Sons P300 2.1 Owner’s manual 6
Pre-Installation
Please read all material carefully prior to installation. If you need additional assistance, contact your
Steinway Lyngdorf representative or email servi[email protected].
Unpacking the Product
Carefully remove the unit and accessory kit from the carton and check for shipping damage. Contact
both the shipper and your Steinway Lyngdorf representative immediately if the unit bears any sign of
damage.
Note: Keep the shipping carton and all packing material for future use. If this unit is shipped
without the original packing, damage could occur and void the warranty.
Inventory
Check the list below to ensure that all necessary product components have been delivered. Report all
discrepancies to your Steinway Lyngdorf representative immediately.
Power cord
Link cable
Remote
LED Signaling
Red: Standby / On
Orange: Switching on
Blinking: Updating software
Operating Voltage
Steinway Lyngdorf products must be connected to the mains power system only. The Model P300 2.1
will automatically detect the voltage between 110-230v.

Steinway & Sons P300 2.1 Owner’s manual 7
Ventilation Requirements
The Model P300 2.1 does not have a built-in fan, nor does it require special measures to ensure
proper heat dissipation. However, it should be placed according to the guidelines below:
It should always have at least one inch of free space on all sides.
It should be placed in an environment free of excessive heat.
In a rack system, the Model P300 2.1 should be placed at the bottom of the rack.
Heat output
Maximum: 85W / 290 BTU/hr.
Cables and Plugs
Use only mains cables and power plugs approved by Steinway Lyngdorf. Using other types may
cause damage to the system and will void the warranty.
Connecting
For cabling between the processor and amplifiers, please use RJ45 to RJ45 B standard cables. Use
only cables and connectors approved by Steinway Lyngdorf. Poor quality cables may violate safety/
EMC regulations as well as cause noise and interference.
For cable lengths less than 1 meter, use CAT5E/shielded CAT6 cable.
For cable lengths in excess of 1 meter, use double-shielded CAT5E cables.
All RJ45 connectors should be shielded.
Please refer to the wiring diagram supplied by Steinway Lyngdorf to determine which cables you
need.

Steinway & Sons P300 2.1 Owner’s manual 8
Home Automation System Integration
The Model P300 2.1 is compatible with home automation systems via the RS232 and network
connector on the rear socket panel. The Model P300 2.1’s IR and trigger connections can also be
programmed for use in a home automation system.
IP Control
Open a TCP connection on port 84 and use the same protocol as on the serial interface (see Model
P300 2.1 Serial Control Manual). Use Telnet, Putty, or similar programs to open the TCP connection.
If you do not know the IP address of the Model P300 2.1 on your local network, the Model P300 2.1
supports Apple’s Bonjour Discovery service, which must be on the computer you want to set up the
Model P300 2.1 with. The software is built-in as part of the Apple OS X operating system (not iOS
devices). For Windows operating systems, the software can be found at
http://www.apple.com/support/bonjour/
Pressing the OK button on the remote and toggling through Info will also display the current IP
address of the unit.
Access the Model P300 2.1 by going to http://P300.local in your browser.
Preparing for Mounting in a Rack
The Model P300 2.1 processor is equipped from the factory with feet for free-standing placement on
a shelf, table, or rack.
To install the Model P300 2.1 in a rack:
Turn the Model P300 2.1 upside down and place it on a stable, even surface.
The screws used to fasten the rack brackets to the bottom of the Model P300 2.1 are in the holes
designated for the brackets when the product leaves the factory.
Fasten the brackets for rack mounting to the Model P300 2.1.
Mount the Model P300 2.1 in a rack.
Steinway & Sons P300 2.1 Owner’s manual 9
Rear Panel
On the back of the Model P300 2.1, you will find a range of inputs and outputs:
Various optical, coaxial, and analog stereo audio inputs.
5 HDMI inputs and 2 HDMI outputs. eARC on HDMI OUT 1
1 trigger input and 4 trigger outputs
2 IR inputs (IR in A and B) and 1 IR connector output (IR in B - duplicated)
2 LAN connectors:
LAN A for Ethernet connection on the local network. IP control is supported.
LAN B for connecting other products to the local network.
2 USB connectors, for music file playback, software updating, etc.
1 streaming USB input
1 SD card slot for storing backup data
1 microphone input for the RoomPerfect™ room correction microphone
1 RS-232 connector for serial control of the unit
1 16-channel DCI-compliant digital AES/EBU input (optional upgrade)
1 16-channel AES67 digital AES/EBU output (optional upgrade)
5 Digital Link outputs for connecting Steinway Lyngdorf’s amplifiers
Note: In Standby mode, only LAN A is active; LAN B connector is not active.
Note: HDMI 2.1 has a higher bandwidth and requires HDMI 2.1 8K compliant cables.
Please check that the cable is HDMI certified with a “HDMI 2.1 Ultra High Speed“ label.
Note: Using optical HDMI cables will require using an USB connection for power supply, as
the HDMI connector provides max. 5V/50mA. Please check that the cable is HDMI certified.

Steinway & Sons P300 2.1 Owner’s manual 10
Remote
The Model P300 2.1 comes with a dedicated RF and IR remote control for installations and everyday
use.
Setup Access the installation menu.
Standby Turn the Model P300 2.1 on and into standby.
Audio Access the post-processing menu.
PiP “Picture-in-picture” and other multi-view formats.
Up/Down Move up and down in menus.
Browse available settings in a menu.
Toggles between the available RoomPerfect™ filters.
Left/Right Move left and right in menus.
Toggle between neutral and the available voicings.
OK Activate the info screen, indicating the status of the unit.
Select a menu and store a selected setting.
Back Return to the previous menu.
Menu Access the user menu.
SRC Access the source menu list.
Source -/+ Toggle between active sources.
Volume +/- Turn volume up and down.
Mute Mute and restore the sound.
Play/Pause Play/pause the currently playing track of the media player.
Skip Forward / Skip in the current playlist in the media player.
Backwards

Steinway & Sons P300 2.1 Owner’s manual 11
How to Pair Remote
The remote control is paired to the Model P300 2.1 at the factory, and you only need to pair it again if
you have a new Model P300 2.1 or remote. To pair the RF remote control to a Model P300 2.1:
Turn on the Model P300 2.1.
Hold down the Play & OK buttons until the remote control’s green LED flashes.
Point the remote control at the Model P300 2.1 and hold it within 30cm / 1 foot of the front panel;
when the green LED stops blinking, the remote is connected via Zigbee.
The remote will be paired to the Model P300 2.1.
To reset the pairing of the remote control, press Back and OK until the red LED flashes twice.
Switching the Remote to RF or IR Mode
To switch the remote from RF to IR mode, hold down the OK and 1 buttons. The LED will flash red
twice.
To switch the remote from IR to RF mode, hold down the OK and 2 buttons. The LED will flash green
twice.

Steinway & Sons P300 2.1 Owner’s manual 12
Setup Procedure
Set up the Model P300 2.1 surround sound processor by following these steps:
Check that the mains voltage switches on the A1/A2 amplifiers is correctly set to either 115V or 230V.
ID-assign all Model A1/A2 amplifiers via dip-switches on the A1/A2 socket panel according to the
project-specific wiring diagram.
Connect speakers to the Model A1/A2 amplifiers.
Connect Model A1/A2 amplifiers to the Model P300 2.1 as shown in the project-specific wiring
diagram.
Connect all external equipment, such as a Blu-ray player or home automation system, to the Model
P300 2.1, including inputs, outputs, and mains.
Connect power to the Model P300 2.1, the amplifiers, and all connected audio and video sources.
Switch on the Model P300 2.1.
Access Installer menu via Web or the remote and OSD.
Go to Speaker and room - -> Manage and add the Speaker Configuration file from a USB stick.
Verify speaker setup by going to Speaker and room, select your speaker configuration and press
Right on the remote to select the setup. At the bottom of the screen, select and press Verify
Speakers.
Check speaker phases (refer to speaker owner’s manuals).
Run RoomPerfect™ Guided Setup.
Set up sources, zones, etc.
Save and back-up settings.

Steinway & Sons P300 2.1 Owner’s manual 13
Installation via OSD
We recommend setting up the Model P300 2.1 via the OSD setup guide. Connect a screen to the
Model P300 2.1 using any of the video output sockets on the back. Access the menu system by
pressing the Setup button on the remote control.
Note: There are some differences between the options available via the web interface and
OSD. This is a description of how to set up via the web interface.
Installation via Web Interface
You will need a computer, and the Model P300 2.1 must be connected to an existing network, or you
may use a crossover network cable for direct connection.
If you do not know the IP address of the Model P300 2.1 on your local network, the Model P300 2.1
supports Apple’s Bonjour Discovery service, which must be on the computer you want to set up the
Model P300 2.1 with. The software is built-in as part of the Apple OS X operating system (not iOS
devices). For Windows operating systems, the software can be found at
http://www.apple.com/support/bonjour/
Access the web menu by typing http://P300.local/ in your browser.
Alternatively, you can connect a screen to the Model P300 2.1 using any of the video output sockets
on the back. Access the menu system by pressing the Setup button on the remote control.
Pressing the OK button on the remote and toggling through Info will display the IP address of the unit.

Steinway & Sons P300 2.1 Owner’s manual 14
HOME Screen
The HOME screen refers to the daily operation as performed with the remote control. The page
displays selected input and formats.
Loudness management turns on a traditional loudness function for low playback level as well as
functions dedicated to the specific formats being decoded. These functions are managed in the setup
menu: Audio Setup / Audio Processing.
The interface for controlling the built-in media streamer is found in the bottom section of this page.
For information as to the use of the interface see section for Streaming Setup.
SETUP
The SETUP screen refers to all basic settings and option in the installation of the processor.
Source
In the Source menu, you can register the individual sources connected to the Model P300 2.1 by the
audio and/or video input sockets they use.
Create
Source name
Input the name for the source.
Lipsync offset
Set delay time in milliseconds to ensure that the video and audio signals are played back
simultaneously.
Volume offset
Enables you to match input levels from different sources.
Audio input
Select the audio input.
Default post processing
Select the default audio mode.
Default voicing
Select the default voicing.

Steinway & Sons P300 2.1 Owner’s manual 15
Video input
Select the video input.
Preset vTuner station
Select and preset a vTuner internet radio station.
Speaker configuration
Select which speaker configuration to use.
Trigger out
Choose which trigger output to activate when using this source.
Audio input
Select the audio input.
This procedure must be followed for all connected sources.
Edit
Edit all enabled sources.
Arrange
Arrange the order of sources by making a prioritized list.
Delete
Delete enabled sources.
Remember to press accept after making selections.

Steinway & Sons P300 2.1 Owner’s manual 16
Speaker and Room
The Speaker and Room menu provides information about the current speaker configuration, allowing
you to select a configuration that is stored on the Model P300 2.1, on a laptop, or on a connected
memory stick.
Speaker Configuration
Manage
Add or delete speaker config files.
To add a file, insert a USB stick with the speaker configuration file you have received from your
Steinway Lyngdorf representative, select the file and press Add. The speaker configuration will be
added to the Speaker Configuration list. After adding the speaker configuration, it will be visible as a
menu below Speaker Configuration. Press Left on the remote to select it.
Verify speakers
Press the Verify Speakers button to verify your setup.
RoomPerfect™
Focus position
The focus filter improves the sound quality at a specific listening position. This makes the focus filter
the best solution for optimal sound quality at a single listening position.
It is possible to add multiple focus positions. This must be done after RoomPerfect™ has
been set up completely.
Edit distance
Be sure to select the unit of measure, then enter the distances to the speakers and woofers.
How to measure distances to speakers and subwoofers
The best results are obtained by using a laser-equipped measuring device. Before starting, place the
RoomPerfect™ microphone at listening height in the main listening position. For each channel,
measure the straight-line distance through the air from the tip of the RoomPerfect™ microphone to
the center of the tweeter unit in the loudspeaker in question. Do not measure distances at floor level,
as these measurements will not give acoustically accurate results.
When measuring distances to in-room boundary subwoofers:
If the stack of subwoofers is taller than the listening position, measure the distance from the listening
position to the back edge of the middle of the stack of subwoofers.

Steinway & Sons P300 2.1 Owner’s manual 17
If the subwoofers are lower than the listening position, measure the distance from the listening
position to the back edge of the top subwoofer.
When measuring distances to in-wall boundary subwoofers:
If the stack of subwoofers is taller than the listening position, measure the distance from the listening
position to the dust cap of the middle of the stack of subwoofers.
If the subwoofers are lower than the listening position, measure the distance from the listening
position to the top dust cap of the top subwoofer.
If in doubt, contact your Steinway Lyngdorf representative for guidance.
Do not measure distances at floor level, as these measurements will not give acoustically
accurate results.

Steinway & Sons P300 2.1 Owner’s manual 18
How to Set Up RoomPerfect™
The RoomPerfect™ microphone is a very sensitive and finely calibrated device which must
be treated with utmost care. If the microphone has been dropped on the floor, it may be
damaged. If this is the case, obtain a new microphone from your Steinway Lyngdorf
representative before performing the system calibration.
Volume Setting
The system guides you through the selection of a proper calibration volume level. Follow the
instructions on the display to find the optimal volume setting for doing the calibration.
You can choose to use a volume setting other than the one requested by the system by choosing
Use Current. The calibration will not be inferior in quality, but the time required for an exact
measurement will be longer. If the volume setting is too high, the system will display “Error –
Clipping”. Reduce the volume and try again.
RoomPerfect™ Preparations
Place the RoomPerfect™ calibration microphone on the stand. Be sure to fasten the screws properly
so the microphone does not move during a measurement.
Plug the supplied microphone cable into the microphone.
Connect the microphone cable to the microphone terminal on the rear panel of your processor.
Placing the Microphone in the Focus Position
When you are prompted to place the microphone in the focus position, connect the microphone to the
microphone input on the back panel and place the microphone, using the microphone stand, in your
primary listening position. The height and the orientation of the microphone should correspond to
your head’s height and direction.
Press Enter and a test signal will start from the left speaker. The system will give an estimated
optimal volume for calibrating the system or will accept the current volume. Adjust the volume if
required and retry the measurement.
The calibration volume should not be so loud that it is inconvenient to you, or that it causes damage
to your loudspeakers. If this is the case, set it to a lower and more appropriate level. A low volume
can result in a longer calibration time or a measurement time-out. A low volume and long
measurement will not affect the quality of the end result.

Steinway & Sons P300 2.1 Owner’s manual 19
Measuring the Focus Position
When the calibration volume has been set, RoomPerfect™ will send a range of tones to measure the
focus position.
If there is noise in the room, the measurement may take longer. This will not affect the quality of the
end result.
See RoomPerfect™ troubleshooting if the measurement stops prematurely, and then retry the
measurement.
Measuring Random Room Positions
When the focus position has been measured, the next step is to measure the acoustical properties of
the room. It is important to perform well spaced measurements to get a comprehensive image of the
acoustical properties of the room. See RoomPerfect™ troubleshooting if the measurement stops
prematurely.
Keep taking measurements until RoomKnowledge reaches 90%.
These are the rules of thumb when measuring the room:
The microphone should be in random and varying positions, heights, and orientations. Point it
up/down/sideways, the more random positions the better.
The measurements should cover the entire room, not only your listening area.
Do not take measurements behind plants, furniture, etc.

Steinway & Sons P300 2.1 Owner’s manual 20
The microphone should not be closer than 0.5m/1.5ft from the floor, ceiling, and walls.
The microphone should be at least 1m/3ft from the front of the loudspeakers.
There should be at least 50cm/1.5ft between each measurement.
Do not take symmetrical measurements in the room.
Calculation of Focus and Global Filters
When room measurements are complete, the system will calculate the focus and global filters
automatically.
This manual suits for next models
1
Table of contents
Other STEINWAY LYNGDORF Recording Equipment manuals

STEINWAY LYNGDORF
STEINWAY LYNGDORF P1 User manual

STEINWAY LYNGDORF
STEINWAY LYNGDORF D User manual

STEINWAY LYNGDORF
STEINWAY LYNGDORF Steinway & Sons P300 User manual

STEINWAY LYNGDORF
STEINWAY LYNGDORF P1 User manual

STEINWAY LYNGDORF
STEINWAY LYNGDORF P200 Use and maintenance manual

STEINWAY LYNGDORF
STEINWAY LYNGDORF P200 User manual