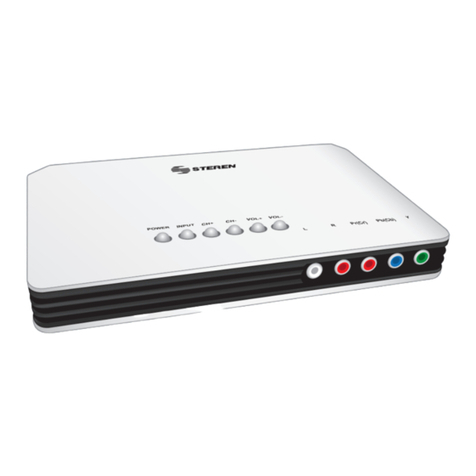
Steren COM-260 User manual

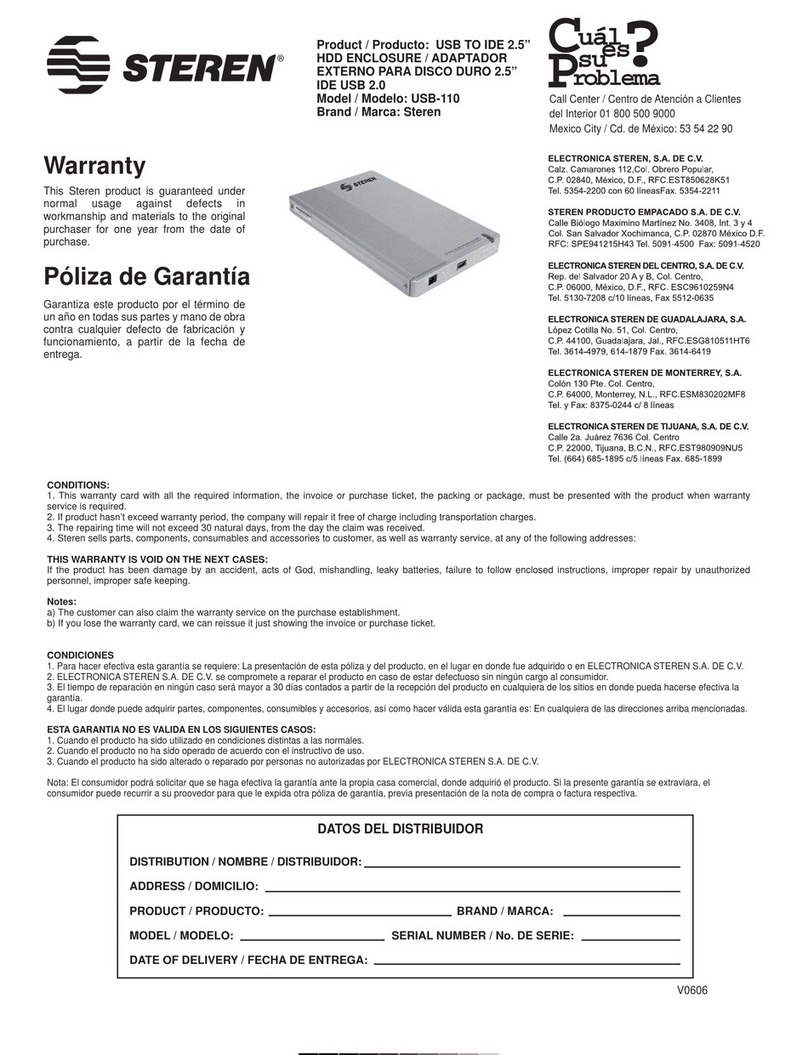
Product / Producto:
Model / Modelo:
Brand / Marca:
TV TO VGA MONITOR
PIP & POP ADAPTER
AND TUNER /
ADAPTADOR Y
SINTONIZADOR DE TV
A VGA CON PIP Y POP
COM-260
STEREN
CONDICIONES
1. Para hacer efectiva esta garantía se requiere: La presentación de ésta póliza y del producto, en el lugar en donde fue adquirido o en ELECTRONICA STEREN S.A. DE C.V.
2. ELECTRONICA STEREN S.A. DE C.V. se compromete a reparar el producto en caso de estar defectuoso sin ningún cargo al consumidor.
3. El tiempo de reparación en ningún caso será mayor a 30 días contados a partir de la recepción del producto en cualquiera de los sitios en donde pueda hacerse efectiva la
garantía.
4. El lugar donde puede adquirir pártes, componentes, consumibles y accesorios, así como hacer válida esta garantía es: En cualquiera de las direcciones arriba mencionadas.
ESTA GARANTIA NO ES VALIDA EN LOS SIGUIENTES CASOS
1. Cuando el producto ha sido utilizado en condiciones distintas a las normales.
2. Cuando el producto no ha sido operado de acuerdo con el instructivo de uso.
3. Cuando el producto ha sido alterado o reparado por personas no autorizadas por ELECTRONICA STEREN S.A. DE C.V.
Nota: El consumidor podrá solicitar que se haga efectiva la garantía ante la propia casa comercial, donde adquirió el producto. Si la presente garantía se extraviara, el
consumidor puede recurrir a su proovedor para que le expida otra póliza de garantía, previa presentación de la nota de compra o factura respectiva.
DATOS DEL DISTRIBUIDOR
DISTRIBUTION / NOMBRE /DISTRIBUIDOR:
ADDRESS / DOMICILIO:
PRODUCT / PRODUCTO: BRAND / MARCA:
MODEL / MODELO: SERIAL NUMBER / No. DE SERIE:
DATE OF DELIVERY / FECHA DE ENTREGA:
Call Center / Centro de Atención a Clientes
del Interior 01 800 500 9000
Mexico City / Cd. de México: 53 54 22 90
This Steren product is warranted under
normal usage against defects in
workmanship and materials to the original
purchaser for one year from the date of
purchase.
Garantiza este producto por el término de
un año en todas sus partes y mano de
obra contra cualquier defecto de fabricación
y funcionamiento, a partir de la fecha de
entrega.
Warranty
CONDITIONS:
1. This warranty card with all the required information, the invoice or purchase ticket, the product box or package, and the product, must be presented with the product
when warranty service is required.
2. If the product stills on the warranty time, the company will repair it free of charge even the transportation charges.
3. The repairing time will not exceed 30 natural days, from the day the claim was received.
4. Steren sells parts, components, consumables and accessories to customer, as well as warranty service, at any of the following addresses:
THIS WARRANTY IS VOID ON THE NEXT CASES:
If the product has been damage by an accident, acts of God, mishandling, leaky batteries, failure to follow enclosed instructions, improper repair by unauthorized
personal, improper safe keeping or otherwise.
Notes:
a) The customer can also claim the warranty service on the purchase establishment.
b) If you lose the warranty card, we can reissue it just showing the invoice or purchase ticket.
Póliza de Garantía

STEREN recomienda que antes de usar su nuevo Adaptador y
Sintonizador de TV para Monitor de PC con PIP y POP lea este
manual de instrucciones para prevenir cualquier mal funcionamiento.
Gracias por haber adquirido su nuevo Adaptador y Sintonizador de
TV para Monitor de PC con PIP y POP, tenga la seguridad que está
adquiriendo un equipo con tecnología de vanguardia.
¿Qué es el COM-260?
El COM-260 es un equipo que le posibilita ver la TV y/o TV por
cable en el monitor de su PC. Le permite conectar al monitor de su
PC, consolas de video juegos o dispositivos como DVD, VCR,
video-cámaras, etc. y manejarlos con un control remoto. Convierte
el monitor de su PC en una TV multimedia con PIP (Picture In
Picture) y POP (Picture On Picture).
Accesorios Incluidos
1. Unidad principal modelo COM-260
2. Control remoto
3. Base de plástico
4. Convertidor de Voltaje ca/cc
Entrada: 120 V ~ 60 Hz 18 W Fig. 1
Salida: 12 V 500 mA
5. Un cable de audio de 3,5mm
6. Un cable VGA
7. Dos pilas AAA
CARACTERISTICAS
STEREN recommends before use the TV to VGA Monitor PIP &
POP Adapter & Tuner to read this instruction manual to prevent any
damage
Just follow these instructions and easily you will be using your new
TV to VGA Monitor PIP & POP Adapter & Tuner
What is COM-260?
COM-260 is a system which allows you to watch the TV or CATV on
the PC monitor.
You can connect to PC monitor: video games, DVD, VCR, video
cameras and control them with a remote control. PC monitor will
perform like a multimedia TV with PIP (picture in picture) and POP
(picture on picture)
Accesories Included
1. Main unit COM-260 model
2. Remote control
3. Plastic stand
4. ca/cc adaptor
Input: 120 V ~ 60 Hz 18 W
Output: 12 V 500 mA
5. 3,5mm audio cable
6. VGA cable
7. Two AAA batteries
FEATURES
Tecnología conecte y opere (Plug & Play). No requiere software.
Todos los canales, 181 canales en formato NTSC (CATV 125,
Libres 83); 106 canales en formato PAL.
4 resoluciones diferentes, 1024 x 768/ 800 x 600/ 640 x 480/
852 x 480 (Mac).
Diseño con base, que permite colocarlo de manera horizontal
o vertical.
Control remoto de función completa.
Conectores de A/V y S-video en el panel frontal, para operación
diaria.
Funciones de TV ajustables: brillo, tinte, color, etc.
Funciones de auto-exploración: nunca pierde un canal.
MTS (opción NTSC), NICAM (opción PAL)
Entrada y salida de audio.
Entrada y salida de VGA.
-
-
-
-
-
-
-
-
-
-
-
Plug & Play technology. No software required
Full channel, NTSC, 181 CH (CATV 125, Air 83CH); PAL 106 CH
4 different resolution, 1024 x 768/ 800 x 600/ 640 x 480/ 852
x 480 (Mac)
A stand that can be placed upright or horizontal
Full-function remote control.
A/V and S-Video connectors on front panel, to daily operation.
TV setups: brightness, hue, color, etc.
Auto–scan functions: never miss the channel
MTS (option NTSC), NICAM (option PAL)
Audio in and out
VGA in and out
-
-
-
-
-
-
-
-
-
-
-
Fig. 1 Fig. 1
- - -
- - -

PANEL FRONTAL
PANEL TRASERO
CONEXION BASICA
FRONT PANEL
REAL PANEL
CONNECTION
Cubierta
semi-transparente
La ventana del receptor
de la señal de IR del
control remoto
Energía
Oprima este botón para
cambiar el modo de operación
Entrada
Modo de entrada, en ciclo
CH +/-
Volumen +/-
Entrada de audio
Entrada de video
Entrada de s-video
PC TV CVBS S-Video
Entrada de Cable
Conector F p/antena o CATV
Video Output
Only valid in TV mode
AUDIO IN
3.5 Stereo connector for
connecting to output PC Sound
Card
DC 12V
Power input connector for
AC/DC adaptor supplied
Speaker
3,5mm stereo connector
to connect to speaker
To Monitor
CHD-15 VGA female
connector to connect LCD
or CRT
VGA in
HD-15 VGA female
connector to connect VGA
output port of VGA card
DVD/VCD
HiFi-VCR
Cámara
Panel Frontal
GAMECUBE
PS2
TM
TM
X-BOX
TM
Semi- transparent cover
The receiving window of IR
Signal from remote control
Power
Source switch, you can
push this button to change
the operation mode
INPUT
Switch for different mode,
this is a cyclic procedure
CH +/-
Volume +/-
Audio Input
Video Input
S-Video Input
PC TV CVBS S-Video
Salida de Video
Válido solo en modo TV
Entrada de Audio
Conector 3,5mm p/conectar
a la salida de la tarjeta de
sonido de la PC
12V
Entrada de Adaptador
Altavoz
Conector de 3,5mm estereo
Salida al Monitor
Conector hembra VGA
HD - 15 para LCD o TRC
Entrada de VGA
Conector hembra VGA
HD- 15 para tarjeta de PC
DVD/VCD
HiFi-VCR
Camcorder
Front View
GAMECUBE
PS2
TM
TM
X-BOX
TM
CABLE IN
Conector F p/antena o CATV
- - - - - -

CONEXIÓN
1) Conexión a LCD o TRC (con esta conexión sólo tendrá función
de TV)
a. Tome la unidad principal COM-260, colóquela horizontal o
verticalmente a un lado de su LCD o TRC.
b. Conecte la antena o CATV a la entrada marcada CABLE IN del
panel trasero.
c. Tome el cable VGA del TRC o LCD, inserte a la entrada TO
MONITOR en el panel trasero, apriete los tornillos. Es importante
asegurar con los tornillos ya que un falso contacto ocasionará
distorsión en la imagen.
d. Tome el conector de sus bocinas multimedia (el conector debe
ser de 3,5mm tipo estéreo), conecte al panel trasero en SPEAKER.
e. Tome el convertidor de tensión ca/cc (incluido) revise que el
voltaje corresponda al suministrado por la red local. Inserte el
convertidor en el contacto y posteriormente inserte el conector al
panel trasero en “DC 12 V”.
f. Encienda su TRC o LCD, presione el botón POWER a modo de
TV. Si aparece la pantalla de TV en su LCD o TRC, ha finalizado su
instalación.
2) Conexión a la computadora (al finalizar la instalación, tendrá la
opción de utilizar como TV o PC)
a. Tome la unidad principal del COM-260, colóquela horizontal o
verticalmente a un lado de su TRC o LCD.
b. Conecte la antena o CATV a la entrada marcada CABLE IN del
panel trasero.
c. Tome el cable VGA del TRC o LCD, inserte a la entrada TO
MONITOR en el panel trasero, tome el cable VGA (incluido) conecte
un extremo a la entrada VGA IN del COM-260 y el otro extremo a la
tarjeta VGA. Apriete los tornillos. Es muy importante asegurar con
los tornillos ya que un falso contacto ocasionará distorsión en la
imagen.
CONNECTION
1) Connection to LCD or CRT (With this installation you will have a
TV function only)
a. Take the main unit, let it upright or horizontal placed beside your
CRT or LCD.
b. Connect antenna or CATV cable to the “CABLE IN” on the back
panel of COM-260.
c. Take VGA cable of CRT or LCD, connect the HD-15 VGA
connector TO MONITOR on the back panel, fasten the screws. It is
very important to fasten the screws, to loose connection will cause
the distortion of picture.
d. Take the connector of your multimedia speaker (the connector
should be 3,5mm male stereo type), connect to SPEAKER on the
back panel.
e. Take out AC/DC adaptor (included), check the voltage of your
outlet of AC power is the same rating with the adaptor. Hook the
AC/DC adaptor to the outlet, connect the output of DC to DC12V on
the back panel.
f. Turn on the power of CRT or LCD, then push POWER button to
TV mode. If there is TV screen on your CRT or LCD, you have
finish the installation.
2) Connection to computer (With this installation you will have a TV
function and you can also use your PC)
a. Take the main unit, let it upright or horizontal placed beside your
CRT or LCD.
b. Connect antenna or CATV cable to the “CABLE IN” on the back
panel.
c. Take VGA cable of CRT or LCD, connecting the HD-15 VGA
connector TO MONITOR on the back panel. Then take the VGA
cable (supplied), connect one end to VGA IN on COM-260, another
end to VGA card. Fasten the screws.
Antena ó CATV
Cable de Audio
Cable VGA
Monitor LCD
Adaptador de Energía
Cable VGA
Tarjeta VGA
Cable de Audio
Tarjeta de Audio
Panel Trasero
Panel Trasero
Bocinas
b.
d.
c.
Bocinas
e.
TRC ó LCD
CA / CD
Adaptador
Antenna or CATV
Audio Cable
VGA Cable
Monitor or LCD
Power Adaptor
VGA Cable
VGA Card
Audio Cable
Sound Card
Back Panel
of a PC
Back View
Speaker
b.
d.
c.
Speaker
e.
CRT or LCD
AC / DC
Adaptor

d. Tome el conector de sus bocinas multimedia (el conector debe ser de
3,5mm tipo estéreo), conecte al panel trasero en SPEAKER.
e. Tome el cable de audio (incluido) de 3,5mm y conecte un extremo a
la salida de las bocinas de la tarjeta de sonido de la computadora, el
otro extremo a AUDIO IN del COM-260.
f. Tome el convertidor de tensión ca/cc (incluido), revise que el voltaje
corresponda con el suministrado por la red local. Inserte el convertidor
en el contacto y posteriormente inserte el conector al panel trasero en
DC 12 V.
g. Encienda su TRC o LCD, presione el botón POWER a modo de TV.
Si aparece la pantalla de TV en su LCD o TRC, ha finalizado su
instalación.
3) Conexión a una consola de juegos, V8 u otras aplicaciones de
video, siga primero este procedimiento.
Si su fuente de video solo tiene salidas RCA, siga estos pasos:
a. Inserte los conectores RCA a la salida de su juego de TV, DVD o
VCR (siga el código de color)
b. Inserte el otro extremo del cable de RCA a “A/V Input” en el
panel frontal (siga el código de color)
c. Encienda el COM-260 y su fuente de video.
d. Seleccione el modo de POWER a modo de TV. Cambie la fuente
a “CVBS”
e. Presione el botón de PLAY en su dispositivo de video, si ve la
imagen, su instalación ha terminado.
Si su fuente de video tiene conector S-video, por favor siga estos pasos:
a. Inserte el conector S-video y los 2 conectores RCA de audio a la
salida de su consola de juegos, DVD o VCR (el conector de S-video
tiene una entrada especial, encuentre la orientación correcta, no lo
fuerce o se dañará)
b. Inserte el conector S-video al COM-260 y los 2 conectores RCA
de audio a AUDIO en el panel frontal.
c. Encienda el COM-260 y su fuente de video.
d. Seleccione el modo POWER a modo TV. Cambie la fuente a “S-video”
e. Presione el botón PLAY en su fuente de video, si ve la imagen su
instalación es satisfactoria.
d. Take the connector of your multimedia speaker (connector should
be 3,5mm male stereo type), connect to SPEAKER on the back
panel.
e. Take the supplied 3,5mm audio cable, connect one end to
speaker out of sound card of computer, another end to AUDIO IN of
COM-260
f. Take the AC/DC adaptor, check the voltage of your outlet of AC
power is the same rating with the adaptor. Hook the AC/DC adaptor
to the outlet, connect the output of DC to DC 12V on the back panel
g. Turn on the power of CRT or LCD, then push POWER button to
TV MODE. If there is TV screen on your CRT or LCD, you have
finished the installation
3) Connection to TV Game console, V8 or another video appliances.
If your video source is only RCAoutput, please follow the steps
a. Connect the RCA connector to the output of your TV game, DVD or VCR
(connection cable should be color coded, yellow for video, white for audio L,
red for audio R)
b. Connect the other end of RCA to the “A/V Input” on the front panel
(connection cable should be color coded, yellow for video, white for audio L,
red for audioR)
c. Turn on the power of COM-260 and video your appliance.
d. Select the POWER mode to TV MODE. Change the source to “CVBS”
e. Push the PLAY key on your video device. If you see the picture your
installation is completed.
If your video source has S-Video, please follow the steps below
a. Connect the S connector and 2 audio RCA connectors to the output of
your TV game, DVD or VCR (S-Video connector has special connector, find
the right orientation, never push too heavily otherwise the S-connector will
be broken)
b. Connect the S-connector to the “S-Video” on the COM-260 and 2 audio
RCA connectors to AUDIO on the front panel
c. Turn on the power of COM-260 and your video appliance
d. Select the POWER mode to TV MODE. Change the source to S-VIDEO
e. Push the PLAY key on your appliance, if you see the picture your
installation is completed. .
Tarjeta de Sonido
Tarjeta VGA
b,
d.
c.
e.
f.
DVD VCR
Cámara
PS2
X-BOX GC
MR MR
MR
Sound Card
VGA Card
b,
d.
c.
e.
f.
DVD VCR
Movie Camare
PS2
X-BOX GC
Tm Tm
Tm
Control Remoto
Descripción de los botones
OPERACION
1) MTS (opcional): Si tiene la opción MTS (NTSC) o NICAM (PAL)
en su COM-260 y está viendo un programa de TV, puede presionar
este botón para seleccionar la salida de audio. (No todos los
programas de TV tienen MTS, si quiere tener esta función, revise
que su estación de TV o su operador de CATV para más información)
2) POWER:
En condición de operación normal, el COM-260 esta en modo TV.
Presionando el botón POWER cambia entre modo TV y PC. Si su
PC está apagada, cuando usted oprima el botón de modo PC, no
aparecerá ninguna imagen en la pantalla. Igualmente, cuando cambie
a modo TV, la señal de CATV/TV se puede perder y no habrá
imagen si la conexión de la fuente no coincide con la entrada de la
fuente seleccionada.
3) MUTE: Si quiere silenciar la salida de audio, oprima el botón
MUTE, si quiere reanudar el audio presione otra vez MUTE o
presione VOL + y el audio regresará. Esta función solo trabajará en
el modo de TV.
Remote Control
Key description
OPERATION
1) MTS (option)
If you have the MTS (NTSC) or NICAM (PAL) option on your COM-260
and you are watching TV program, you can push this button to select
your audio output. (Not all TV program has MTS, if you want to have this
function, check your TV station or CATV operator for further information)
2) POWER
In normal operating condition, COM-260 is in TV MODE. Push this
button to switch between TV and PC mode. If your PC is off, there
will be no picture on your screen, when you push this button to PC
mode. And same way, when you change to TV mode, your video or
CATV/TV signal will be lost, and no picture if the signal source
connection is not coincident with the input source setting.
3) MUTE
Press this button to mute audio out. To resume press it again or
press VOL +. This key will work only on TV mode.
Control de Volumen
Encendido/ Apagado
INPUT
Control de Volumen
EXIT
Teclado Numérico
Ultimo Canal Seleccionado
imagen sobre imagen
Apagado por Tiempo
9 Canales
MTS(SC)
Silencio
CH+/-
Seleccionar
Menu
SCAN
RES
OSD
STEREO
Presionar "MTS" Presionar "MTS"
Presione "Encendico"
CATV IN
Presione "MUTE"
0 40 MUTE
Volume Control
Power ON/OFF
INPUT
Volume Control
EXIT
Numeric Key
RCL: Last Channel Recall
PIP (Picture in Picture)
Sleep Timer
9 Channel
MTS(SC)
MUTE
CH+/-
Select
Menu
SCAN
RES
OSD
MONO SAP STEREO
Press "MTS" Press "MTS"
Press "Power"
CATV IN
Press "MUTE"
0 40 MUTE
CH+/- (Channel)
CH+/- (Canal)
MONO SAP

4) INPUT:
Selección de la fuente de señal. Existen diferentes fuentes para el
COM-260. Oprima este botón para seleccionar la fuente, la selección
es en ciclo cerrado según figura:
5) CHANNEL+/-:
Oprima los botones para retroceder o avanzar al siguiente canal.
Estos botones sólo funcionan en modo TV.
6) SELECT:
Este botón trabaja con el botón MENU cuando ajusta la caja de TV
del COM-260, necesita presionar este botón para confirmar.
7) VOL+/-:
Puede subir o bajar el volumen de la salida de audio. Este botón
sólo funciona en modo TV.
8) MENU:
Ajuste del COM-260, tiene 6 funciones disponibles.
Si no está familiarizado con esta función se recomienda no
utilizarla ya que puede distorsionar la imagen.
Cuando presione MENU mostrará el siguiente mensaje en su pantalla:
A. Input: Fuente del COM-260.
Al elegir esta opción tendrá otras 4 opciones disponibles (ver
pantalla), seleccione la que desee y presione SELECT en el control
remoto y finalice su selección
4) INPUT
Selection of signal sources. There are different sources for COM-
260. Push this button to select a source. Selection is a cyclic
procedure and only valid in TV mode:
5) CHANNEL+/-
Push these buttons to channel up or down. These keys are only
valid under TV mode.
6) SELECT
This key works with MENU key, when you adjust the COM-260 TV
box. You need to push this button to confirm.
7) VOL+/-
Press the buttons to up or down the volume on the audio output.
These keys are valid only under TV mode.
8) MENU
Adjustment of COM-260. There are 6 items available
If you are not so familiar with the adjustment, we strongly recommend
you not to use this function. Otherwise you will experience the distortion
ofpicture.
Press MENU button, there will show the following message on your screen
A. Input: Source of the COM-260
When you choose this function there are 4 selections available
(shown on your screen), select what you like. Then press SELECT
key on the remote control and finish the selection.
CATV IN CVBS S-VIDEO IN
TV CVBS S-Video
V)
A
V( PC
Presionar "INPUT" Presionar "INPUT" Presioinar "INPUT"
CH47 CH48
Presionar
SELECT
VOL VOL
CH
CH
001 01 40
Presionar
1. Input
2. Picture
3. TV function
4. Resolution
5. OSD function
6. Language
7. Reset
MENU
1. Input
2. Picture
3. TV function
4. Resolución
5. OSD function
6. Language
7. Reset
1. TV
2. CVBS
3. S-Video
4. PC
Al presionar input
obtendra 4 submenus
MENU
CATV IN CVBS S-VIDEO IN
TV CVBS S-Video
V)
A
V( PC
Press "INPUT" Press "INPUT" Press "INPUT"
CH47 CH48
Press
SELECT
VOL VOL
CH
CH
Press
1. Input
2. Picture
3. TV function
4. Resolution
5. OSD function
6. Language
7. Reset
MENU
1. Input
2. Picture
3. TV function
4. Resolución
5. OSD function
6. Language
7. Reset
1. TV
2. CVBS
3. S-Video
4. PC
Choose Source then
press Select, 4 items
show up
MENU

B. Picture: fija el parámetro de la Imagen.
Luego de seleccionar la función Picture debe presionar SELECT en
el control remoto. Aparecerán 5 opciones de esta función, si quiere
realizar algún ajuste necesita seleccionar la función y presionar
SELECT en el control remoto, después realice los ajustes.
ajuste hacia abajo, ajuste hacia arriba.
Brightness: ajusta el brillo en la pantalla.
Contrast: ajusta el contraste en la imagen.
Color: ajusta el color de la imagen.
Hue: ajusta la saturación de color.
Sharpness: ajusta agudeza de la imagen.
C. TV function
Cuando seleccione la función TV, presione SELECT en el control
remoto, aparecerán 6 opciones de esta función. Elija la que desea
ajustar, presione SELECT y realice los ajustes.
ajuste hacia abajo, ajusta hacia arriba.
TV System: CATV, AIR 2 opciones (solo para NTSC).
Channel Edit: adicionar, borrar 2 opciones.
Fine tune: Sintonía fina de la frecuencia de TV.
MTS Mono. Estéreo, SAP: 3 opciones (solo para NTSC).
Full Scan: Explora la frecuencia del canal.
Channel Scan: Explora el canal con la frecuencia interna map.
D. Resolution
Cuando seleccione la función de resolución, presione SELECT en
el control remoto, aparecerán 8 funciones a elegir. Seleccione la
que desea ajustar y presione SELECT en el control remoto para
realizar el ajuste.
640 x 480 60 Hz/ 800 x 600 60 Hz/ 852 x 480 60 Hz/ 1024 x 768 60 Hz
640 x 480 75 Hz/ 800 x 600 75 Hz/ 852 x 480 75 Hz/ 1024 x 768 75 Hz
B. Picture: setting of picture parameter
Choose picture function and press SELECT on remote control,
there will be 5 selections. You can choose different setting. If you
want to do the adjustment you need to highlight the item you want,
then press SELECT on remote control, then do the adjustment. ---
key is to adjust lower, key to adjust higher.
Brightness is to adjust the brightness on your screen
Contrast is to adjust the contrast of the picture
Color is to adjust the color of the picture
Hue is to adjust the saturation of color
Sharpness is for adjusting the sharpness of picture
C. TV function
Choose TV function and press SELECT on remote control, there will be 6
selections. You can choose different setting. If you want to do the
adjustment you need to highlight the item you want, then press SELECT on
remote control, then do the adjustment.
key is to adjust lower, key to adjust higher.
TV System CATV, AIR 2 selection (only for NTSC)
Channel Edit add, erase 2 selection
Fine Tune: fine tuning of the TV frequency
MTS Mono. Stereo, SAP 3 selections (only for NTSC)
Full Scan: Scan the channel with frequency
Channel Scan: scan the channel with internal frequency map.
D. Resolution
Choose TV function and press SELECT on remote control, there
will be 8 selections. You can choose different setting. If you want to
do the adjustment you need to highlight the item you want, then
press SELECT on remote control, then do the adjustment.
640 x 480 60 Hz/ 800 x 600 60 Hz/ 852 x 480 60 Hz/ 1024 x 768 60 Hz
640 x 480 75 Hz/ 800 x 600 75 Hz/ 852 x 480 75 Hz/ 1024 x 768 75 Hz
1. Input
2. Picture
3. TV function
4. Resolución
5. OSD function
6. Language
7. Reset
1. TV
2. CVBS
3. S-Video
4. PC
5. Sharpes
Al presionar picture
obtendra 5 submenus
MENU
Al presionar tv functions
obtendra 6 submenus
MENU
1. Input
2. Picture
3. TV function
4. Resolución
5. OSD function
6. Language
7. Reset
1. TV system
2. Channel Edit
3. Fine Tune
4. MTS
5. Full Scan
6. Channel Scan
MENU
1. Input
2. Picture
3. TV function
4. Resolución
5. OSD function
6. Language
7. Reset
1. 600 x 480 60 Hz
2. 800 x 600 60 HZ
3. 852 x 480 60 Hz
4. 1024 x 768 60 HZ
5. 640 x 480 75 HZ
6. 800 x 600 75 Hz
7. 852 x 480 75 Hz
8. 1024 x 768 75 HZ
Al presionar tv resolución
obtendra 8 submenus
1. Input
2. Picture
3. TV function
4. Resolución
5. OSD function
6. Language
7. Reset
1. TV
2. CVBS
3. S-Video
4. PC
5. Sharpes
Choose Picture then
press "Select", 5 items
show up
MENU
Choose TV Functions then
press "Select",4 items show
up
MENU
1. Input
2. Picture
3. TV function
4. Resolución
5. OSD function
6. Language
7. Reset
1. TV system
2. Channel Edit
3. Fine Tune
4. MTS
5. Full Scan
6. Channel Scan
MENU
1. Input
2. Picture
3. TV function
4. Resolución
5. OSD function
6. Language
7. Reset
1. 600 x 480 60 Hz
2. 800 x 600 60 HZ
3. 852 x 480 60 Hz
4. 1024 x 768 60 HZ
5. 640 x 480 75 HZ
6. 800 x 600 75 Hz
7. 852 x 480 75 Hz
8. 1024 x 768 75 HZ
Choose Resolutions then
press "Select", 8 items
show up.

E. OSD Function:
Al seleccionar OSD y presionar SELECT en el control remoto,
aparecerán 2 opciones de esta función. Seleccione la que desea
ajustar y presione SELECT en el control remoto para realizar el
ajuste.
OSD Position:
Seleccione la posición OSD Message en la pantalla, presione
para elegir la posición que desea.
OSD Color: Elija el color en OSD Message
F. Language
1. English 2. Chinese
G. Reset
Al presionar esta función su COM-260 regresará a los ajustes de
fábrica.
9) EXIT
Cuando esté realizando los ajustes en la función de MENU, puede
presionar este botón para regresar al menú principal o salir de los
ajustes.
10) Teclado numérico
Puede elegir directamente el canal mediante el teclado. Este botón
sólo es válido en el modo TV.
11) SCAN
Si esta ajustando su COM-260 por primera vez, es recomendable
presionar este botón para buscar el total de canales que tiene y
almacenarlos en su memoria. Hay 3 opciones disponibles:
1. Full Scan (Exploración Completa)
2. Channel Scan (Exploración de Canal)
3. Exit (Salir)
Full Scan: Exploración del canal por frecuencia
Channel Scan: Exploración de los canales por mapeo del canal
(pre-set)
12) RCL
Presione este botón para sintonizar su TV en el canal que había
sintonizado previamente.
13) RES
Este tiene 10 opciones disponibles y es cíclico.
640 x 480 60 Hz/ 800 x 600 60 Hz/ 852 x 480 60 Hz/ 1024 x 768
60 Hz
640 x 480 75 Hz/ 800 x 600 75 Hz/ 852 x 480 75 Hz/ 1024 x 768
75 Hz
14) OSD Function
Si presiona este botón, la fuente de entrada y el canal se mostrarán
en su pantalla. Puede deshabilitarlo presionando OSD de nuevo.
E. OSD Function
Choose TV function and press SELECT on remote control, there
will be 2 selections. You can choose different setting. If you want to
do the adjustment you need to highlight the item you want, then
press SELECT on remote control, then do the adjustment.
OSD Position:
Choose the OSD Message position on the screen, press
to choose the position that you like.
OSD Color: Choose the color of OSD Message
F. Language
1. English 2. Chinese
G. Reset
When you select this item, you will set the COM-260 to original
factory setting
9) EXIT
if you are doing adjustment in MENU function, you can press this
key to return to main menu or existing set up.
10) Numeric key
Directly choose the channel you want to watch. This key is only
valid in TV mode.
11) SCAN
To set up COM-260 for the first time. It is recommended to press
this key to search the total channel you have and store them in
memory. There are 3 selections available:
1. Full Scan
2. Channel Scan
3. Exit
Full Scan: scanning the channel by frequency
Channel Scan: scanning the channels by channel mapping (pre-set)
12) RCL
If you press this key, you can tune your TV on the previous channel
you had been tuned.
13) RES
There are 10 selections available and it is cyclic
640 x 480 60 Hz/ 800 x 600 60 Hz/ 852 x 480 60 Hz/ 1024 x 768
60 Hz
640 x 480 75 Hz/ 800 x 600 75 Hz/ 852 x 480 75 Hz/ 1024 x 768
75 Hz
14) OSD Function
If you press this key, the input source and the channel will display
on your screen. To exit the function press OSD again.
1. Input
2. Picture
3. TV function
4. Resolución
5. OSD function
6. Language
7. Reset
1.OSD Position
2. OSD Color
Al presionar OSD
obtendra 2 submenus
MENU
1. Input
2. Picture
3. TV function
4. Resolución
5. OSD function
6. Language
7. Reset
1.OSD Position
2. OSD Color
Choose OSD then
press "Select", 2 items
show up
MENU

15) 9 Channels Preview. (POP)
Sólo es valido en modo TV. Si quiere pre-visualizar el canal, presione
este botón, la programación de TV aparecerá en la pantalla una por
una en 9 ventanas. Presione cualquier tecla numérica dos veces,
para cancelar esta opción.
16) SLEEP
Presione este botón para programar el tiempo de apagado automático
de su TV en 7 opciones: 5min/ 10min/ 15min/ 30min/ 60min/ 90min
OFF.
17) PIP Function
Este botón se usa bajo el modo de PC.
Existen 4 modos: 1/4, 1/9, 1/16 y apagado. Cuando presione el
botón PIP activará la función Picture & Picture, y podrá utilizar la
flecha para mover la localización de PIP. Si presiona de nuevo PIP,
la pantalla se volverá mas pequeña.
GUÍA DE SOLUCIÓN DE FALLAS (hacer tabla)
1. No hay imagen.
a) La conexión puede no estar correcta, compárela con el diagrama.
b) Revise la conexión de la energía y el suministro del voltaje.
c) Asegúrese que el modo seleccionado es el mismo que el de la
entrada de señal, y ejecute la auto exploración de nuevo. (Por
ejemplo: bajo el modo AIR TV, el conector F debe estar conectado
con la antena UHF/VHF. Bajo el modo CATV, el conector F debe
estar conectado con el sistema de CATV)
2. No hay sonido.
La conexión puede no estar correcta, compare la conexión con el
diagrama.
3. COM-260 no responde mientras utilizamos el control remoto.
d) Asegúrese que esta apuntando a la ventana del sensor infrarrojo
del COM-260.
e) Revise las baterías y reemplace con nuevas si es necesario.
La salida de señal VGA estándar del COM-260 es idéntica a la
tarjeta general de la PC VGA, por lo tanto el uso de esta unidad no
viola la garantía de su monitor LCD o CRT.
INFORMACIÓN PARA EL USUARIO
Este equipo ha sido probado y cumple con los límites de los
dispositivos digitales clase B, de acuerdo con la parte 15 de las
reglas FCC. Estos límites están diseñados para proveer una
protección razonable contra interferencias dañinas en una instalación
residencial.
15) 9 Channels Preview (POP)
This function is only valid in TV mode. If you want to preview the TV
channel, you can press this key and the TV program will display on
your screen one by one in 9 windows. Press a numeric key twice to
cancel the preview.
16) SLEEP
Press this key to set the timer for automatic shut down of TV box,
there will be 7 selections: 5min/ 10min/ 15min/ 30min/ 60min/ 90min
OFF
17) PIP Function
This key is used under PC mode. There are 4 modes : 1/4, 1/9, 1/16
and turn off. Press PIP key and the function will be active, then use
arrow key to move the PIP location. If you press PIP key again, the
screen will become smaller.
Trouble shooting
1. No picture
a) The connection might not be correct, contrast connection with the
diagram.
b) Check the power plug and the supplied voltage are properly
connected.
c) Make sure the selected mode is the same as input signal, then
perform AUTO SCAN again. (For example: under AIR TV mode, the
F connector has to be connected with UHF/VHF antenna. Under
CATV mode, the F connector has to be connected with CATV system)
2. No sound
The connection might not be correct, contrast connection with the
diagram.
3. COM-260 has no response while using remote controller
a) Make sure that you are pointing to the IR sensor window of COM-260.
b) Check the batteries and replace for new one if necessary
The standard of VGA signal output from COM-260 is identical to
general PC VGA display card, so the use of this unit will not violate
the warranty of LCD or CRT monitor.
User Information
This system has been tested and found to comply with the limits for
Class B digital device, pursuant to part 15 of the FCC rules. These
limits are designed to provide reasonable protection against harmful
interference in a residential installation.
TV 123
4
789
56
Modo TV Presione esta Tecla 9 Canales Previos Presione cualquier
tecla numérica 2
veces para cancelar
esta opción
SELECT
VOL VOL
CH
CH
Presione "PIP" Modo 1//4 Modo de PIP ventana
Presione "PIP" Modo 1/9 Presione "PIP" Modo 1/16 Presione "PIP" Modo off
Modo TV Press this key 9 Channel Preview Press numeric key
to view the chanel
shown in 9 channels
SELECT
VOL VOL
CH
CH
Press "PIP" 1/4 mode Move the PIP window
Press "PIP" 1/9 mode Press "PIP" 1/16 mode Press "PIP" Turn off
123
4
789
56

Este equipo genera, usa y es capaz de emitir energía de radio
frecuencia, si no se instala o se usa de acuerdo a las instrucciones,
puede causar interferencia que dañe las radio comunicaciones. Sin
embargo, no hay garantía de que la interferencia no va a ocurrir en
alguna instalación en particular.
Si este equipo causa interferencia a la recepción de radio o televisión,
cuando lo apaga o prende, corrija el problema de la siguiente
manera:
- Reoriente la antena.
- Incremente la separación entre el equipo y el receptor.
- Conecte el equipo en un contacto de un circuito diferente a donde
esta conectado el receptor.
- Consulte a su distribuidor o personal calificado en radio/TV.
ESPECIFICACIONES
Entrada de señal: TV/CATV 75 ohms hembra o IEC hembra
Entrada de video: Conectores hembra (jack) RCA y S-video
para conectar vídeo juegos o dispositivos A/V
Entrada de Audio: RCA estéreo izquierdo y derecho
Entrada de Audio: PC: Conector de 3,5mm estéreo
Entrada de VGA: Standard HD-15 hembra para monitor de PC
Convertidor de Tensión: Entrada: 120 V ~ 60Hz 10W
Salida: 12 V 500mA
Salida VGA: HD-15 hembra
Salida de Video (solo TV): RCA
Salida de Audio: Conector 3,5mm estéreo
Regulaciones: FCC 15.225
FCC parte 15-clase B
ICES-003
CE
Panel Frontal: Botones para encendido/apagado,
cambio de canal,
Volumen.
Entrada: Nominal 12 V 500mA
Colocación: Horizontal y/o Vertical
Control Remoto: Entrada: 3 V (2 X AAA)
This system generates, uses and can radiate radio frequency
energy. If it is not installed and used in accordance with the
instructions, may cause harmful interference to radio
communication. However there is no guarantee that interference will
not occur in a particular installation.
If this system causes harmful interference to radio or television
reception, which can be determined by turning the equipment off
and on, the user is encouraged to try to correct the interference by
one or more of the following measures:
- Reorient or relocate the receiving antenna.
- Increase the separation between the equipment and receiver
- Connect the system to a different circuit from the one the receiver
is connected
- Consult the dealer or a radio/TV technician for help
Specifications
CATV/TV input: 75 ohms F female o IEC female
Video input: RCA connectors and S-Video to connect
video games or A/V devices
Audio input (Signal source): Stereo RCA left, right
Audio input (PC): 3,5mm stereo connector
VGA input: HD-15 female
AC/DC adapter: Input: 120 V ~ 60Hz 10W
Output: 12 V 500mA
VGA output: HD-15 female
Video output
(only valid on TV mode): RCA
Audio output: 3,5mm stereo connector
Regulatory specification: FCC 15.225
FCC part 15-class B
ICES-003
CE
Front panel: ON / OFF keys, change channel,
volume
Input: 12 V 500mA
Stand installation: Horizontal or uprigth
Remote Control: Input: 3 V (2 X AAA)
- - - - - -
- - -
- - -- - -
- - -
Other manuals for COM-260
1
Table of contents
Other Steren Adapter manuals

Steren
Steren USB-110 User manual

Steren
Steren POD-081 User manual

Steren
Steren COM-203 User manual

Steren
Steren 505-490 User manual

Steren
Steren COM-280 User manual

Steren
Steren POD-200 User manual

Steren
Steren COM-405 User manual

Steren
Steren COM-865 User manual

Steren
Steren COM-452 User manual

Steren
Steren COM-473 User manual

Steren
Steren ELI-1230 User manual

Steren
Steren COM-843 User manual

Steren
Steren POD-158 User manual

Steren
Steren 208-151 User manual

Steren
Steren COM-8230 User manual

Steren
Steren ELI-1250 User manual

Steren
Steren COM-400 User manual

Steren
Steren COM-205 User manual

Steren
Steren ELI-1240 User manual

Steren
Steren ELE-9230BL User manual